Essential Command Line Skills for Web Designers
If you’ve ever followed a web design or development tutorial, you might have seen instructions asking you to use commands like npm install or git clone. These instructions are for the Command Line Interface (CLI), a tool we use to instruct the computer to carry out specific actions, typically by entering commands in Terminal or Command Prompt.
For web designers, using Terminal or Command Prompt might not seem the easiest, especially if you’re more accustomed to graphical interfaces. However, command line tools such as Yeoman, Bower, and Google Web Starter Kit rely on command line inputs.
If the thought of typing commands seems daunting, this article will introduce you to a few simple command lines to get you started and make you more comfortable with using them.
Read Also: Essential Shell Commands Every Blogger Should Know
Before We Begin…
Let’s discuss Terminal and Command Prompt first. These applications grant you access to the operating system’s heart. It’s crucial to understand that once you make a change here, it cannot be undone. Therefore, any actions taken in these environments must be approached with care – only proceed if you’re confident in what you’re doing.
Another key point is the inability to use the mouse within Terminal or Command Prompt. This means you can’t search or select text using the mouse. All interactions are through the keyboard, making keyboard shortcuts invaluable.
For Windows users, it’s important to note that some commands might not be available. In such cases, I recommend using tools like Cygwin, UnxUtils, or Windows Services for UNIX Version 3.5 to bring UNIX utilities to Windows. Now, get ready to dive in with enthusiasm.
Changing Directories
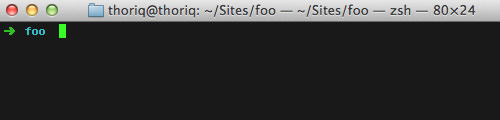
Navigating through directories is a common task. Both Terminal and Command Prompt utilize the cd command for changing your current directory to a specified destination. For example, to move to a folder named foo, you would type:
cd foo
The current directory is displayed before the blinking cursor, as shown below.
To dive into a sub-directory of foo, you can do it in one step:
cd foo/sub-folder
If you need to go back to the previous directory or move up one level from your current directory, simply type:
cd ..
Read Also: How to Use the CD Command in Linux
Creating a New Folder
The mkdir command is handy when you need to create a new directory. To make a directory named foo, you would use the following command:
mkdir foo
Creating multiple directories simultaneously is also straightforward. The next command will create three directories named foo, hello, and world in one go:
mkdir foo hello world
This mkdir command works in both Terminal and Command Prompt.
Read Also: How to List Files and Folders in Linux
Creating a New File
To create an empty file, the touch command is what you need. For instance, to create a file named filename.html, you would type:
touch filename.html
If you want to create several files at once, just list them all in the command like so:
touch file.html style.css
Read Also: How to Use the ‘touch’ Command in Linux
Moving Files
To move a file to a specific folder, use the mv command. For instance, to move style.css into a folder named /css, the command is:
mv style.css /css
The mv command can also be used to rename files and folders. To rename index.html to about.html, you would use:
mv index.html about.html
Read Also: How to Use mv in Linux
Copying Files
To copy a file, the cp command (or copy on Windows) is used. For example, copying index.html and naming the duplicate as about.html can be done with:
cp index.html about.html
Remember, on Windows platforms, you should use the copy command.
Read Also: How to Copy Files and Folders in Linux
Listing Directory Contents
One of my most frequently used commands is the List Directory command, also known as ls. This command allows you to view all the contents within a directory.

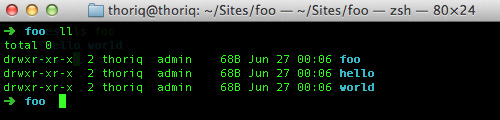
By specifying a folder name before the ls command, you can list the contents of that particular folder, as shown below:

To get more details about the contents, such as creation date, permissions, and owners, use ls -l or ll.
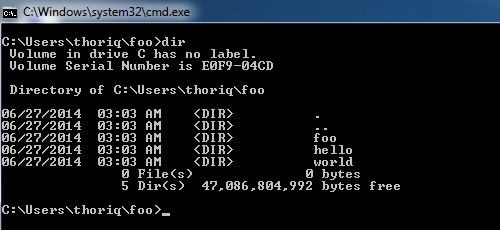
Note that the ls command works in UNIX shells, meaning it’s suitable for Ubuntu and OS X but not for Windows. For Windows, you’ll need to use the dir command instead.
Read Also: How to List Files and Folders in Linux
Opening Files
To open files or folders in their default applications, use the open command. For example, to open the Desktop folder in Finder:
open ~/Desktop
To open a .txt file in TextEdit (the default plain text editor in OS X), you would use:
open readme.txt
Windows users should opt for the edit command for a similar effect. To open a text file in the default editor, the command is:
edit readme.txt
Read Also: How to Use the ‘open’ Command in Linux
Creating Symbolic Links
Symbolic links, or Symlinks, function like shortcut folders, yet the system recognizes them as actual folders. A favorite use case of mine for Symlinks is to sync folders from /Dropbox to my /Sites directory, where I store all my web development projects.
Here’s how you specify the command:
ln -s /source /destination
To link your /Dropbox to the /Sites folder, execute:
ln -s ~/Dropbox/project ~/Sites/project
For Windows, the equivalent command is mklink /d.
Read Also: How to Use the ‘ln’ Command in Linux
Using the Nano Editor
If you need to set up a new VirtualHost with a new domain name, you’ll likely need to edit the hosts file that maps domain names to IP addresses. The fastest way to do this is by using the following command:
sudo nano /etc/hosts
Sublime Text Command Line Interface
Sublime Text includes a command line interface (CLI), subl, allowing operation through Terminal and Command Prompt. Initially, the Terminal won’t recognize the subl command.
To integrate Sublime Text CLI, execute this command:
ln -s "/Applications/Sublime Text.app/Contents/SharedSupport/bin/subl" ~/bin/subl
With this setup, you can open files directly, such as style.css, using:
subl style.css
Adding --add to your command opens files or folders in the existing Sublime Text window:
subl --add foo
For additional options, subl --help will guide you.
Read Also: 12 Best Sublime Text Tips and Tricks
Mastering these command lines and starting with the basics will reveal that commands can be more efficient than graphical interfaces for certain tasks. Hopefully, this guide helps you begin your journey.
Further Reading: Command Line Mastery
Explore more through these posts, which teach you various tasks using command lines: