Essential Shell Commands Every Blogger Should Know
The language of shell commands is among the earliest forms of system communication. Since the dawn of electronic computing, computers have had the ability to access command-line prompts, predating the development of modern Operating Systems.
For tech enthusiasts and bloggers alike, acquiring a basic understanding of shell commands can be a real time-saver. Learning how to use the terminal to execute command-line tasks is a vast subject. It’s unrealistic to grasp all the nuances from a single reading. However, dedicating some time to explore and apply the principles of a Command Line Interface can be incredibly beneficial.
In the following sections, I will share invaluable tips for bloggers worldwide. It’s worth noting that nearly every Graphical User Interface (GUI) for accessing a computer’s files has an underlying command line component. At its core, computing involves entering commands and receiving immediate responses. But before we dive into specific commands and their syntax, let’s first take a moment to understand some historical context.
Understanding Linux Shell Commands
With numerous terms in play, it’s useful to define a few that might seem a bit complex at first glance. Here’s a brief explanation of some key terms you’ll come across:
- shell – a fundamental program that processes user inputs and executes commands. The term “shell” broadly refers to any command-line interface.
- terminal – the interface that establishes a connection between the user and a computer system.
- bash – a scripting language predominantly utilized in Linux environments for writing shell scripts.
- command – a specific instruction or set of instructions given to a computer to perform a task.
- kernel – the core software embedded within most Operating Systems. It manages the computer’s hardware resources, such as memory, external devices, and CPU operations, based on commands received through the shell.
It’s noteworthy that these command-line interfaces have a long-standing history. The command line functionality between Linux and macOS is largely similar. This similarity exists because Linux was developed as a free, open-source Operating System based on Unix. Conversely, Apple’s macOS was derived from BSD, another Unix-based system.
Windows, however, is the exception, having been developed on top of the classic DOS (Disk Operating System). While there are some similarities in commands, interactions with the command line in Windows are significantly different from those in Linux/Unix systems.
How to Open a New Terminal Window
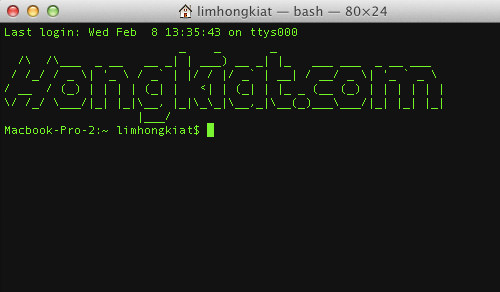
The Terminal window, characterized by its black backdrop and blinking cursor, stands ready for your commands. You can open it through any Graphical User Interface (GUI) menu or by setting up shortcut keys. On a Linux system, search for an application called terminal or konsole. For detailed instructions, it’s a good idea to refer to the documentation of your specific Linux distribution, such as Ubuntu or Debian.
For those using a Mac, the fastest way to launch a terminal window is via Spotlight. Pressing Command + Option + Space will initiate a new Spotlight search, or you can select the magnifying glass icon to open a search panel. Simply type “terminal” in the search field, and the application should appear in the results promptly.
Getting Started with Terminal Commands
With your terminal window open, let’s dive in! First up, learning to navigate through directories. The pwd command helps you identify your current directory by displaying its path. Meanwhile, ls allows you to view the contents of the directory you’re in, listing out files and subdirectories. pwd stands for “Print Working Directory,” and “ls” is short for “List.” Experimenting with these commands is a great way to start, and don’t worry – they won’t modify or delete your files.
When you use ls to list directory contents, you’ll see both files and directories. Items without a file extension (.jpg, .gz, .rpm, etc.) are directories. Navigate through these using the cd command, which stands for “Change Directory.” It functions exactly as you’d expect, allowing you to move through your file system with ease.
A handy shortcut for moving up a directory is cd ../. This command is invaluable for quickly going back through directories to locate something specific. Use pwd each time you change directories to confirm your current location, and ls to determine your next move.

To directly access the root directory or any subdirectory, just use a forward slash with the path. For instance, to move to your root home directory from anywhere, simply enter cd /home and press enter. This bypasses the need to navigate up through multiple levels to reach a higher directory level.
Read Also: 90+ Keyboard Shortcuts for Mac’s Terminal
Creating and Managing Files and Folders
Having learned to navigate your file system, the next step is creating files and directories. If the graphical user interface (GUI) isn’t your preference for organizing directory structures, the command line offers a powerful alternative. The mkdir command, which stands for “Make Directory,” is your go-to for quickly establishing a well-organized file system.
If you have root access, you’ll have greater freedom to experiment. However, be mindful of file permissions, as they can sometimes restrict your ability to create new directories. For a deeper understanding and additional options, refer to the mkdir documentation page.
Moreover, command-line tools offer various arguments to modify their behavior. For instance, appending --help to any command, like mkdir --help, will display a comprehensive list of options and usage guidelines for that command.
When it comes to file management, the cp (copy) and mv (move) commands are essential. They allow you to replicate or relocate files between directories. Both commands require specifying the source file and the target location. Additionally, the rm filename command is used to delete files, and rm -rf directory_name/ is for removing directories. Exercise caution with these commands, as actions performed cannot be undone!
Utilizing Wildcard Patterns for File Management
While moving and copying files adds efficiency to file management, harnessing the full potential of these skills involves a deeper understanding of shell scripting for task automation. This is where wildcard commands come into play, allowing you to operate on multiple files simultaneously rather than one at a time.
In specifying file targets, two symbols become particularly useful: the asterisk (*) represents any string of characters, and the question mark (?) stands for any single character. Additionally, brackets can specify character patterns, with a range of predefined character classes available when enclosed by colons, such as [:alnum:] for alphanumeric characters and [:digit:] for digits.
To illustrate, here are some examples:
- a* – selects all files starting with “a”.
- foo*.txt – finds all text files that start with “foo”. This is specific to text files, ignoring other types even if their names start similarly.
- photo?? – captures files or folders named “photo” followed by any two characters.
- [xyz]? – matches files starting with either x, y, or z, followed by one additional character.
The versatility of wildcard patterns is vast, offering a powerful tool for those willing to master it. However, becoming proficient with shell scripting and wildcard usage requires patience and practice. For further exploration and examples, check out the Tux Files info page.
Mastering File Compression and Archiving
Creating and managing archive files is a cornerstone of modern computing, essential for activities such as emailing and downloading. Whether it’s graphics, code libraries, fonts, or design mockups, zipping files not only minimizes their size but also simplifies their transfer.
In the Linux/Unix environment, the zip and gzip commands are the go-to tools for file compression. While their differences are minimal and largely technical, they serve the same purpose: efficient data compression and storage with slightly different methods and file formats.
Both commands come with a plethora of options, as detailed on various online resources like About’s Linux information page. One notable option is zip -r, which allows for recursive compression of all files within a directory into a single archive. For example, executing zip -r myfolder newarchive compresses everything in ‘myfolder’ into ‘newarchive.zip’. This recursive option saves time by eliminating the need to list each file individually.
The choice between using gzip and zip largely comes down to personal preference and the specific requirements of the task at hand. While .zip files are more universally accepted, especially in Windows environments, .gz files are not without their uses and can be managed on Windows systems as well.
Unarchiving files is just as straightforward with the unzip and gunzip commands, each offering a wide range of arguments for different needs. For those used to graphical archive managers, these command-line tools provide a familiar functionality in any Unix-like system, including Mac OS X, allowing for efficient decompression directly from the terminal.
Navigating Super User Access in Terminal
For those frequently using the terminal, gaining superuser privileges can be a game-changer, especially for web developers or bloggers who often encounter permission errors. It’s tempting to log in directly as the root user to bypass these issues, but this is widely considered poor practice within the Linux community. The root account is typically reserved for emergency system repairs or if you’ve forgotten your primary account’s password.
To operate as a superuser without staying logged into the root account, you can use the su command, which stands for “substitute user.” By default, without specifying another username, su transitions you to the root account. After entering the root password, your prompt should change to root@yourcomputer, indicating you’re operating with root privileges. To return to your regular user account, simply enter the exit command.
However, on systems like Ubuntu, the approach to superuser access differs slightly. Instead of staying logged in as root, Ubuntu employs the sudo command, allowing users to execute individual commands with superuser privileges. This method enhances security by limiting root access to a per-command basis. Notably, Ubuntu isn’t alone; Apple’s OS X also leverages sudo for granting superuser permissions. After entering your command with sudo, you’ll be prompted to input your root password, after which the command will execute and return you to your user prompt upon success.
Mastering File Permissions
One common challenge when managing files is navigating through the permissions maze. Imagine the number of times you’ve been halted in your tracks, unable to make changes to a file due to lack of access rights. It’s often necessary to change the ownership of files, preferably as the root user, to overcome this hurdle.
The chown command, short for Change Owner, is straightforward and is compatible with nearly all Linux and Unix systems. If you’re using Ubuntu, remember to prefix your chown commands with sudo unless you are already operating as the root user.
To use chown effectively, you only need two pieces of information: the username of the new owner and the file or directory path. The command operates within your current directory by default. However, if you want to target a file starting from the root directory, simply start the path with a forward slash.
Understanding and applying file ownership concepts is especially crucial in server management. Having shell access and being able to manipulate file permissions is key. For instance, installing common web applications often involves modifying database files. Appropriately taking ownership of these files can protect you against potential unauthorized access to the server.
Integrating Command Line Skills
Armed with these new commands, it’s time to dip your toes into the command line waters of your chosen operating system. For those venturing into DOS and Linux, I recommend starting with more forgiving commands to avoid any unintended file or directory mishaps.
Exercise caution with the rm command, as incorrect wildcard usage can lead to regrettable file deletions. A smart approach is to test your wildcard expressions with the ls command first. This previews the files targeted for deletion. If the list checks out, you can proceed with confidence by swapping ls with rm – simply hit the up arrow in your terminal to recall your last command, make the swap, and execute.
The command line offers a powerful set of tools for managing tasks, but it’s not the answer to everything. While it’s tempting to dive deep into command line usage to boost your tech credentials, remember the value of balance. Many tasks may be accomplished more efficiently through a graphical user interface (GUI). By exploring and experimenting, you’ll soon discern which tasks are best suited for the terminal and which are more comfortably handled with a mouse and keyboard.
Essential Shell Commands for Bloggers
Managing Nested Directories
Utilizing the rm command, you can eliminate files and directories from your storage. This includes deeply nested folders filled with various files and data. The -r option allows for the recursive deletion of folders and their contents. By incorporating the -f option, the system executes commands without seeking confirmation, ignoring any errors related to non-existent files. An example command to remove a directory from 2009 would be:
rmdir -r -f /home/you/documents/mydir1/2009
Database Connections Simplified
For those frequently managing a website’s backend, ensuring a secure database connection is crucial. This is especially true when dealing with sensitive website and user data. Local databases might not require stringent security measures. While the syntax may vary depending on the system, the basic premise for connecting to a database remains consistent. Essential information includes the database name, your username, password, and often the hostname, typically localhost. Below are examples for connecting to MySQL and Sybase databases.
mysql -u myusername -h localhost -p
After executing the above for MySQL, press enter without a password. If the connection is successful, you’ll be prompted for your password. Enter it, and a welcome message will appear upon a successful login.
isql -U myusername -P <<EOF
use gdb_1
EOF
For Sybase database access, the isql command works similarly to MySQL’s method, requiring only a username and password, followed by selecting the database with the use command.
Database Backup Essentials
Once you’re connected to a database, you might wonder about the next steps. While it’s wise to stick to straightforward SQL tasks rather than delve into complex operations like adding users directly, backing up your database is a critical task that shouldn’t be overlooked. Though the process may seem daunting, a bit of research (about 15-30 minutes) should set you on the right path.
Backing up a Sybase database can be quite intricate, requiring advanced shell commands. Ed Barlow’s database backup scripts offer a comprehensive solution for automating the backup process, including dumping tables, error logs, and statistics. These robust scripts are accessible and can be found at Ed Barlow’s website.
MySQL backups, similarly, involve elaborate shell scripts. These scripts facilitate saving backups to a designated directory and employ a BASH loop to archive each database table. The complete script can be downloaded from nixCraft’s article, which is tailored for MySQL database dumps. After customizing the script with your database details, it can be executed manually or set up as a cron job for regular automated backups.
Restoring Your Database
Restoring a database might seem complex, but it’s generally more straightforward than setting up backups. For Sybase users, the process involves shell commands, starting with load database dbname. For guidance, the Sybase documentation offers detailed instructions.
MySQL restoration is simplified to a single command, streamlining the process whether or not you’re already logged in. Since MySQL backup files are essentially SQL scripts, they can rebuild the database. Here’s how to execute a restore:
mysql -u username -p database < /path/to/dump_file.sh
Remember to replace “username,” “database,” and the path to your backup file with your specific details. This method is efficient for quickly reinstating your database from a backup.
Utilizing Direct Shell Downloads
The wget command is a versatile tool for downloading files from the web, supporting HTTP, HTTPS, and FTP protocols. To download a file, simply use wget followed by the file’s URL. For example, downloading the Hongkiat logo can be done as shown:
wget https://assets.hongkiat.com/uploads/v4s/n_logo.gif
For downloading files via FTP, especially from private servers requiring authentication, the syntax includes the username and password. Here’s a concise example for downloading images:
wget ftp://username:password@ftp.mywebsite.com/files/folder/*.jpg
Folder Compression Techniques
Earlier, we touched on file compression basics. For those new to the command line, the zip command is a straightforward starting point, although you’re free to explore alternatives like gzip. The goal with compression commands is to encapsulate all desired files within a new archive. When using zip, the first parameter specifies the archive’s name, followed by the target directory or files. To ensure your archive includes every file within the directory, use the -r option for recursive processing. Here’s how to compress a directory effectively:
zip -r newfile_name.zip /path/to/content/folder
Automating Find and Replace Operations
Handling a vast array of files, especially when they follow a naming convention, might necessitate bulk renaming or content modification. This is where the sed command, a stream editor for filtering and transforming text, becomes invaluable. It’s celebrated for its efficiency, capable of processing a directory’s worth of files swiftly. An example of its use could involve replacing text across multiple files, as demonstrated below:
sed -i 's/abc/xyz/g' *.jpg
In this scenario, we aim to replace all instances of abc with xyz within .jpg files. The -i option modifies files directly, eliminating the need for a separate backup process. For further details on leveraging sed for your file editing needs, refer to the sed documentation.
Efficient File Creation
Creating multiple files simultaneously can be cumbersome without the right tools. Fortunately, the command line offers efficient solutions for generating a series of documents or text files. Among the available text editors, vi/vim stands out as a powerful option for Linux CLI users, with alternatives like the JOE text editor also available. Alternatively, the cat command allows for file creation, albeit with viewing rather than editing capabilities.
To create a file using vi, simply execute the command followed by the desired file name. Within the vi editor, pressing ‘i’ enters insert mode for text editing. To save and exit, press the esc key, then type :+x and press enter. This method may seem unusual at first but offers robust security and efficiency once mastered.
vi /home/you/myfile.doc
Utilizing Shell for Networking
For networking diagnostics and management, the shell command line is equipped with several useful tools. The ping command, for example, allows you to verify the accessibility of a website or server by sending packet requests and reporting back with the response time and server details. This is invaluable for troubleshooting website or internet connectivity issues.
To examine your network configurations, the ifconfig command provides detailed insights, akin to Windows DOS’s ipconfig command but with more comprehensive options for custom DNS configurations. Similarly, the netstat command offers visibility into open ports and network connections, facilitating deeper network analysis.
Mastering Package Management
In the realm of Unix-based software installation, two primary package management systems prevail: RPM Package Manager (RPM) and Debian Package Manager (DEB). These systems ensure access to the latest software packages via mirror sites.
For RPM-based distributions, commands like yum and rpm are integral, with syntax such as yum install package-name to initiate installations. Debian and Ubuntu users, on the other hand, rely on the apt package management system, employing commands like apt-get install package-name for installations and apt-get upgrade mypackage1 for updates, ensuring streamlined package management across different Unix environments.
Identifying Large Files for Organization
Keeping your digital workspace organized is crucial for productivity, especially when files start to accumulate and directories grow unwieldy. For a thorough review of your files, the ls command is invaluable, offering insights into your directories.
To pinpoint the largest files within any directory on your hard drive, the following command is your ally:
ls -lSrh
This command combines four options for detailed, user-friendly output: -l for listing detailed information, -S for sorting by size (largest first), -r for reversing the order (so the largest files appear last, aligning with the terminal’s display), and -h for human-readable sizes (e.g., MB instead of bytes), facilitating an efficient review and cleanup process.
Sending Emails Directly from the Shell
For those managing email communications alongside other tasks, streamlining the process is a game-changer. The mailto: command, familiar to web and email applications, functions similarly in the command line, offering a quick way to initiate email composition without opening a mail client.
Even if you’re uncertain of the recipient’s address, a placeholder like noreply@nothing.com can be used to generate a new email window, where you can adjust the subject, body, and CC fields as needed. This command exemplifies the efficiency of command-line tools in everyday tasks:
mailto:noreply@hongkiat.com
Conclusion
After exploring the major Operating Systems, it’s clear that each has its unique strengths. However, for those operating within a Linux environment, the terminal is as indispensable as any graphical user interface. It’s crucial to familiarize yourself with at least the basic commands and to practice navigating the command line interface.
Beginners are bound to encounter challenges along the way. Such obstacles are a natural part of the learning curve. It’s important to stay determined and set achievable, realistic goals for yourself. Shell scripting, while demanding at the outset, can become second nature after a few weeks of consistent practice. If you’ve discovered any helpful tricks or tips for maneuvering through the Linux/Unix command line interface, please feel encouraged to share them in the discussion section below.