Maximize Your CSS with Compass and Sass
In our last post, we mentioned Compass, an open-source CSS Authoring Framework that enhances your workflow.
Compass is a powerful extension for Sass, much like the LESS Element for LESS. It offers a robust collection of ready-to-use CSS3 Mixins and additional tools that make it an indispensable companion for Sass. Let’s explore its capabilities.
How to Install Compass
Compass, like Sass, needs to be installed on your system. However, if you are using an application like Scout App or Compass.app, this step is not required.
If you’re not using these applications, you can install Compass manually via the Terminal/Command Prompt by entering the following commands:
On Mac/Linux Terminal
sudo gem install compass
On Windows Command Prompt
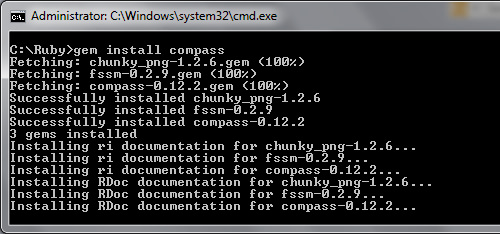
gem install compass
After a successful installation, you’ll receive a notification like the one shown below:
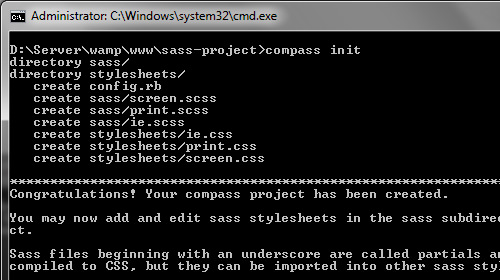
Next, navigate to your working directory and run the following command to initialize a Compass project:
compass init
Further Reading: Compass Command Line Documentation
Configuring Compass
After running the compass init command, a file named config.rb will be created in your working directory. This file is used to configure the project’s output settings, such as preferred directory names.
http_path = "/"
css_dir = "css"
sass_dir = "scss"
images_dir = "img"
javascripts_dir = "js"
Remove any comment lines generated by Compass, and set line_comments to false if you don’t want them included in the output CSS.
line_comments = false
You can also choose the CSS output style from four options: :expanded, :compact, :compressed, and :nested. For development, it’s usually best to keep it :expanded.
output_style = :expanded
These configurations should suffice for most projects. For more options, refer to the Compass Configuration Reference.
Finally, to monitor changes in your files, use the following command:
compass watch
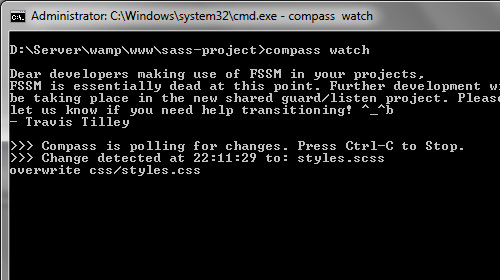
This command works similarly to Sass’s watch command, tracking changes and updating the CSS files accordingly. Make sure to run this command after configuring your project in config.rb to ensure all changes are recognized.
Leveraging CSS3 Mixins
Before diving into CSS3, import Compass into your main .scss file with the following line:
@import "compass";
This imports all of Compass’s extensions. However, if you only need the CSS3 mixins, you can specifically import them with:
@import "compass/css3";
Further Reading: Compass CSS3
Now, let’s create something with Sass and Compass. Start with a simple HTML document:
<section>
    <div></div>
</section>
We will create a rotated box with rounded corners using the following Sass code:
body {
    background-color: #f3f3f3;
}

section {
    width: 500px;
    margin: 50px auto 0;

    div {
        width: 250px;
        height: 250px;
        background-color: #ccc;
        margin: 0 auto;
        @include border-radius;
    }
}
The border-radius mixin generates all the necessary browser prefixes. By default, it sets the corner radius to 5px, but you can customize the radius like this: @include border-radius(10px);.
section div {
    width: 250px;
    height: 250px;
    background-color: #ccc;
    margin: 0 auto;
    -webkit-border-radius: 10px;
    -moz-border-radius: 10px;
    -ms-border-radius: 10px;
    -o-border-radius: 10px;
    border-radius: 10px;
}
Next, let’s rotate the box. With Compass, this is easy; just call the transformation method like this:
body {
    background-color: #f3f3f3;
}
section {
    width: 500px;
    margin: 50px auto 0;

    div {
        width: 250px;
        height: 250px;
        background-color: #ccc;
        margin: 0 auto;
        @include border-radius(10px);
        @include rotate;
    }
}
This mixin automatically generates the vendor prefixes needed for rotation, which defaults to 45 degrees. Here’s the generated CSS:
section div {
    width: 250px;
    height: 250px;
    background-color: #ccc;
    margin: 0 auto;
    -webkit-border-radius: 10px;
    -moz-border-radius: 10px;
    -ms-border-radius: 10px;
    -o-border-radius: 10px;
    border-radius: 10px;
    -webkit-transform: rotate(45deg);
    -moz-transform: rotate(45deg);
    -ms-transform: rotate(45deg);
    -o-transform: rotate(45deg);
    transform: rotate(45deg);
}
Explore Compass Helpers
One of the standout features of Compass is its Helpers. These functions extend the capabilities of Sass functions. Let’s explore some practical examples.
Adding @Font-face Files
Here, we’ll add a custom font family using the @font-face rule. In plain CSS3, the code would look like this, including four different font types:
@font-face {
    font-family: "MyFont";
    src: url('/fonts/font.ttf') format('truetype'),
         url('/fonts/font.otf') format('opentype'),
         url('/fonts/font.woff') format('woff'),
         url('/fonts/font.eot') format('embedded-opentype');
}
With Compass, the same result is achieved more easily using the font-files() helper:
@include font-face("MyFont", font-files("font.ttf", "font.otf", "font.woff", "font.eot"));
This code generates the same output as the manual method, automatically detecting the font type and adding it to the format() syntax.
You may notice that the font path (/fonts/) is not specified. Compass derives this path from the config.rb file using the fonts_path property:
fonts_dir = "fonts"
If you change it to fonts_dir = "myfonts", the generated code will be url('/myfonts/font.ttf'). By default, Compass points to stylesheets/fonts if no path is specified.
Adding Images
Now, let’s look at adding images. Typically, you would use the background-image property like this:
div {
    background-image: url('/img/the-image.png');
}
With Compass, you can replace the url() function with the image-url() helper, allowing Compass to manage the path for you.
div {
    background-image: image-url(the-image.png);
}
Compass also offers Image Dimension Helpers, which can automatically detect an image’s width and height. If you need to specify these dimensions in your CSS, you can do so as follows:
div {
    background-image: image-url("images.png");
    width: image-width("images.png");
    height: image-height("images.png");
}
The generated output will look like this:
div {
    background-image: url('/img/images.png?1344774650');
    width: 80px;
    height: 80px;
}
Further Reading: Compass Helper Functions
Final Thoughts
We’ve covered a lot about Compass today, and as you can see, it’s an incredibly powerful tool that allows us to write CSS more elegantly and efficiently.
While Sass is a fantastic CSS preprocessor, it’s not the only one available. LESS is another option, which we’ve also discussed extensively. In our next post, we’ll compare Sass and LESS to determine which one offers the best features for preprocessing CSS.