8 Fastest Ways to Take Screenshots on Windows 10
Taking screenshots is a core part of my job, and I am sure many of you also need to take screenshots often. There are over a dozen ways to take screenshots in Windows only. However, as I’m always looking for ideas to boost productivity on Windows 10, I have found some of the fastest way to take screenshots on Windows 10.
Unfortunately, different situations require different methods to take screenshots. Sometimes you just need to quickly share your point of view, and sometimes you need to take multiple screenshots for demonstrating a process. Keeping up with both situations, here are some of my favorite methods to quickly take screenshots in Windows 10.
Read also:
- 20 best free screenshot tools and plugins
- Screenshot keyboard shortcuts for Windows and macOS
- 9 Android screen recording apps
- 5 best screen recording apps for Windows
- How to – Changing macOS sreenshot file format
- How to – Include mouse pointer in screenshot
1. Use the Print Screen key
(Steps required: 2)
Probably the easiest and quickest method to take screenshots that doesn’t involve any prior setup. However, it only works for quickly sharing the screenshot over the internet or to an image editing app.
Steps:
- Press the Print Screen key on your keyboard (next to F2 key), and a screenshot of your whole screen will be copied to the clipboard. There will be no indication, though.
- Press Ctrl + V keys over any field where images are accepted and the screenshot will be pasted. You can then share it. It could be a social media website, chat program, or even an image editor like Windows Paint or GIMP.
If you just want to take a picture of the current window in focus, then press Alt + Print Screen instead.
Takeaway
If you want to quickly share the current state of your screen or window without editing, then it’s perfect.
Limitations
This method doesn’t save the image. If you need to permanently save it, you’ll have to paste it in an image editor and then save it. So it’s not a good option when you need to take permanent screenshots. You also can’t annotate or edit the screenshot before sharing.
2. Take screenshot and save it as file
(Steps required: 1)
There is also a way to take fullscreen screenshots and automatically save them, which can be handy when you need a screenshot file instead of a pasteable image.
Step:
- Press Windows + Print Screen keys and a fullscreen screenshot will be saved to Screenshots folder in your default Pictures folder.
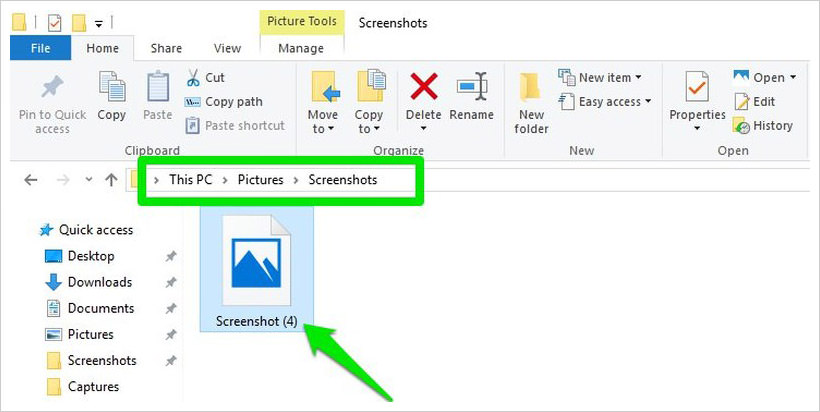
The image will be in PNG format. For quicker access, you can also create a shortcut to the screenshot folder on your desktop.
Takeaway
This method is good, when you need to take multiple screenshots and need them organized as image files.
Limitations
You can only take fullscreen screenshots with this method, and there is no way to edit screenshot before saving.
3. Take specific region screenshot
(Steps required: 3)
Windows 10 allows you to take a screenshot of any area on your screen, but your PC must be updated to Creators Update to use this feature.
Steps:
- Press Windows + Shift + S keys to startup up the region screenshot taking tool. You’ll see a crosshair and your background will be blurred.
- Now click-and-drag to select the area of which you want to take a screenshot. When you’ll let go, the screenshot of selected area will be copied to the clipboard.
- Just paste the screenshot in any image field and it will be shared.
Although this method has three steps, but in practice, the process is almost as fast as the first method in this list.
Takeaway
When you need to quickly share a specific part of the screen, go for this method.
Limitations
It won’t automatically save the screenshot as an image file, and you can’t annotate the screenshot before sending.
4. Use Windows 10 Game Bar
(Steps required: 1)
The Xbox Game Bar tool in Windows 10 can also be used for taking window screenshots. However, it only works in opened apps (not file explorer or Windows settings), and you must set each app as a game at least once in Game Bar before taking screenshots of it.
To set any app as a game, open the app and press Windows + G keys. When prompted, check the checkbox next to Yes, this is a game, and the app will be set as a game in Game Bar. Game Bar will always remember your preferences.

Step:
- Press Windows + Alt + Print Screen keys and a window screenshot will be taken without any indication. You can find the screenshot in Captures folder inside your default Videos folder.

The image will be in PNG format and it will be named after the name of the program of which you took screenshot along with date/time stamp.
Takeaway
If you need to take window screenshots and save them as a file, then it’s a good alternative to the method 2 above. Automatic naming according to program name also helps easily identify.
Limitations
You can’t annotate the image and it’s only limited to window screenshots.
5. Use Windows 10 Snipping Tool
(Steps required: 3)
Windows built-in Snipping Tool is a good option to take care of basic screenshot taking needs. It might not be as fast as the above methods, but it offers more control.
Steps:
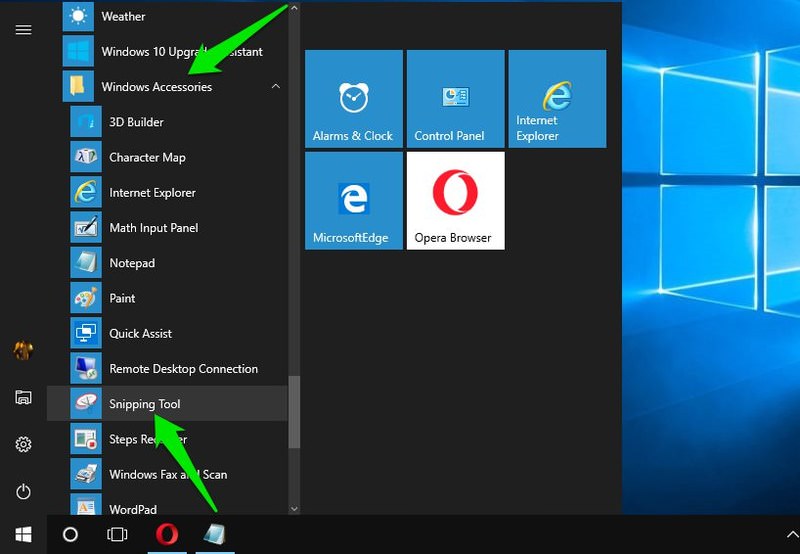
- To launch Snipping Tool, type
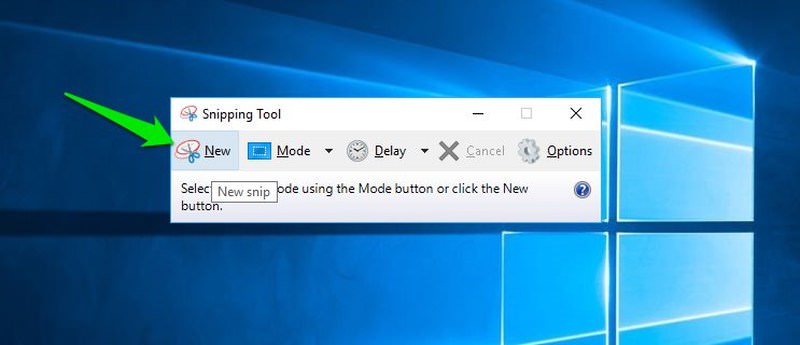
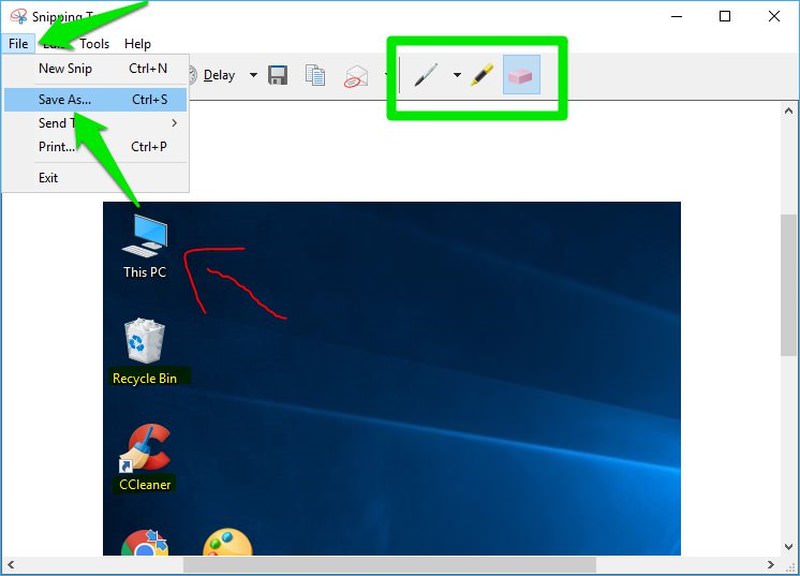
snipping toolin Windows search, or access it from the Start menu under the Windows Accessories folder. - Snipping tool offers 4 modes to capture screenshots. You can take region, free form, window, and fullscreen screenshots. Just press the New button to take the screenshot.
- The screenshot will automatically open up in Snipping Tool interface and you can annotate it using basic pen and highlighter. Here, go to File > Save as to save the screenshot.
Takeaway
When you want to take a screenshot and annotate it as well, then Snipping Tool is a good built-in app.
Limitations
For a dedicated screenshot app, it’s very limited in features and requires more effort to take a screenshot. Furthermore, it doesn’t let you take and manage multiple screenshots.
6. Use a third-party screenshot app
(Steps required: 1)
If you want a comprehensive solution, then you’ll have to download a third-party app. I personally use and recommend PicPick as it’s easy to use and free. It can take 7 different types of screenshots and you can batch edit them using dozens of image editing tools.
Before you take screenshots with PicPick, let me help you set it up:
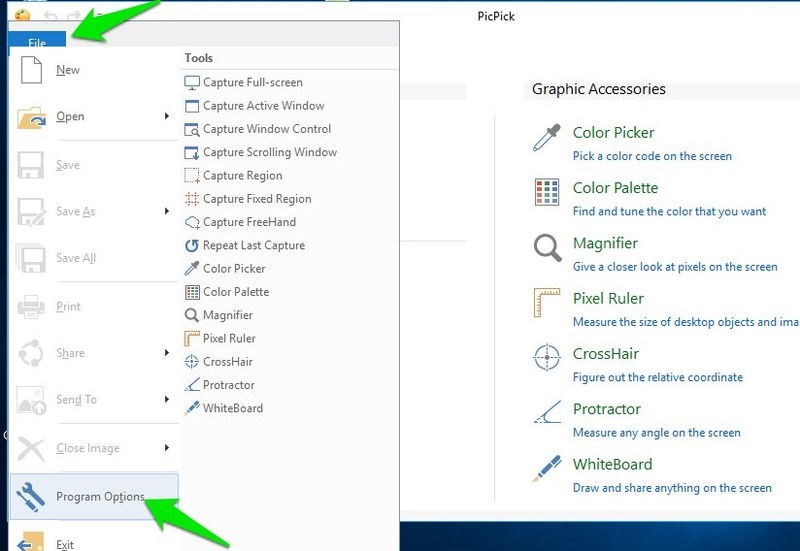
- Download and install PicPick and go to File > Program Options.
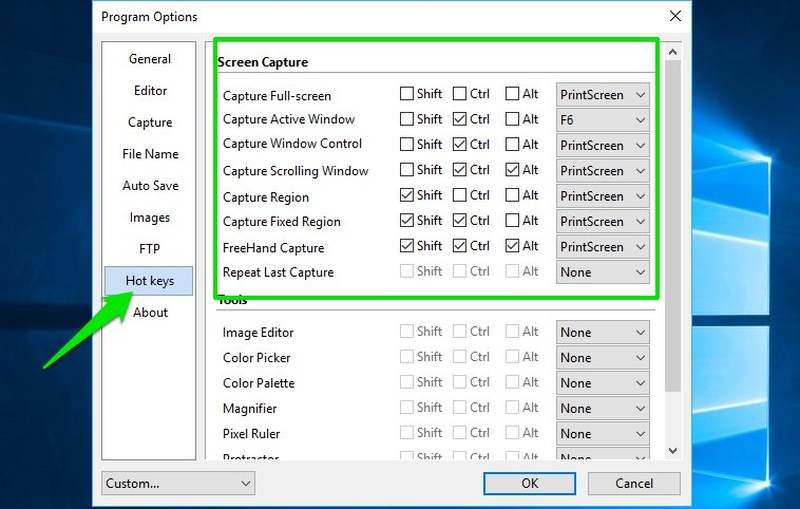
- Here move to Hot Keys section and you’ll see all the screenshot methods along with a hotkey for them. Now re-configure (if you want) and memorize the hotkeys for screenshot types that you want to use.
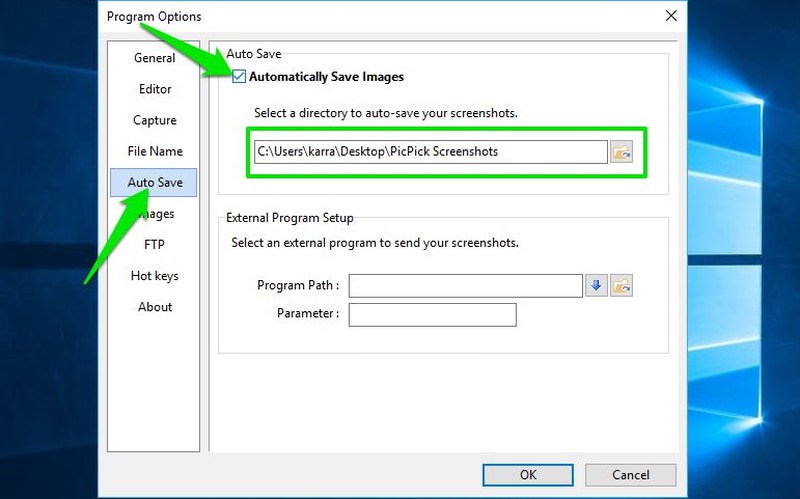
- You will also see an Auto Save section here. Click on it and check the checkbox next to Automatically Save Images option and provide a path where the screenshots will be saved.
Step:
- Press the hotkey for the type of screenshot you need and it will be automatically saved to the specified location.
Takeaway
If you need a comprehensive tool to take multiple screenshots and also edit them in one place, then PicPick is perfect. For example, if your work involves taking screenshots for demonstration, then download PicPick.
Limitations
As it’s a third-party tool, it needs to continuously run in the background to offer its services. Its icon stays in the system tray.
7. Use Microsoft Edge Web Note tool
(Steps required: 2)
If you use Microsoft Edge for browsing and only need to take screenshots of content inside the browser, then it’s Web Note tool is all you may need. The tool is basically made for annotating web content and sharing it with others, but it actually takes a screenshot of the web page that can also be saved locallys if required.
Steps:
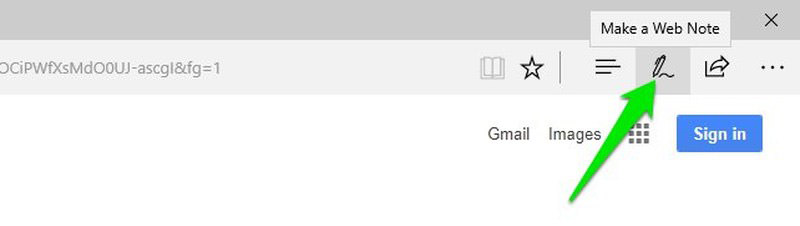
- In Microsoft Edge, click on the Web Note button in the address bar (pen icon). The address bar will turn purple and the screenshot will be taken. You may annotate it if you require, using a pen, highlighter, and a text box.
- Click on the Share button at the right-end of the purple bar and you’ll see sharing options for the screenshot.
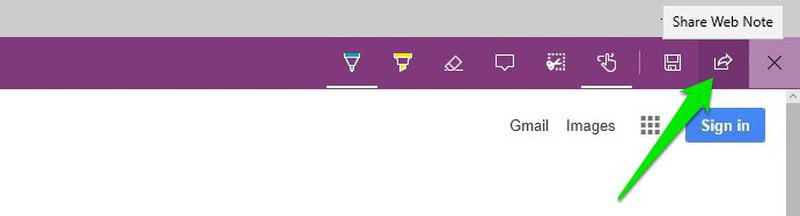
If you want to locally save the screenshot instead, then click on the Touch writing button to disable it and drag-and-drop the image on your desktop to save it on your PC.

Takeaway
If you are Microsoft Edge user and need a quick method to take screenshots, annotate it and then share it, then the Web Note tool should be enough.
Drawback
It’s only limited to Microsoft Edge and you can only take screenshots of web pages.
8. Use extensions for Chrome & Firefox
(Steps required: 3)
There are reliable screenshot extensions available for Chrome and Firefox as well. Out of many, I recommend Awesome Screenshot that is available for both Chrome and Firefox. It lets you save screenshots to local storage or quickly share online, you can even save it in Awesome Screenshot cloud storage.
Steps:
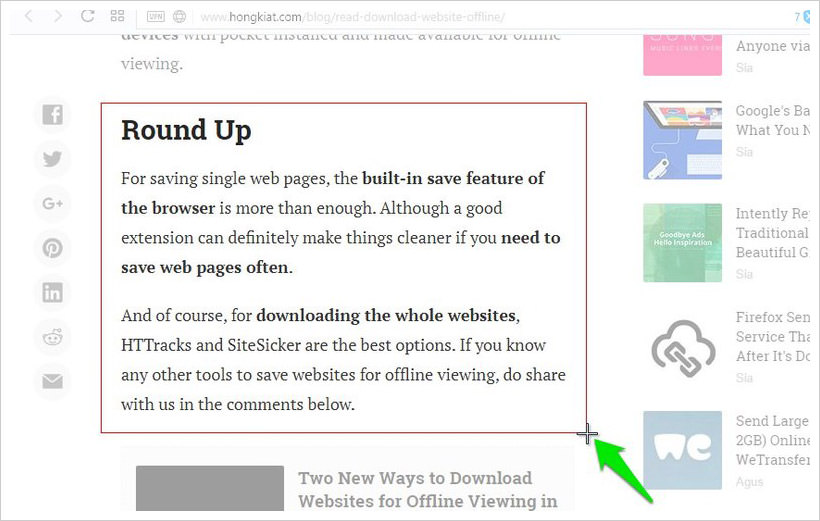
- After installing the extension, use the screenshot hotkeys Ctrl + Shift + E (default) to take the screenshot of the web page.
- The screenshot will immediately open in Awesome Screenshot editor where you can use dozens of tools to edit it. Click on Done when you have made your edits.
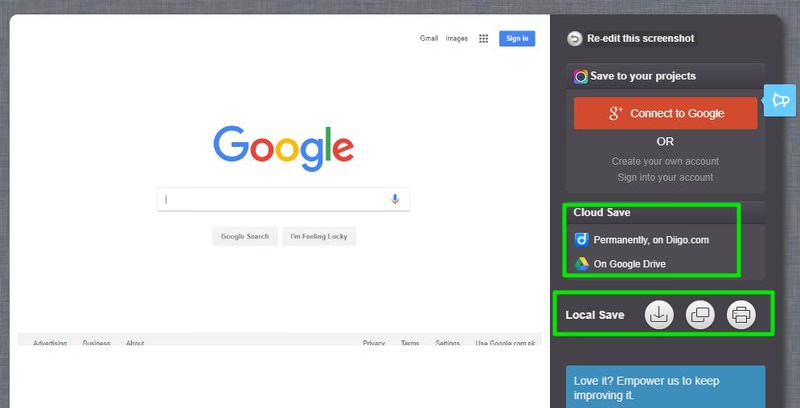
- Now you will see options to share and save the screenshot. You can locally download, copy to clipboard, save to Google Drive, or save to Awesome Screenshot cloud storage.


Takeaway
If you mostly need to take screenshots of web pages, then Awesome Screenshot offers multiple tools to take better screenshots and annotate them.
Limitations
It is only limited to web pages and the screenshot taking and sharing/saving process is a bit slower as compared to other methods.
Conclusion and suggestions
Taking screenshots the fastest and easiest way possible is very important and these methods should help take screenshots fast in different situations.
For me, PicPick and Print Screen shortcut are usually enough. For demonstrations I use PicPick, and for quickly sharing my view I just press Print Screen and paste the screenshot. How do you take screenshots on Windows 10? Share with us in the comments.
Read Also: 5 Best Free Android Apps to Remote Control Your PC