How to Capture Your Mouse Cursor in Screenshots
Ever wondered why your mouse cursor disappears every time you take a screenshot? Whether on a Mac or a PC, capturing the mouse pointer isn’t straightforward. Try it out for yourself!
If you need to include the cursor in your screenshots, you might think about editing it in afterward, but this can be quite cumbersome. What if you could capture it automatically?
In this tutorial, we’ll show you how to use a built-in Mac tool called ‘Grab’ to include your mouse cursor in screenshots without needing any additional apps or editing.
Read also:
- 20 Best Free Screenshot Tools and Plugins
- Fastest Ways to Take Screenshots on Windows 10
- Screenshot Keyboard Shortcuts for Windows and macOS
- 9 Android Screen Recording Apps
- 5 Best Screen Recording Apps for Windows
- How to Change macOS Screenshot File Format
- 10 Awesome Screen Capturing Browser Extensions
1. Setting Up ‘Grab’
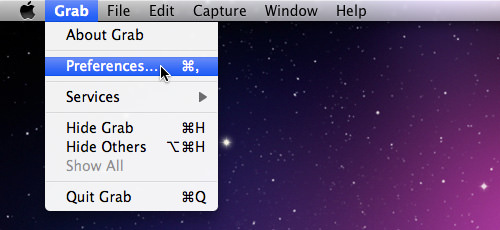
To begin using Grab, navigate to your Applications > Utilities folder, find ‘Grab’, and open it. Click on ‘Preferences’ to choose your desired mouse pointer.
2. Select Mouse Pointer
After opening ‘Preferences’, a new window will appear displaying various pointer types available for your screenshots. Choose the one that suits your needs.
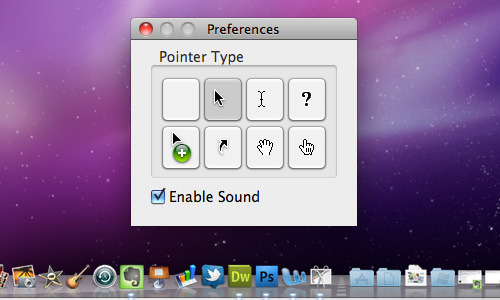
Enable the ‘Enable Sound’ option to hear a sound effect when you capture a screenshot.
3. Capture Style
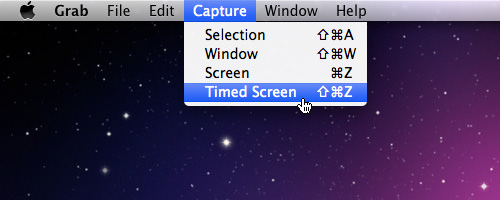
With the mouse pointer configured, switch to the ‘Capture’ tab. Here, select either ‘Screen’ or ‘Timed Screen’, both of which are effective for capturing the mouse cursor in your screenshot.
-
Select ‘Screen’ to open a guide window for your screen grab. To begin capturing, simply click anywhere within your window area.
-
The guide window will not be included in your screenshot, and your mouse pointer will be captured as set earlier.

-
Choose ‘Timed Screen’ for a guide window that gives you 10 seconds to position your mouse pointer. Click ‘Start Timer’ and place your cursor where you need it before the time runs out.

4. Saving Your Screenshot
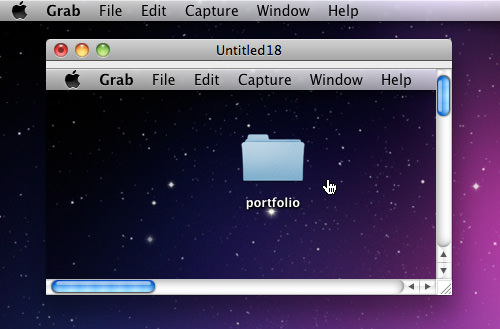
Once you’ve captured a screenshot with Grab, a new window will display your snapshot. This is your chance to see the results with the cursor included.
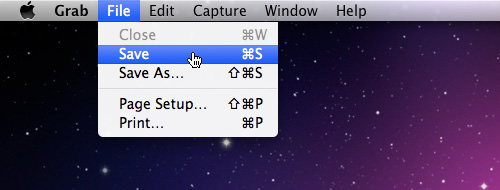
To save the image, click on ‘File’ then ‘Save’. Be aware that the file will be saved in ‘.TIFF’ format.
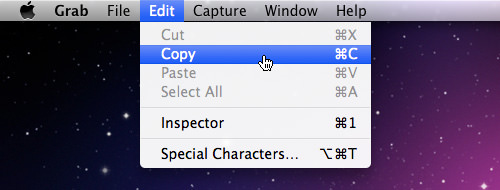
If you prefer to copy the image to use elsewhere, simply click ‘Edit’, then ‘Copy’, and paste it wherever you need it.
Conclusion
Capturing screenshots has never been easier. Gone are the days of hide-and-seek with your mouse cursor. With Grab, you can effortlessly include your cursor in your screenshots, no additional software needed.