Capto Screen Capturing Tool (Review)
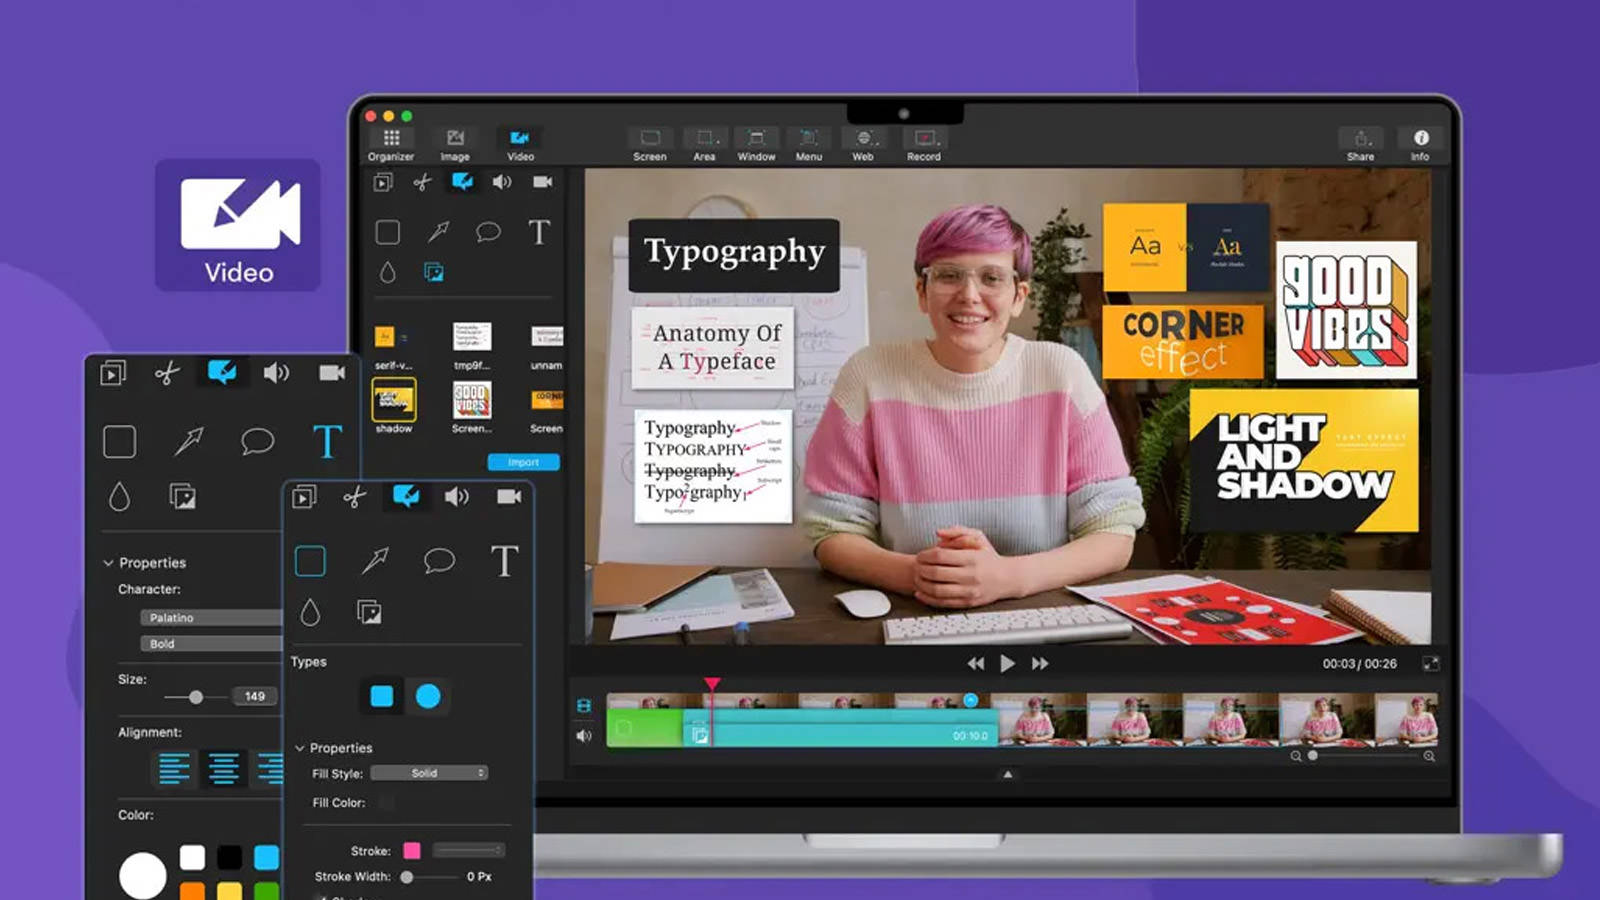
Capto is an impressive application designed for both screen capturing and screen recording. At first glance, the app might seem a bit daunting due to its wealth of features. It offers numerous modes for taking screenshots and recording your screen, giving you plenty of options to choose from.
It has all of Mac’s screenshot features…
Similar to the native screen recording feature on Mac, Capto allows you to capture:
- The entire screen.
- A specific area of your choice.
- Any particular window, active or inactive.
…plus a little extra.
Beyond the capabilities of Mac’s built-in screen recording features, Capto offers the following enhancements:
- Screen capture with a customizable delay time, such as a 4-second delay.
- The ability to capture dropdown menus and webpages.
All screenshots and screen recorded videos will be stored within the app. Additionally, the app provides tools that allow you to annotate your screenshots and edit screen recordings right within its interface, details of which I’ll delve into later in the article.
Download Capto:
Getting Started
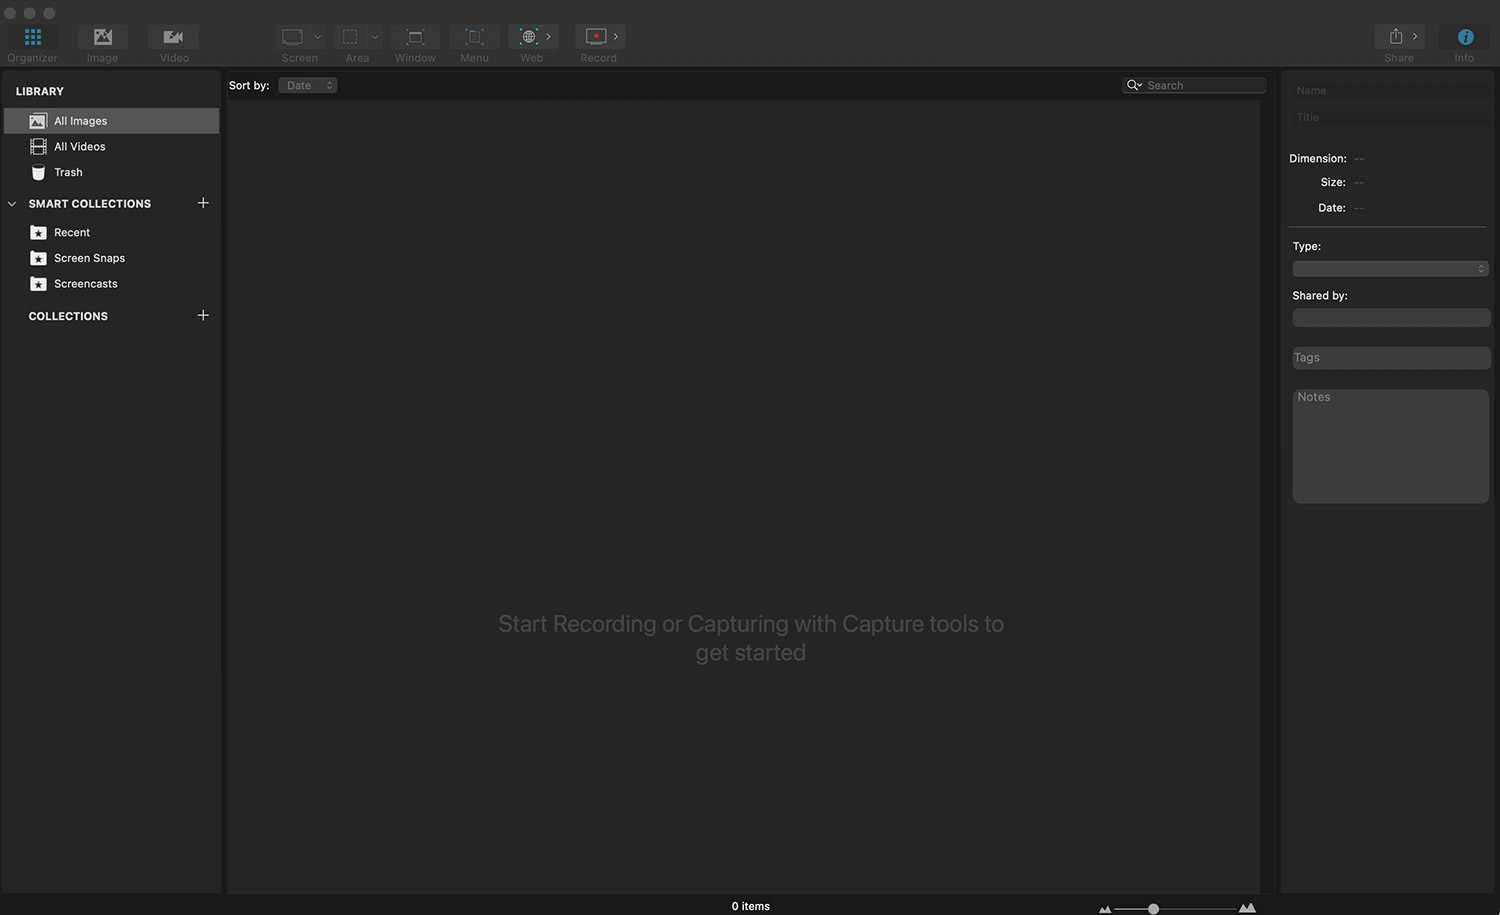
After downloading, installing, and launching the app for the first time, this is the interface you’ll be greeted with.
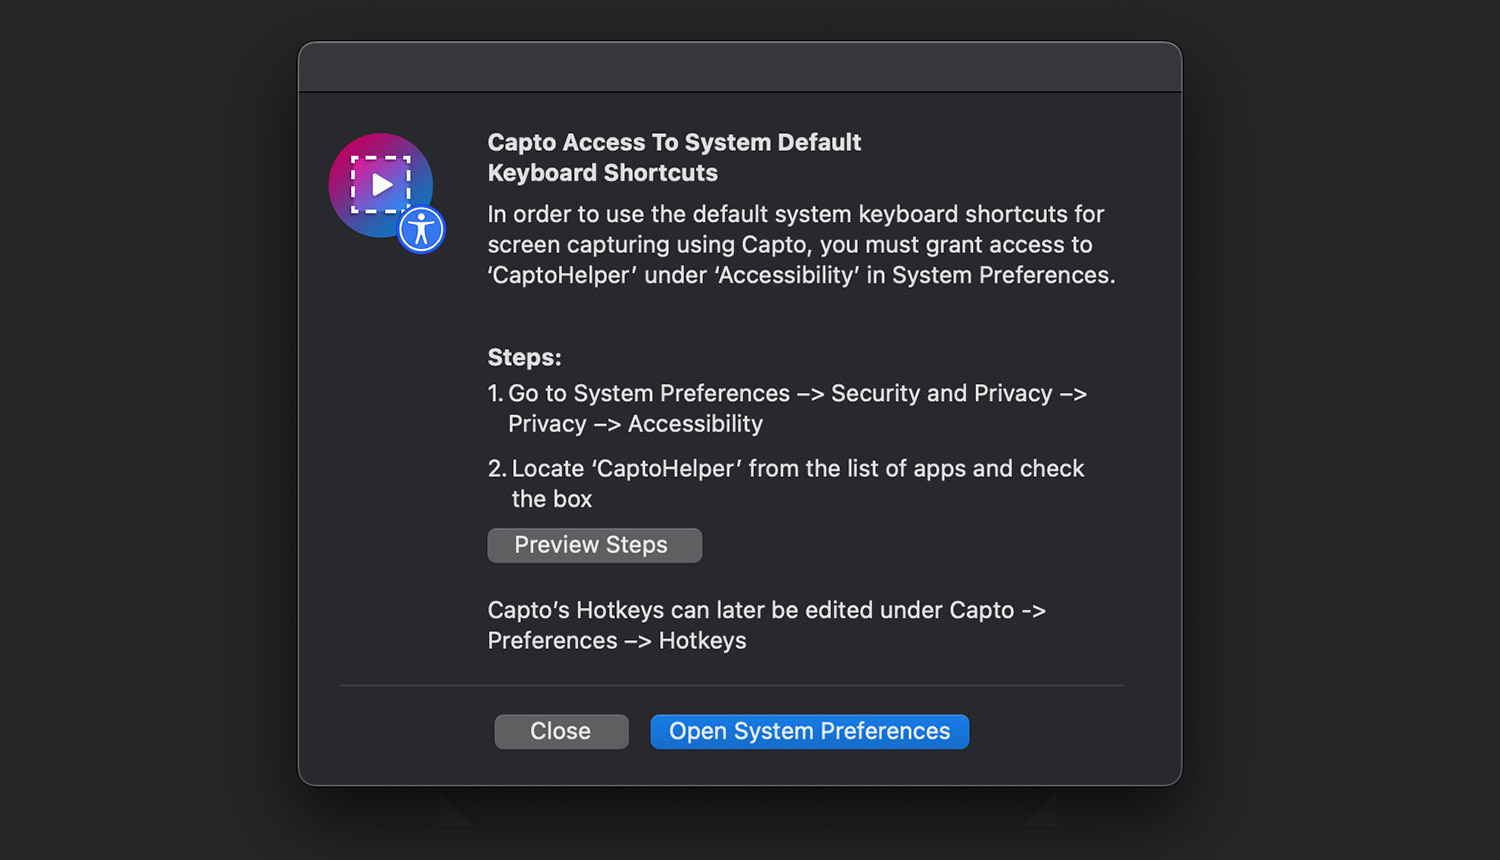
The first step after installing the Capto is to allow it the necessary permissions to integrate with your system’s default keyboard shortcuts.
To do this, navigate to your System Preferences, then to Security & Privacy > Privacy > Accessibility. Scroll down the list until you find “CaptoHelper,” and make sure to check the box next to it.
To begin, you can either select options like "Screen", "Area", "Window", "Menu", etc., from the top bar, or you can utilize keyboard shortcuts. Click here for a list of all the keyboard shortcuts.
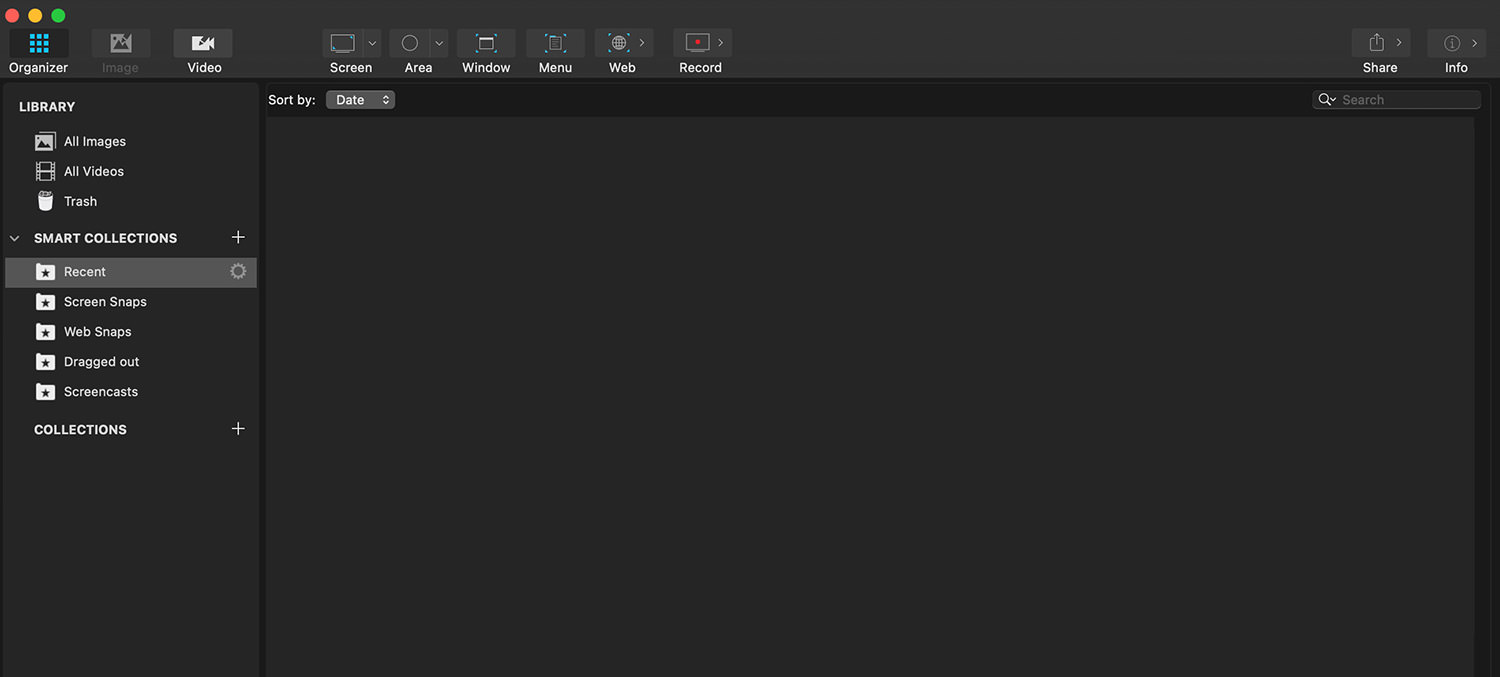
All the screenshots taken with the app will be stored under Library > All Images, and screen recordings can be found under Library > All Videos.
And of course, the "Trash" is where you’ll find anything you’ve deleted.
Now, let’s look at how to perform some basic screen capturing using the app.
Screen Capture with Capto
Capto offers a variety of ways to create screenshots. Here’s a complete list:
- Capture the entire screen.
- Capture the screen with a delay of n seconds.
- Capture a specific area in various shapes like rectangular, circle, or custom (freehand).
- Capture a window.
- Capture a menu.
- Capture a webpage.
Next, we’ll explore each of these features in detail, showing you how they work and what the results look like.
Screen Capture
To capture your desktop’s screen, click the “Screen” icon (or use the shortcut key Command + Control + 3). Your cursor will turn into a camera icon.
Then, double-click on your desktop to take the screenshot.
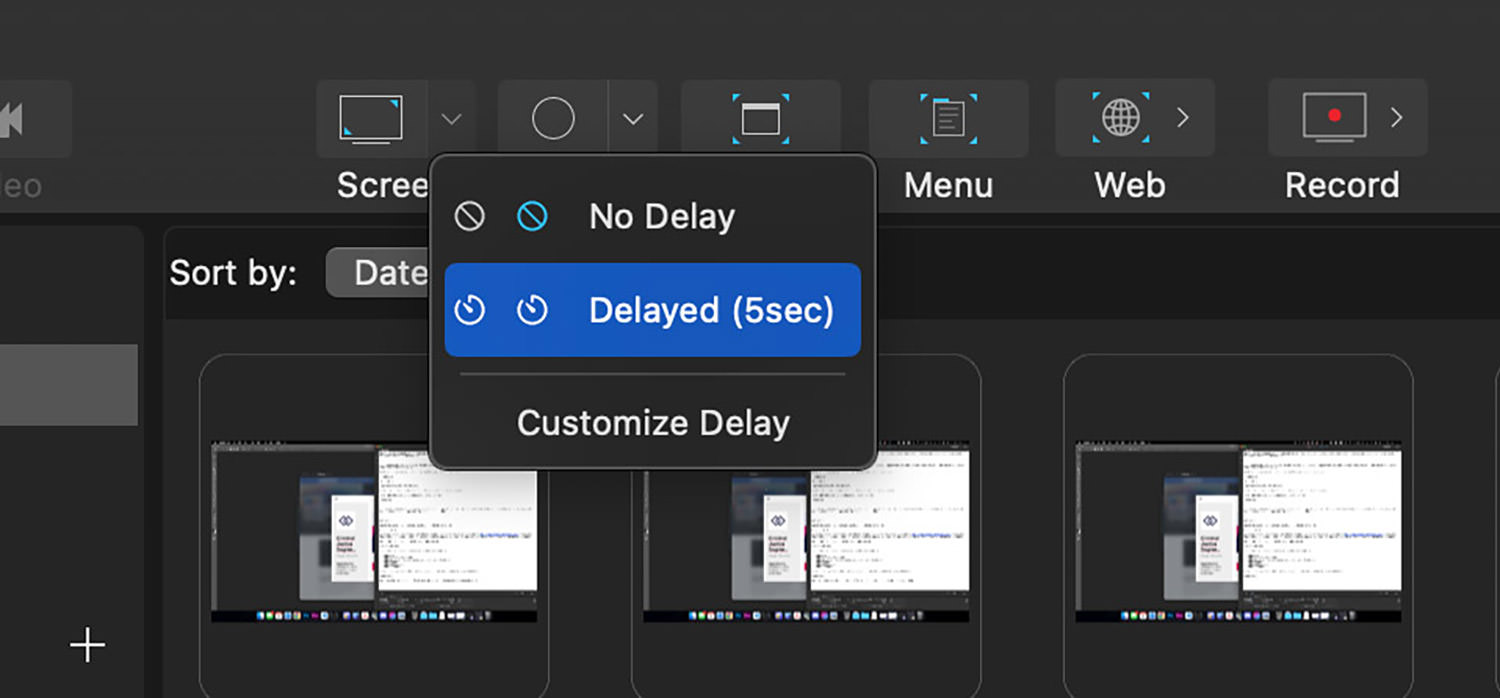
Screen Capture with Delay
If you want to delay a screen capture, click the down arrow next to “Screen,” select “Delayed (5 sec),” or set the time you prefer. After that, follow the same steps as a regular screen capture.
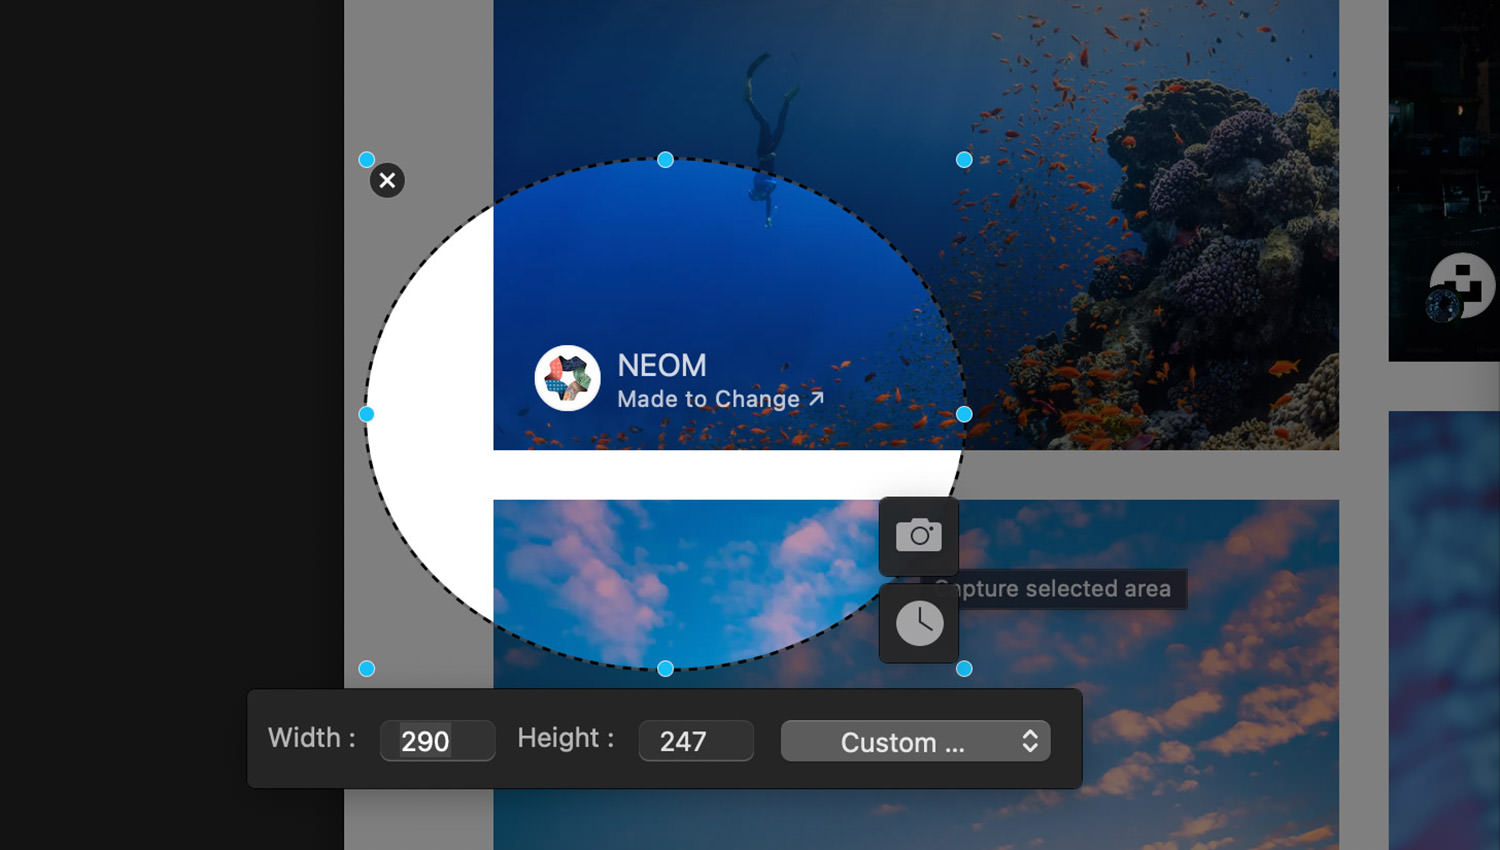
Screen Capture Specific Area
You can also take screenshots of specific areas in various shapes like a rectangle, circle, or freehand drawing. To do this, select the desired shape from the “Area” option on the top toolbar.
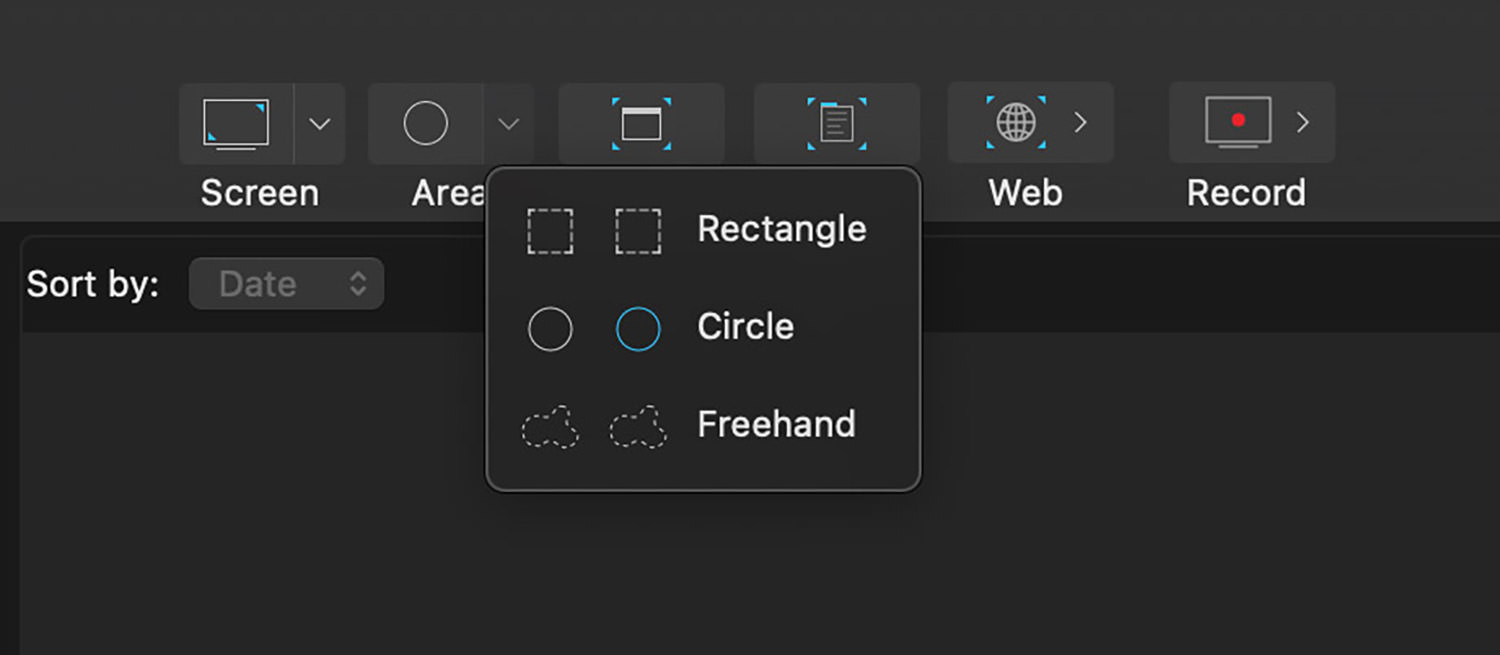
Draw the shape on the part of the screen you wish to capture and then click the camera icon.
Screen Capture a Window
You can also capture a specific window, whether it’s currently active or only partially visible on your desktop. After clicking “Window“, move your cursor over the window you want to capture and double-click to take the screenshot.
Screen Capture a Menu
Capto allows you to capture menus as well, which is especially handy if you want to guide someone towards a particular feature or function within an application. I find using keyboard shortcuts is the easiest method.
Here’s how you do it:
- In the app whose menu you want to capture, navigate to the feature or option you’re interested in.
- Press the keyboard shortcut Command + Shift + M, twice, to highlight the intended menu bar for capture.
- Press Enter to take a screenshot of it.
Screen Capture a Webpage
Lastly, let’s explore how to screen capture a website. Capto offers three ways to do this:
- Snap from Capto browser: This opens an in-app browser in Capto, where you then enter a URL and capture the webpage.
- Open current URL in Capto:This option opens an in-app browser in Capto, which loads the website currently open in your default browser.
- Snap active browser URL: This option captures a screenshot of your active browser window.
For the first two options, click “Exit” in the top right corner to close the in-app browser.

This feature enables you to capture:
- The visible part of the webpage,
- The entire page, including content below the fold,
- A specific section of the page,
- Or download the webpage as a PDF.
To ensure a perfect screenshot, make sure the webpage you intend to capture is fully loaded before executing the screenshot command.
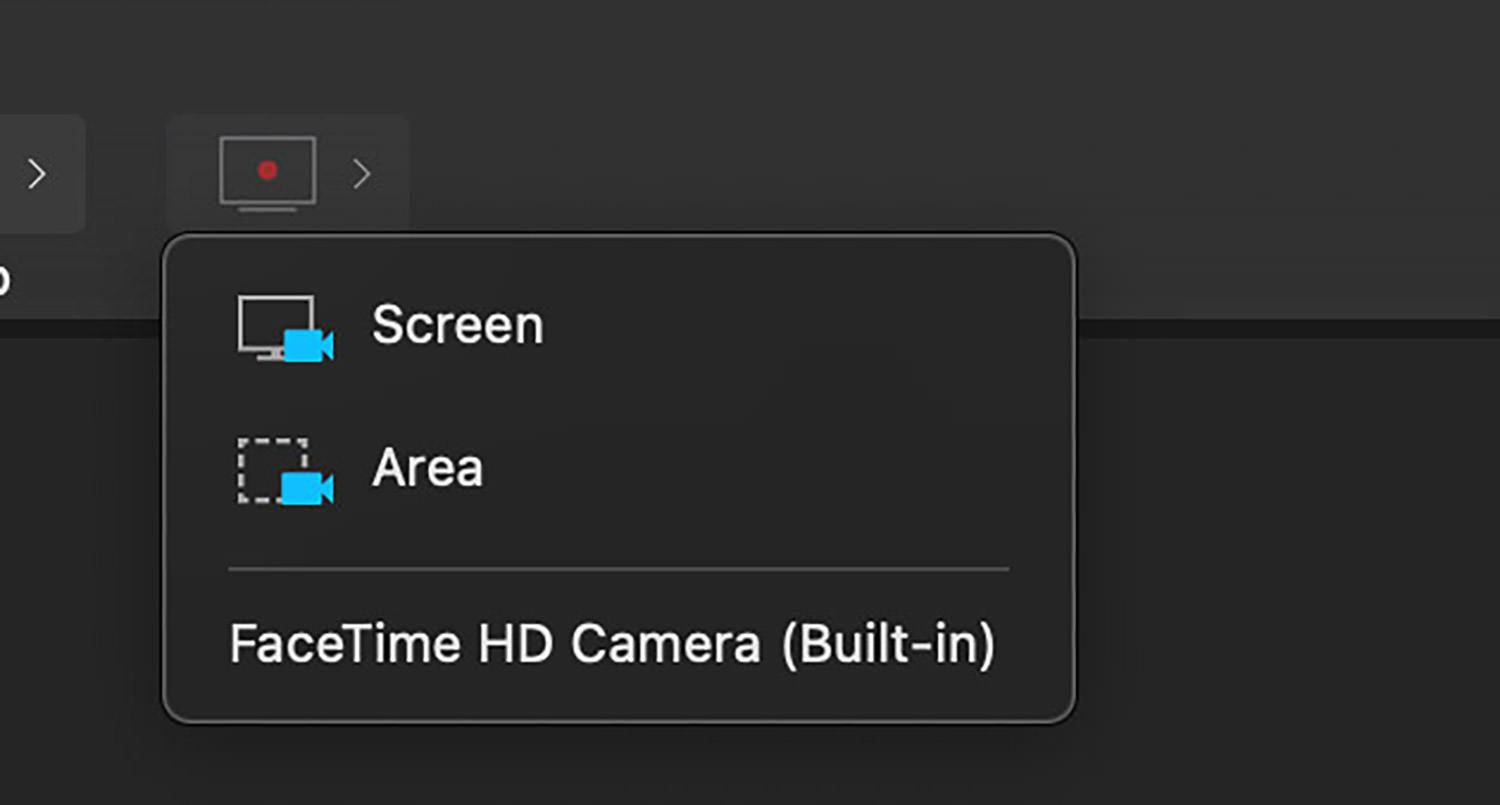
Screen Recording with Capto
Before we delve into annotating captured screenshots, let’s explore screen recording with Capto. The process is quite similar to taking screenshots. Similar to the native Mac’s screen recording feature, it allows you to:
- record the entire screen,
- or just a specific area.
It’s worth mentioning that Capto also allows for the highlighting of mouse clicks during recording.
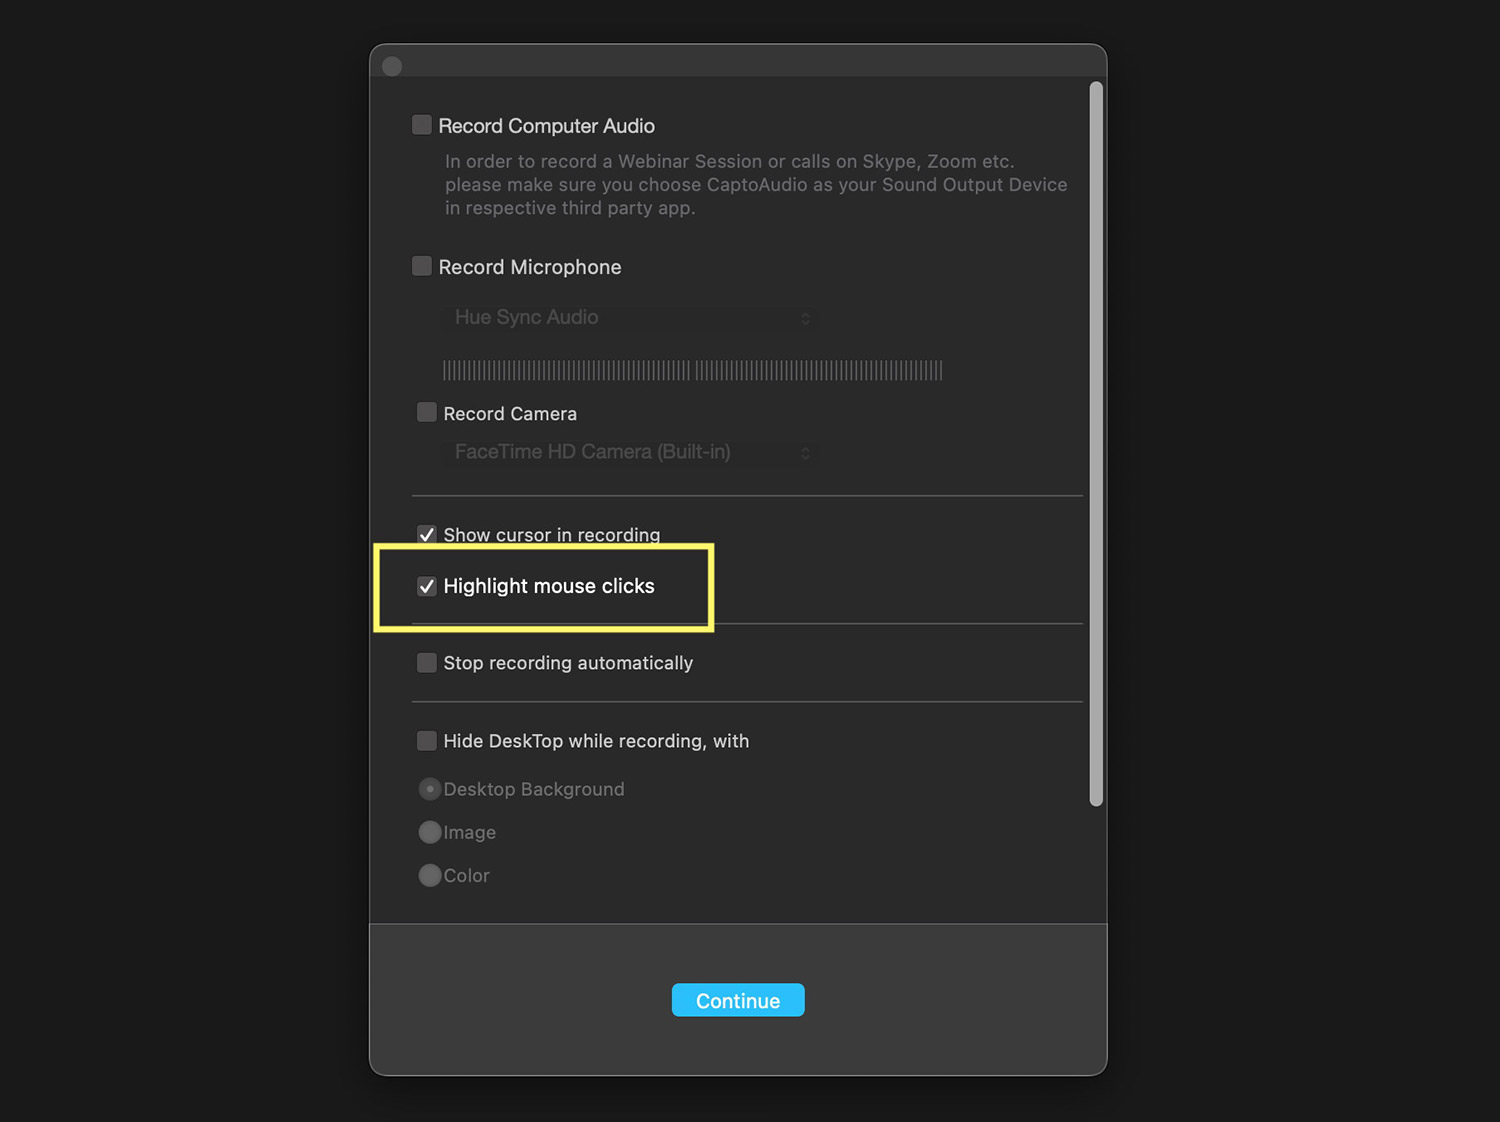
During a screen recording, you can choose to pause it or cancel the recording entirely. And when you’re finished, simply click “Stop & Save Recording” on the top menu bar.

Annotating Screenshots
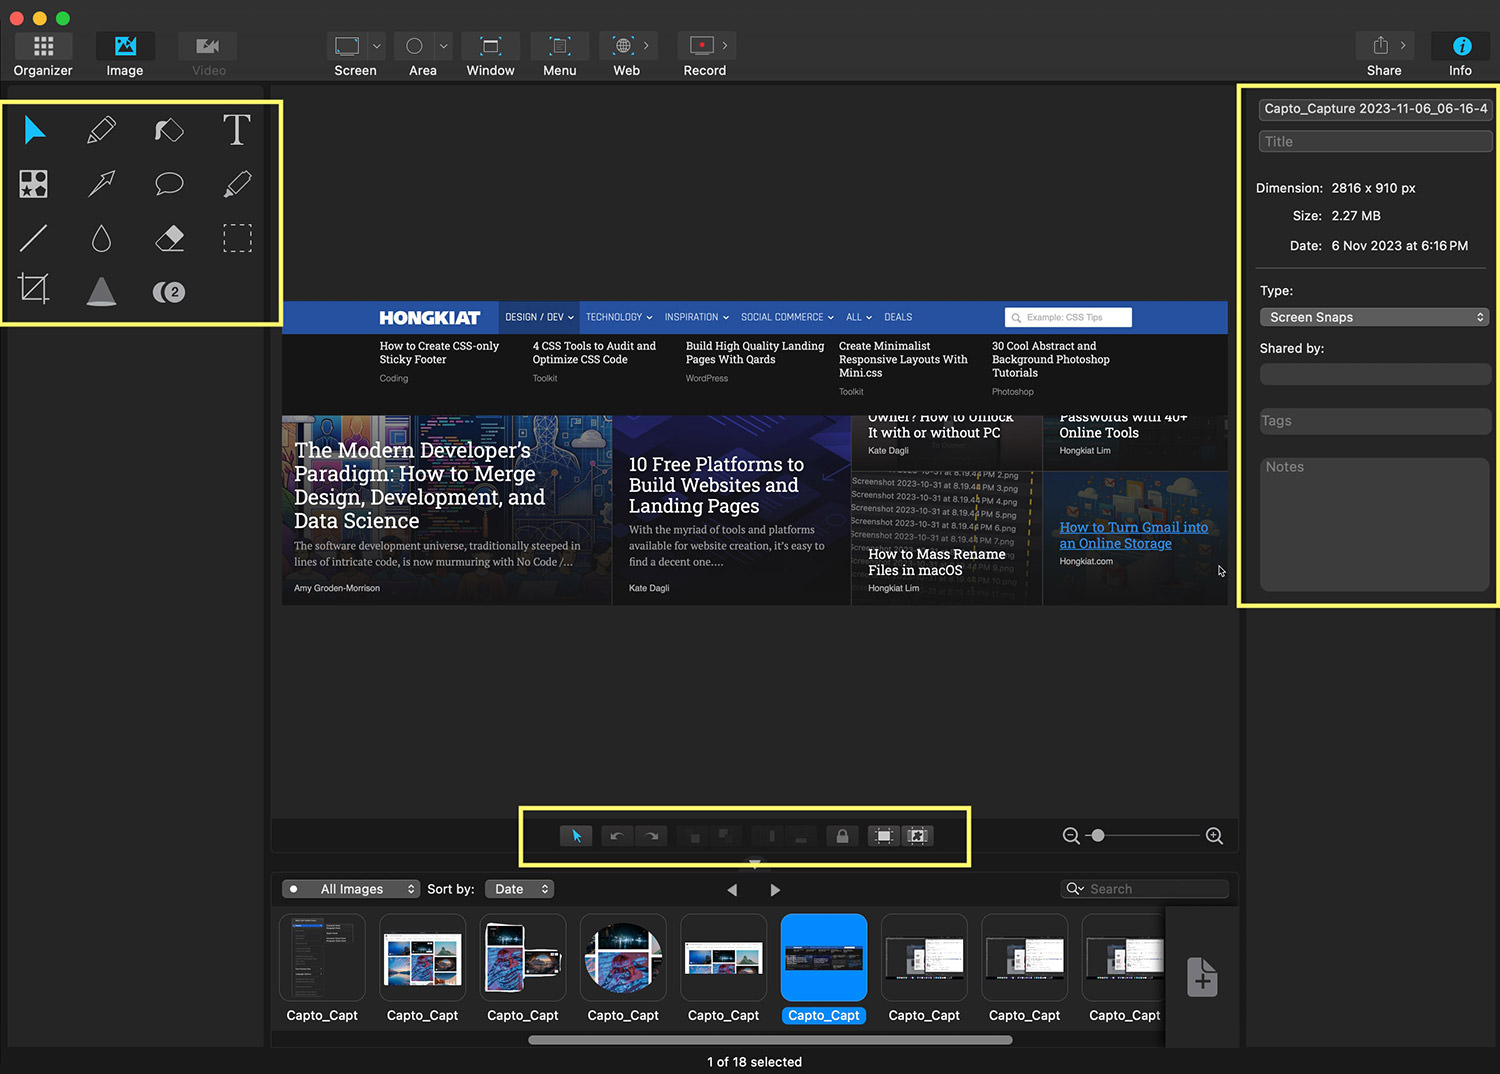
All screenshots captured using the app are stored within the app and can be accessed under “Image.” Within this section, you have a variety of annotation options, such as:
- Hand-drawn sketching.
- Adding text and lines.
- Inserting symbols, arrows, chat bubbles.
- Highlighting areas.
- Blurring specific areas.
- Adding step numbering, and more.
Also within this interface, you can crop your image, rotate it, or even add tags and notes to further organize your files.
Editing Screen Recording
For the screen recordings you’ve created, there are basic annotation options available, though not as extensive as those for screenshots. Nonetheless, you can add highlight boxes, arrows, callouts, text, blur specific areas, or even overlay images onto your video.
Additionally, the app provides basic video editing capabilities, including trimming to determine where the recording should start and end, cropping the frame, and more.

Sharing Screen Capture and Recordings
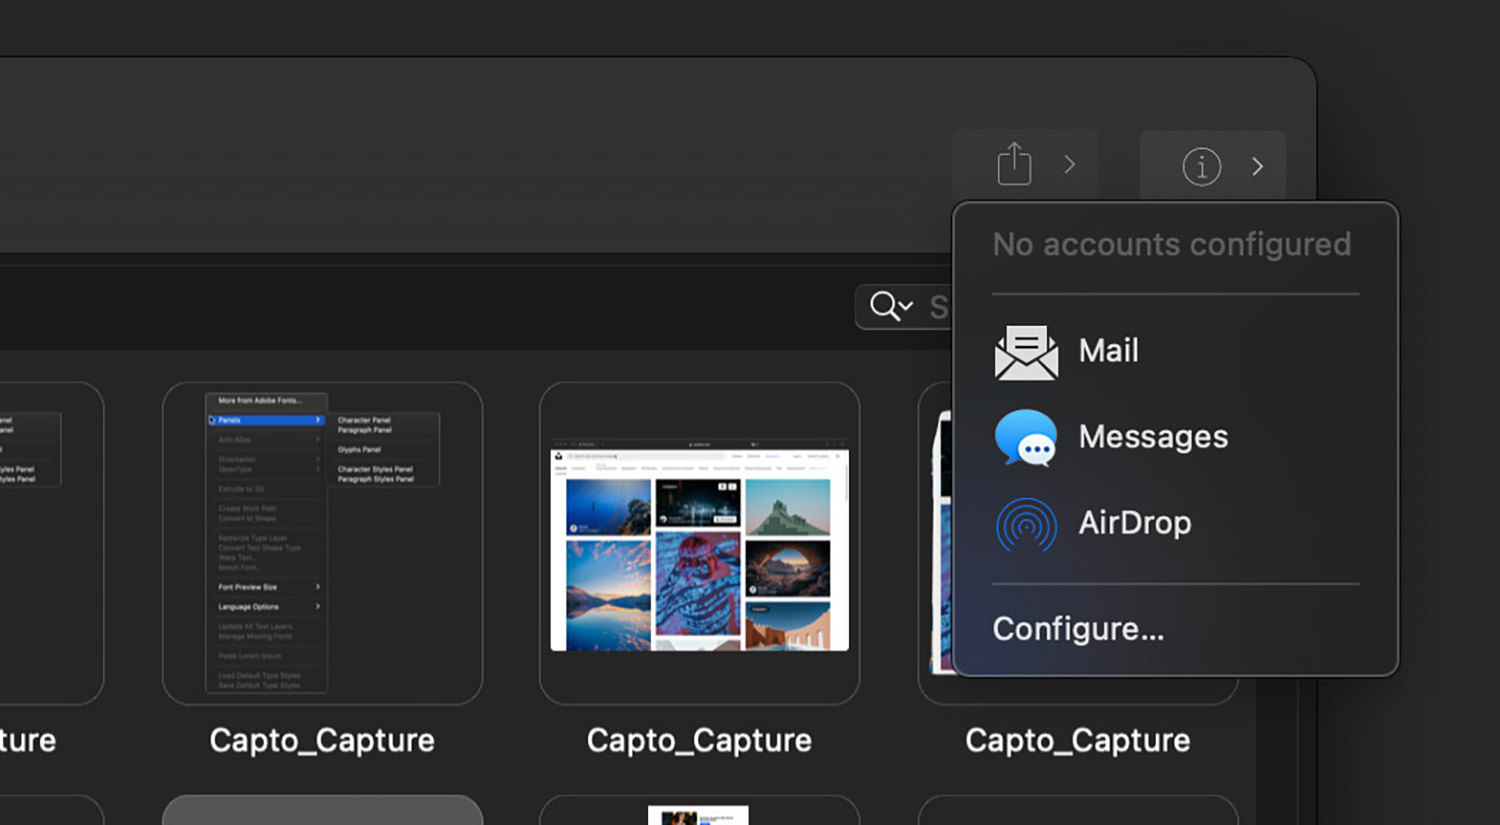
Everything created with Capto is saved within the app. To export for sharing, you’ll need to manually select the screenshot or screen recording, right-click, and choose “Save to Desktop“.

Alternatively, you can use the Share icon in the top right corner to share instantly via Mail, Messages, or AirDrop.
Final Thoughts
That covers just about everything the Capto app can do, which is a substantial set of features for a screenshot app. What I particularly appreciate about this app is that it stores all your screenshots and recordings internally, meaning you won’t have to manually customize a location for your screenshots on your Mac. It also enables you to organize them with notes, tags, or even put them into customized smart collections.
Capto’s Price:
The Capto app costs a one-time fee of $29.99 for a single user, valid for use on two Macs. If you find it useful for more people, there’s a family pack available for $44.99, which allows for use on up to five Macs.
Black Friday Deal: The app is now available at a 50% discount, priced at $15 during Black Friday sales.
Capto comes with a 15-day free trial with no payment details required. You can download it from the Mac App Store. The trial version of Capto includes a watermark on all screenshots. To enjoy all features without watermarks, you’ll need to purchase the app.