Screen Capture Keyboard Shortcuts for Windows & macOS
Want to talk with your team, explain something, or share a chat you had? Screenshots are a great way to do it.
If you need to take and show screenshots fast, using keyboard shortcuts is the best method. Shortcuts make your work faster, but you need to know the right ones.
For those wanting to take screenshots on Mac or Windows, here are the shortcuts you need. Let’s get started with Windows; for Mac users, jump to this section.
Windows Shortcut for Screenshots
Windows lets you take a picture of the whole screen or just the current window without needing any other software.
Here’s how:
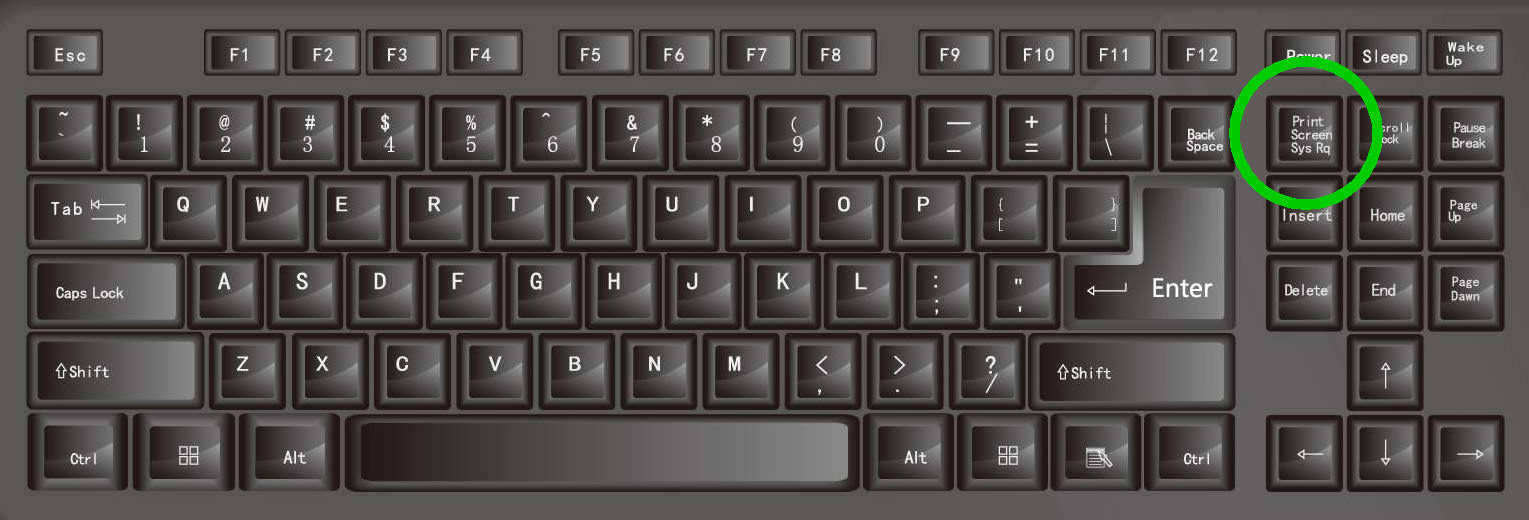
- Press the PrtScn button to save the entire screen to Clipboard. You can then put it in text tools (like MS Word) or picture tools for more steps.
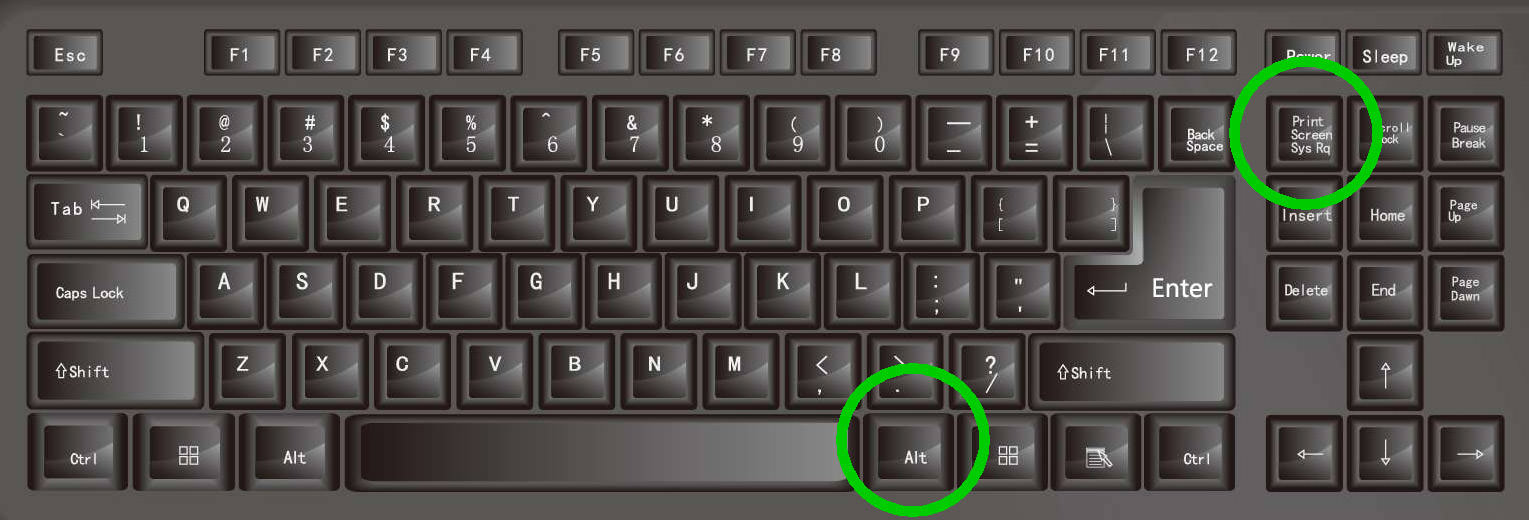
- Hold the Alt key and press the PrtScn button to take a picture of just the current window.
Mac Shortcut for Screenshots
Compared to Windows, macOS offers users greater flexibility when it comes to taking screenshots. With a Mac, you can:
- Screenshot the entire screen
- Screenshot a specific area
- Screenshot a specific window
- Screenshot the Touch Bar (for MacBook Pro)
Here’s how you do it:
1. Capture the Whole Screen
Press Command + Shift + 3 to take a picture of the entire screen. The screenshot will be stored on your desktop.
2. Capture a Specific Area
Press Command + Shift + 4 and your cursor changes to a crosshair. Drag the crosshair over the area you want to capture. It will save to your desktop.

Note: Pressing Shift or Option while dragging changes how you select the area.
3. Capture a Specific Window
Press Command + Shift + 4 then hit the Space key. Your cursor will turn into a camera shape. Hover over the window you want to screenshot and click once. It will save to your desktop.
4. Screenshot the Touch Bar
If you own the MacBook Pro with a Touch Bar and want to capture its Touch Bar, press Command + Shift + 6.
Note: Usually, these steps save your images as .PNG on your desktop. If you want to change the file type or where they’re saved, read the next section.
How to Change Where Screenshots Are Saved
If you often take many screenshots and don’t want them to clutter your desktop, macOS lets you pick a different folder to save them.
Video tutorial:
Instructions:
- Make a folder and name it Screenshot or whatever you prefer.
- Open Terminal and type the command below, but don’t hit Enter just yet.
- Place your cursor right after the “n” in “location” and press the Space key once.
- Drag the folder you just made into Terminal. This adds the folder’s address after “location”. Your command should now look like:
- Hit Enter and type in the following command:
- Press Enter one more time.
defaults write com.apple.screencapture location
defaults write com.apple.screencapture location /Users/yourname/Documents/Screenshots
killall SystemUIServer
Extra Tips:
How to Save Screenshots to Clipboard
If you’d rather save your screenshots to the clipboard (so you can paste them in tools like Photoshop), just add the Control key to your keyboard command.
Here’s how the updated shortcuts would be:
- Control + Command + Shift + 3 – Captures the whole screen and saves to clipboard.
- Control + Command + Shift + 4 – Takes a screenshot of a chosen area and saves to clipboard.