10 Windows 10 Tips to Maximize Productivity
Windows 10 is a fast and efficient operating system that’s designed to enhance user productivity. The most-used desktop operating system offers a multitude of features that help the users juggle between applications seamlessly and multi-task with minimum efforts.
These features, however, aren’t obvious and thus unknown by many people. That’s why, in this post, we’re showcasing 10 tips and tricks to make the most out of Windows 10 to put your productivity in the faster gear.
10 Tools to Improve Windows Performance
PCs require continuous maintenance to ensure a great experience. Cleaning unwanted data, updating the software, keeping the system... Read more
Shortcuts to each respective tip:
- GodMode to control everything
- Command Windows via voice
- Organize app windows with snap
- Resize snapped apps with mouse
- Find app windows using Task View
- Group apps using Virtual Desktop
- Using Tablet Mode View
- Handwrite notes with Windows Ink
- Use Touchpad Gestures for quick tasks
- Scroll inactive windows with mouse
How to Access Windows 10 Boot Options Menu (6 Ways)
Windows 10 offers a lot of interesting features, and the advanced boot options to troubleshoot many of the... Read more
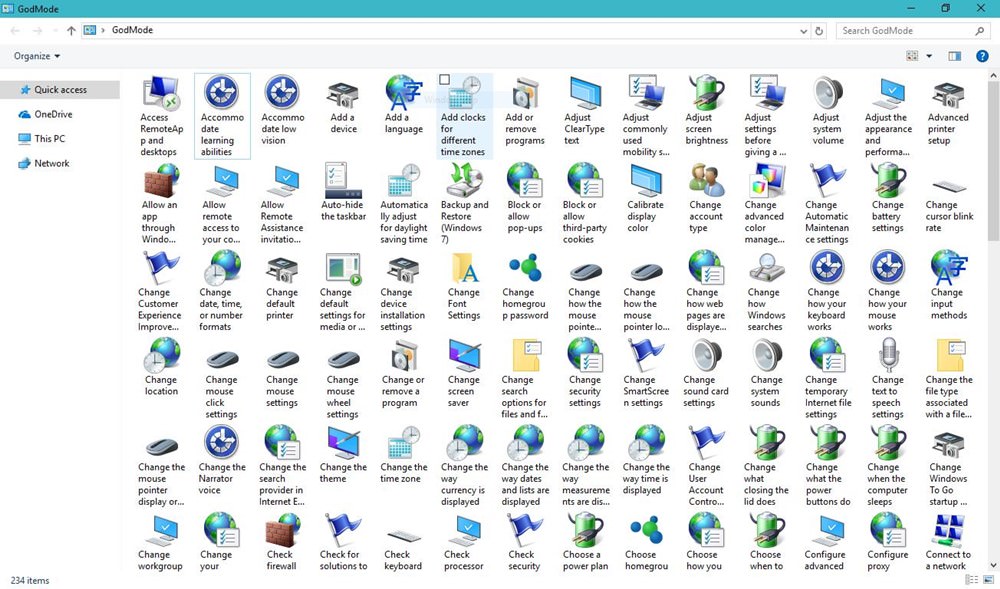
1. Use GodMode to control everything
GodMode is one of the best kept secrets of Windows 10. It’s nothing but a hidden folder that packs quick access to piles of customization options and powerful features of Windows 10. With it to your access, you can customize almost anything without the need of searching that option or configuration in the Settings or Control Panel.
You can activate the GodMode in few following simple steps.
- Right-click on the Desktop, select "New", choose "Folder".
- Right-click the "New folder", click "Rename".
- Set the following as the new name of that folder: "
GodMode.{ED7BA470-8E54-465E-825C-99712043E01C}" (without quotes).
This will make the folder’s icon transform into somewhat like Control Panel and you can open the "GodMode" folder to find all settings under one roof.
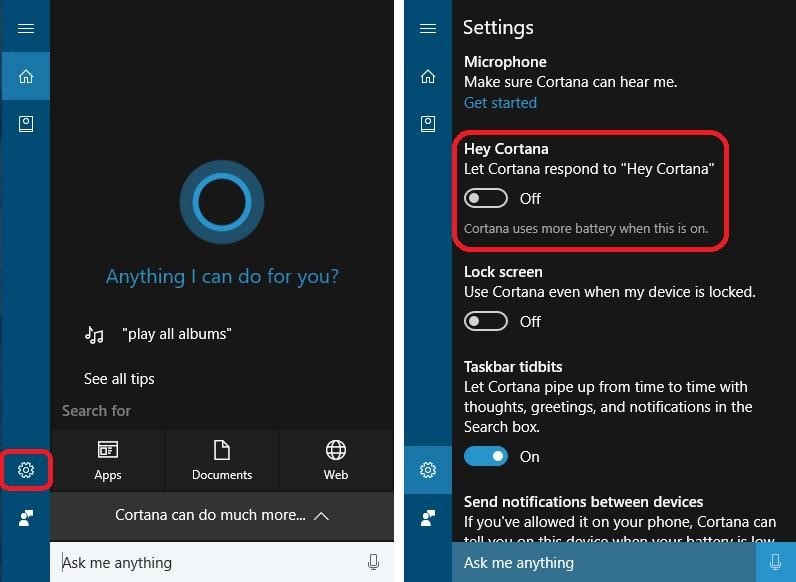
2. Use your voice to give commands
Windows 10 comes with a virtual assistant, Cortana, that sends you personal alerts, suggestions and reminders based on your set preferences, mails and other data from your Microsoft account. Cortana does much more: opens apps, plays music, sets events, searches the web, shows local and world news, notifies about important updates, etc.
To make things super easy, Cortana offers an innovative "Listening Mode", which allows you to speak to Cortana like speaking to a person and ask her to do something, say play some music. You can enable this feature using these steps:
- Open Cortana and click the "Settings" icon.
- Toggle on the option "Let Cortana respond to "Hey Cortana"".
3. Use Snap to organize app windows
Snap is a super cool feature that helps you take full advantage of the screen area on every device. It’s most helpful when one is juggling between multiple apps and wishes to arrange them on the screen effortlessly per one’s multi-tasking requirements.
Snap lets you snap any window to any half or quadrant of the screenbarjust drag the app’s title bar to an edge or on the side of the screen and the app simply arranges it in its own space. At that moment when the app is placed using this feature, Snap Assist also comes into picture and helps you quickly snap other apps in the leftover space.
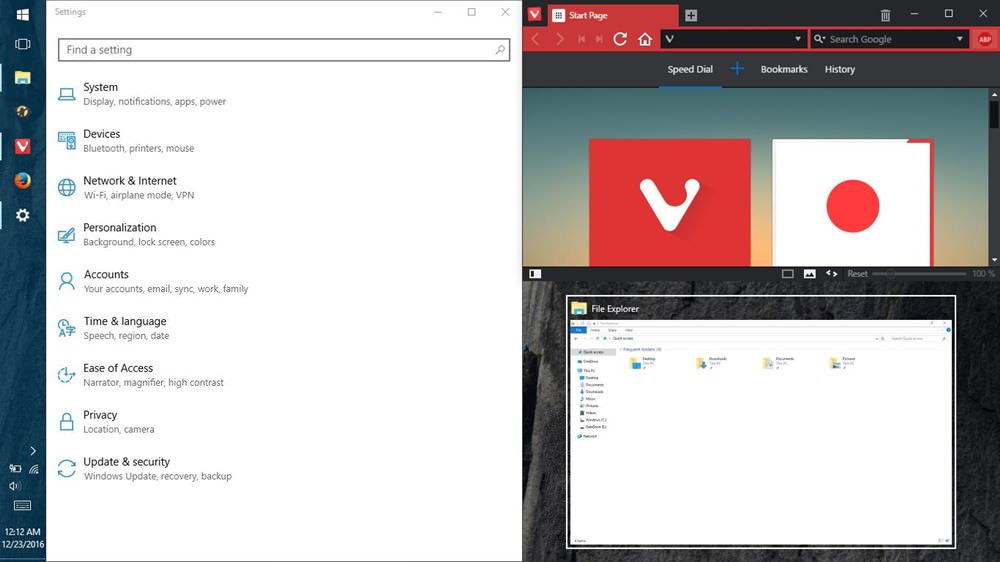
You can snap open applications to left or right half of the screen or to top-left, top-right, bottom-left or bottom-right quadrant of the screen. To speed up the process even more, you can use following keyboard shortcuts to use the Snap feature:
Win + Left: Snaps to the left half.
Win + Right: Snaps to the right half.
Win + Left and Win + Up: Snaps to the top-left edge.
Win + Right and Win + Up: Snaps to the top-right edge.
Win + Left and Win + Down: Snaps to the bottom-left edge.
Win + Right and Win + Down: Snaps to the bottom-right edge.
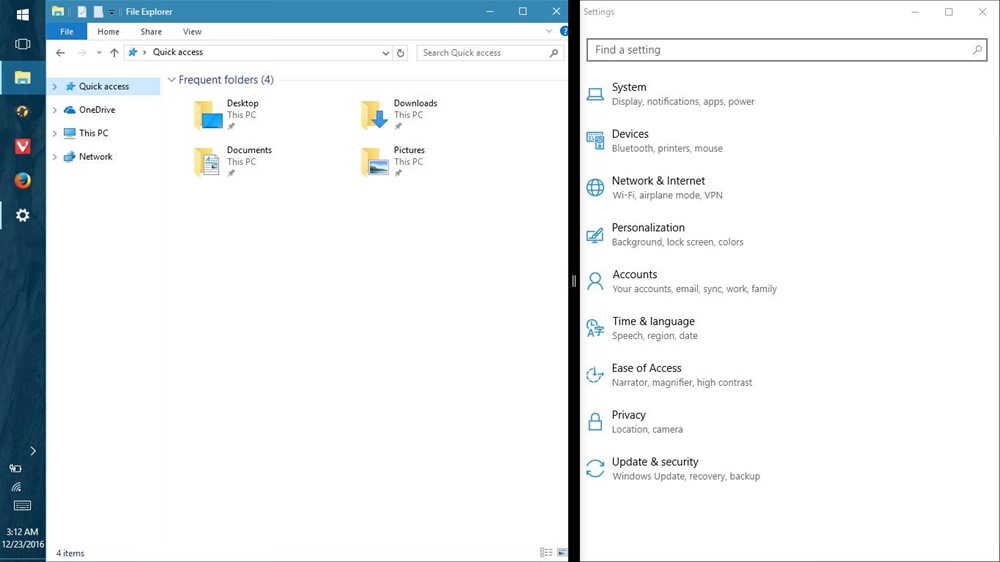
4. Use mouse to resize snapped apps
The ability to snap windows to either of the four quadrants or the two halves of the screen is by far one of the most useful feature introduced in Windows 8. However, that’s not all when it comes to Windows 10baryou can even resize them now.
You can hover the mouse pointer over the intersection point of the two snapped app windows to resize them per your choice. This allows you to resize both the windows at the same time but it only works when apps are stacked horizontally, i.e., side by side.
5. Use Task View to find app windows
Task View is an innovative task switcher first introduced in Windows 10 to enhance the multi-tasking experience. It shows thumbnail views of all the open applications of the current desktop or virtual desktop (find more details about virtual desktops below).
The feature allows you to manage multiple apps across desktops and monitors, quickly locate an app’s window quickly and show desktop or minimize all windows. You can access the Task View screen by doing anyone of the given methods:
- Click "Task View" button on the Taskbar (the button beside the Search bar).
- Press the Win + Tab.
- Swipe three fingers on the trackpad.

6. Use Virtual Desktops to group apps
Windows 10, takings hints from Linux distros, finally brings the virtual desktop feature to help you organize or group the open applications in your system. Using the same feature, you can group apps into multiple virtual desktops with only one virtual desktop (with all its component app windows) being visible at any single moment of time.
To start with this feature, just follow the below steps:
- Launch the "Task View" by pressing its icon in "Taskbar".
- Click the "New desktop" button at the bottom-right corner to create a new virtual desktop.
- Click the newly created desktop (say Desktop 2) and open few apps.
- Now open "Task View" again and click Desktop 1, and you’ll notice that the apps from Desktop 2 are now hidden.
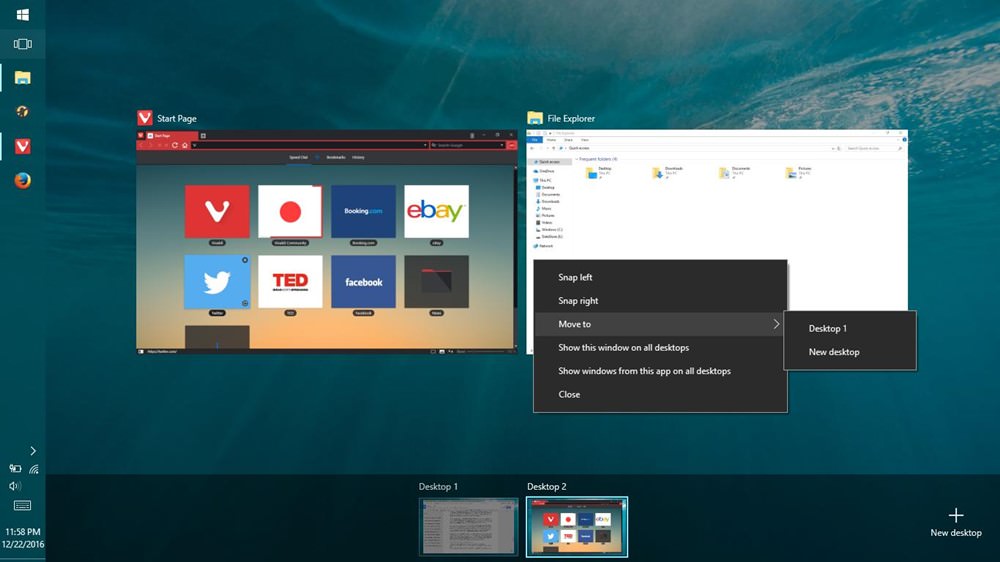
To move apps between the virtual desktops, do this:
- Open the "Task View" and choose the source desktop.
- Drag the application to the target desktop (from the desktops list shown in the bottom of the screen).
Alternatively, you can also try doing this:
- In the "Task View", choose the source desktop.
- Right-click the app and choose "Move to" and select the target desktop.
For example, let’s say you create two virtual desktops: one for work and other for play. The first desktop can have apps like browser, email client, word processor, etc. and the other desktop can have apps such as music player, video streamer, etc. When you will open the first one, you won’t see music player in the Taskbar or Task View (as it’s part of the second virtual desktop) and so on. And thus, it also assists in keeping work and play separate.
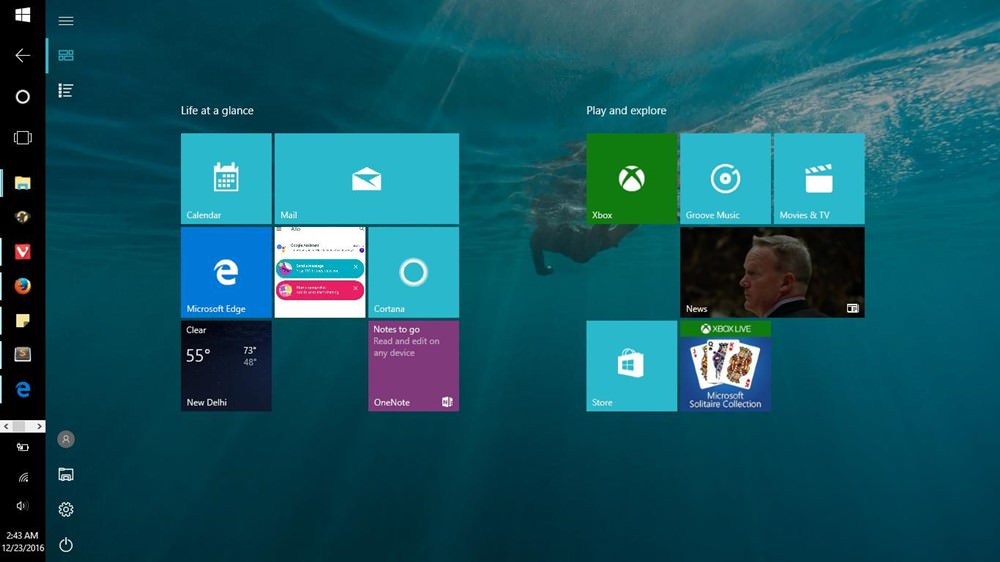
7. Use Tablet Mode View on your PC
Windows 10 is intelligent enough to change its look & feel depending on your device. For example, if you’re working on a tablet, it shows its full screen metro interface that works in touch mode. Whereas on a traditional PC, it appears in its desktop interface.
However, if you want to enjoy the best of both worlds and want to experience the full screen interface (aka Tablet Mode) on your usual PC, there’s a simple trick to do so. You just need to follow these steps:
- Open the "Action Center" using its icon on Taskbar (or by swiping with four fingers on the touchpad).
- Click and enable "Tablet mode".
8. Use Windows Ink to handwrite notes
Windows Ink is an annotation and note feature introduced in Windows 10 that’s mainly meant for users with touchscreens and Microsoft Surface. This doesn’t mean it’s not useful or available on your desktop system, but on the contrary, it’s superb.
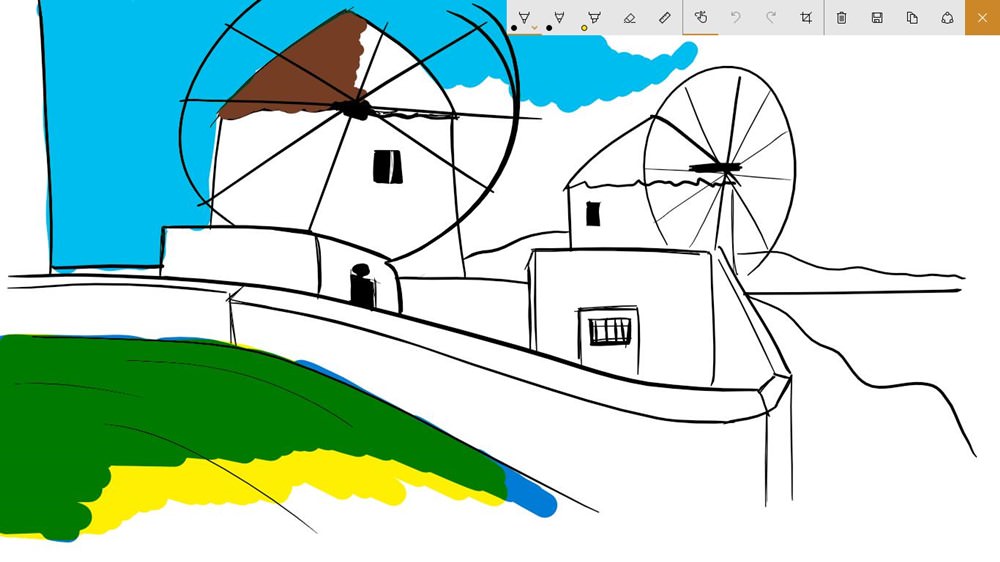
Windows Ink comes with three tools at minimum, namely:
- Sticky Notes: the familiar Sticky Notes with the functionality to handwrite notes with your finger or the Surface Pen on touch screens or the mouse otherwise.
- Sketchpad: a whiteboard with pencil, pen, highlighter, rulers and lot more drawing tools to pen down your thoughts using touch or drawing an art on the screen.
- Screen sketch: grabs a screenshot of the visible screen and lets you draw or annotate over the screenshot using pen, pencil, highlighter and more tools.
9. Use Touchpad Gestures for quick tasks
Windows 10 understands finger-friendly touchpad gestures for achieving quick tasks. Do note, however, that these gestures are only supported on precision touchpads, so if you’re not able to make these gestures work, then most probably it’s the fault of your laptop. Below are the useful touchpad gestures to use everyday:
- Scroll: Slide horizontally or vertically with two fingers.
- Zoom in/out: Pinch in or out using two fingers.
- Right-click: Tap with two fingers on the touchpad.
- Show desktop: Swipe opposite to screen using three fingers.
- See all windows: Swipe towards the screen with three fingers.
- Switch b/w windows: Swipe left or right using three fingers.
10. Use mouse to scroll inactive windows
In multitasking environments, it’s common to have multiple apps opened side by side wherein you’re working on one and checking out or reading something on the other. In such situations, the feature to scroll inactive windows helps to scroll the inactive app without clicking on it.
The feature to scroll the inactive windows by just hovering over them can be activated using these steps:
- Open "Settings" and choose "Devices".
- Click "Mouse & touchpad" and toggle on the option "Scroll inactive windows when I hover over them".
Final words
Well, that’s all about the various tips, tricks and features to help you improve productivity while using Windows 10. If you know any more useful tip or trick for Windows 10, please don’t hesitate to share with us using the comments.
How to Speed Up Your Slow PC (25 Ways)
25 Ways to Speed Up Your Slow PC Is your computer often slow or unresponsive? Each new version... Read more