How to Setup TREZOR Wallet (For First-timers)
If you are serious about the cryptocurrencies in your possession, you should keep them in a hardware wallet because it is probably the safest. In this tutorial, I’ll show you how to set up your TREZOR – one of the most secure hardware wallet available – for the very first time.
How to Reset and Recover Your Trezor Wallet
Trezor is a reliable and secure cryptocurrency wallet. However, if, on an unfortunate day, you forget your Trezor... Read more
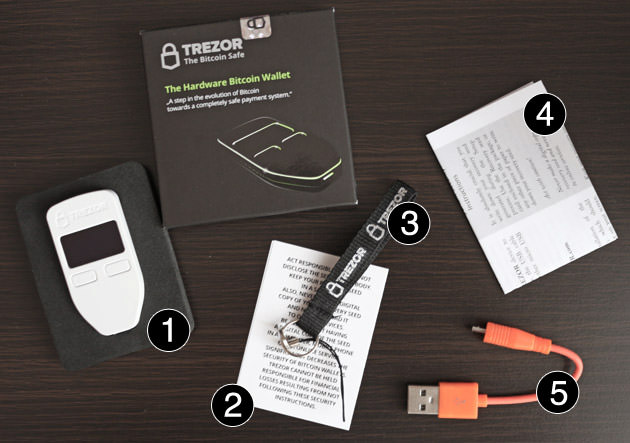
Inside the box
First and formost, make sure the security seal on the box is untampered. In case you find it to be tempered, get in touch with TREZOR support.

Here’s what you get inside the box.
Setting up TREZOR
Setting your TREZOR for the first time is pretty straight forward. The whole process will take approximetely 10-15 minutes.
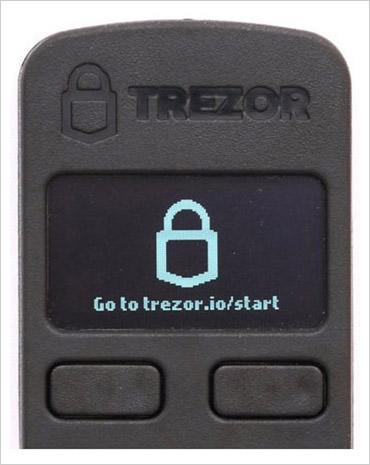
Step 1: Connect TREZOR to your computer
Connect TREZOR wallet to your computer using the USB cable provided. On your TREZOR wallet’s screen, you should then see a Lock icon, and an instruction asking you to go to trezor.io/start.
Step 2: Go to trezor.io/start
Learn how the TREZOR PIN and the recovery seed works. Then, choose if you want to subscribe to their newsletter or not, and continue to setting up your device.
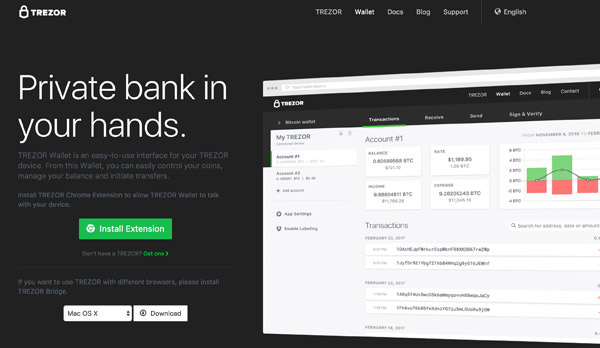
Step 3: Install TREZOR Wallet
Go to wallet.TREZOR.io if you’re not being directed to. In order for your TREZOR device to communicate with your TREZOR wallet, you can either install the TREZOR Chrome Extension, or the TREZOR Bridge specifically for your operating system.
In this guide, I’m going to go ahead using the Chome Extension.
Step 4: Install laterst firmware
For safety reasons, no firmware will be installed when the device is shipped. Click "Yes, Install" to begin installation of the firmware for the first time.
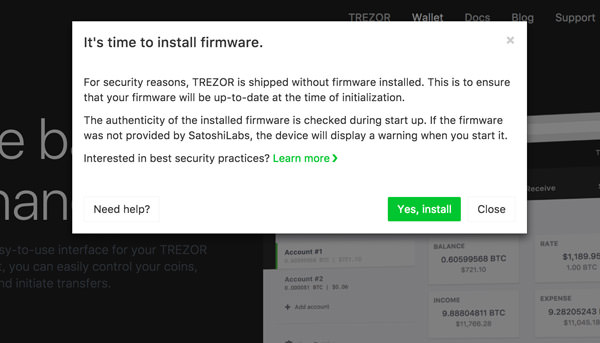
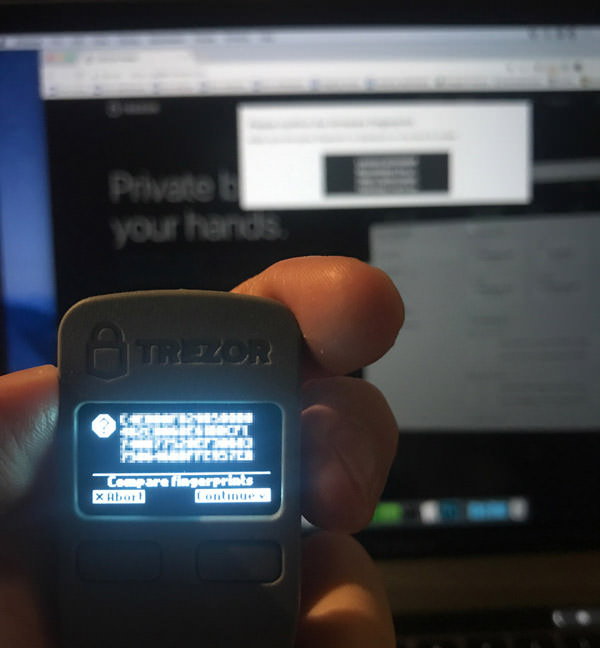
Cross check the firmware fingerprints on browser screen against the one on your TREZOR, make sure they matches. Click "Continue" on your TREZOR.
Step 5: Reconnect TREZOR
Plug it out, plug it in again and go to wallet.TREZOR.io.
Step 6: Give TREZOR device a name

Step 7: Setting up the PIN
Setting up your PIN may seem confusing at first, but once you get a grasp of it, it’s easy.
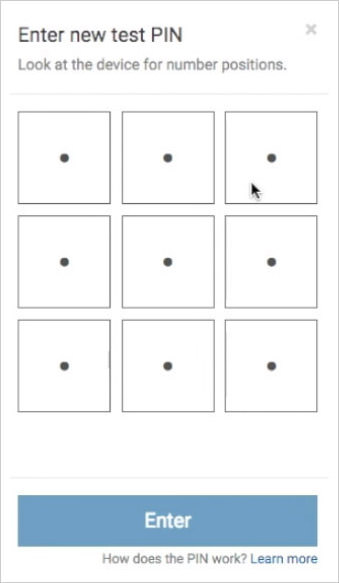
You will see a 3×3 grid (with dots) on your browser.
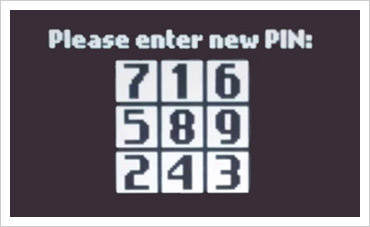
And you will see a 3×3 grid (with numbers) on your TREZOR.
Now, suppose you want your PIN to be, let’s say – 6789. You are going to refer to the exact position of these numbers in your TREZOR, and hit them in sequence in your browser.
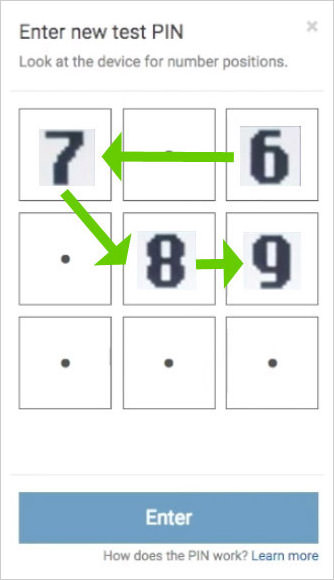
You will need to do this twice to confirm your PIN.
More: Learn more about TREZOR PIN.
Step 8: Write down the recovery seeds
Next, your TREZOR will display a unique combination of 24 words. This will allow you to recover your accounts in case you lose your device.
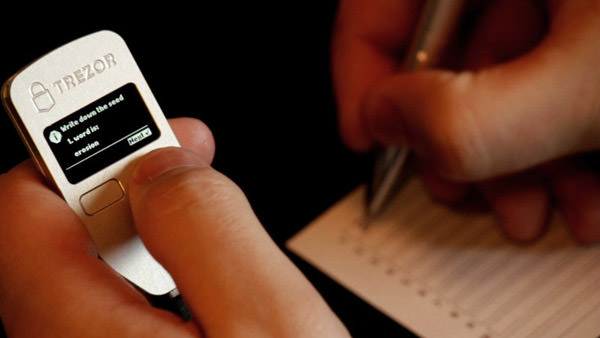
Write them down, all 24 words, in the recovery seed card provided, word by word. Verify it again, and click Finish on your TREZOR.
Make sure you never lose your recovery seed card.
More: Learn more about PIN recovery.
Final Step: Enter PIN to access TREZOR wallet
Go to https://wallet.trezor.io/ again on your browser (if you already have it closed), enter PIN, hit enter and access your wallet for the first very time.
It should look something like this.
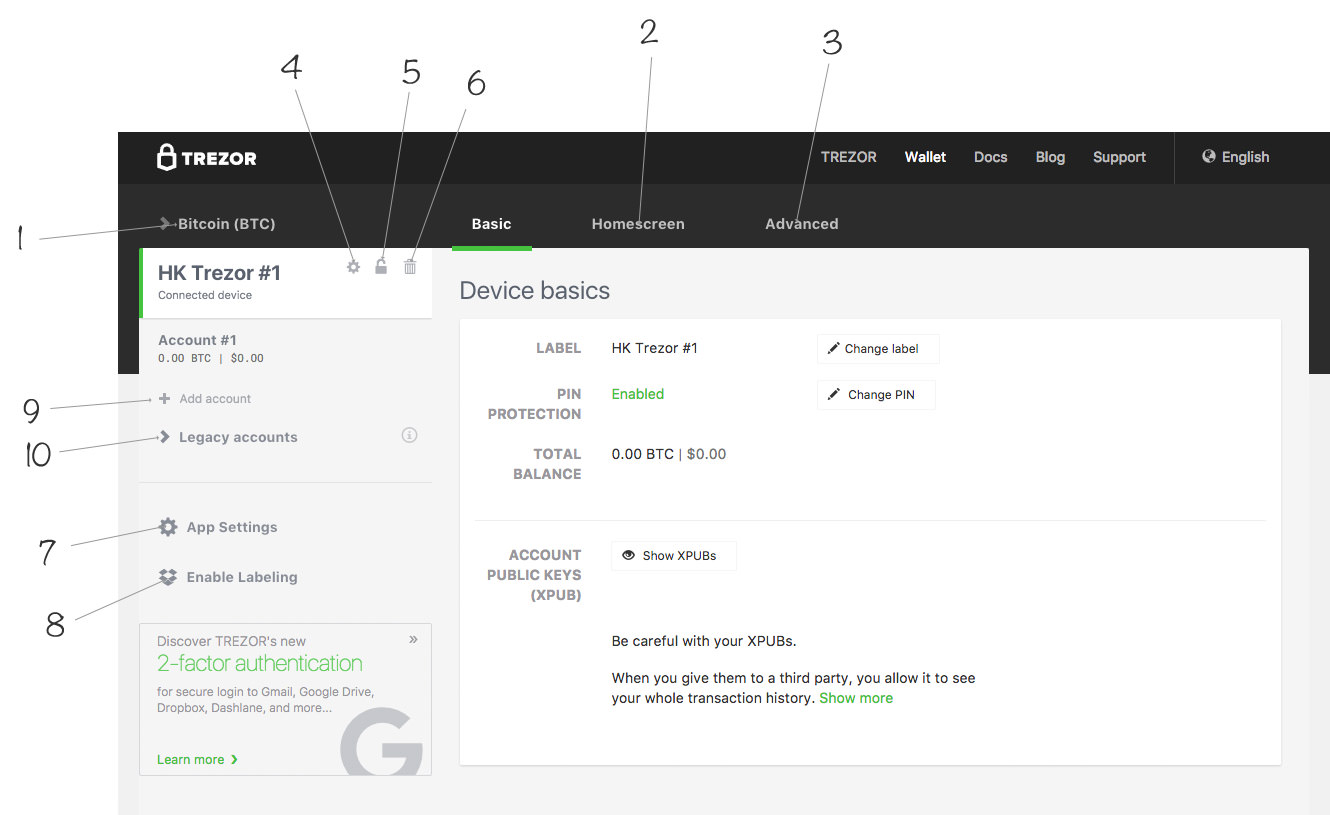
- Access your other cryptocurrency wallets. TREZOR currently supports: Bitcoin, Bitcoin Cash, Dash, Litecoin, Zcash, Ethereum and Ethereum Classic.
- Customize your TREZOR device homescreen.
- Access security features like enabling and disabling passphrase and PIN here. You can also wipe (remove all information) your TREZOR device here.
- Edit device’s basic settings; e.g. Change label and PIN.
- Lock TREZOR device.
- Forget TREZOR device.
- Change fiat currency, currency backend and bitcore server url.
- Connect TREZOR to Dropbox to access features (E.g. Rename accounts, Label receiving addresses) and information (E.g. Comment transactions) TREZOR wallet and transactions.
- Add new account.
- Add old accounts before SegWit.
Useful TREZOR-related links
- Buy TREZOR device
- Setup TREZOR device
- Access TREZOR wallet
- Understand TREZOR wallet recovery process
- Contact TREZOR support
6 Ethereum Wallets to Keep ETH and Other Crypto Safe
Ethereum is a rapidly growing digital currency that thousands of people are using for trade. However, it's not... Read more