How to Install and Setup MetaMask on Your Phone
If you’re into cryptocurrency buying and selling, you’ve probably already know what MetaMask is, but in case you don’t, it is a crypto wallet that makes interacting with the blockchain super easy.
MetaMask keeps your crypto assets safe and enables you to access your coins or NFT through a browser extension as well as a mobile app. And the best part is that MetaMask is free!
So, in this article, I am going to tell you how to set up MetaMask on your mobile device with a thorough step-by-step process. If you want to know more about MetaMask, you can check it out this article. Let’s get started.
10 Best MetaMask Alternatives
Explore top MetaMask alternatives for secure cryptocurrency transactions. Discover unique features of BlockWallet, Trust Wallet, and more. Read more
Setting up MetaMask – Step-by-step Guide
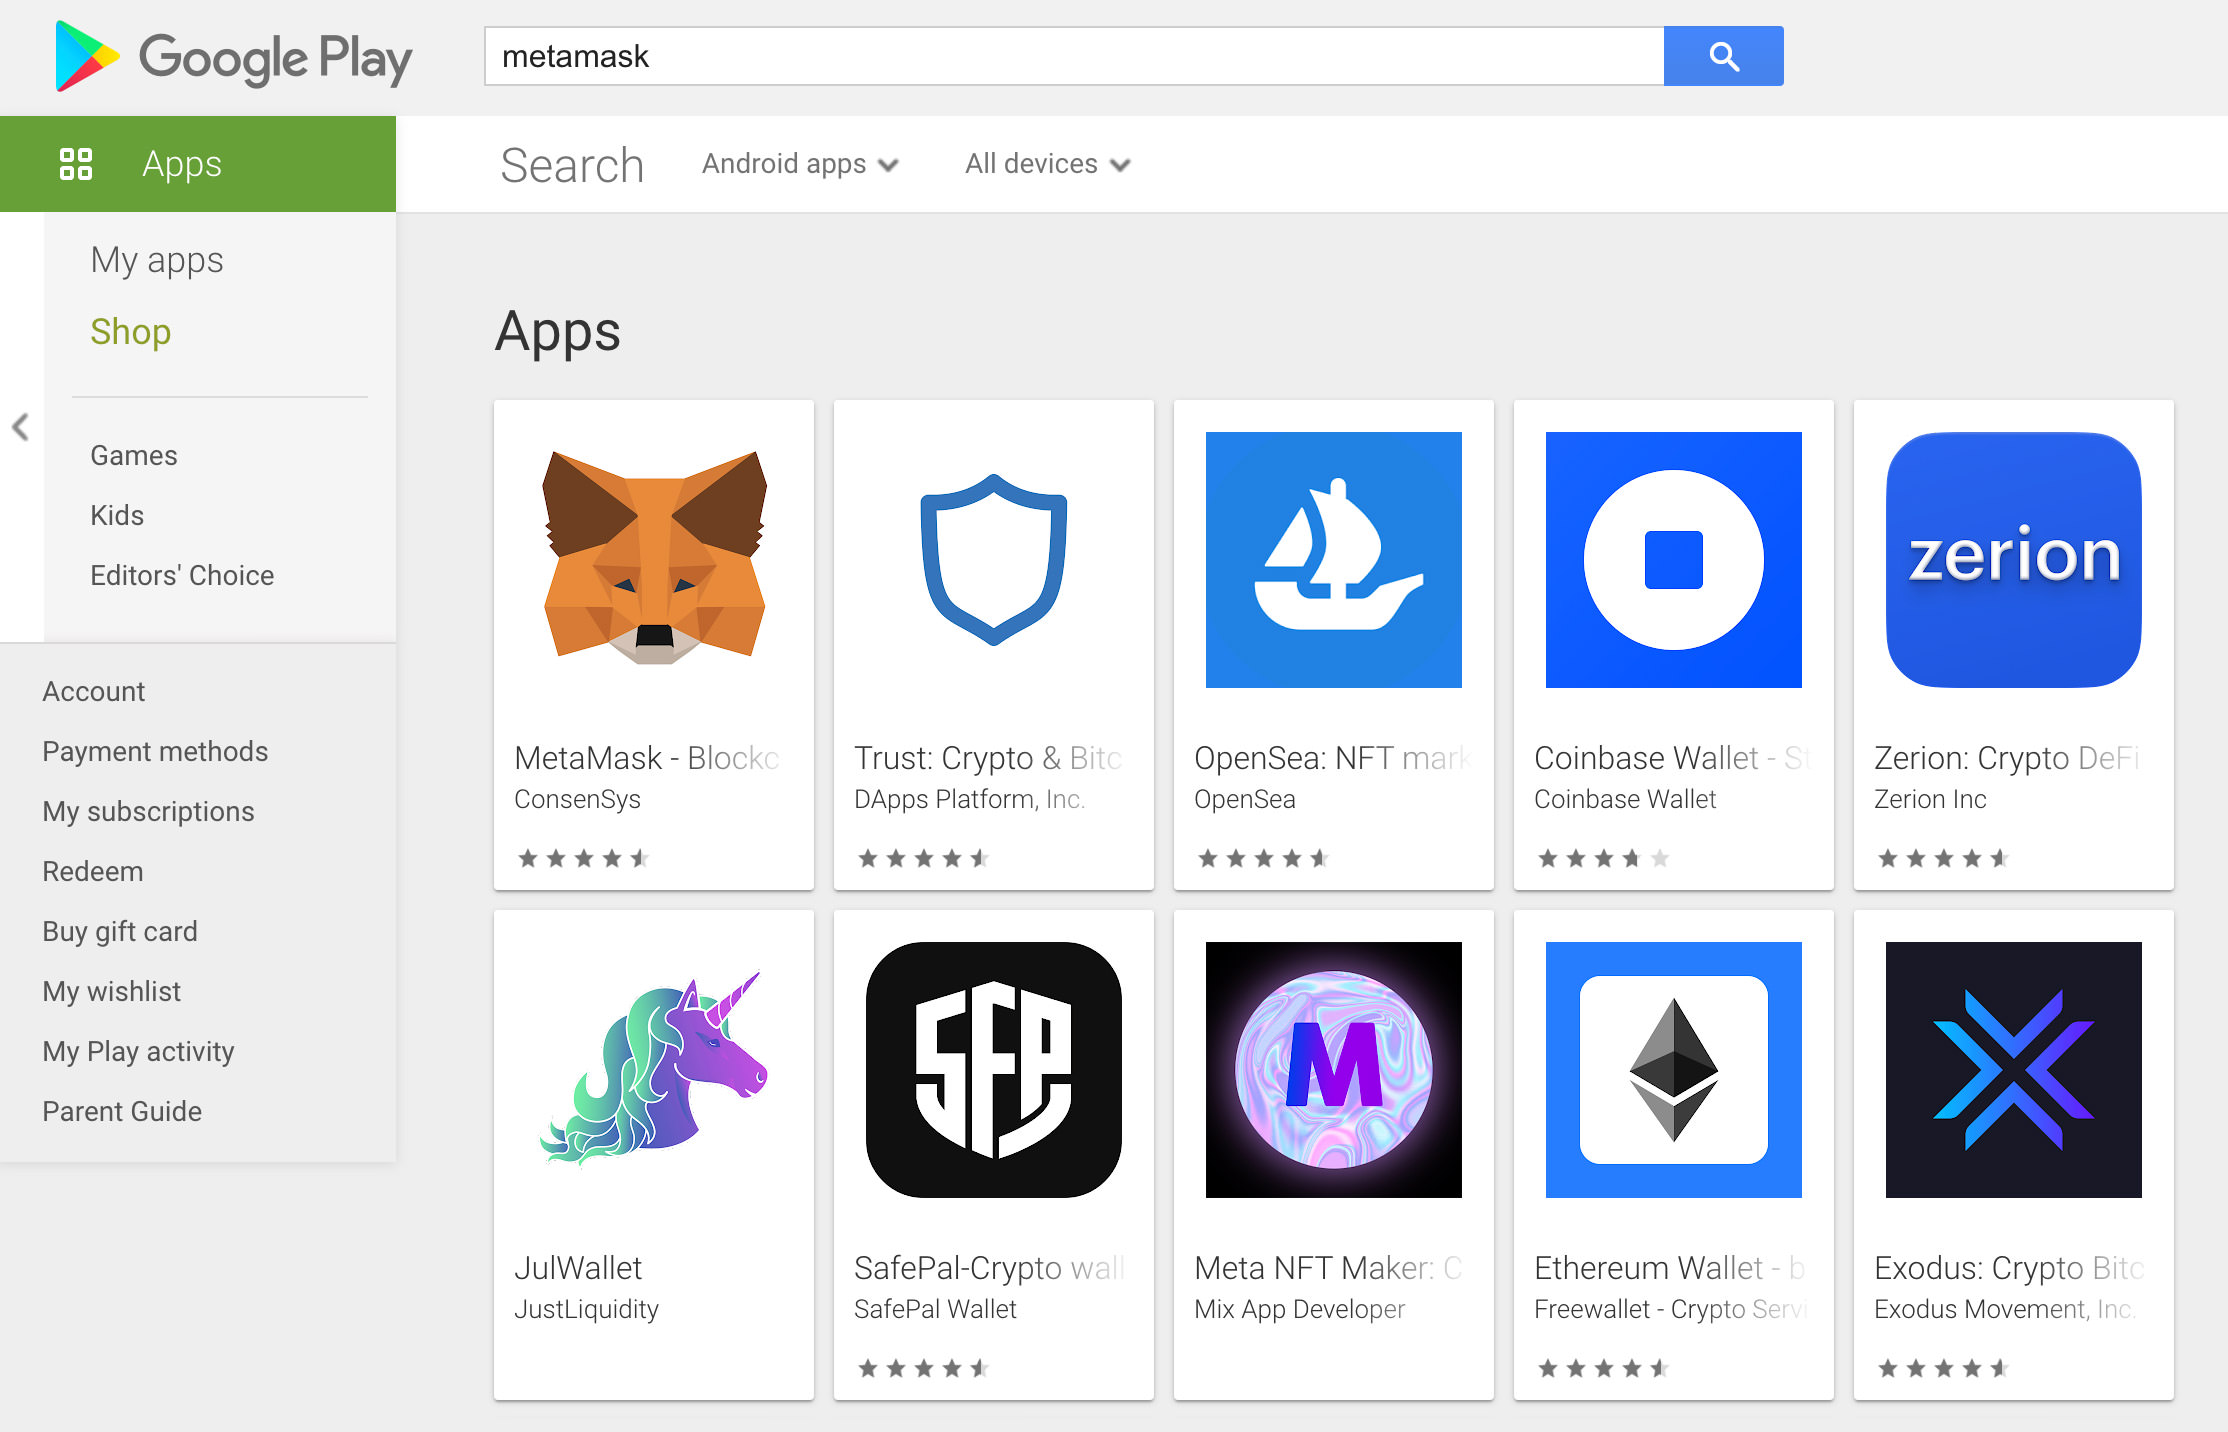
- First, you will need the MetaMask mobile app; the best and safest way to get it is through the Google Play Store or Apple Store, depending on your mobile’s operating system.
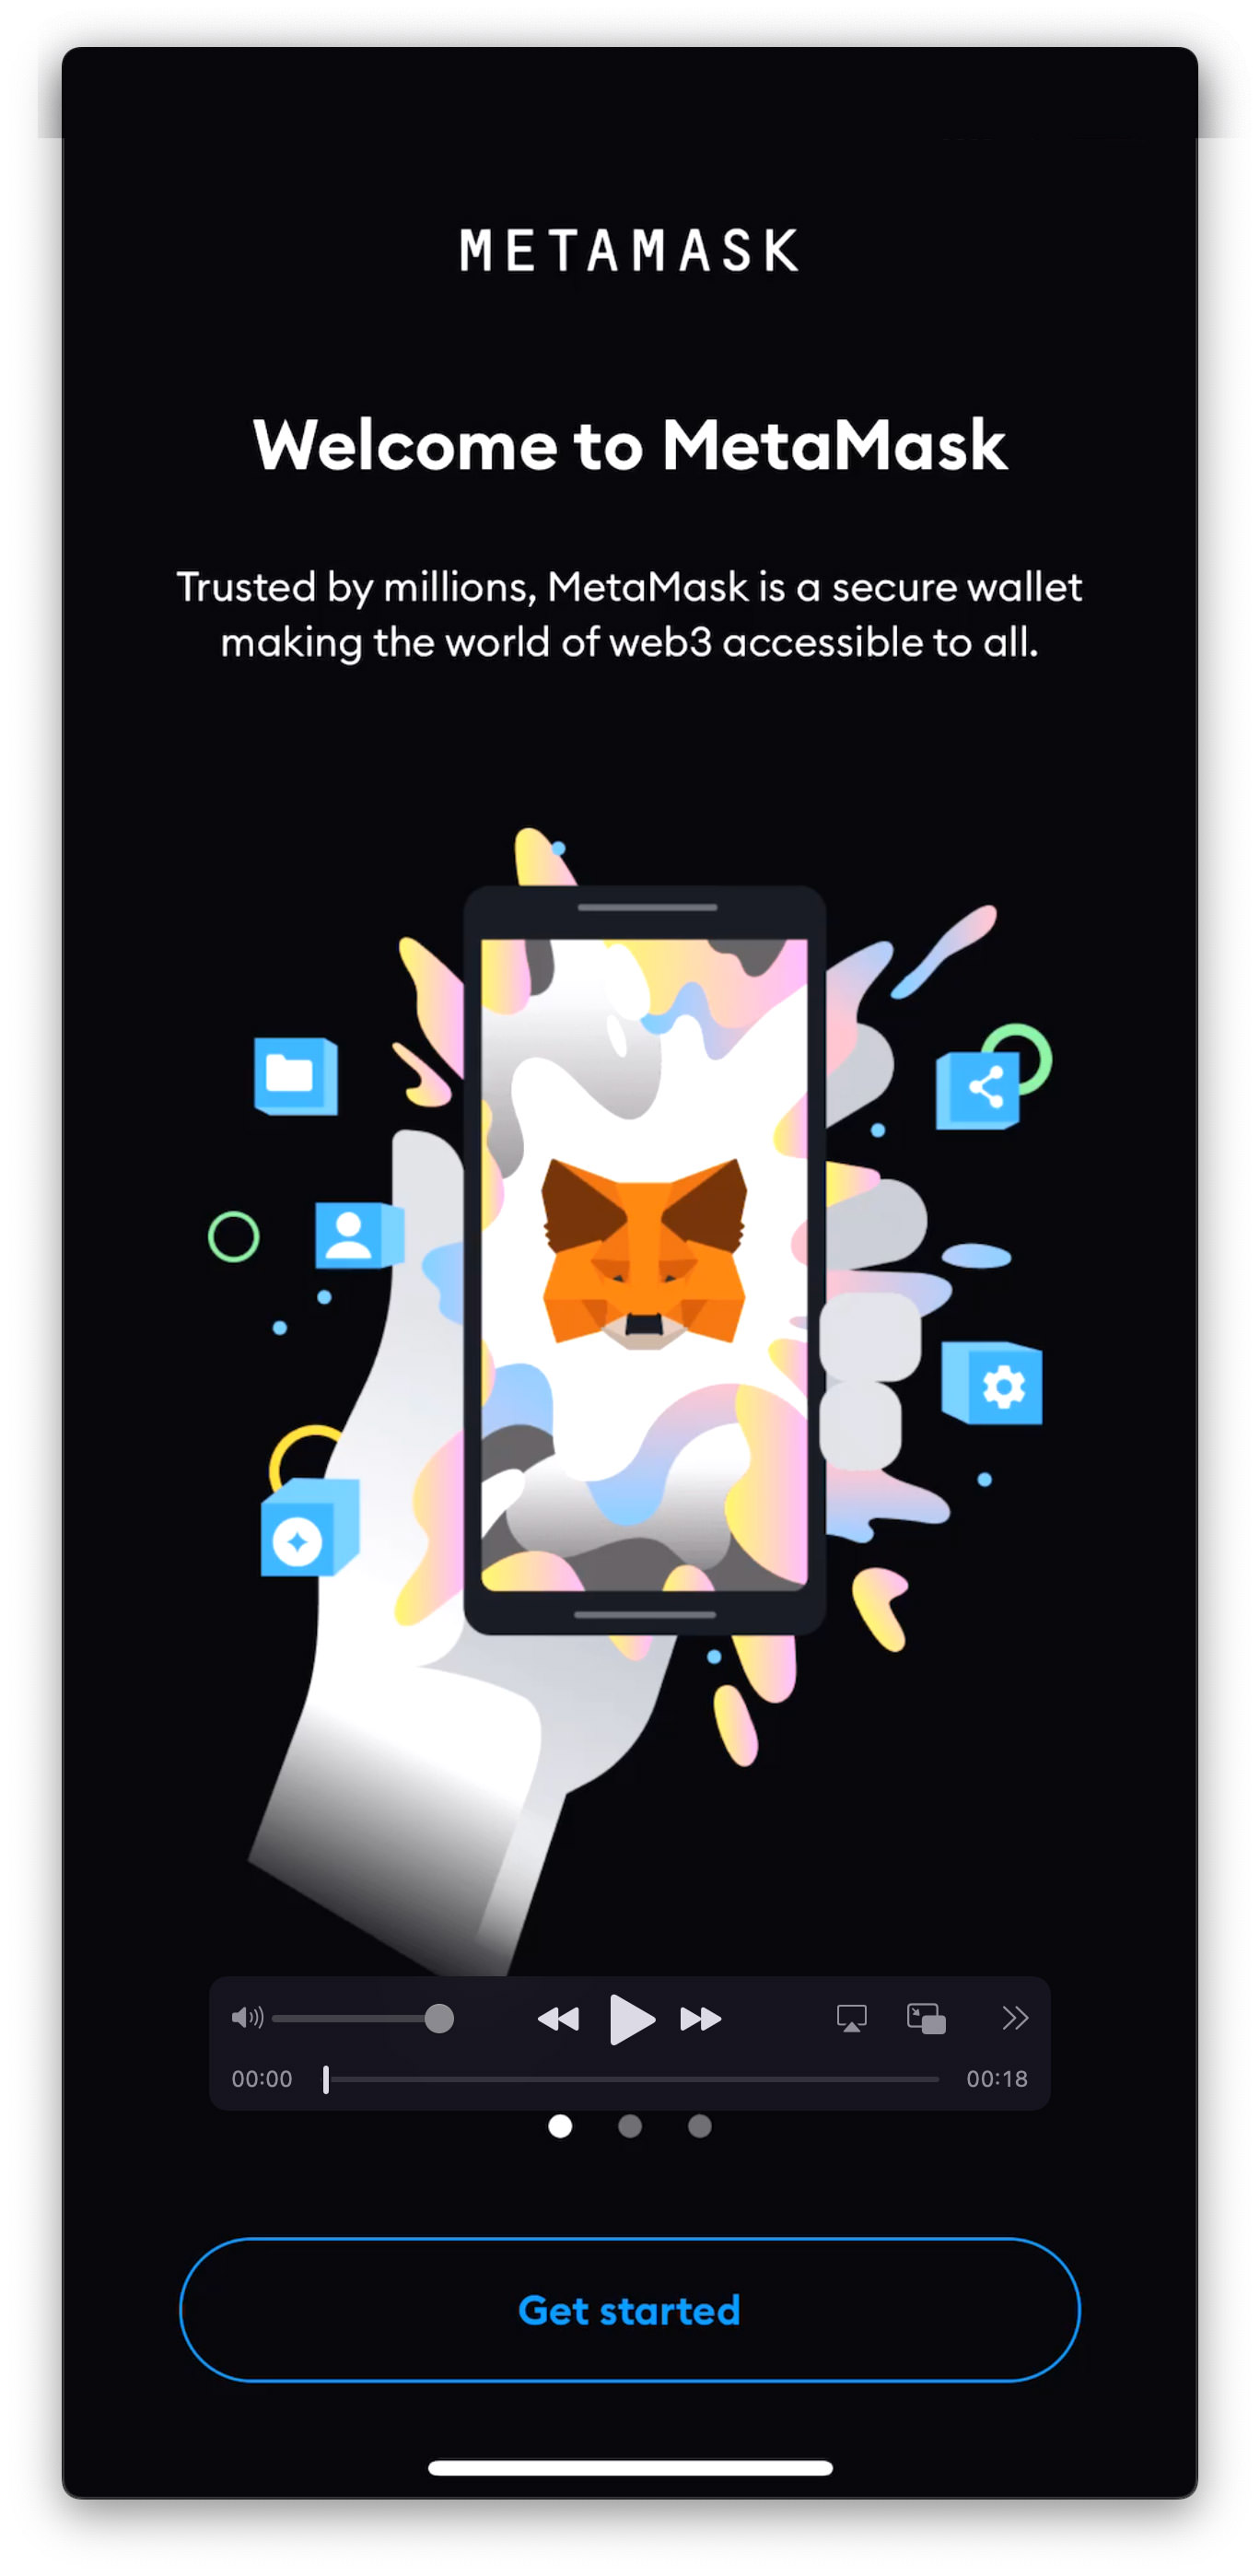
- Once successfully installed, launch the MetaMask app, then tap “Get started” to initiate the wallet setup process.
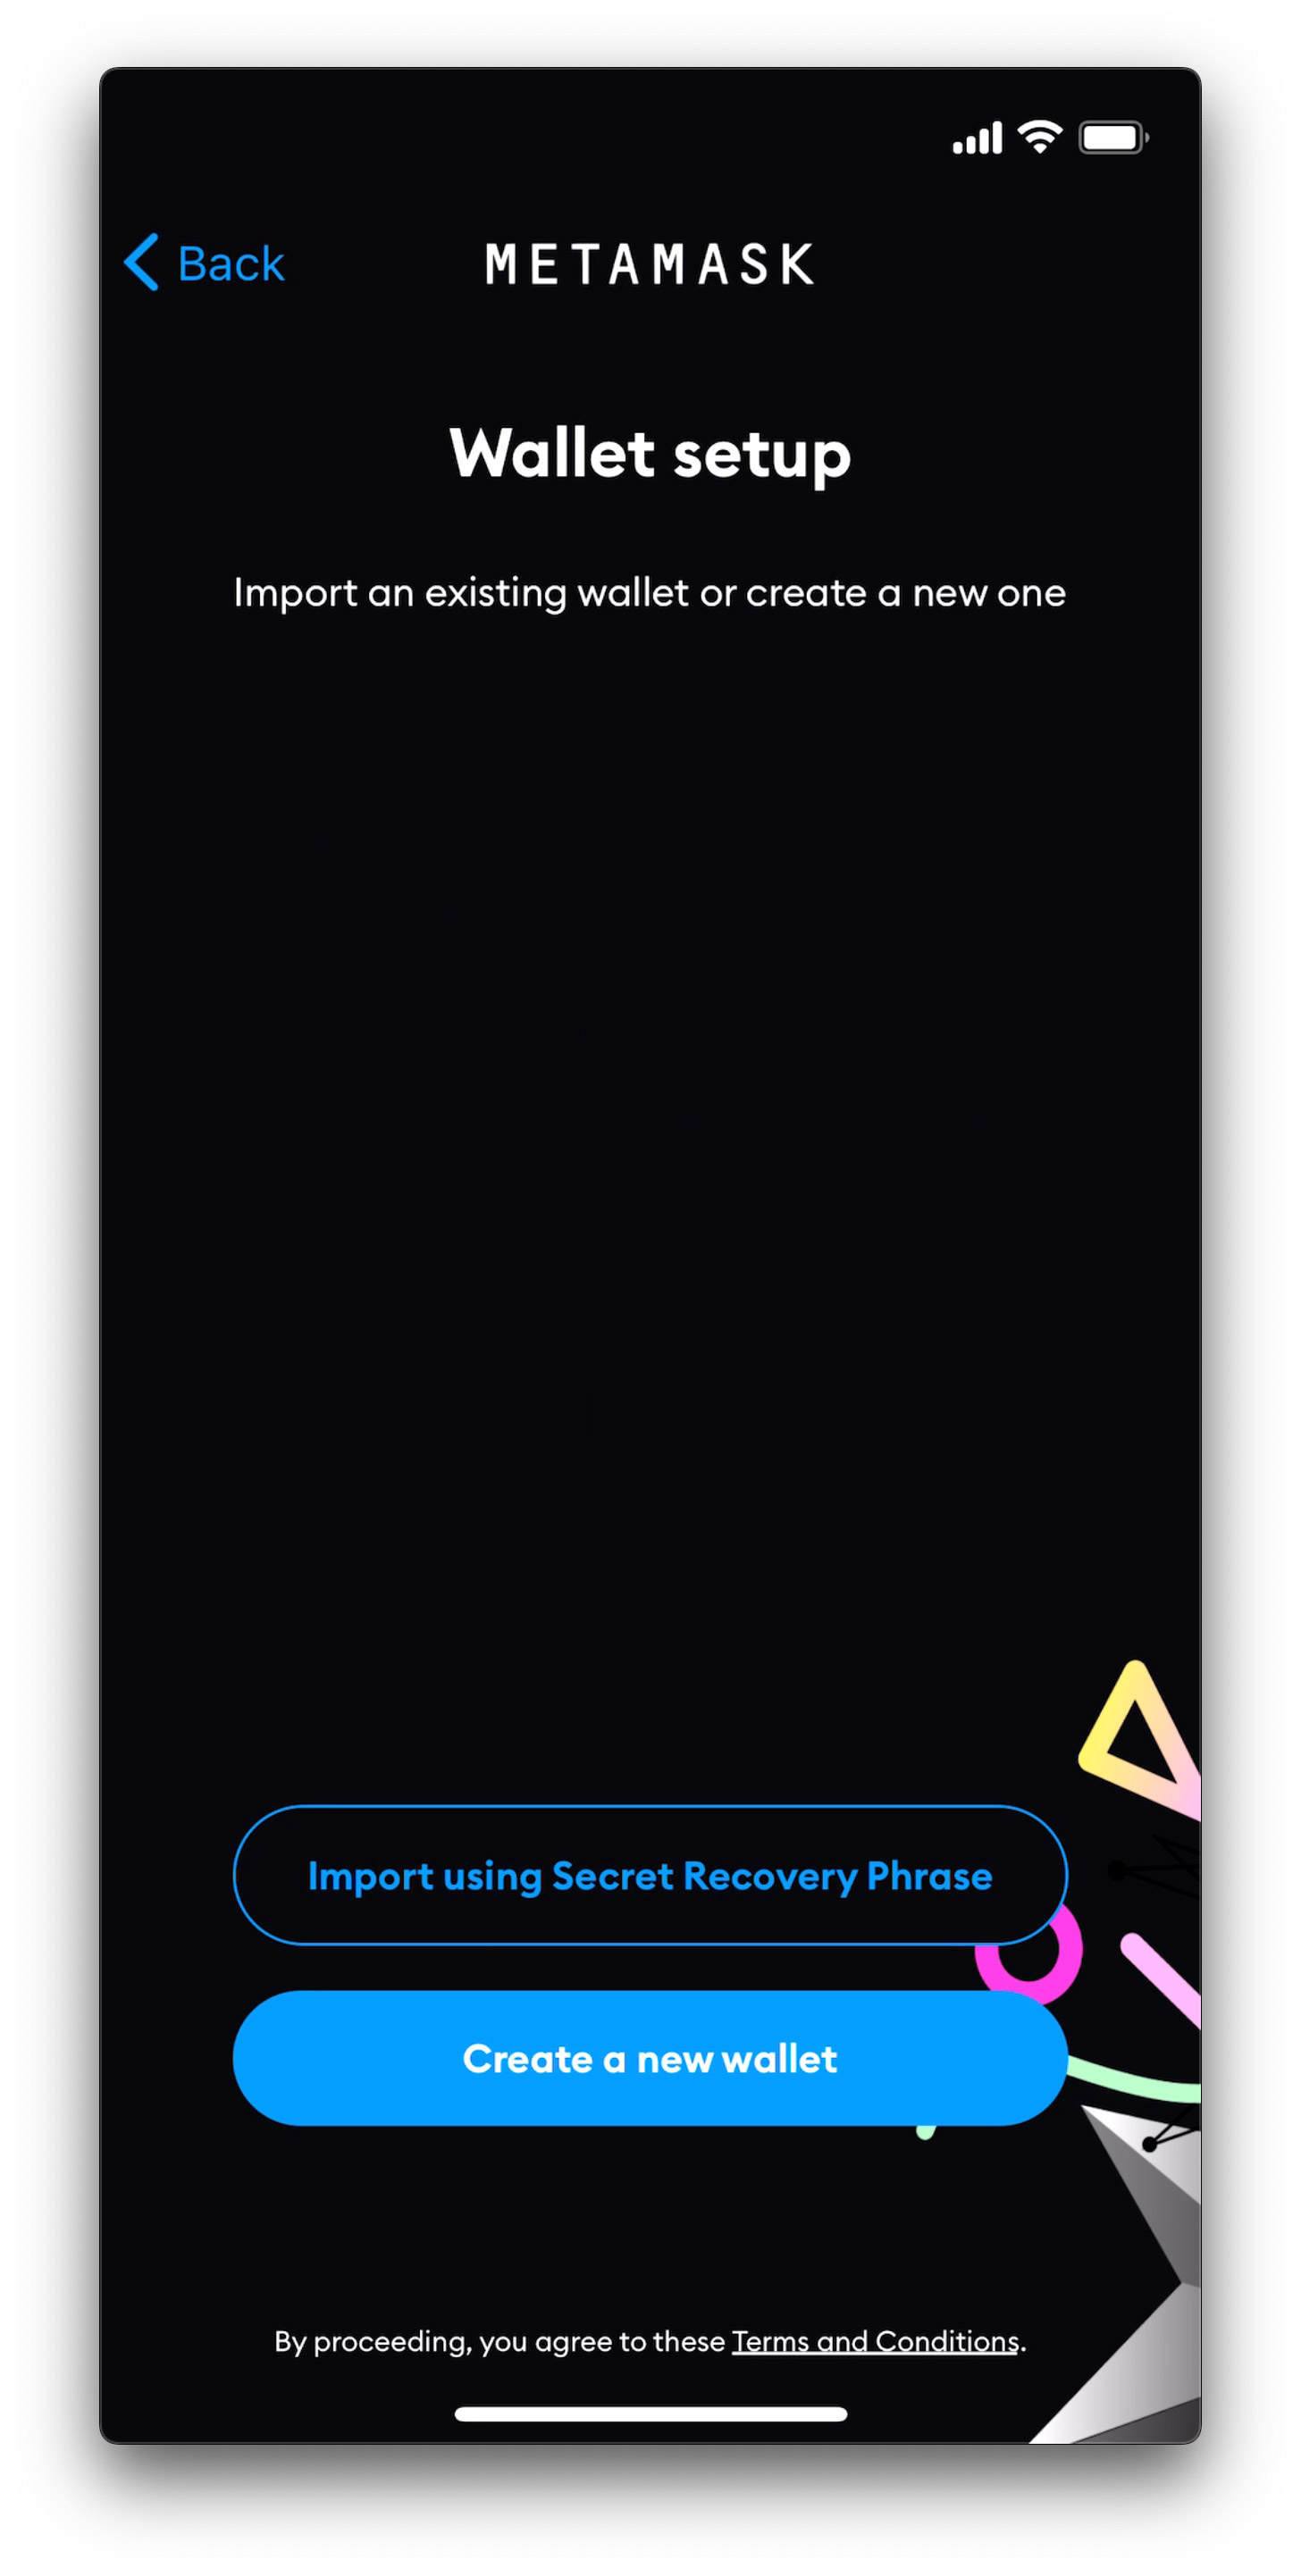
- Since this is your first time creating the MetaMask wallet, tap “Create a new wallet“.
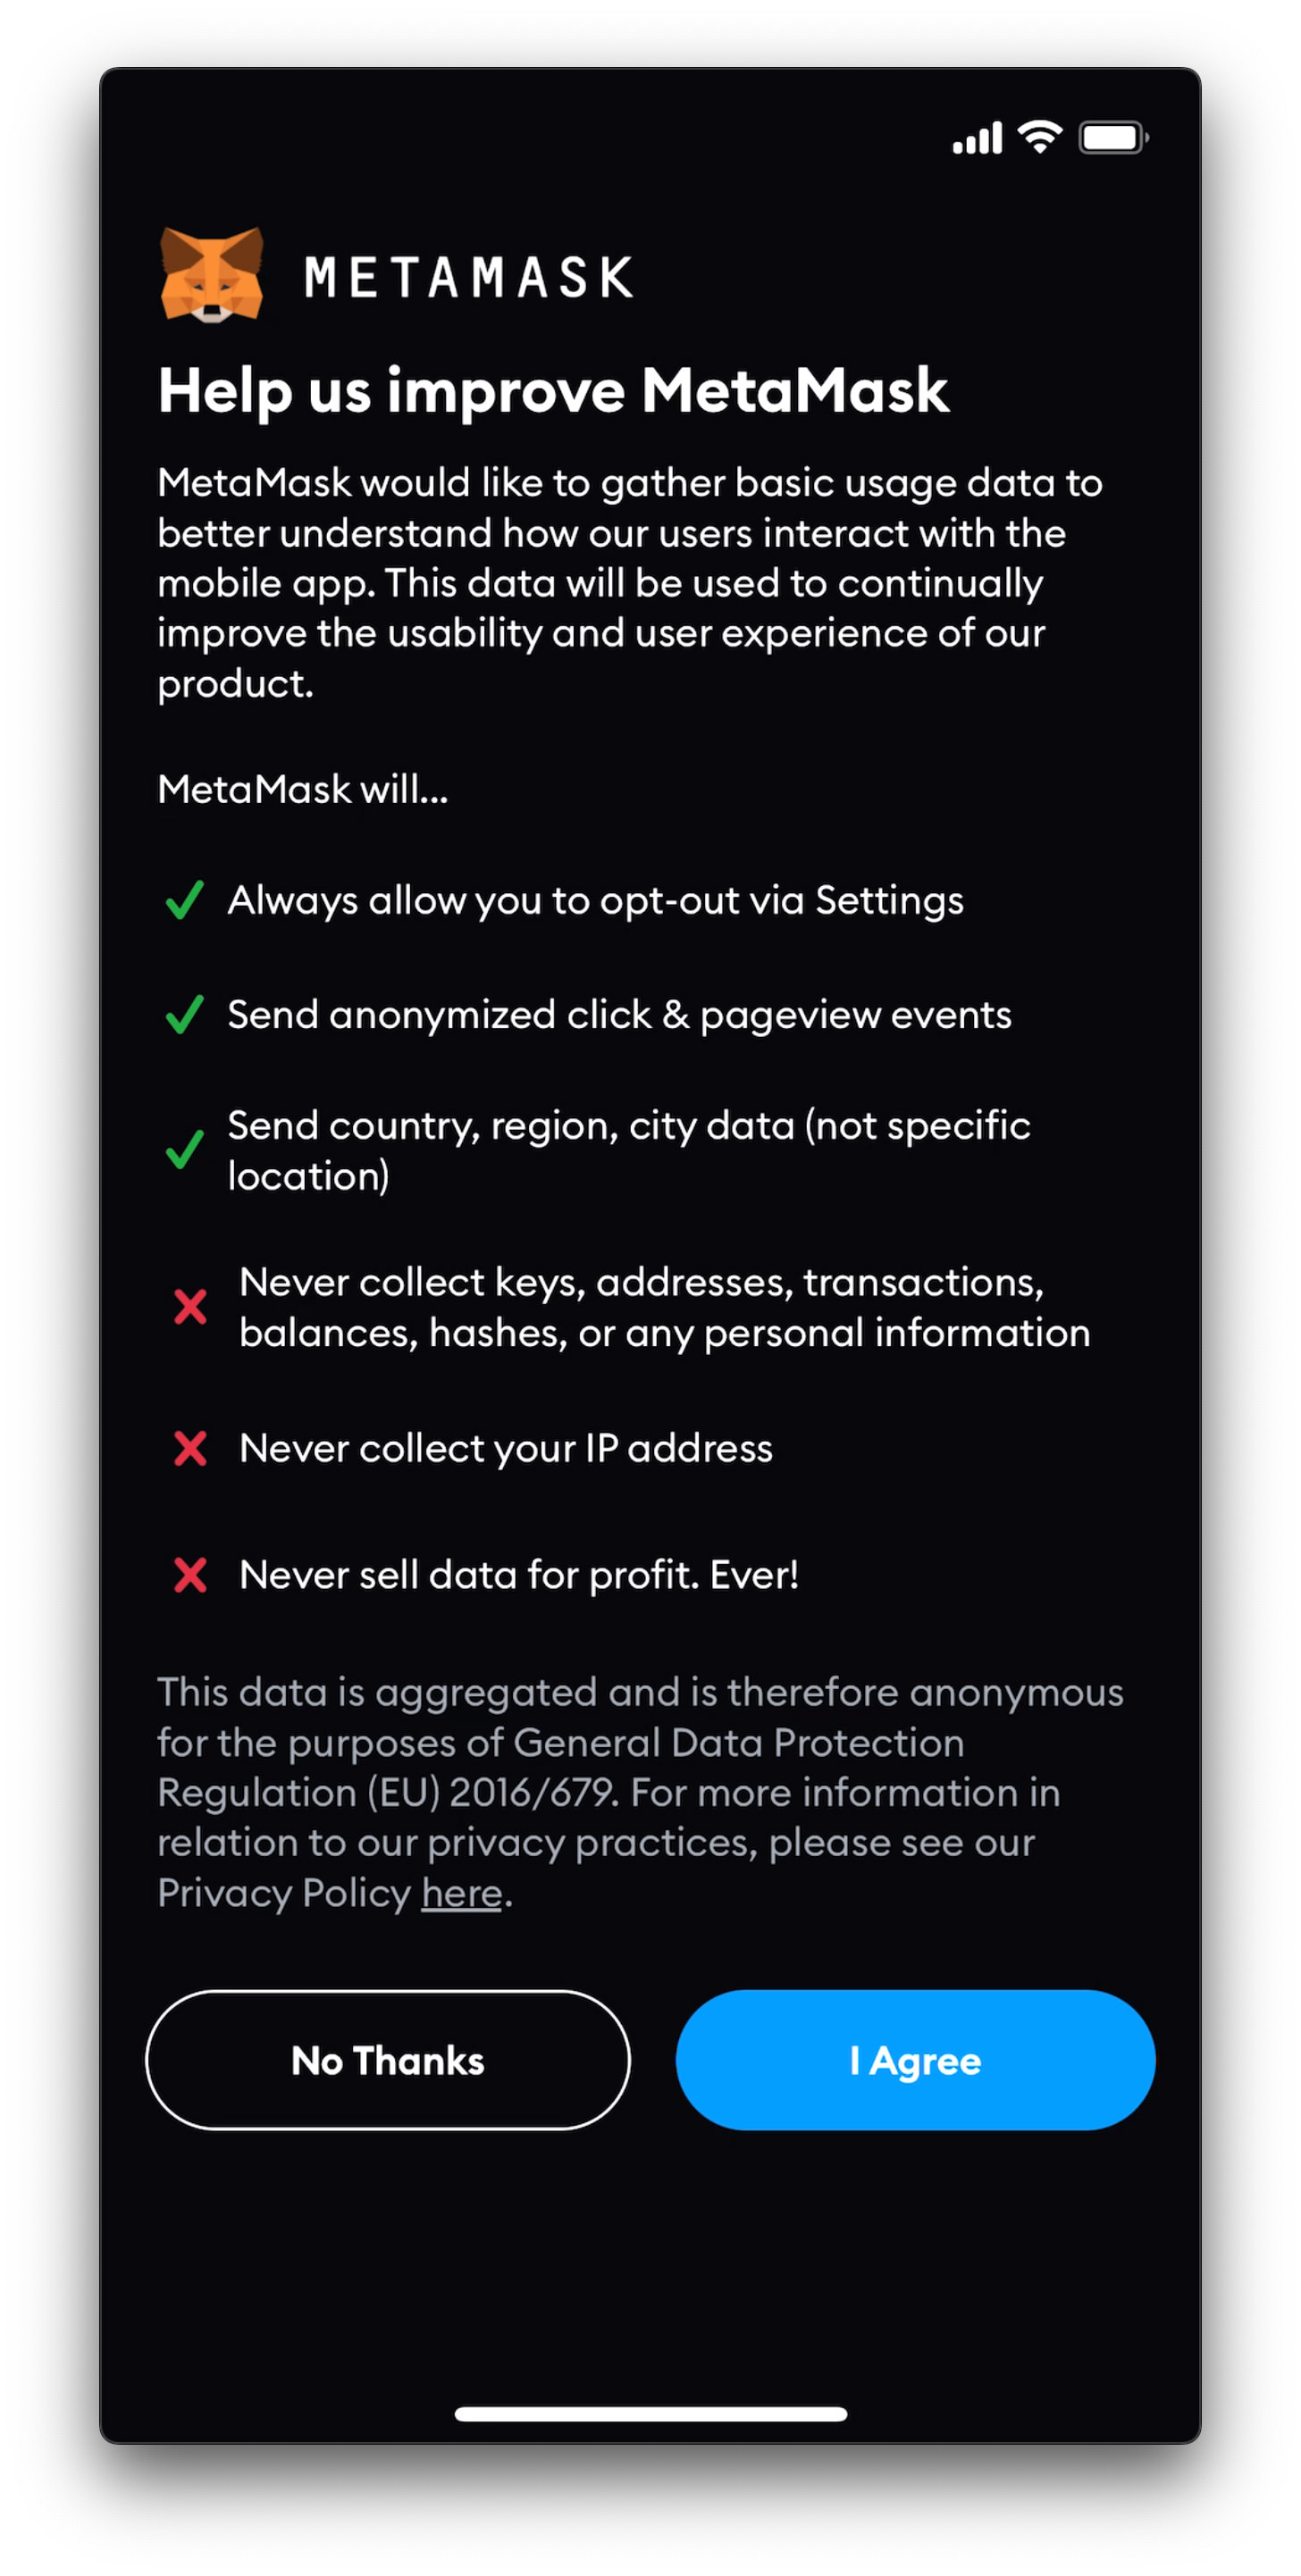
- On this next page, you will be asked about collecting your data for improvement purposes. If you are concerned about your privacy, tap “No Thanks“; otherwise, if you are comfortable about your data being collected, tap “I Agree“.
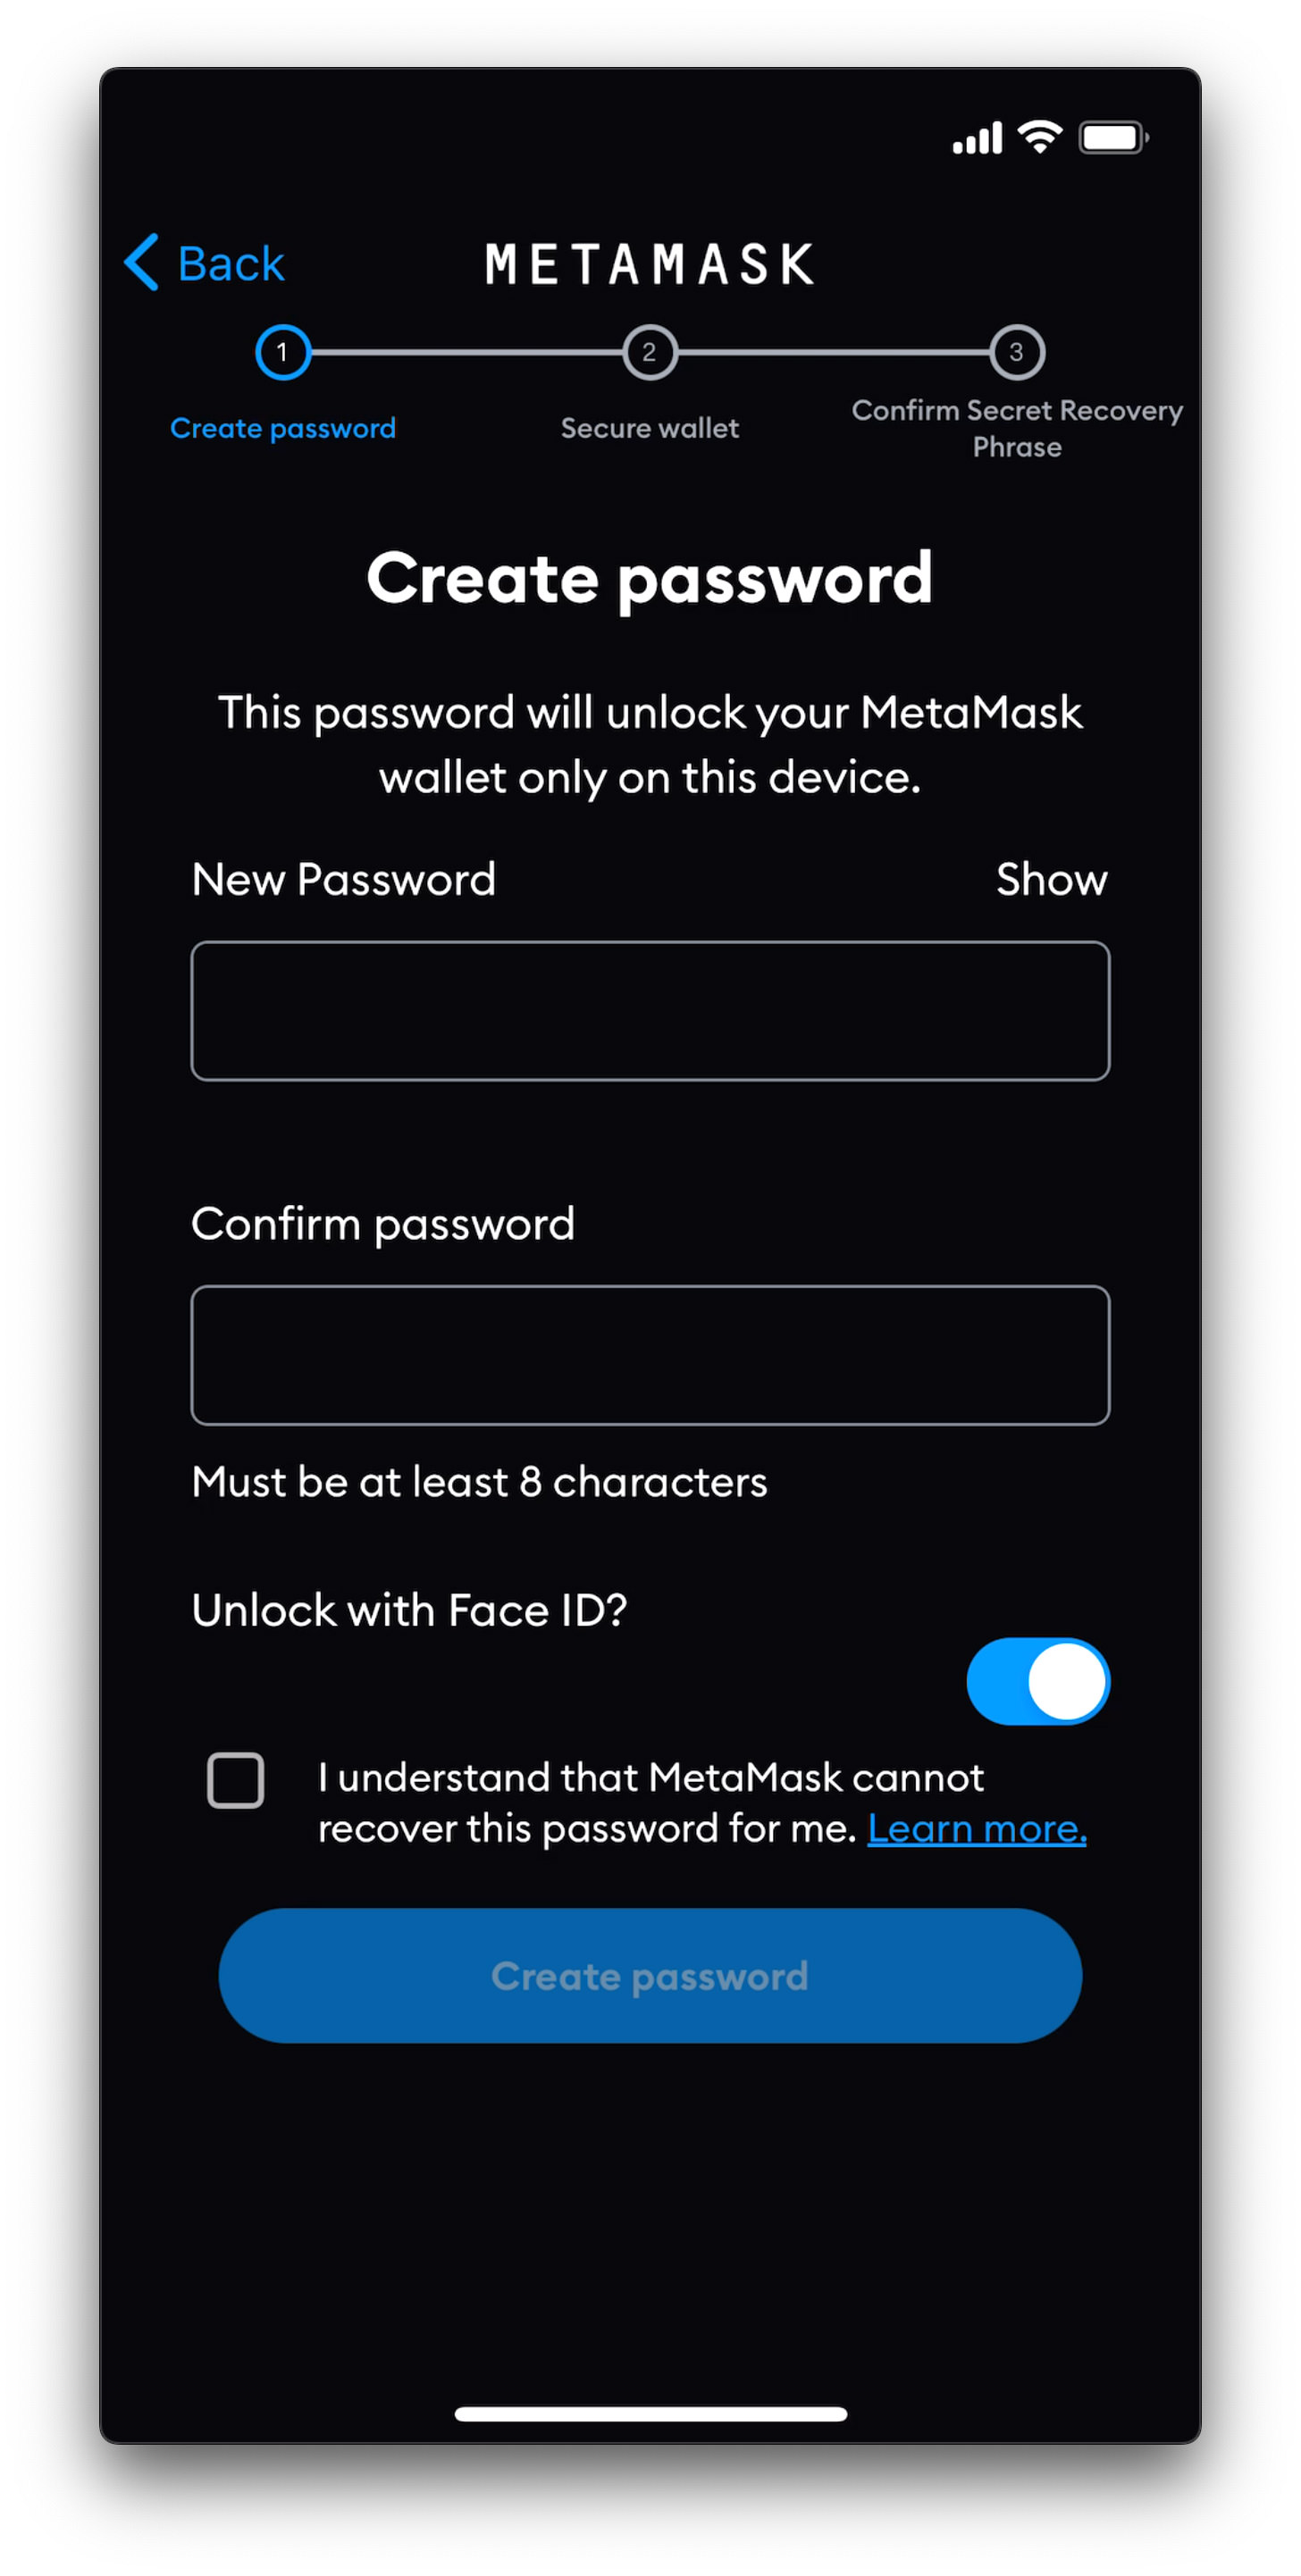
- Next, you’ll be on a 3-step process to create your MetaMask wallet. First, enter a new password, and then confirm the password. This password will be used for unlocking the MetaMask app on your mobile phone. I also encourage that you enable “Unlock with Face ID” if your phone supports it. Next, check the box below and tap “Create password“.
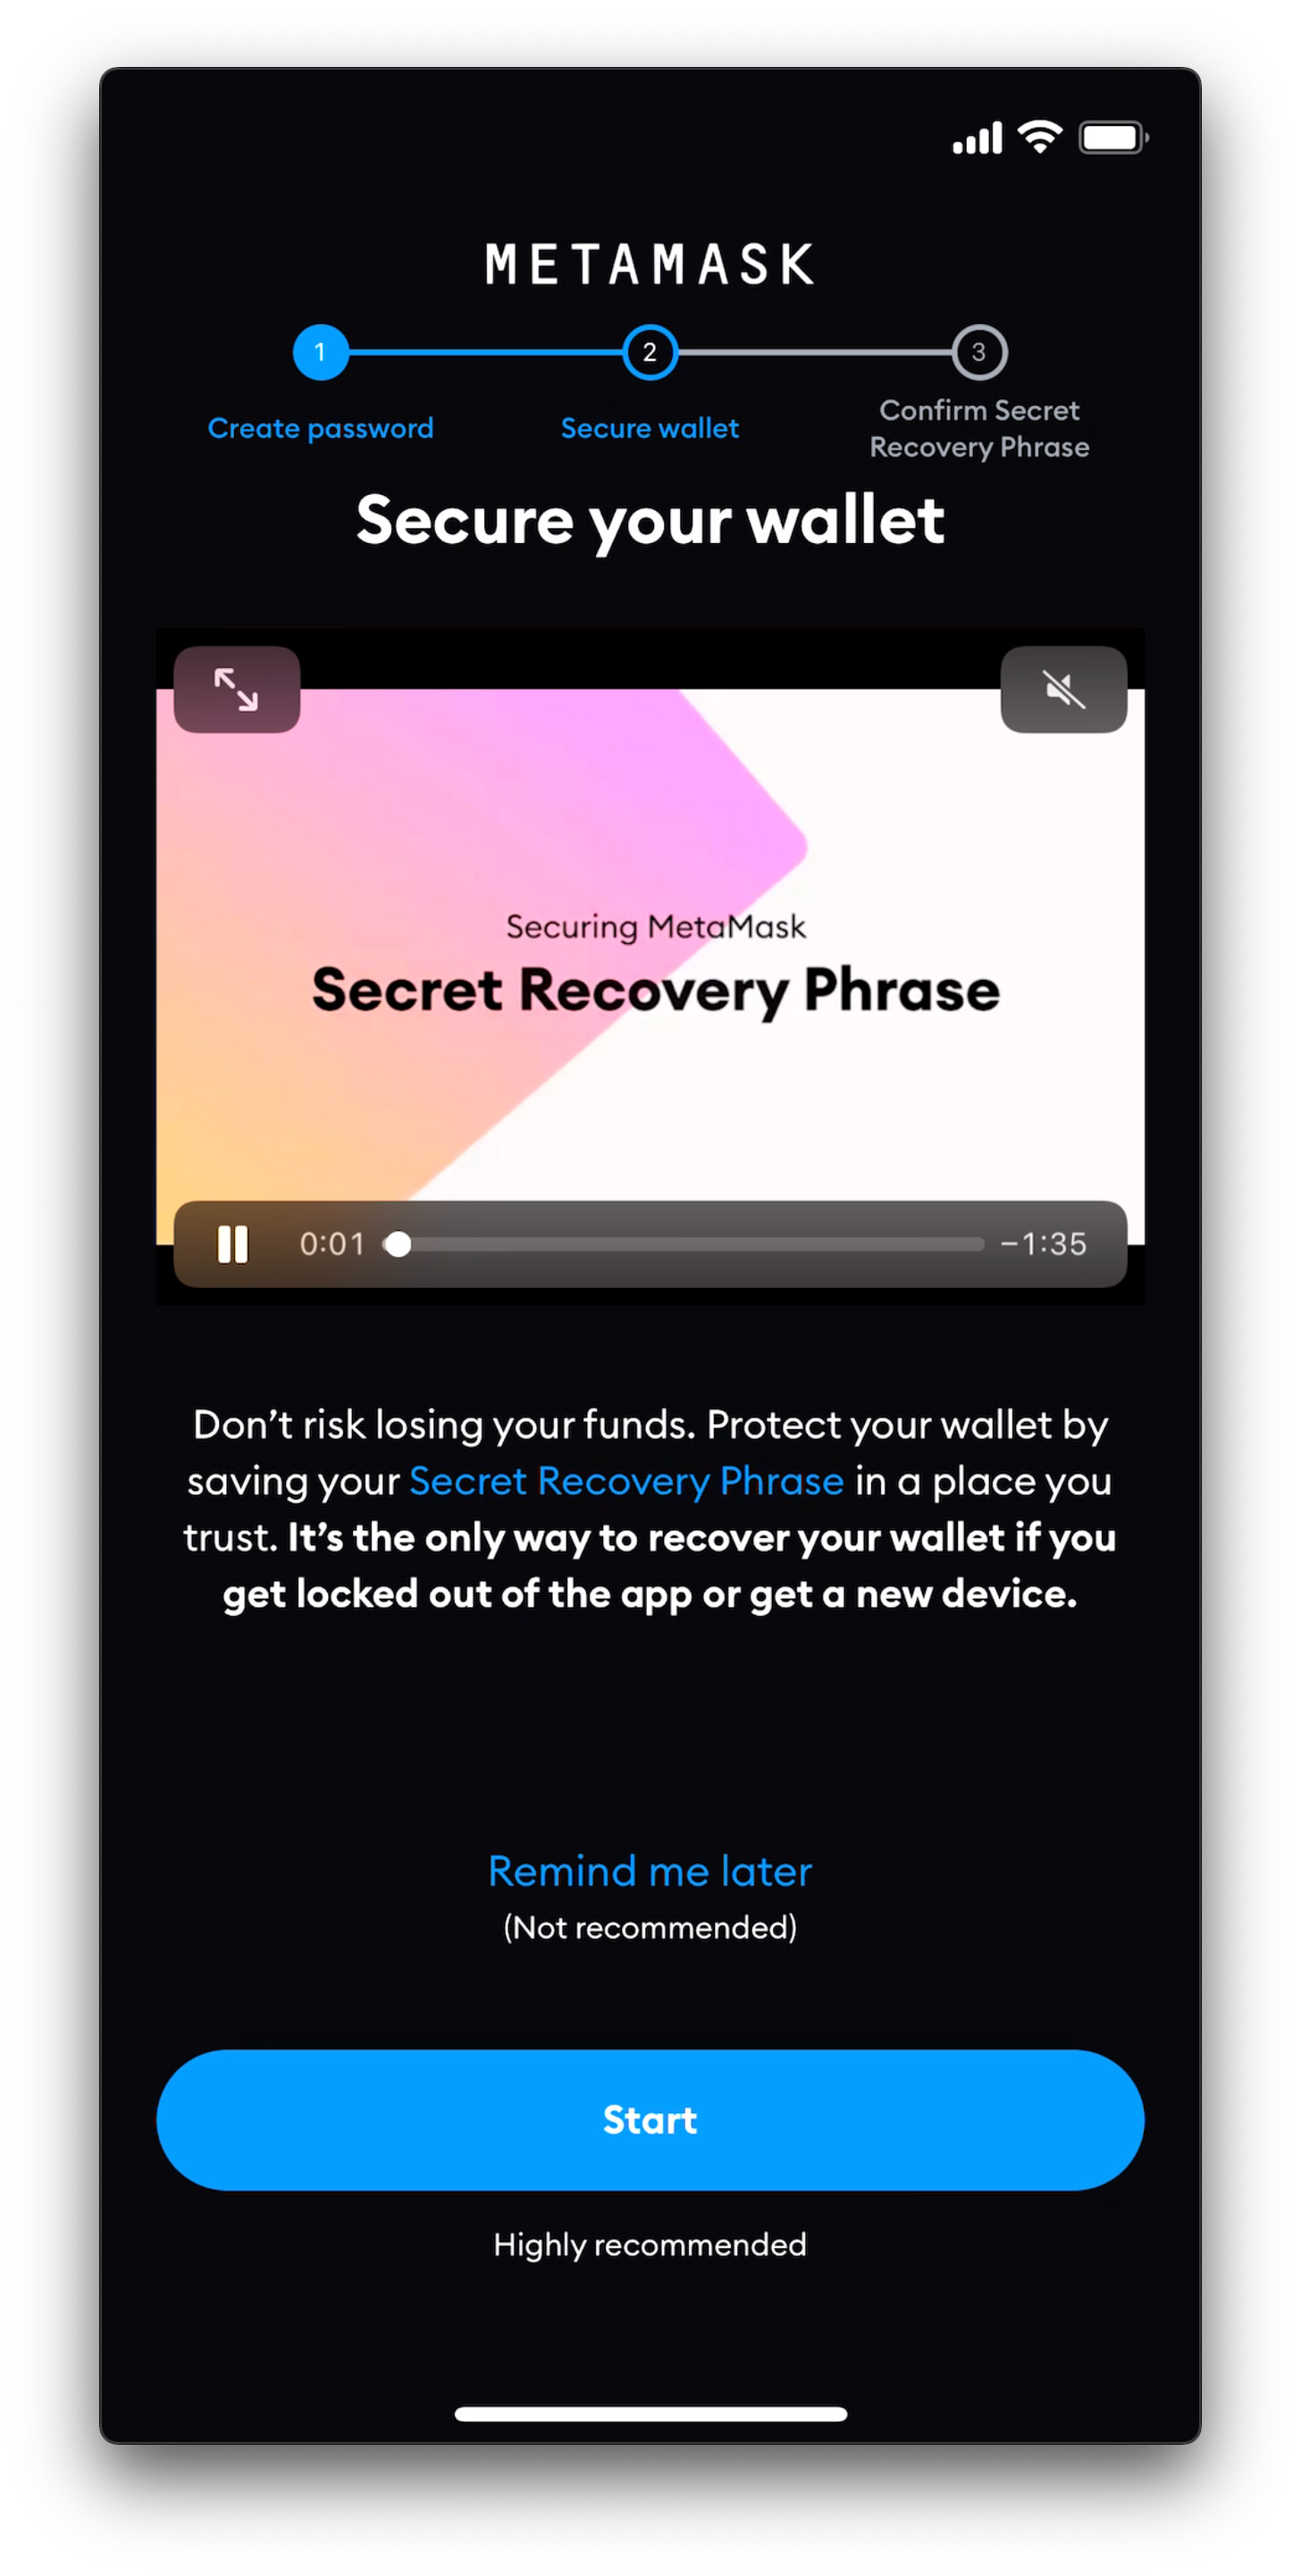
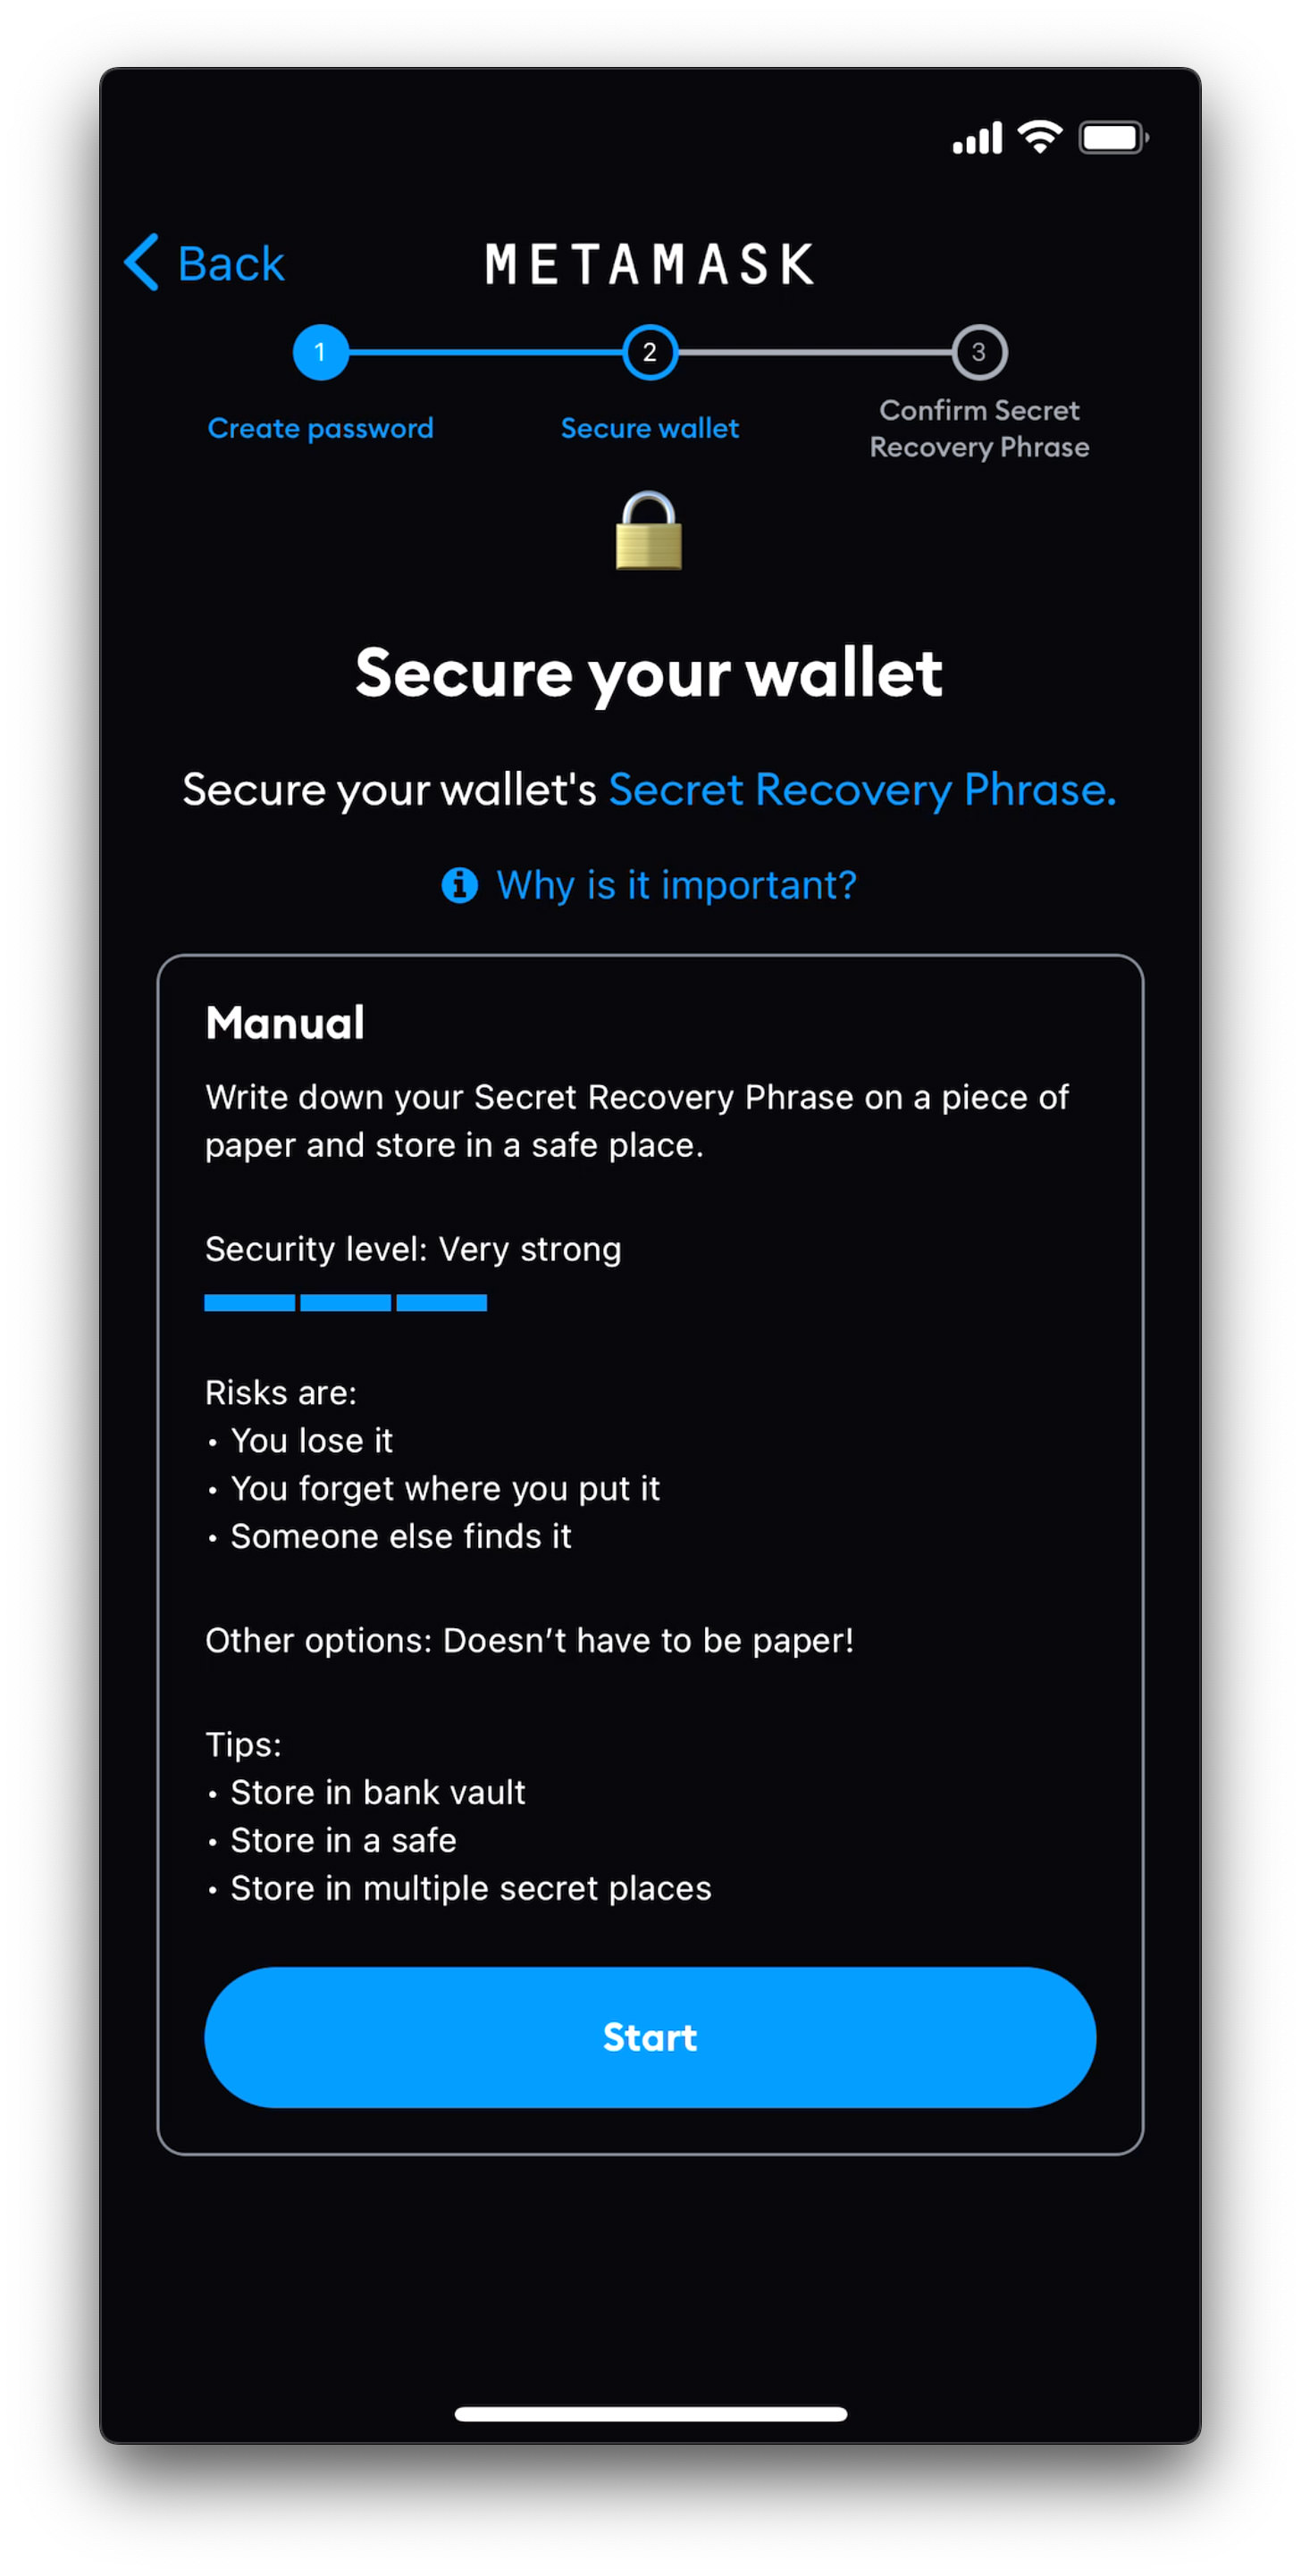
- Now, technically, your Metamask wallet has been created. It’s time to ensure that it is secure and only accessible to you. Tap “Start” to begin securing your wallet.
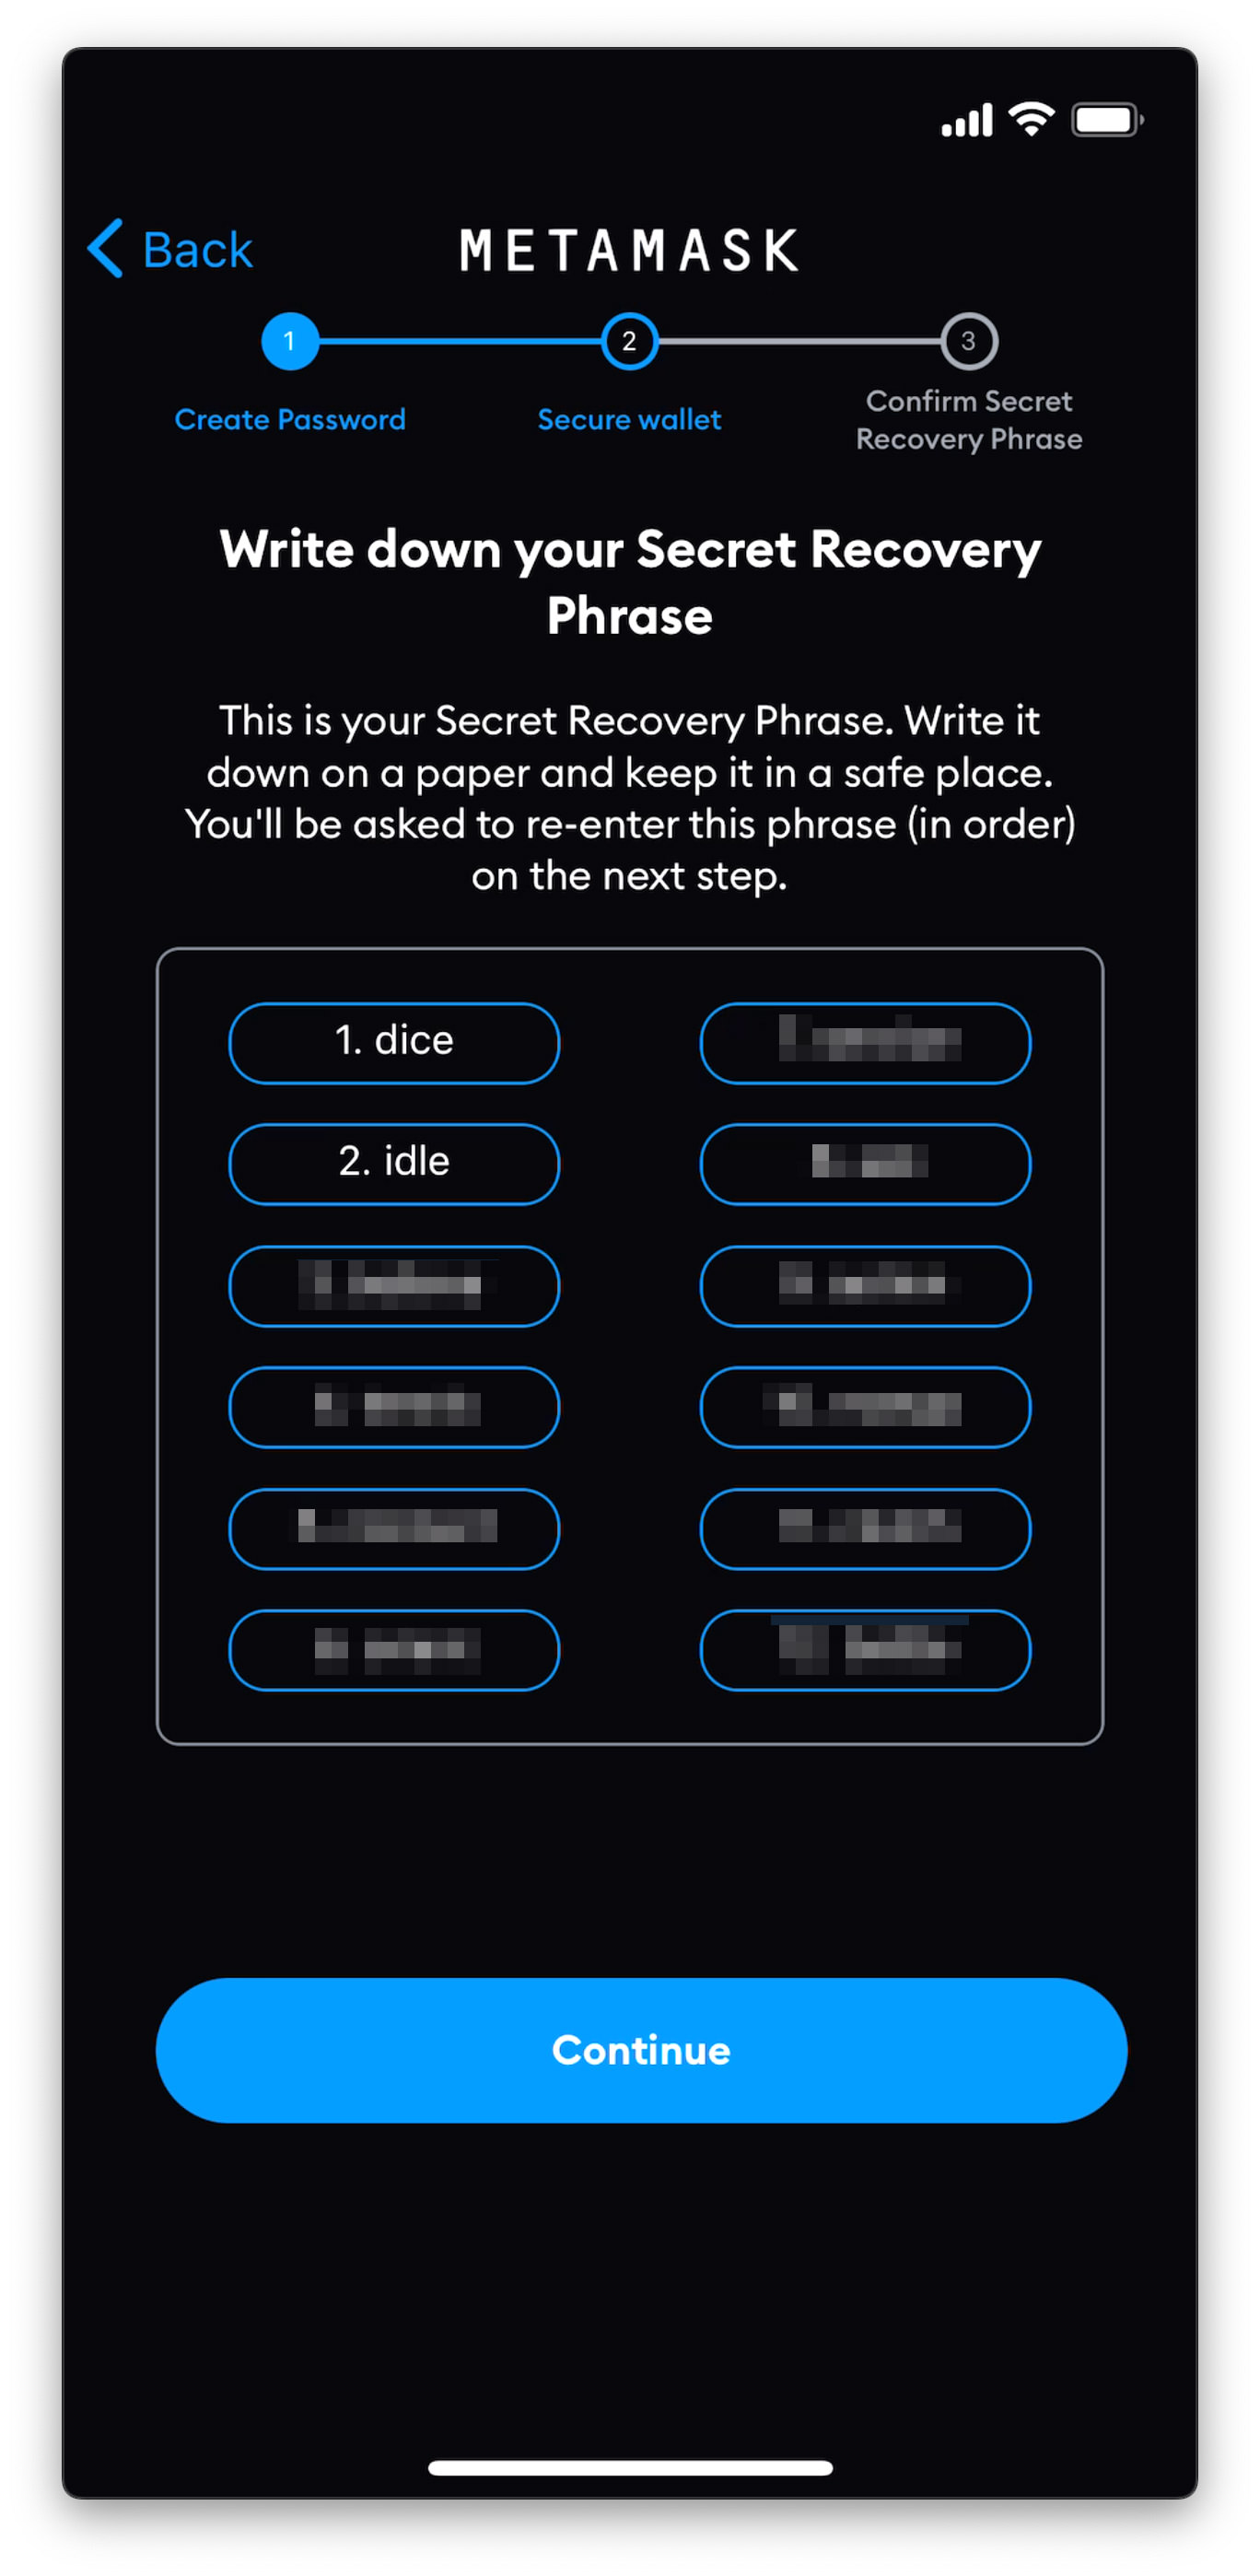
- After tapping Start, this (screenshot below) is what you will see, and the next page will be a very important one, so pay close attention. When you tap on the Start button below, you will be given a set of “Security Recovery Phrases,” and they are of extreme importance; you will need them to recover your funds if anything happens to your phone. Take out a piece of paper, write them down, and keep them somewhere safe. Now, tap the Start button to begin.
- Make sure no one is looking at your screen; tap View.

You will be presented with a set of 12 words. These are your Secret Recovery Phrases; they are unique and only for you. Note them down somewhere safe. Tap Continue when you are done.
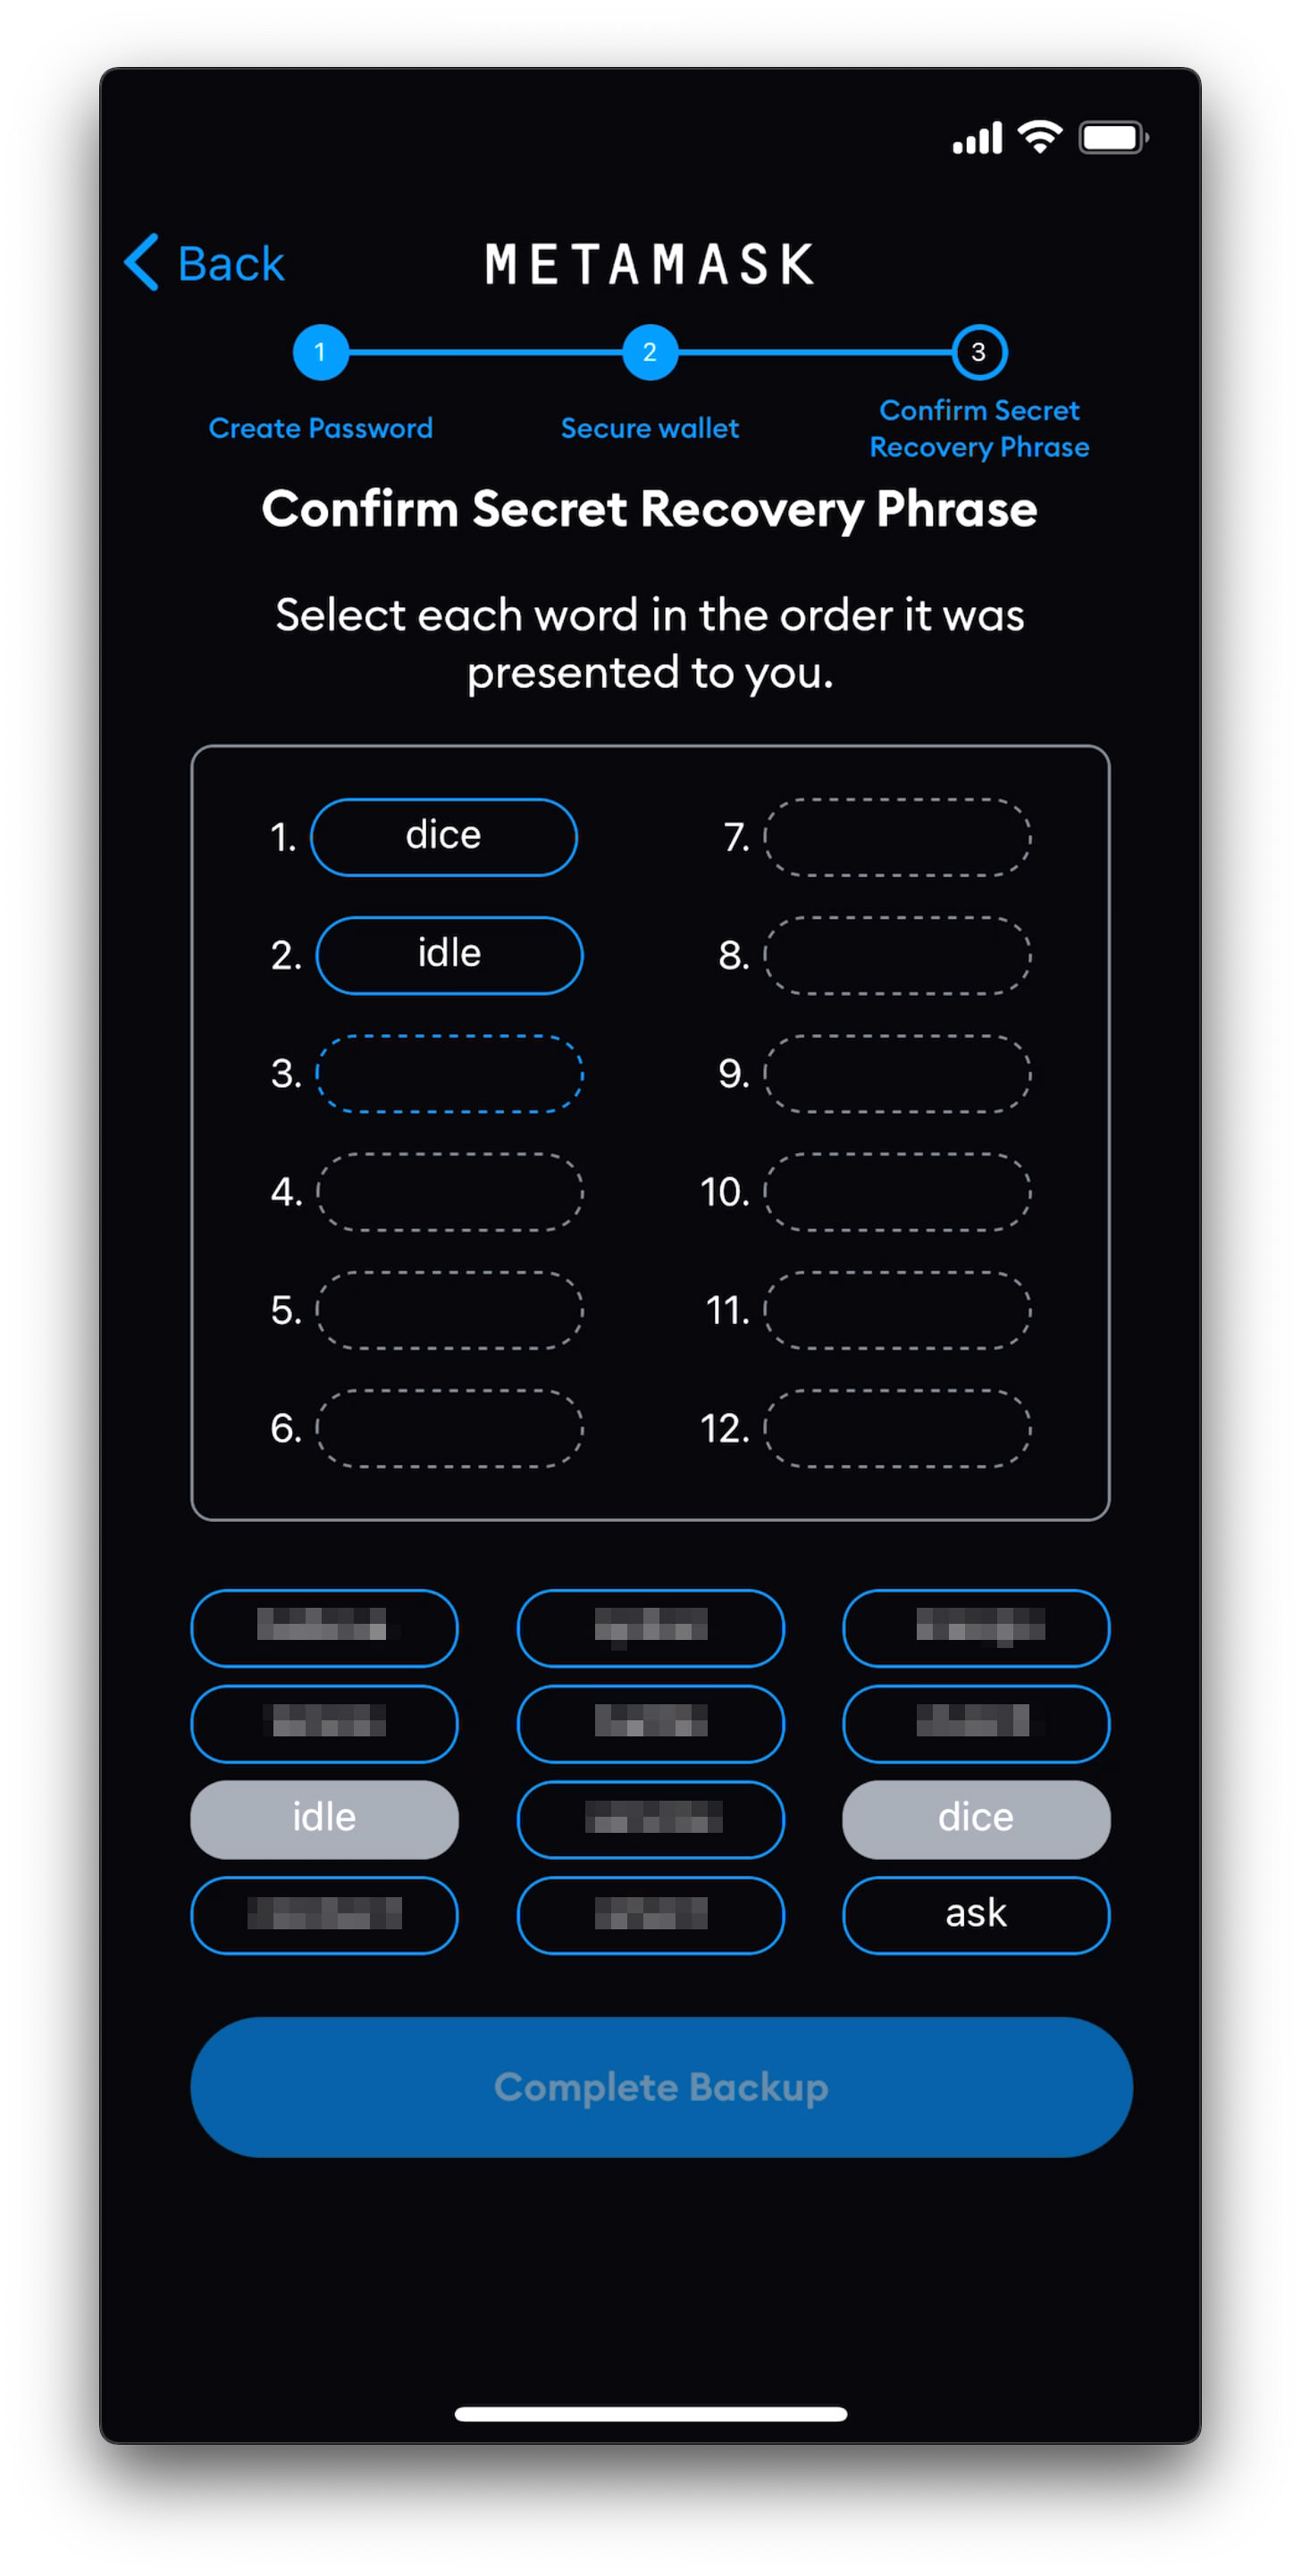
- Next, you will be asked to re-organize the words back to their original order. This is to ensure that you’ve got them recorded down correctly. Once you are done, tap “Complete Backup”.
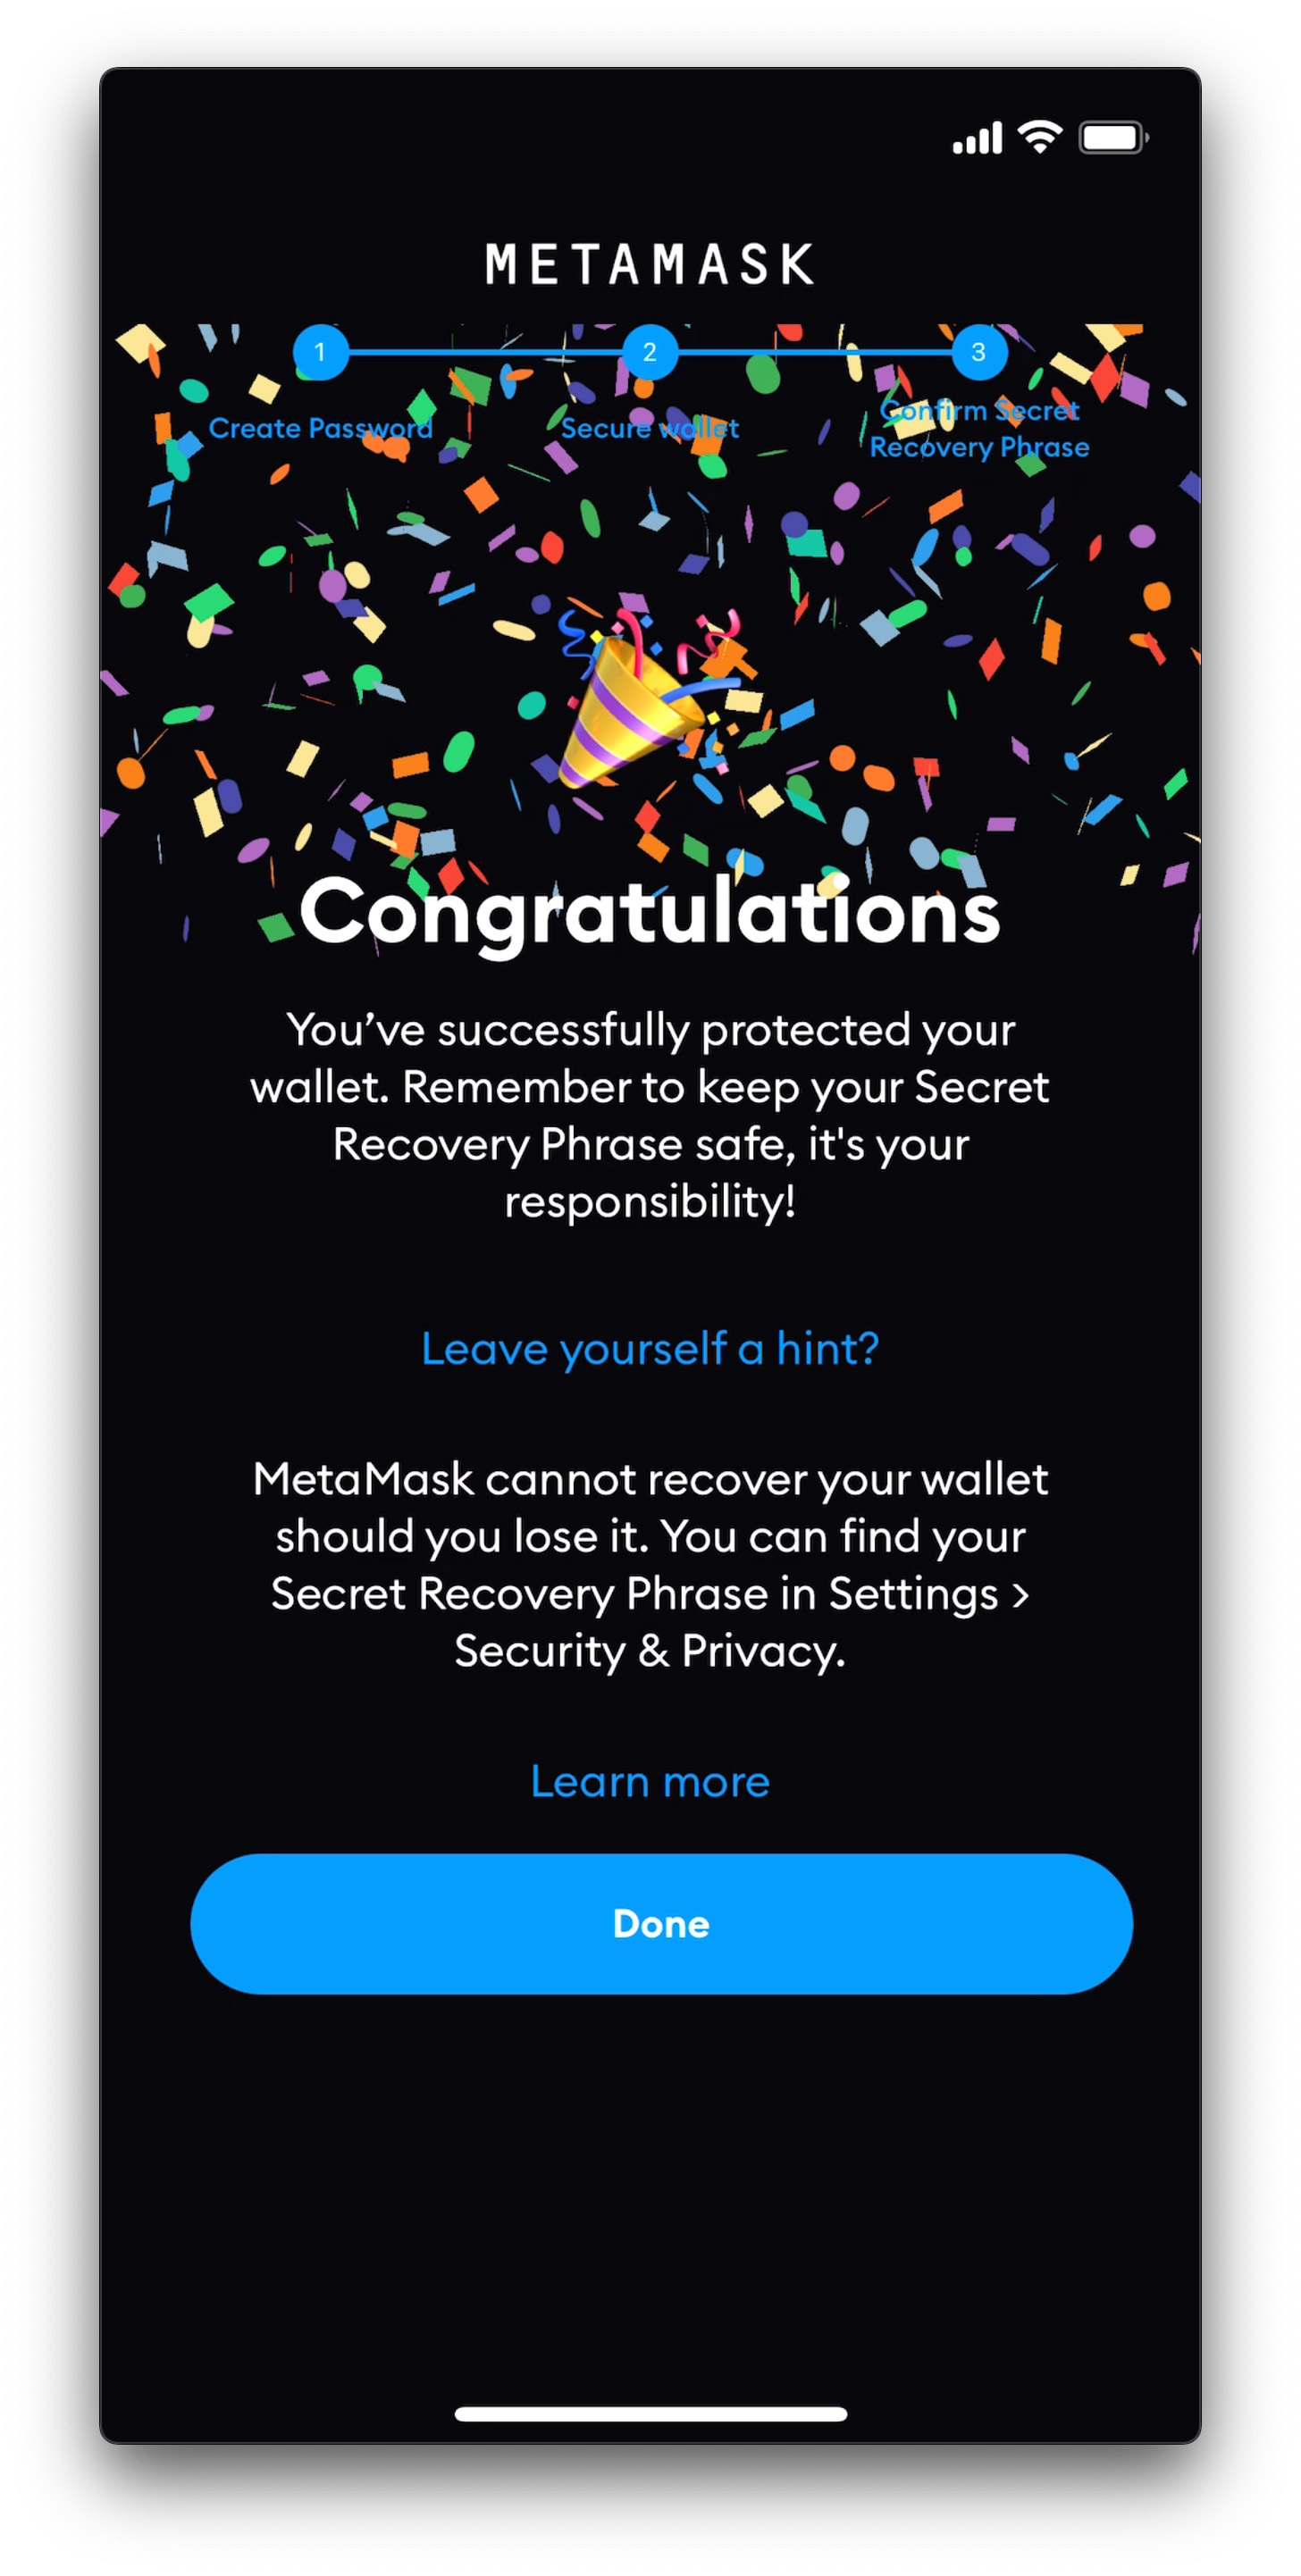
- This next page indicates that you’ve got everything right, pat yourself on the back, then tap “Done“.
After tapping Done, this is the screen you will see, a.k.a your MetaMask wallet’s main page.
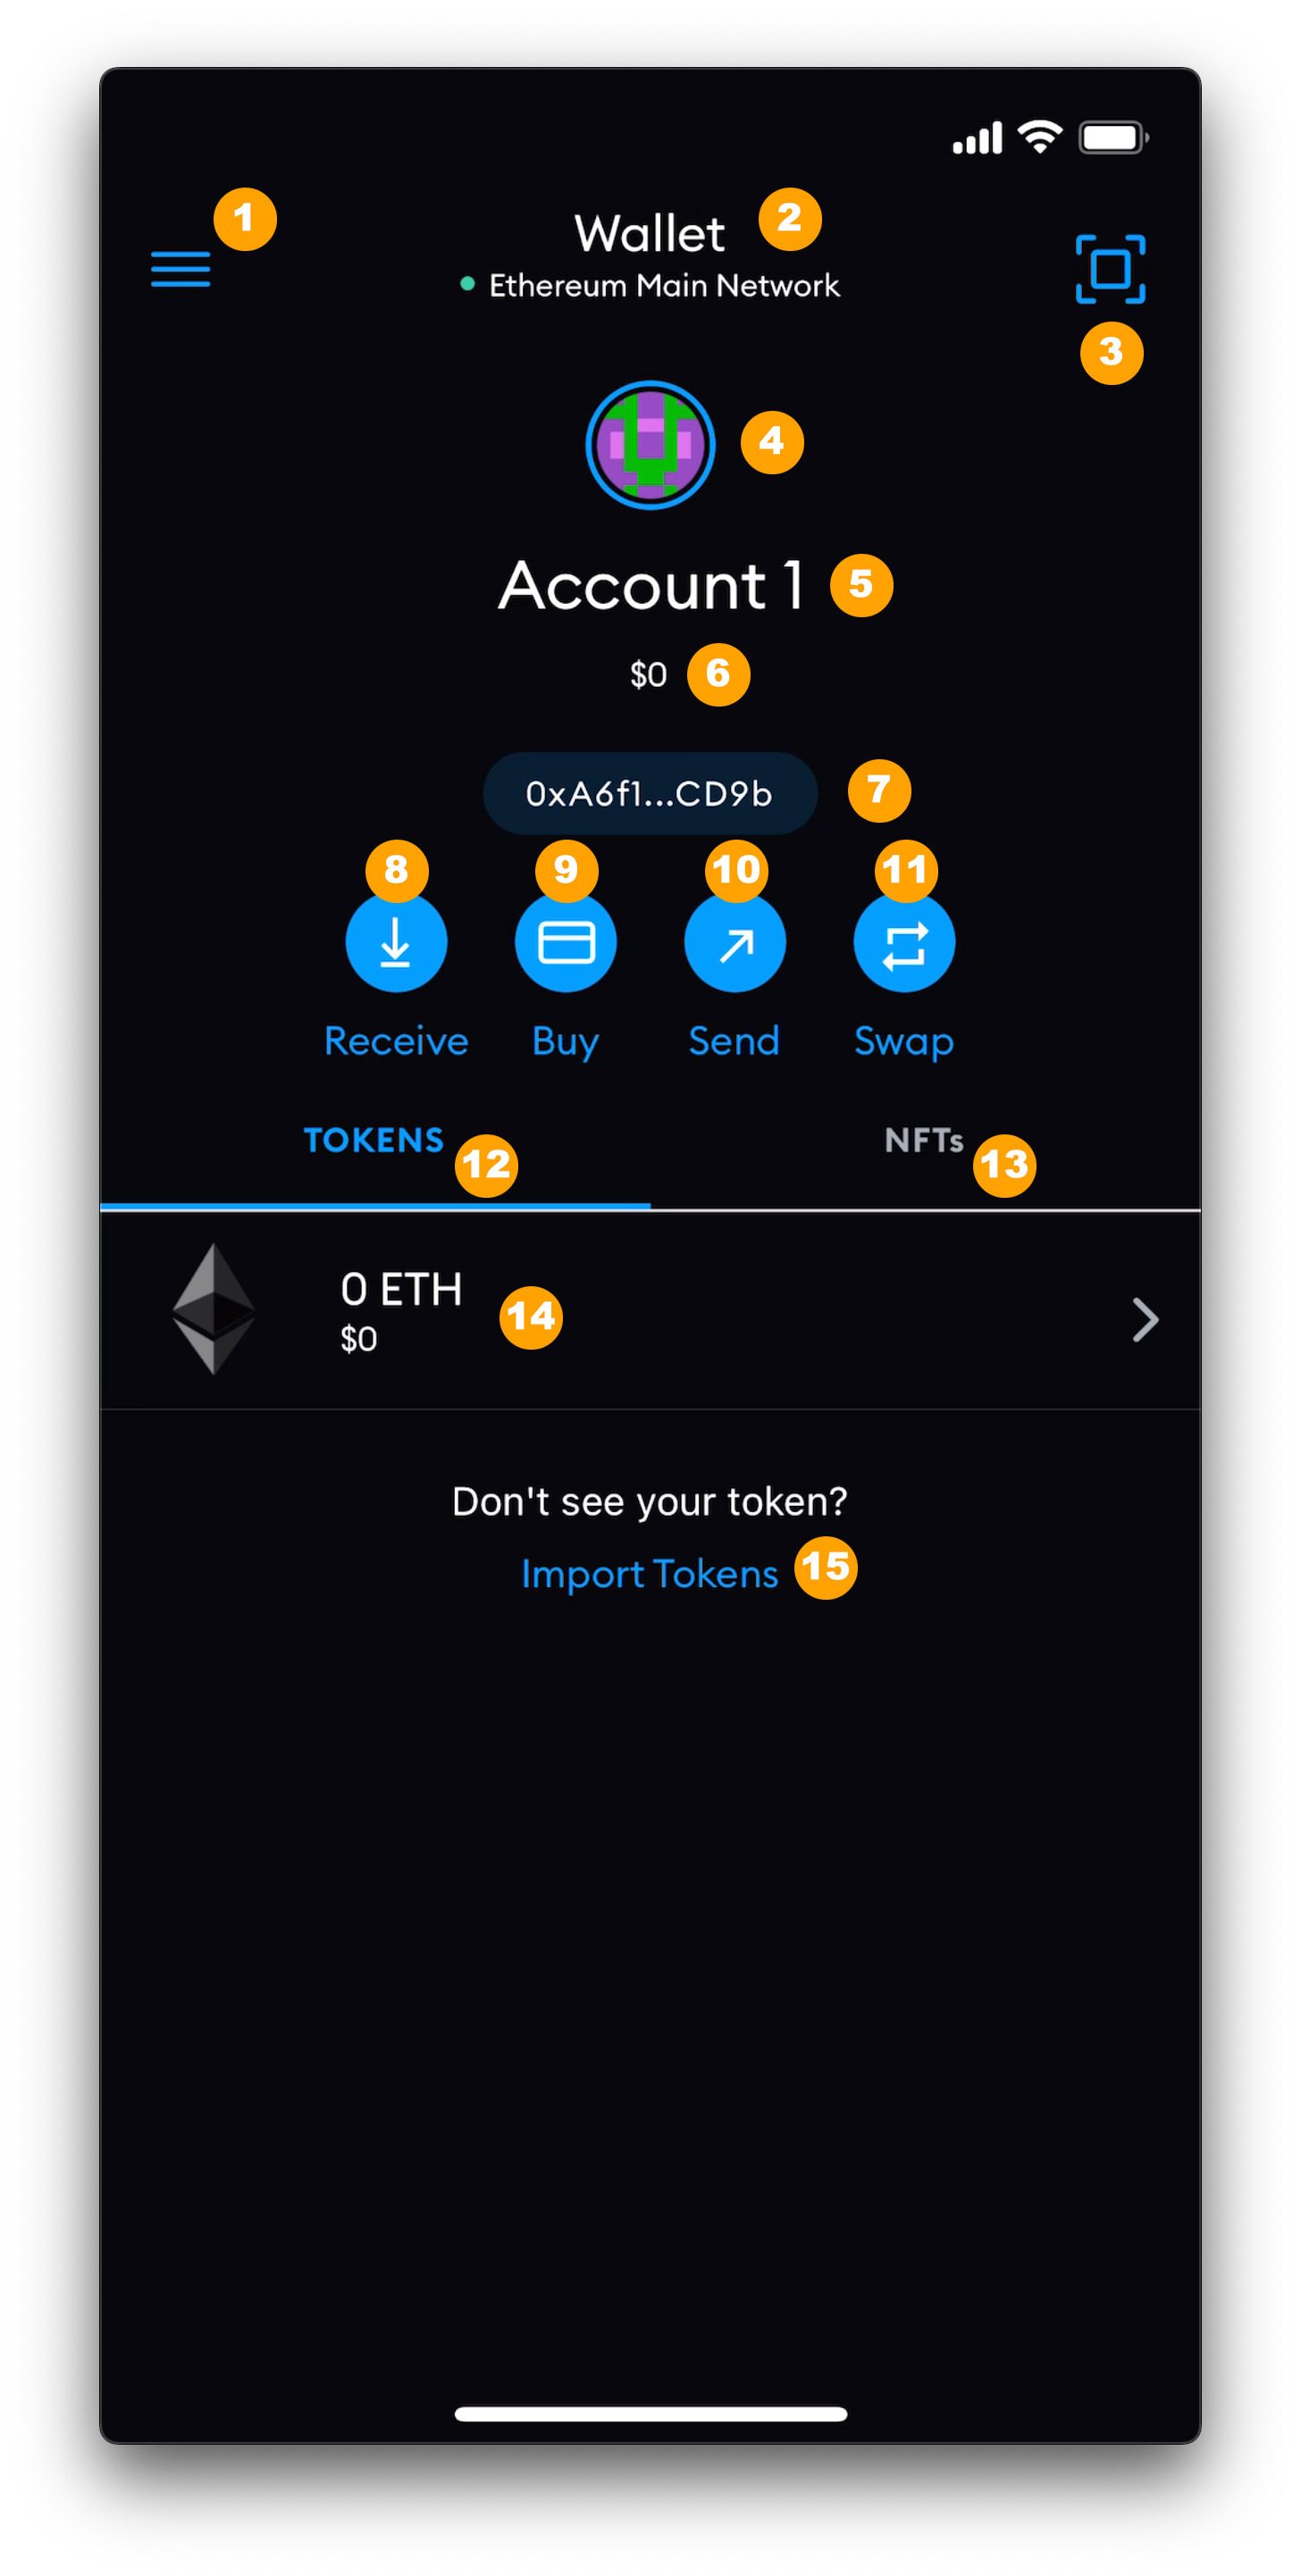
And here’s to give you a brief idea of what each part of the UI does. Feel free to explore around and get familiar with your MetaMask wallet.
- Access to wallet settings and all other features and options your MetaMask wallet provides, including a built-in browser, contact MetaMask support, quick access to Etherscan, and more.
- Your wallet and the network it is currently on. Tap on this to change to other networks.
- QR Code scanner.
- Your account’s Identicon. You can choose between two different styles, the “Jazzicons” and “Blockies”, but uploading your own photo is not supported.
- Your account’s name. To change, tap on it, and hold until editing is available.
- Your current balance.
- Your wallet’s default address.
- Tap this to get your wallet’s QR Code and address to receive payment.
- Tap this if you want to make a crypto purchase.
- Tap this to send crypto to someone else or transfer between your accounts.
- Tap this to swap between the current token and other available tokens.
- Tokens tab. All tokens in your wallet will be listed here.
- NFT tab. All NFTs you have will be listed here.
- Your default ETH wallet.
- Click here to add wallets of other crytocurrencies.