How to Convert Media Files With FFmpeg
FFmpeg is a very powerful and great command line tool used for performing various conversion operations on audio and video files. The good thing about this tool is that it is absolutely free to use. It is available for Windows, Linux and Mac operating systems.
Not everyone knows how to use it though and for that purpose, I’ve come up with this guide on how to use FFmpeg for Windows OS. From the very first step of downloading the program to cropping an audio file, this tutorial aims to help you cover the basics, so that you can play around more later on.
Downloading FFmpeg for Windows
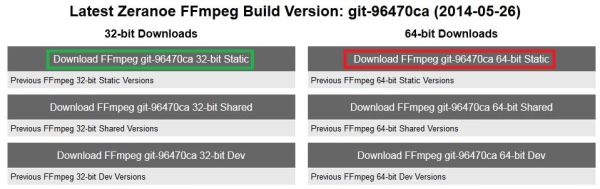
To download the tool, click here to go to the webpage. Once you’ve done that locate the download option, as shown below. The download option highlighted in green is for 32-bit Windows OS while the other option in red is for 64-bit Windows OS.
To verify if your OS is 32-bit or 64-bit, click on the Start icon on the left side of your desktop then type Run in search bar and in run write the command of dxdiag and press the Enter key.
Under the heading of ‘System Information’, you can easily find the name of the OS and the version being used (32-bit or 64-bit).
Extracting the files
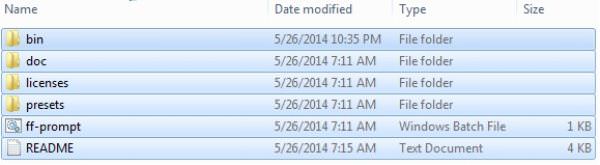
Once you have downloaded FFmpeg, you’ll have to extract the files from the .zip folder. For this purpose, you should have a zip extractor installed. You can download a free zip extractor called 7-zip from here.
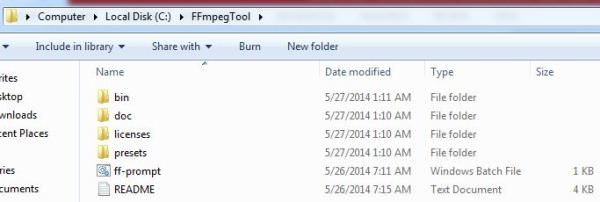
After extracting the files, select all of the files, create a folder in C drive named FFmpegTool and paste all the files in this folder as shown below. It is important to note that you should keep the folder name and drive the same to avoid any problems in executing commands to perform conversions.
Starting FFmpeg
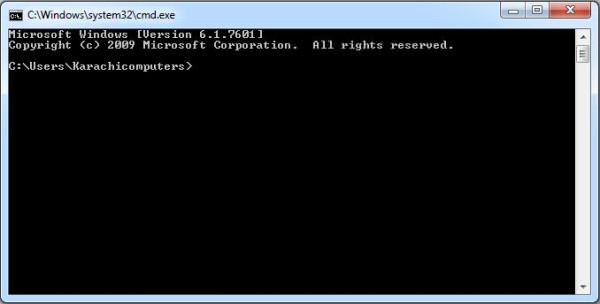
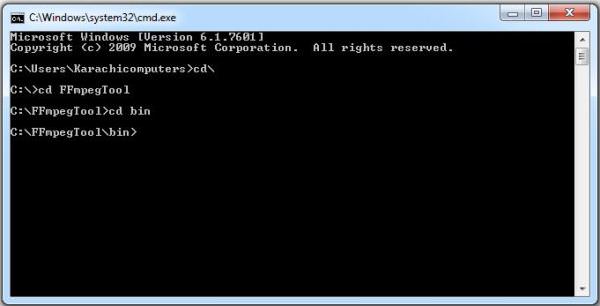
Go to Run, type cmd and press the Enter key. A command line window will appear as shown here.
Type cd\ and press the Enter key. It should appear as below.

Now type cd FFmpegTool, this command will allow you to enter into the FFmpegTool folder which we have created earlier (be careful with the spelling as any spelling mistake in command will cause an error).

Type cd bin and press the Enter key to access the content in the bin folder. You should see the following.
Finally, type ffmpeg.exe and press the Enter key. It will take 1 or 2 seconds to execute the command and you should be able to see the result shown below.

If you see text lines written on your screen (as per the above image) then it means the tool is working fine and ready to use.
Some important FFmpeg commands
Now, we’ll go through some of the important commands for FFmpeg. Copy the video in the bin folder on which you’ll perform the operations. I have copied a video called samplevideo and will use this video throughout the remainder of this post.
1. Extracting audio-only from video file
Once you have tested that FFmpeg is working fine then type in the following command:
ffmpeg -i yourvideoname.mp4 -vn -ab 128 outputaudio.mp3

Here -vn is used to extract audio and -ab is used to save audio as 128Kbps MP3 file. You can change the bit rate to 256Kbps or something else. Just change the value after -ab. All of the output files will be stored automatically in the bin folder.
2. Extracting video while muting audio
In the command written below, -an is used to remove the audio from the video file. The command should look like so:
ffmpeg -i yourvideoname.mp4 -an mutevideo.mp4

3. Resizing video file
In the command written below, -s is used to resize the video file.The command is:
ffmpeg -i yourvideoname.mp4 -s 640x480 -c:a copy resizedvideo.mp4

4. Adding poster image to an audio file
You can add a poster image to your audio file easily and the output would be a video file with an image being displayed in the front and audio in the background. This is really handy when uploading MP3 files to video hosting and sharing sites.
You must copy the image in the bin folder. Then execute this command:
ffmpeg -loop 1 -i inputimage.jpg -i inputaudio.mp3 -c:v libx264 -c:a -strict experimental -b:a 192k -shortest outputfile.mp4

5. Cut video file into a smaller clip
The -ss defines the starting time stamp (here starting time is the 45th second) and -t tells the total time duration for the clip. So, -t 40 means 40 second duration. The command should like this:
ffmpeg -i yourvideoname.mp4 -ss 00:00:45 -codec copy -t 40 outputclip.mp4

6. Split a video file into multiple parts
Most of the hosting servers only allows for a specific size of file to be uploaded. To overcome this issue, you can use the split command to split a large video file into smaller parts, which is:
ffmpeg -i yourvideoname.mp4 -t 00:00:59 -c copy part1.mp4 -ss 00:00:59 -codec copy part2.mp4

Here -t 00:00:59 represents a part that is created from the start of the video to the 59th second of video. -ss 00:00:59 shows the starting time stamp for the video. It means that the 2nd part will start from the 59th second and will continue up to the end of the original video file.
7. Convert a video file from one format to another
You can see all of the formats supported by FFmpeg by using the following command:
ffmpeg -formats
To convert a video file from one format to another format, the following command is used:
ffmpeg -i yourvideoname.mp4 -c:v libx264 outputfilename.wmv
The command below is an example of when converting a .mp4 file into a .wmv file.

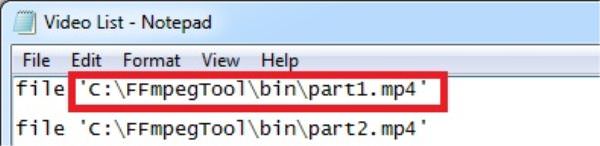
8. Join (merge) multiple video files
FFmpeg can also join multiple video or audio files with the same codecs. Create a .txt file including a list of all the input video files that are supposed to be merged. The keyword file is followed by name, path and the format of the video files. Add all of the files in the same way in the created .txt file and save this .txt file in the bin folder.
Now type the following command to join the video files:
ffmpeg -f concat -i file-list.txt -c copy outputfile.mp4

9. Cropping and audio file
To crop part of an audio file, the following command can be utilized:
ffmpeg -ss 00:00:15 -t 45 -i sampleaudio.mp3 croppedaudio.mp3
Here, -ss 00:00:15 is the staring time and -t 45 is the duration of the cropped file.

Alternatively…
While FFmpeg is great, this free tool still may have some limitations that wouldn’t do what you need to do.
WinX HD Video Converter, on the other side, is a GPU-accelerated HD video converter that not only converts media files but also allows you to cut/merge, resize videos, etc. Do check it out.

Conclusion
We’ve covered downloading and installing FFmpeg as well as some of the useful commands that you can use. You can explore the rest of the commands via the help option of FFmpeg. Just type in ffmpeg -h in command line. This will list all the available options and commands for these options. So why don’t you try it out for yourself?