How to Store Crypto in Hardware Wallet (For First-timers)
So you are a crypto trader, but for some reason, you want to hold your cryptocurrency for a longer period of time and don’t plan to trade it any time soon? The best and safest would be to store them in a hardware wallet. But setting up a hardware wallet can be pretty complicated.
I’ve shown you how to set up a Trezor hardware wallet in one of my previous posts. In today’s post, I’m going to bring to your attention another great alternative to a crypto hardware wallet – the Ledger Nano S.
This article will detail how I set up and configure the Ledger Nano S hardware wallet, to storing crypto into it, and everything in between.
Here’s the Table of Content for easier navigation:
- Intro to Ledger Nano S hardware wallet
- Ledger Nano S hardware wallet unbox
- Setting up: Ledger Nano S hardware wallet
- Setting up: Ledger Desktop app
- Ledger Nano S Firmware update
- Adding Crypto Account in Ledger Nano S
- Sending crypto to Ledger Nano S
1. Ledger.com and Nano S Hardware Wallet
Created by the folks behind Ledger SAS, the Nano S is one of the cheapest, easiest to use, and most secure solutions to store your cryptocurrency offline. The device costs around USD $70 per piece, and is available in various colors.
Click here to learn more about Ledger’s hard wallet.
Tip: The Ledger Nano S is much cheaper (21% discount) if you buy in a pack of 3.
Apart from the Nano S, there’s also a more advanced (and hence costlier) version called the Ledger Nano X that comes with wireless access and a larger display.
For this article, I’ll be using the Ledger Nano S.
2. Ledger Nano S Unboxing
If you’re planning to get yourself a the Ledger Nano S hardware wallet, here’s a list of everything you should be expecting in the box.
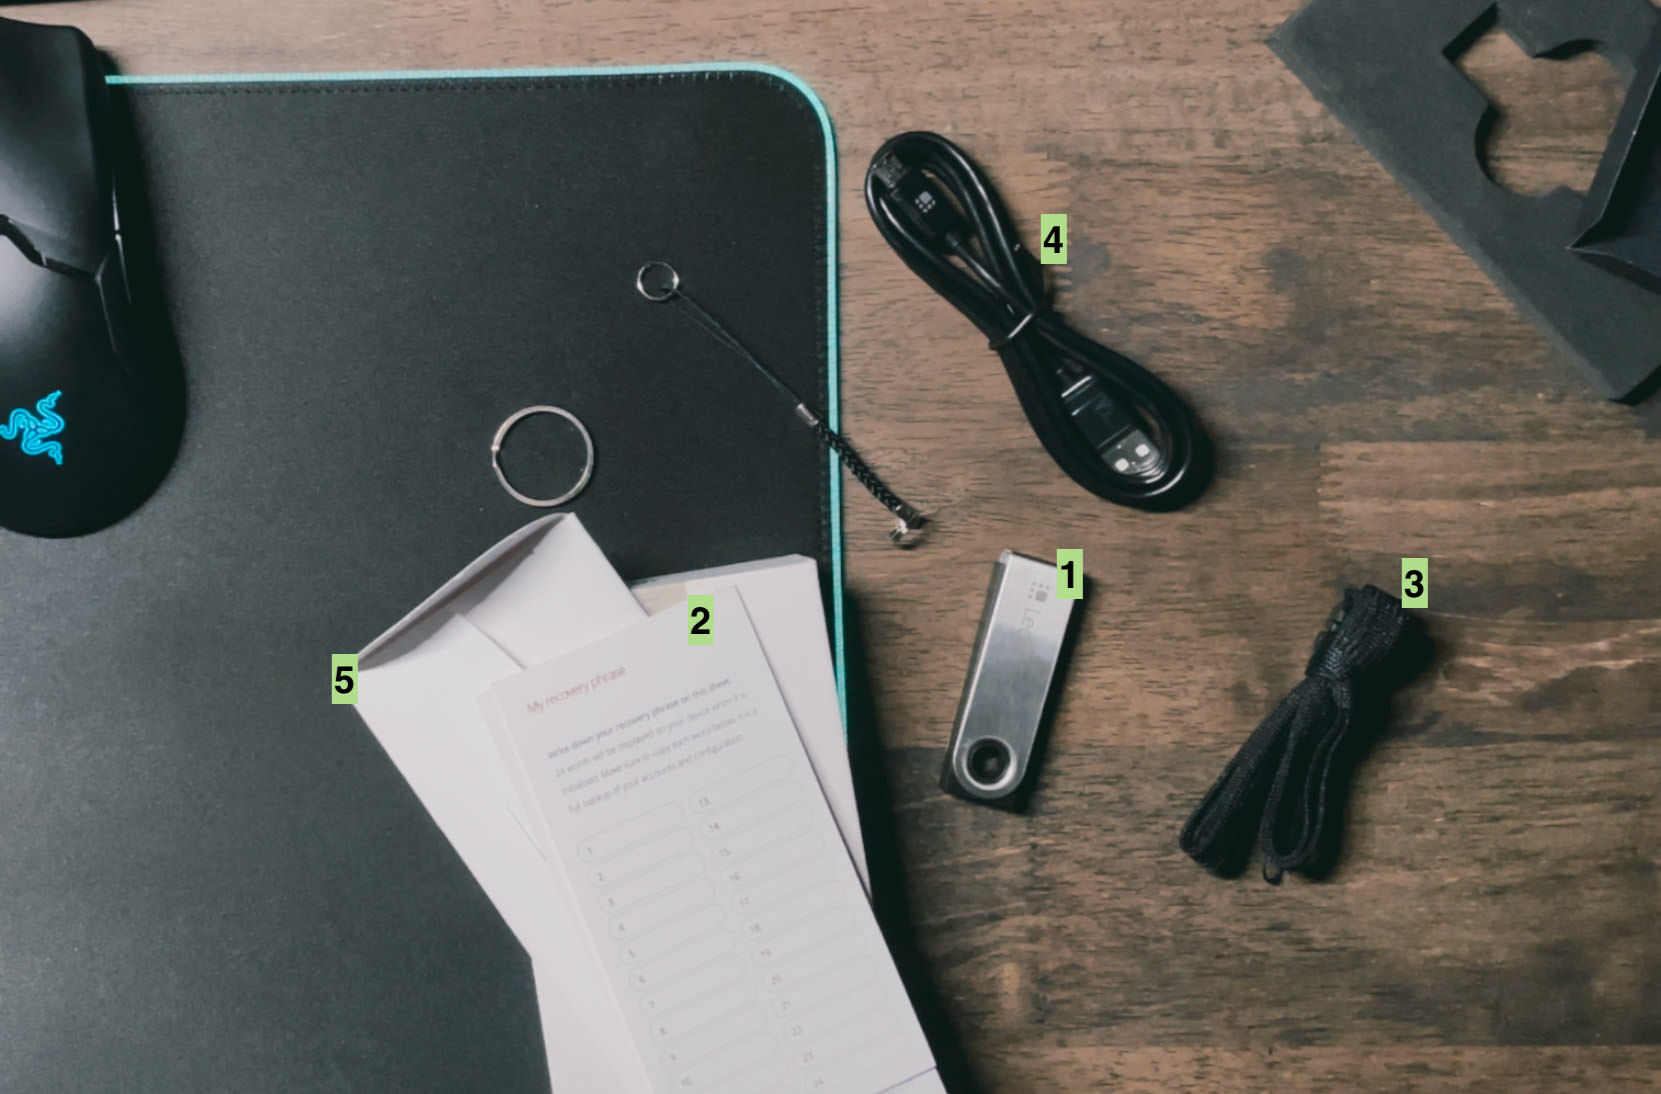
- The Ledger Nano S device,
- One piece of recovery sheet for noting down the recovery phrases,
- One Ledger-branded lanyard,
- One USB cable (Male to Micro B Male), and
- Some not-so-important papers that you can read later.
3. How to Set Up Ledger Nano S
First things first, let’s get the Ledger Nano S device set up.
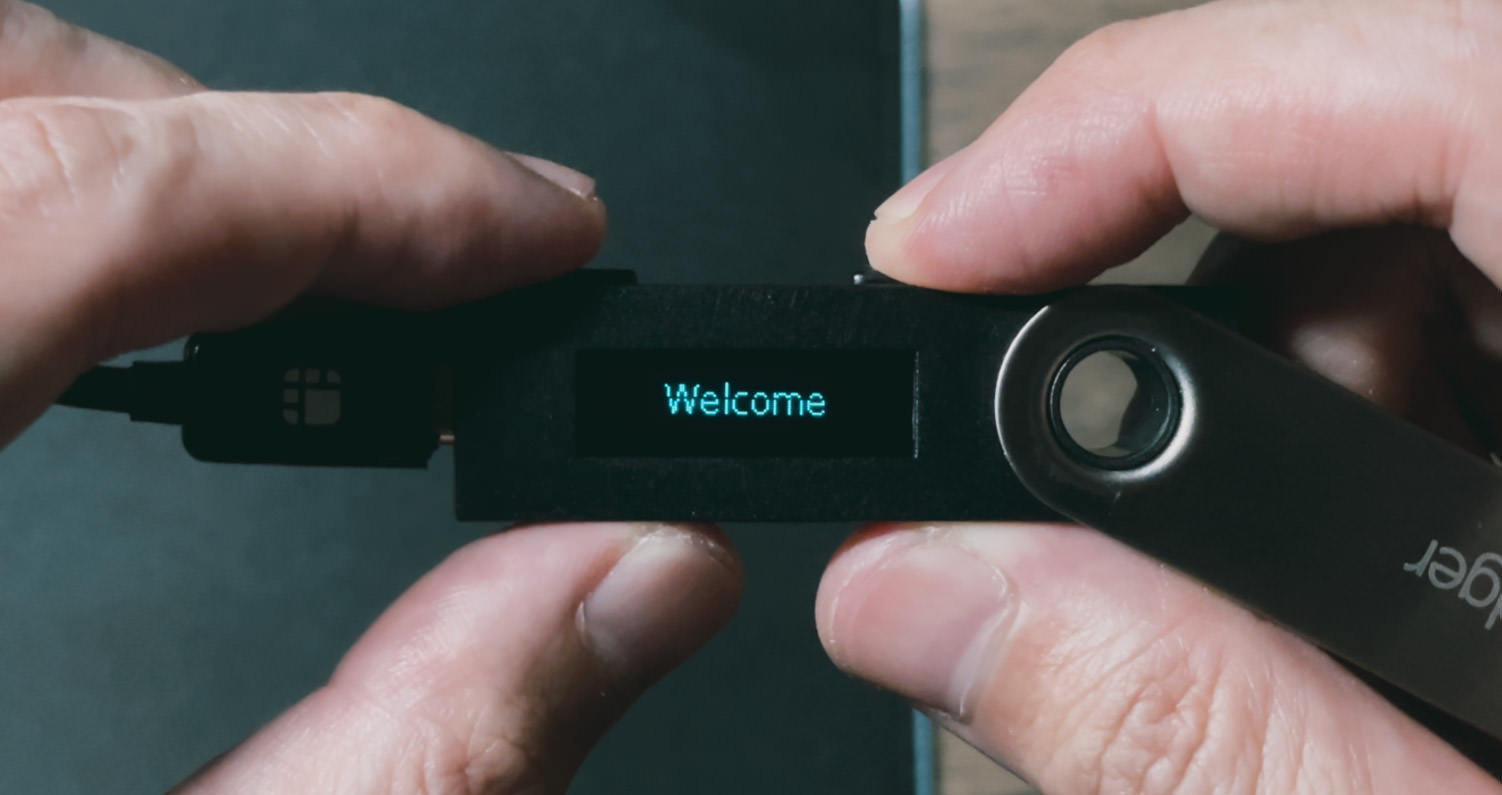
- Connect the Nano S device to your computer with the USB cable provided.
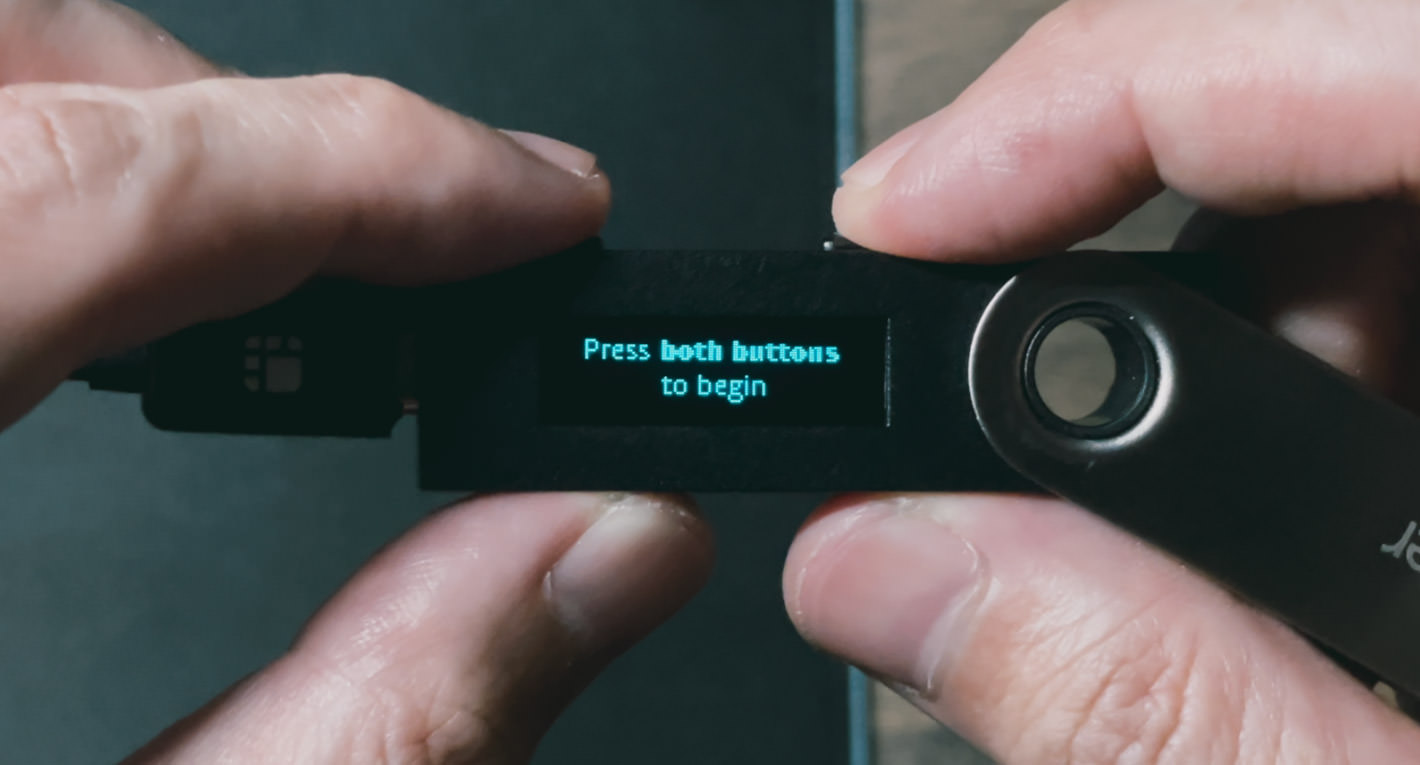
- When the device is powered, you will be greeted with a “Welcome” and then “Press both buttons to begin“. Do as instructed; press both the buttons on the device to begin setup.
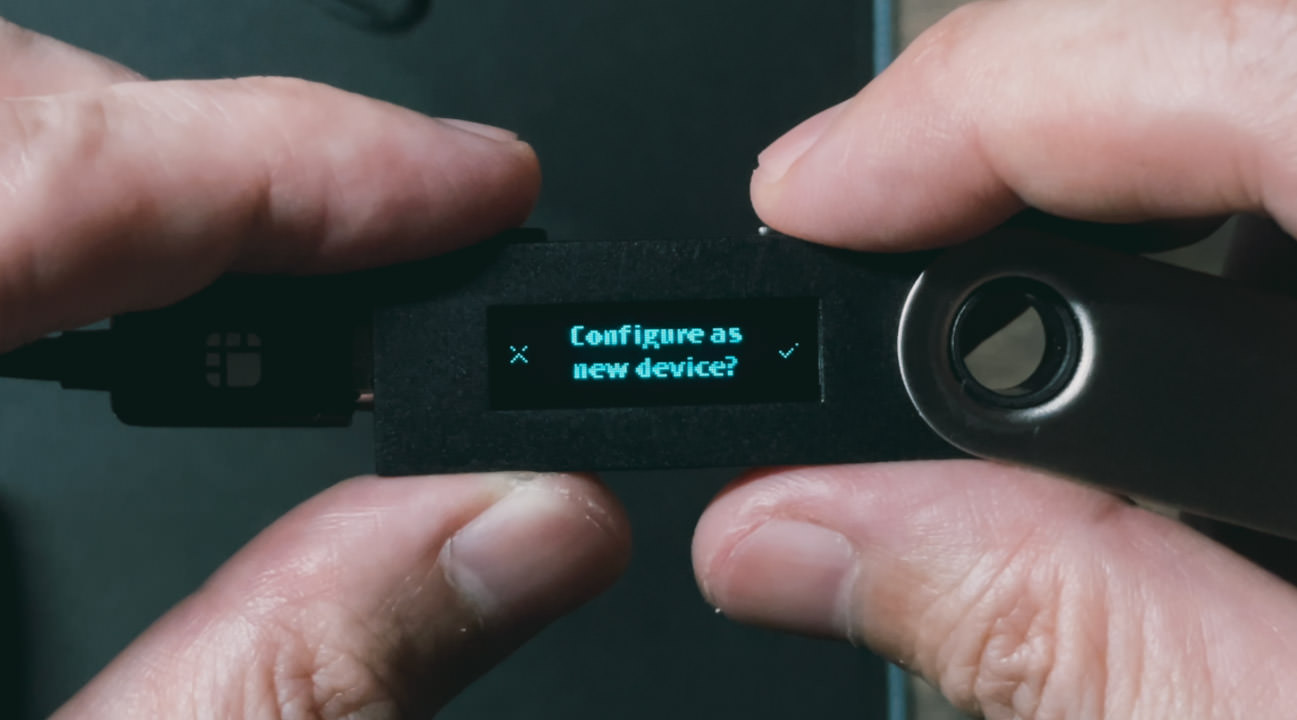
- Click the right button to configure your Nano S as a new device.
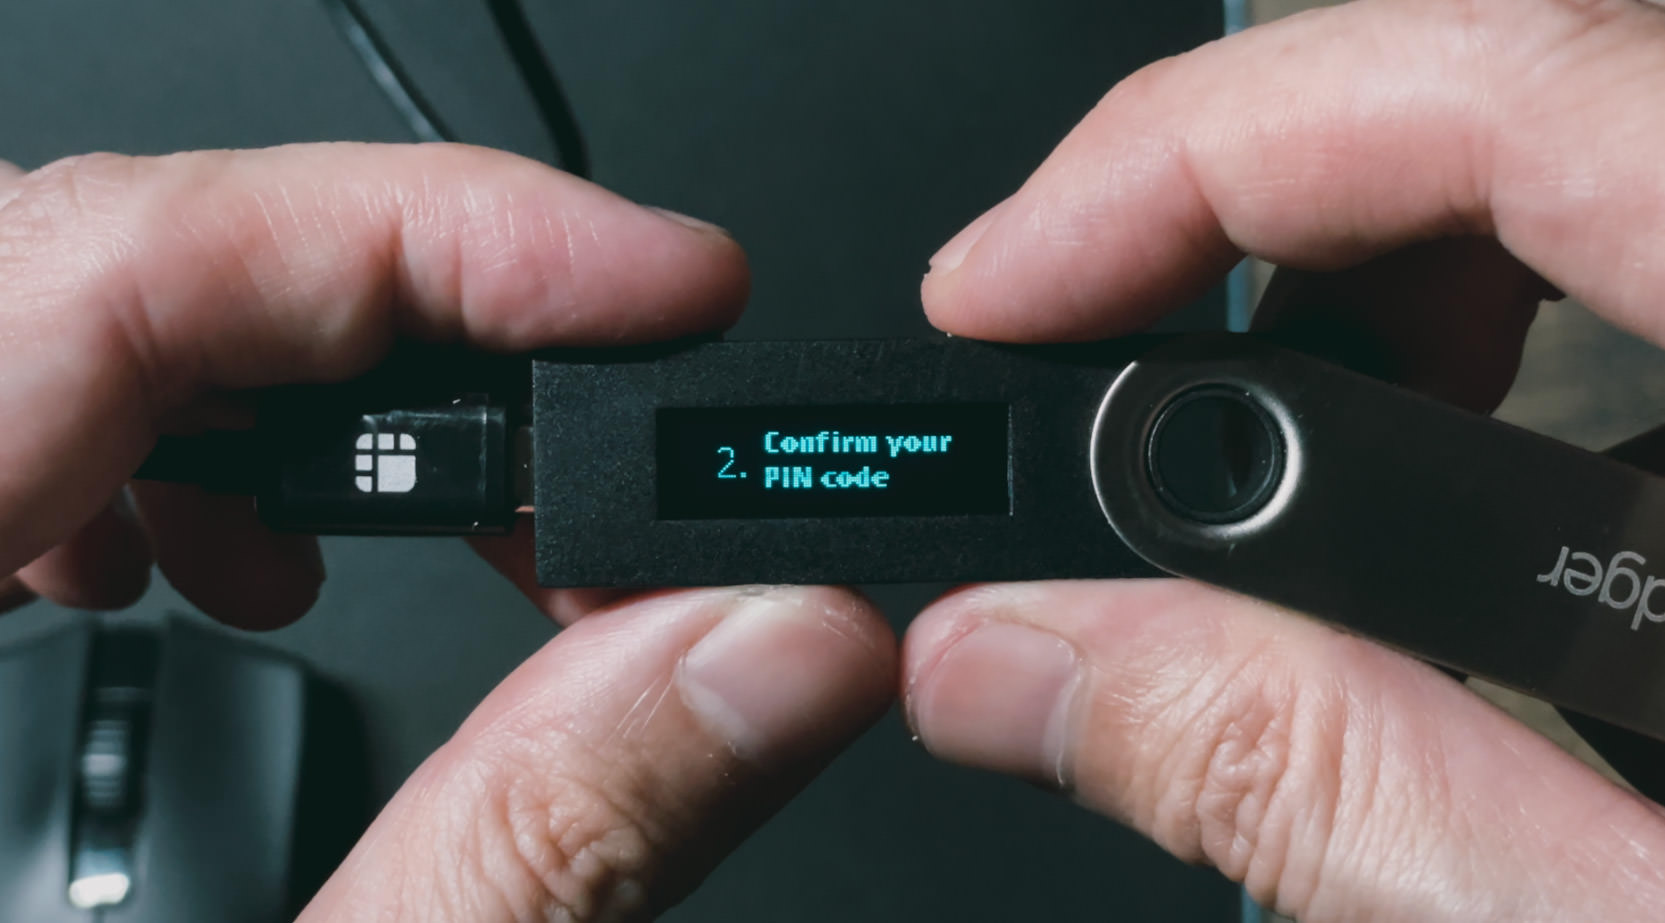
- Here lies the most crucial part of the setup – you need to create an 8-number PIN code for your device. The left button decreases the number count, the right button increases the number count, and pressing both buttons together confirms your input.
- Repeat to confirm your PIN code entered.
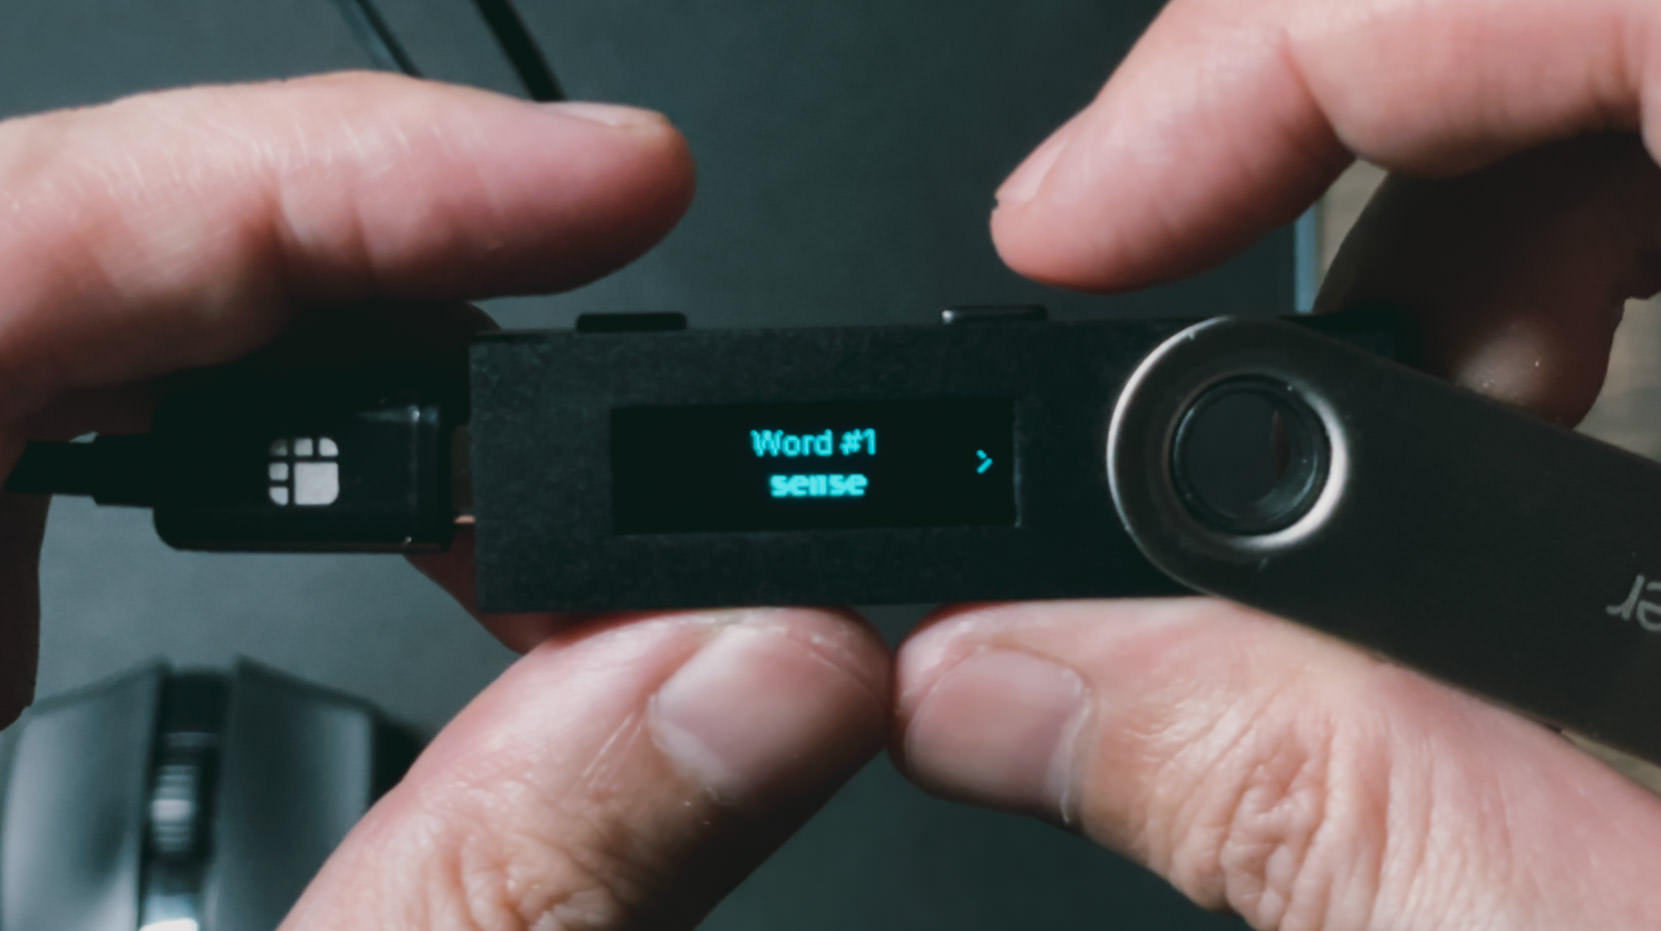
- Next, you will be given a set of recovery phrases – all 24 of them. They are just as important as your 8-digit pin codes because, shall you lose the device, these phrases are your only hope in recovering the cryptos inside. Write the recovery phrases down in the recovery sheets provided, and keep them safe and inaccessible to anyone else but you. Use the right button to navigate to the next phrase and the left button to the previous.
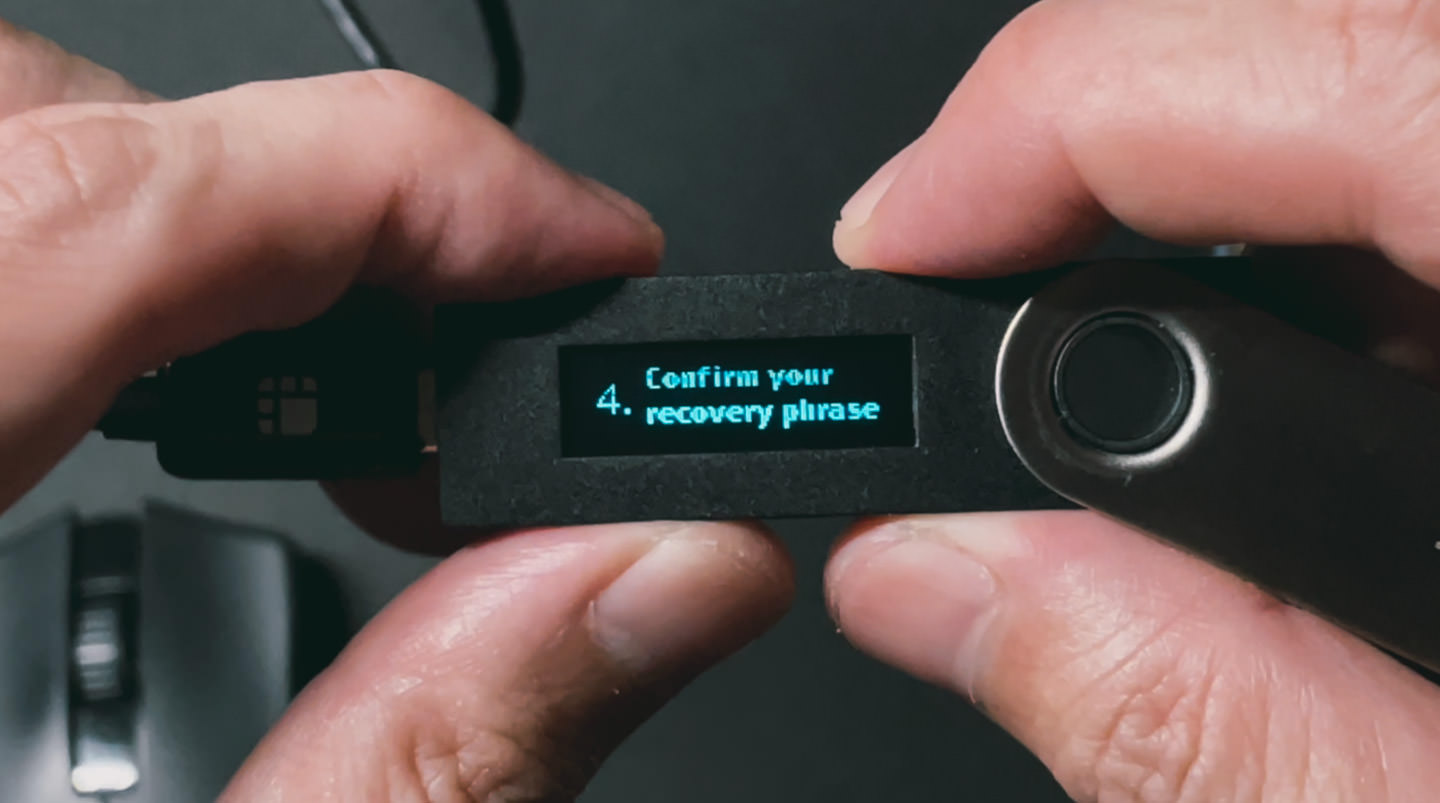
- Once you’ve written them down, the device will want you to confirm all 24 recovery phrases again. This step ensures you’ve recorded the correct phrases in the right order. Follow the instructions on the screen and pick the correct phrases accordingly.
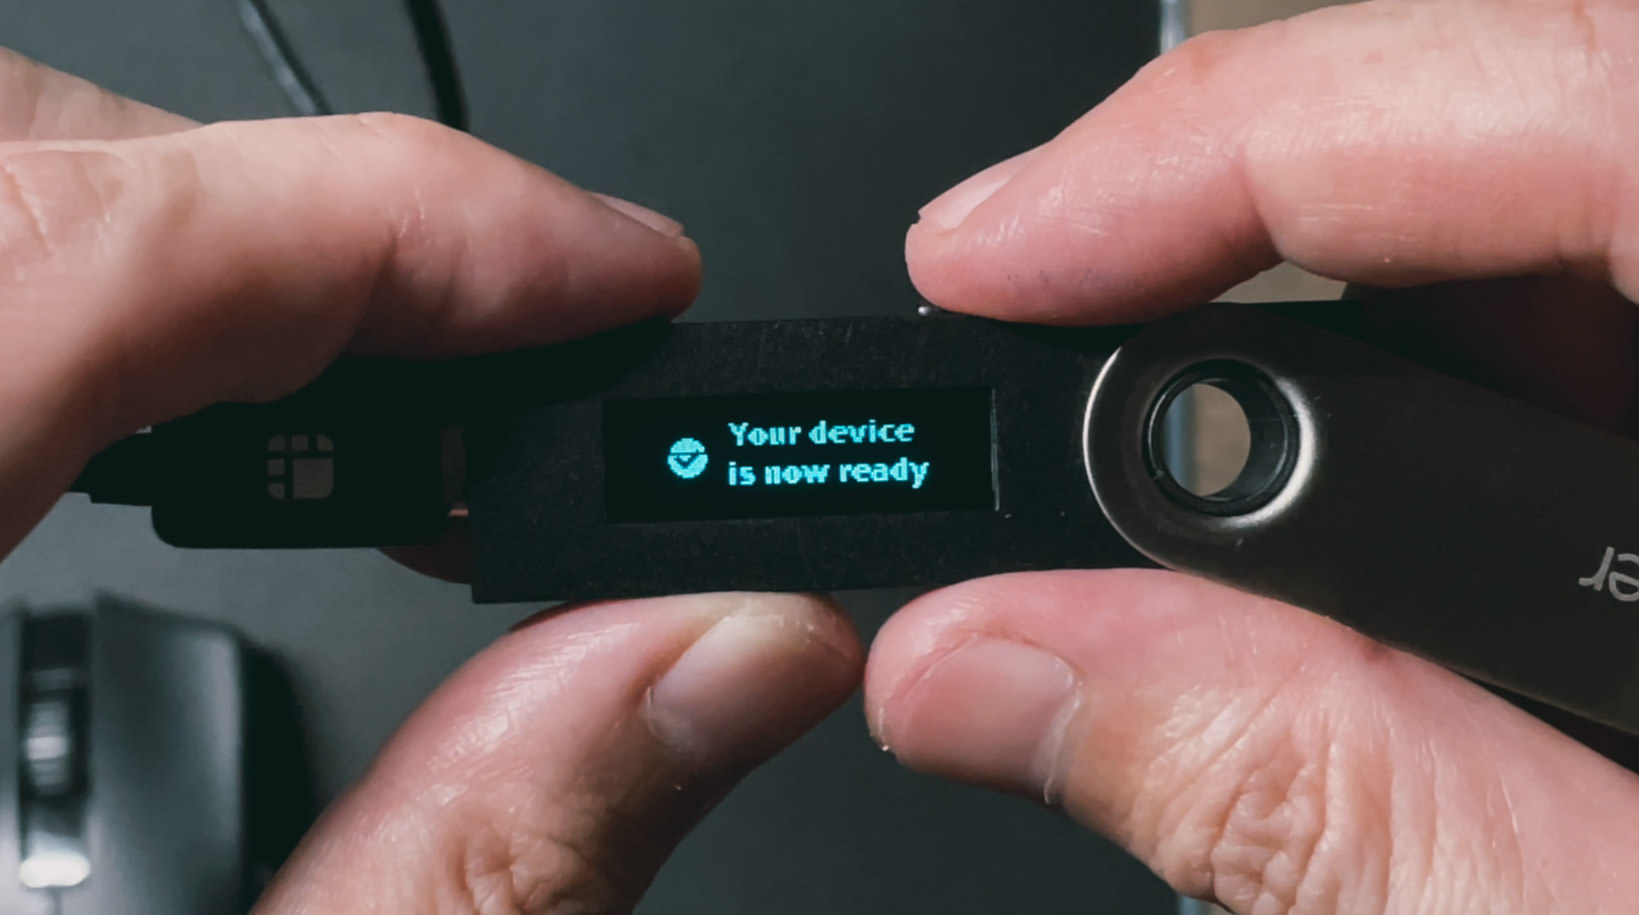
- “Your device is now ready” is what you will see if everything works out fine.
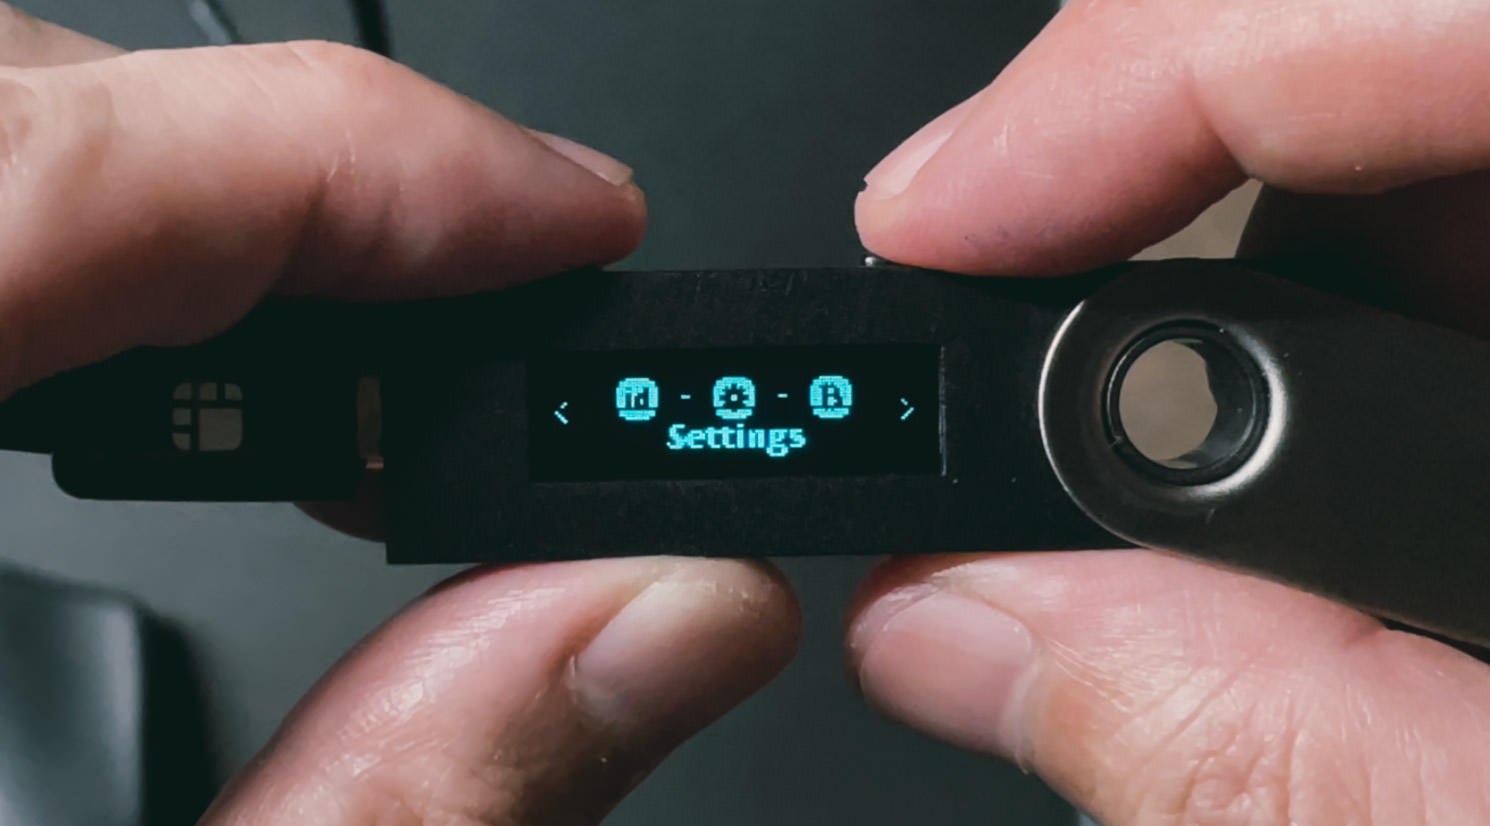
- Clicking both buttons together will bring you into the hardware wallet, where you can make further changes to its settings or add any cryptocurrency app directly on the device. But there’s no need for that; we will do that in via Desktop app later.

4. Install and Set Up Ledger Desktop App
After the device is set up, let’s download and install the Ledger Desktop app. The desktop app will maake life much easier; at least you don’t have to depend on the two buttons on the device for every setting you are going to make or change.
- Head over to https://www.ledger.com/ledger-live/download to download and install the correct Desktop Ledger app for your operating system.
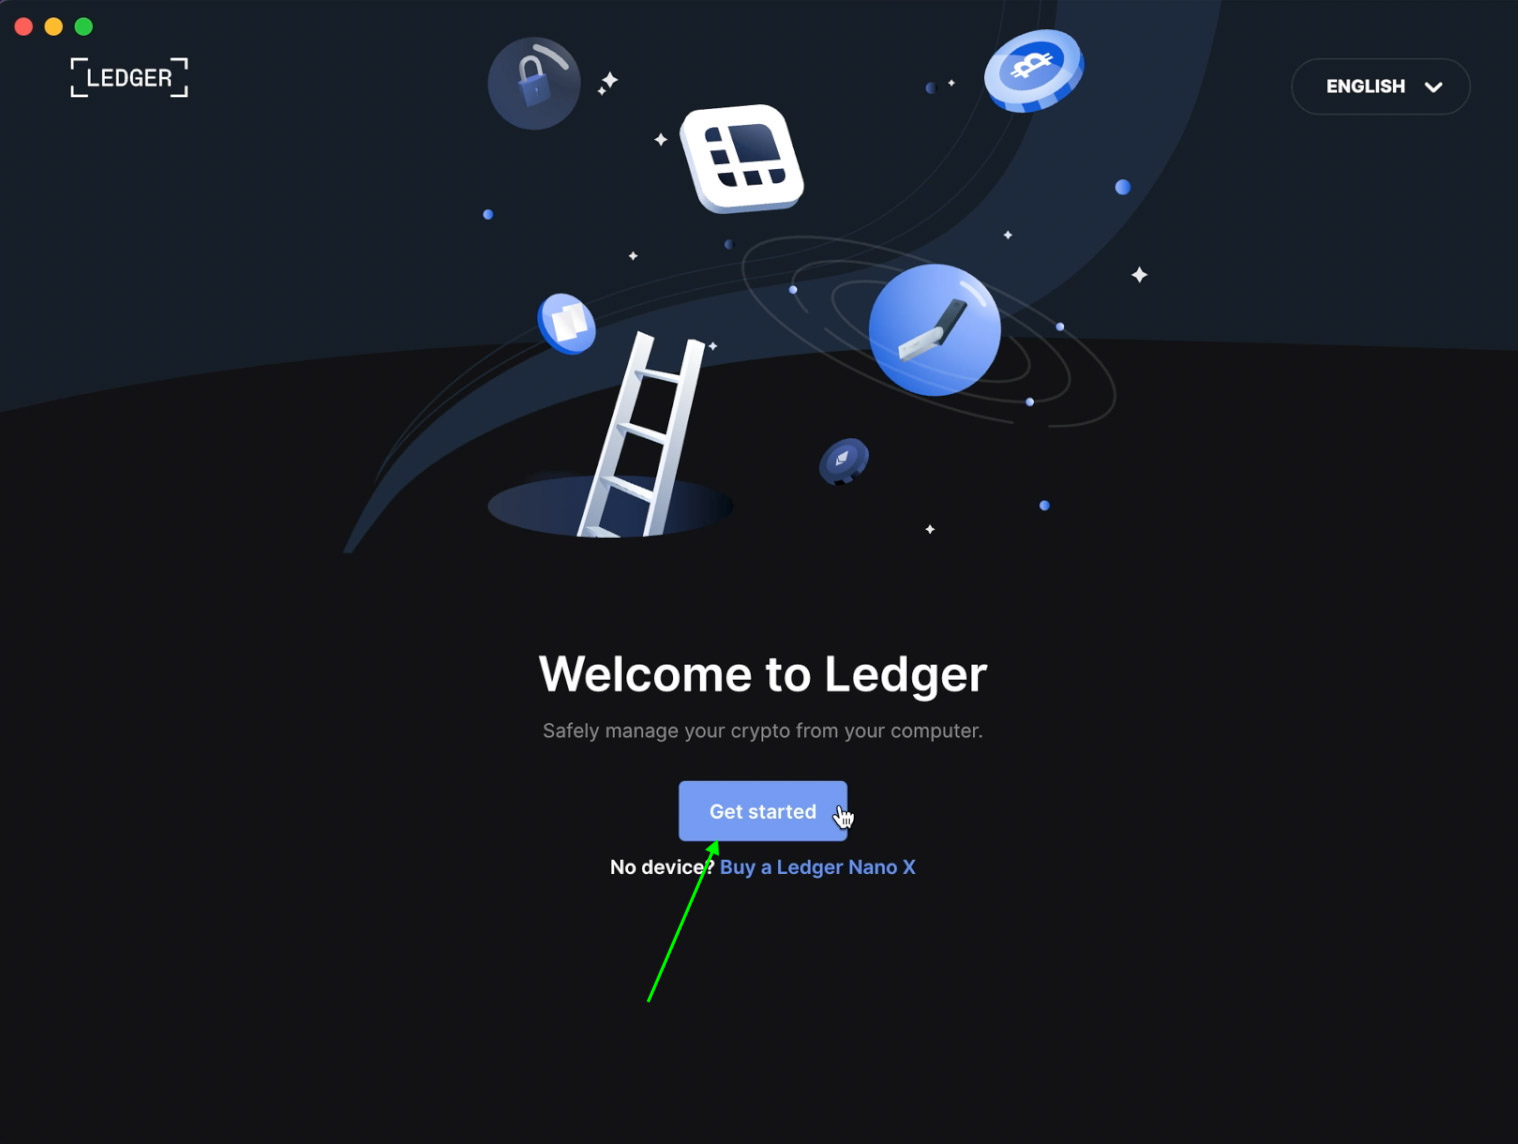
- Upon installation, click “Get Started“, agree to the terms and conditions, select your device’s model, which is Nano S, and click “OK, I’m ready“.
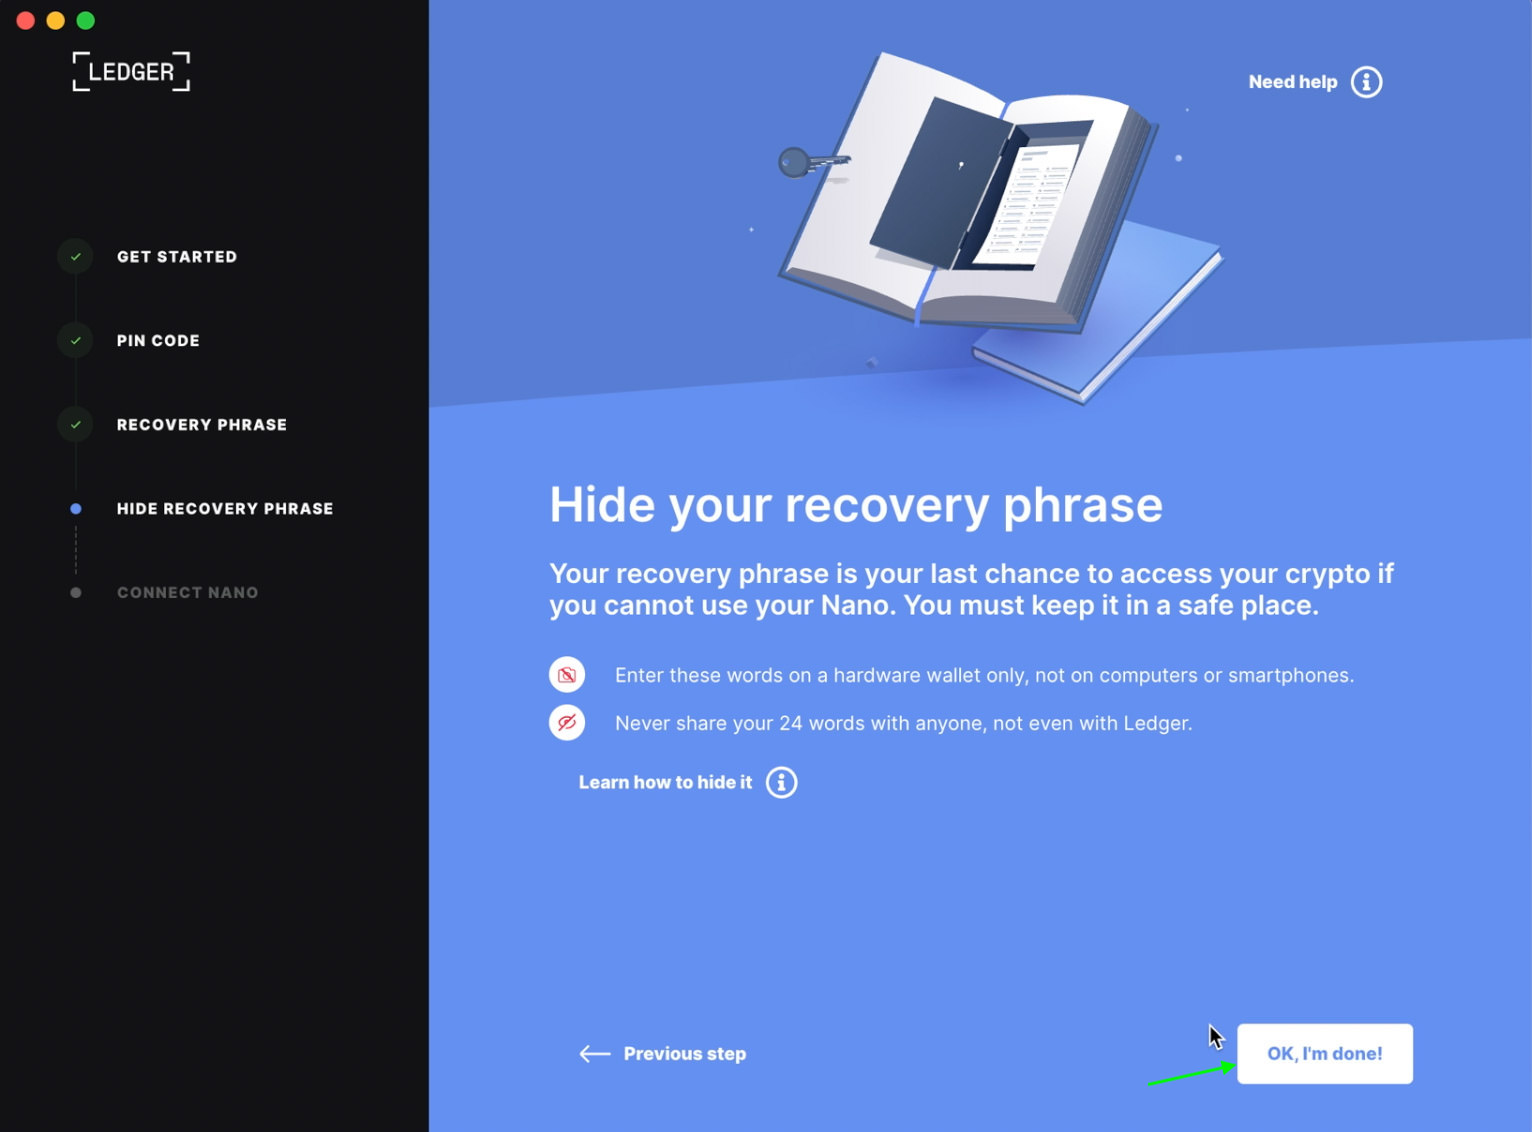
- Keep clicking “Next step” (because we’ve already done those), until you reach the page where you click “OK, I’m done!“.
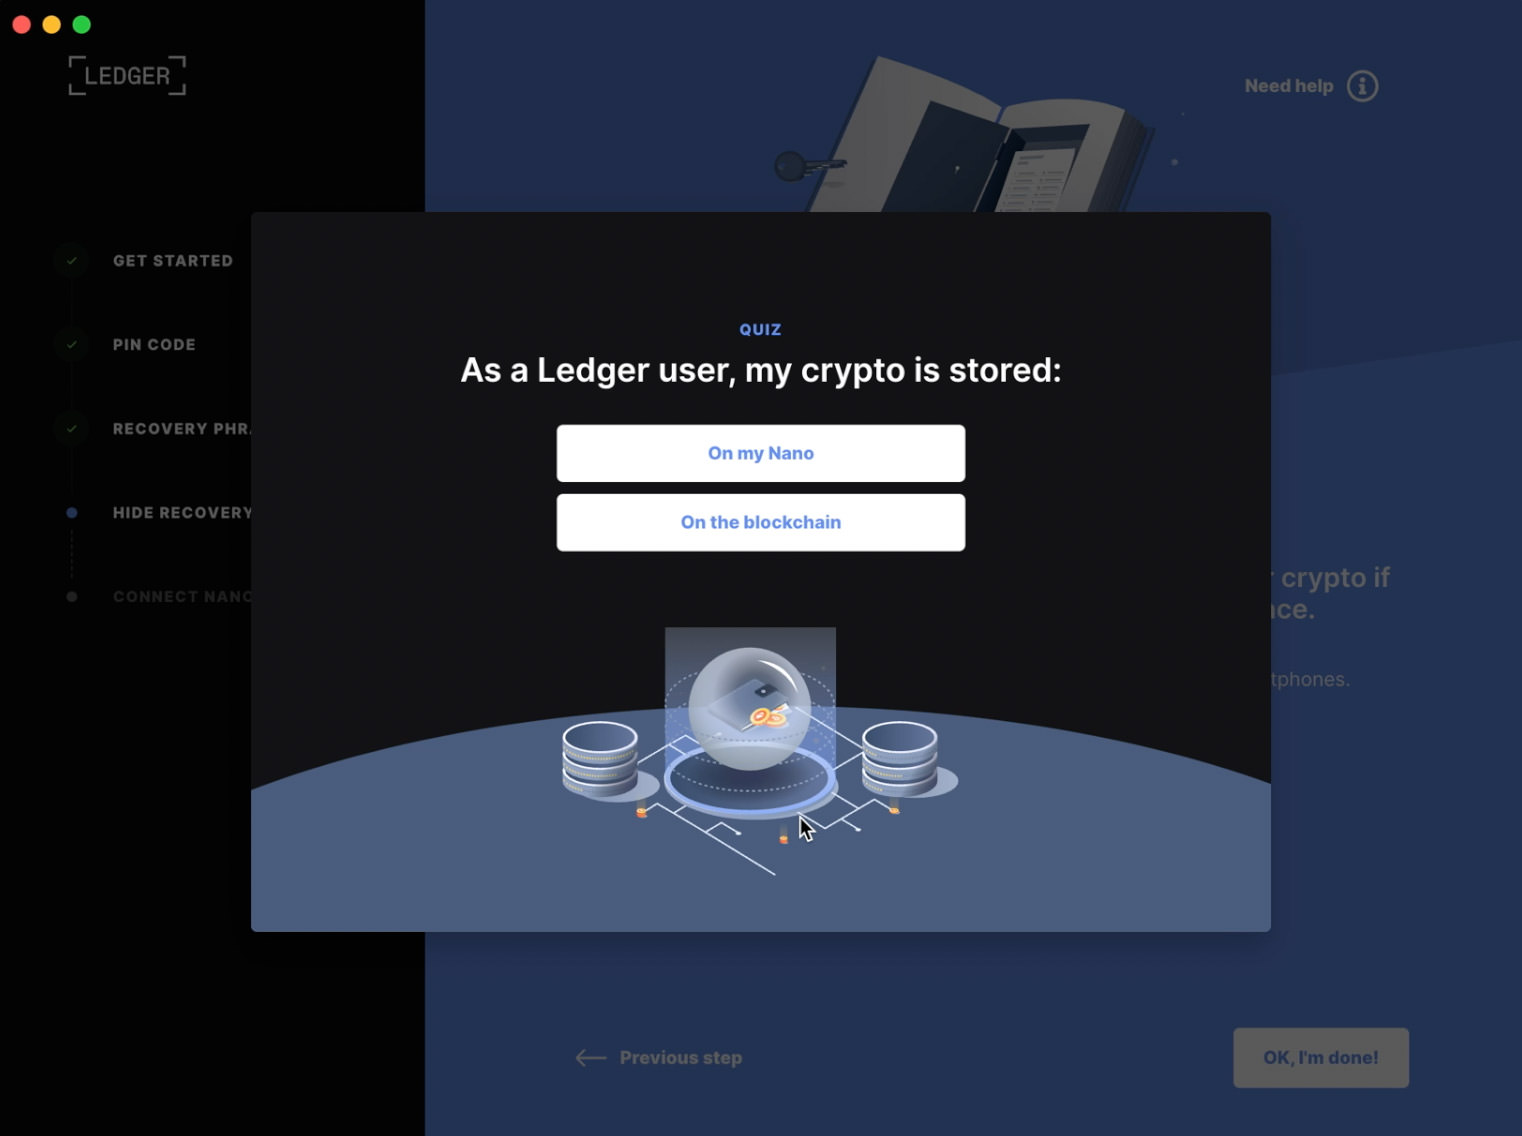
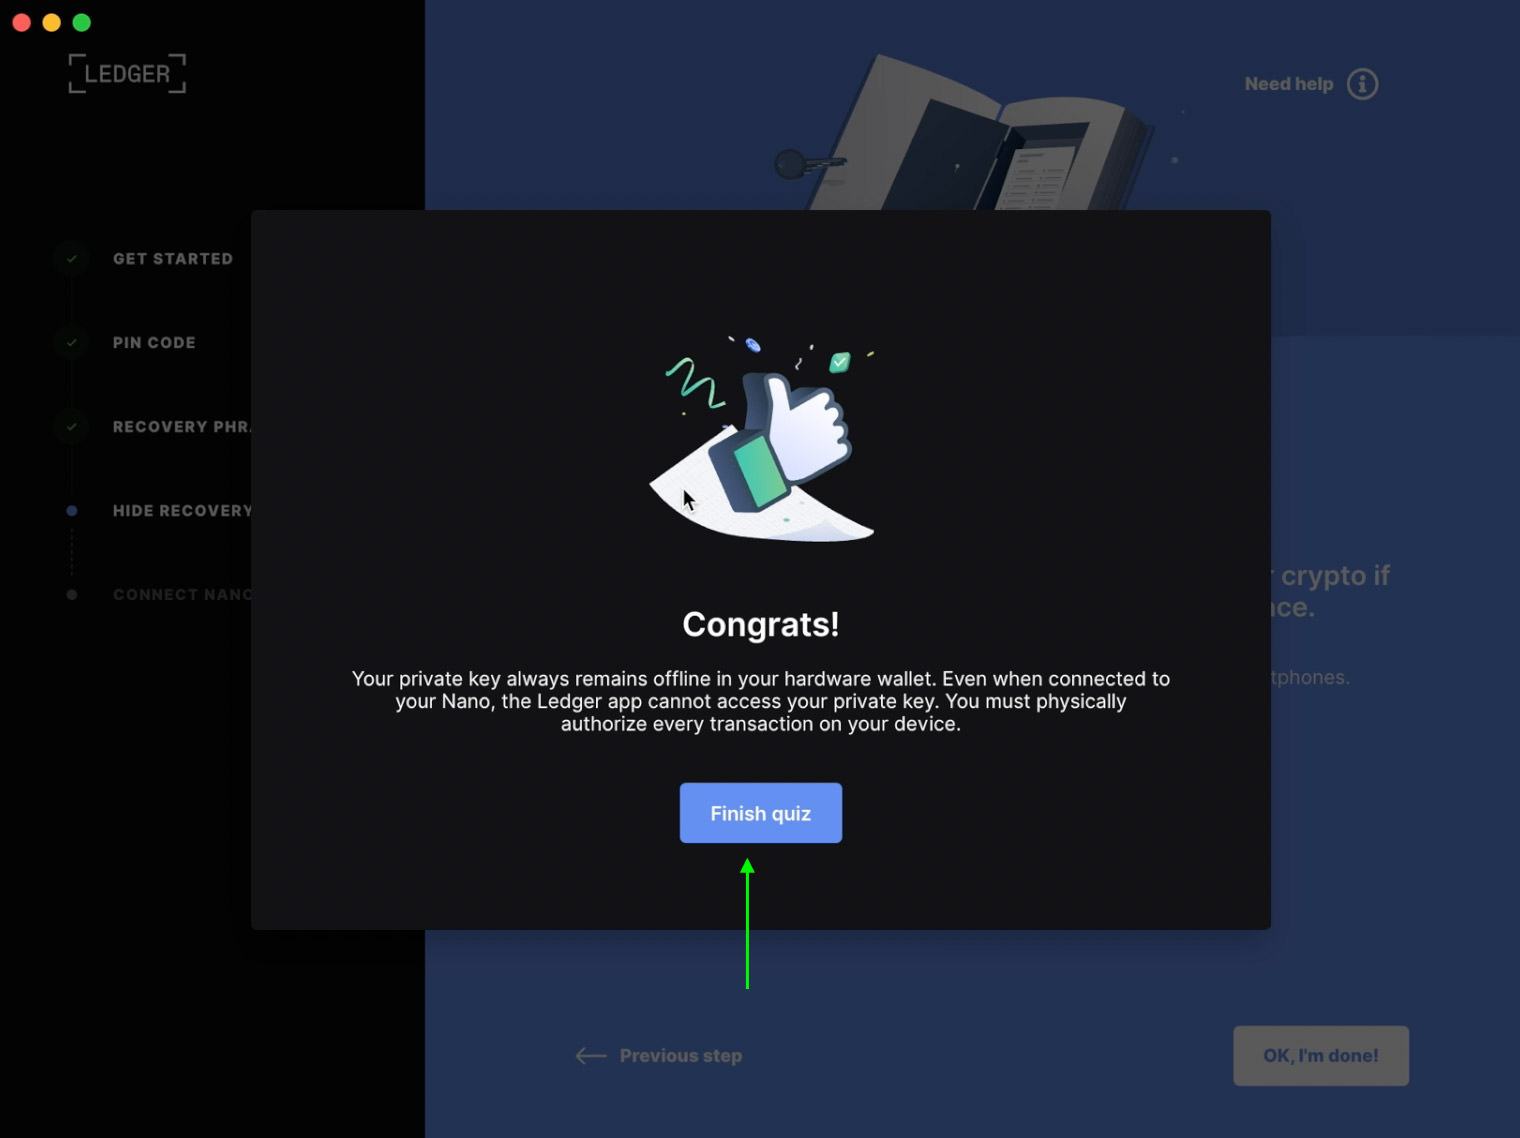
- You’ll be required to take a 3-question quiz to continue. Try answering these questions to the best of your understanding, but I’ll share the answers here anyway. – As a Ledger user, my crypto is stored: On the blockchain. – If my recovery phrase is no longer secure or private: My crypto is no longer safe and I need to transfer them to a secure place. – When I connect my Nano S to the Ledger app, my private key is: Still offline.[img]
- When you are done, click “Finish quiz“.
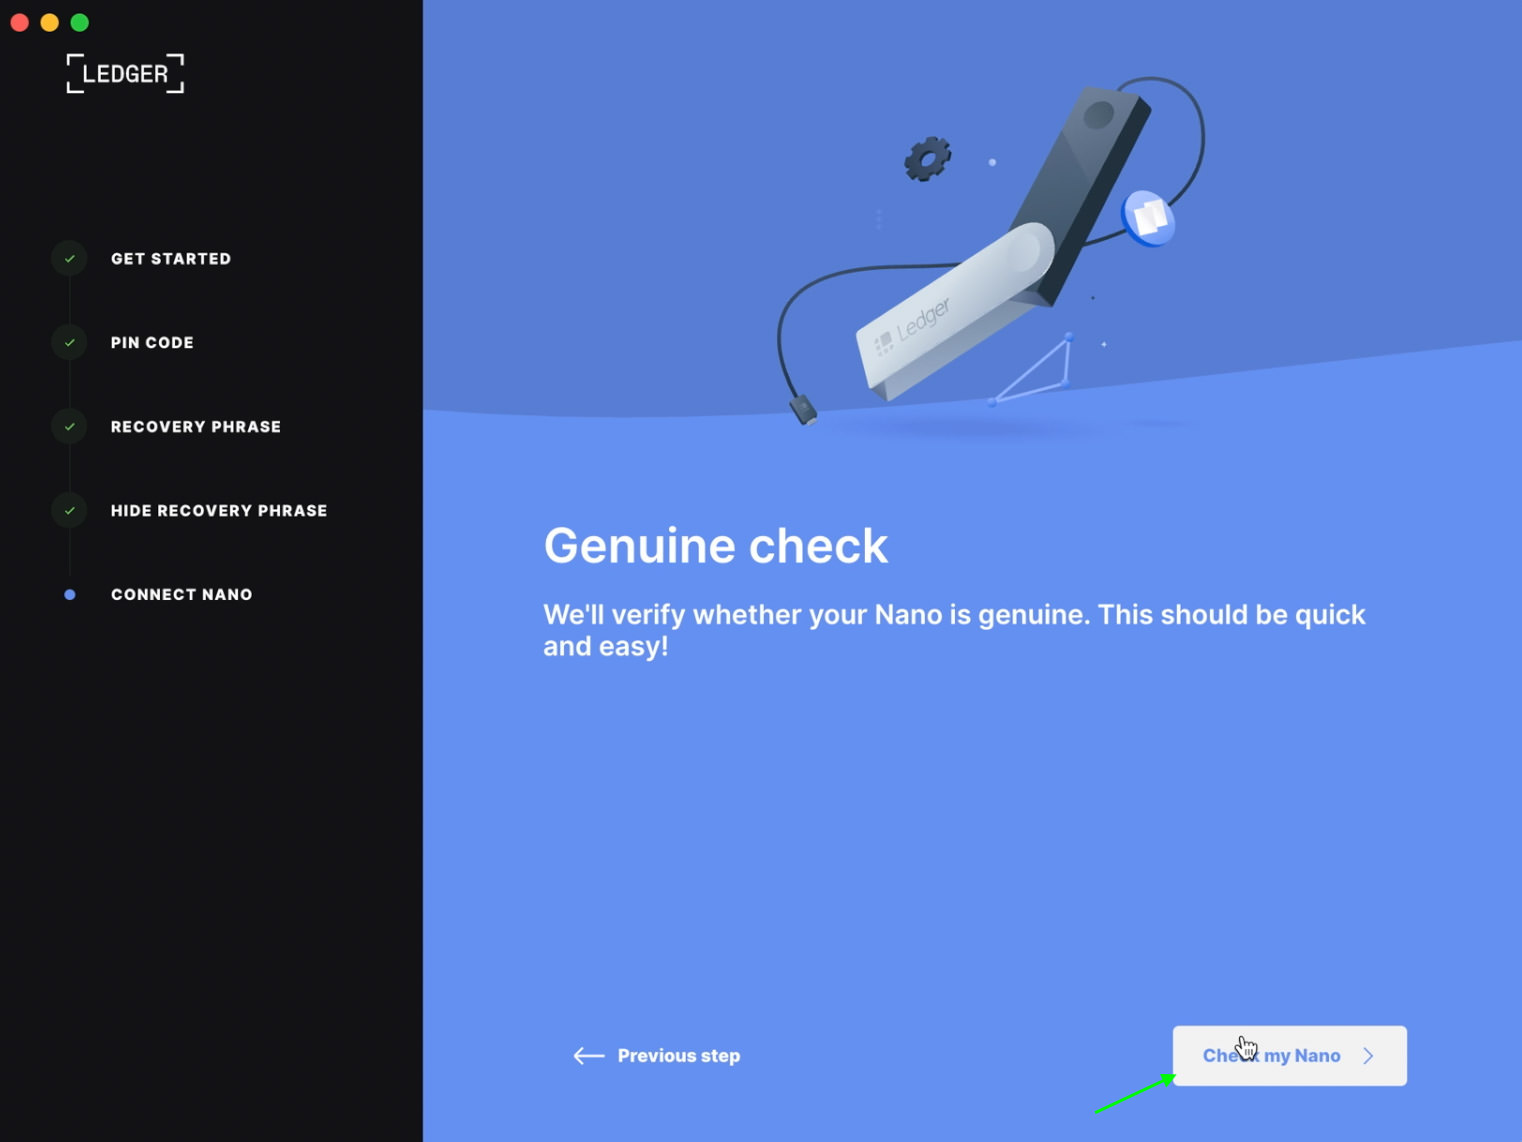
- Now, click “Next step” and then “Check my Nano” so the app can check if your Nano S is genuine and then it will follow up by finishing the set up process of the device.
- And if everything goes well, which it most likely should, this is the screen you will end up seeing.

5. Update Ledger Nano S Firmware
It is essential that your Nano S is running on the latest firmware. This should be the first thing you do before you install any apps on it.
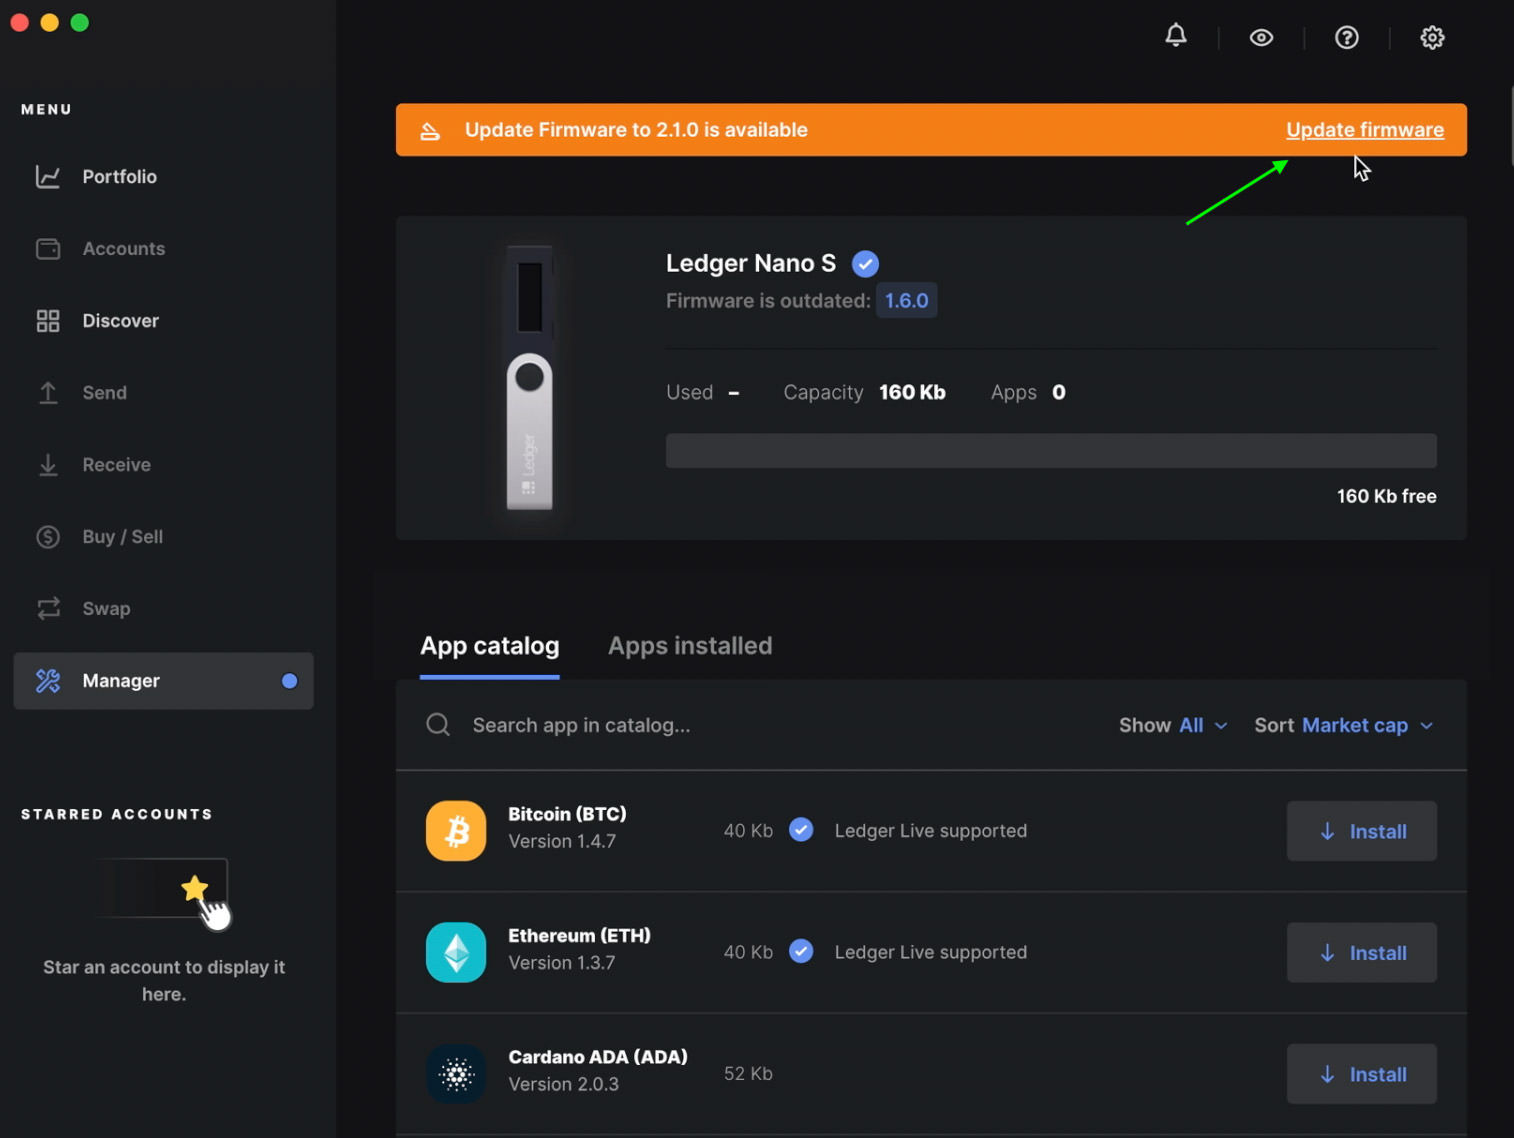
To find out if your Nano S requires a firmware update, click the Manager tab on the left sidebar. If you see the following message that says “Update firmware to X.X.X is available“, that’s a sign that your device is outdated, and a firmware update is required.
To update Nano S firmware, this is what you need to do:
- Click the “Update firmware” link.
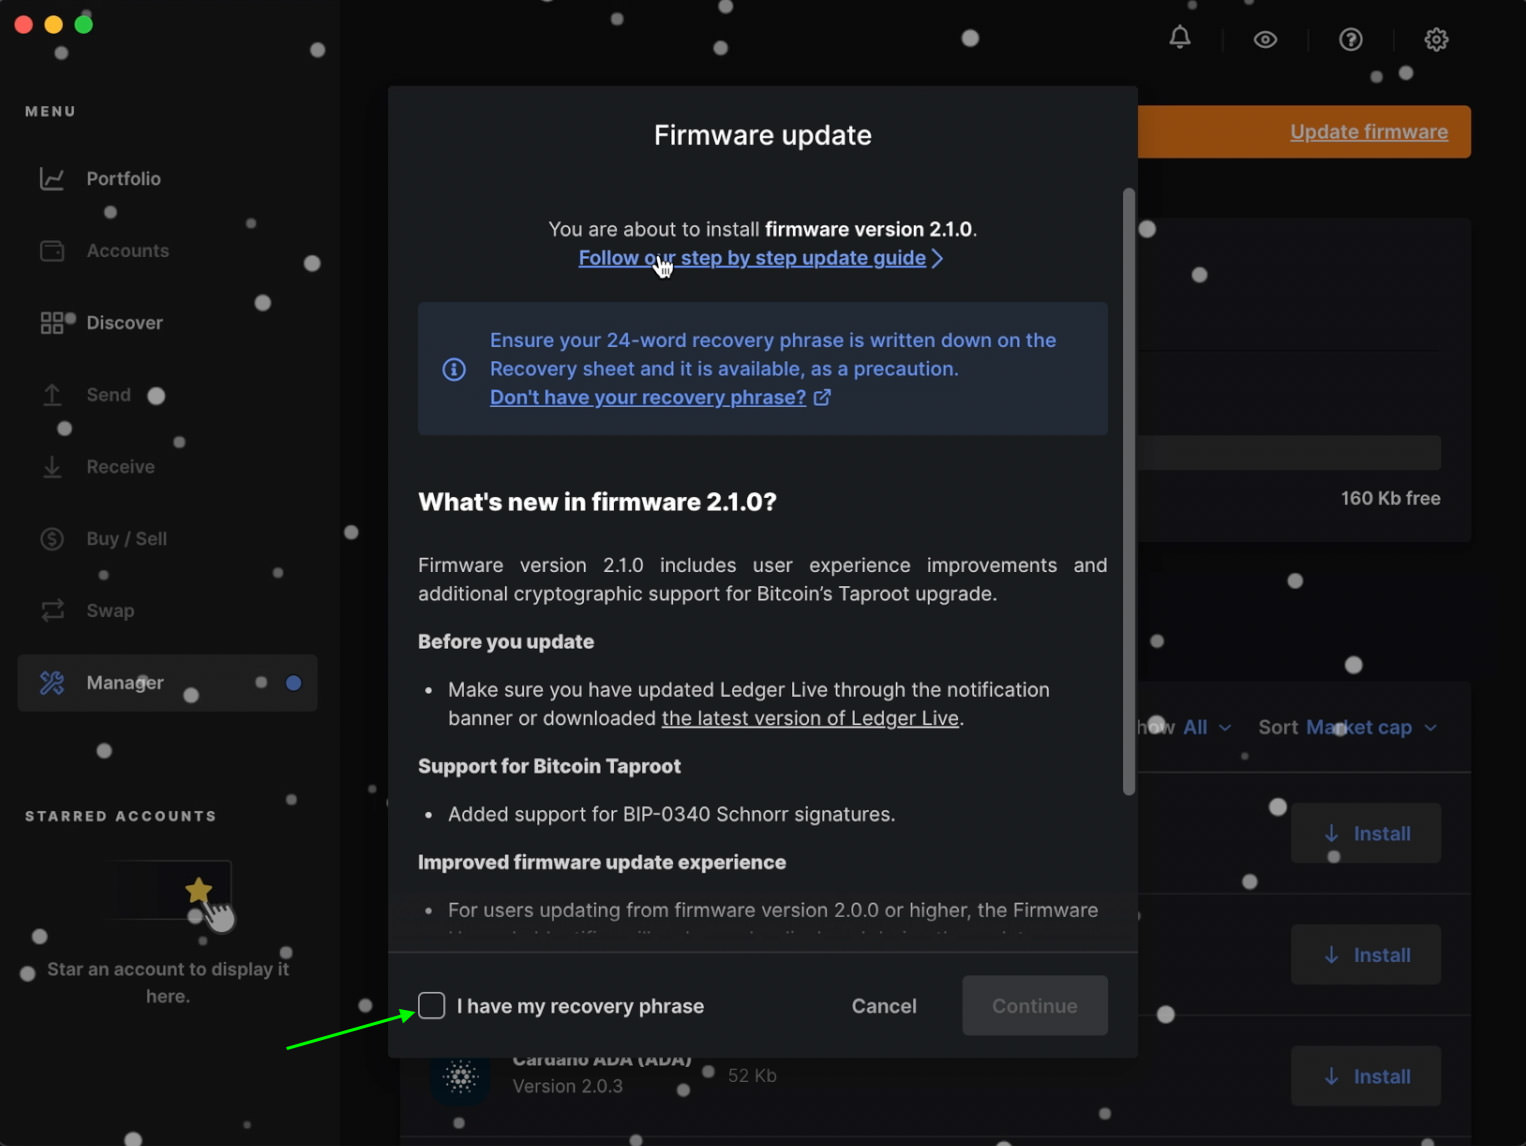
- At the Firmware Update page, check “I have my recovery phrase” and then click Continue. At this step you should have your 24 recovery phases ready.
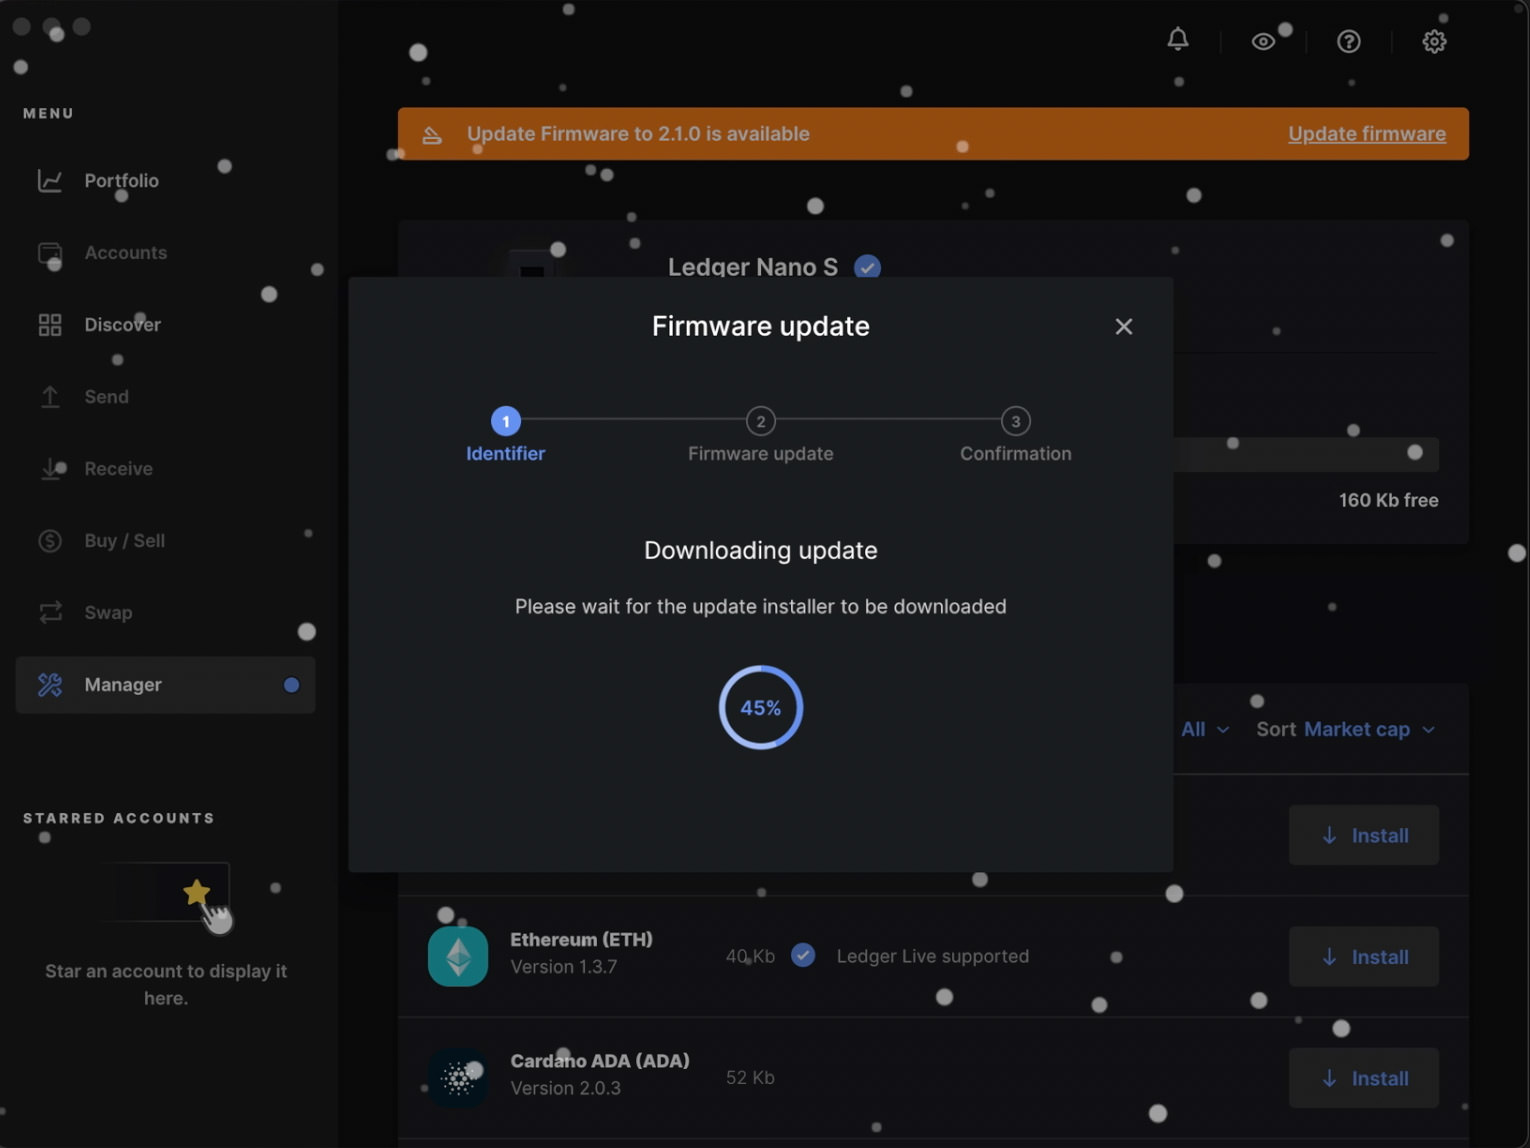
- The firmware update will start to download. This takes approximately 3-10 minutes, depending on your connection.
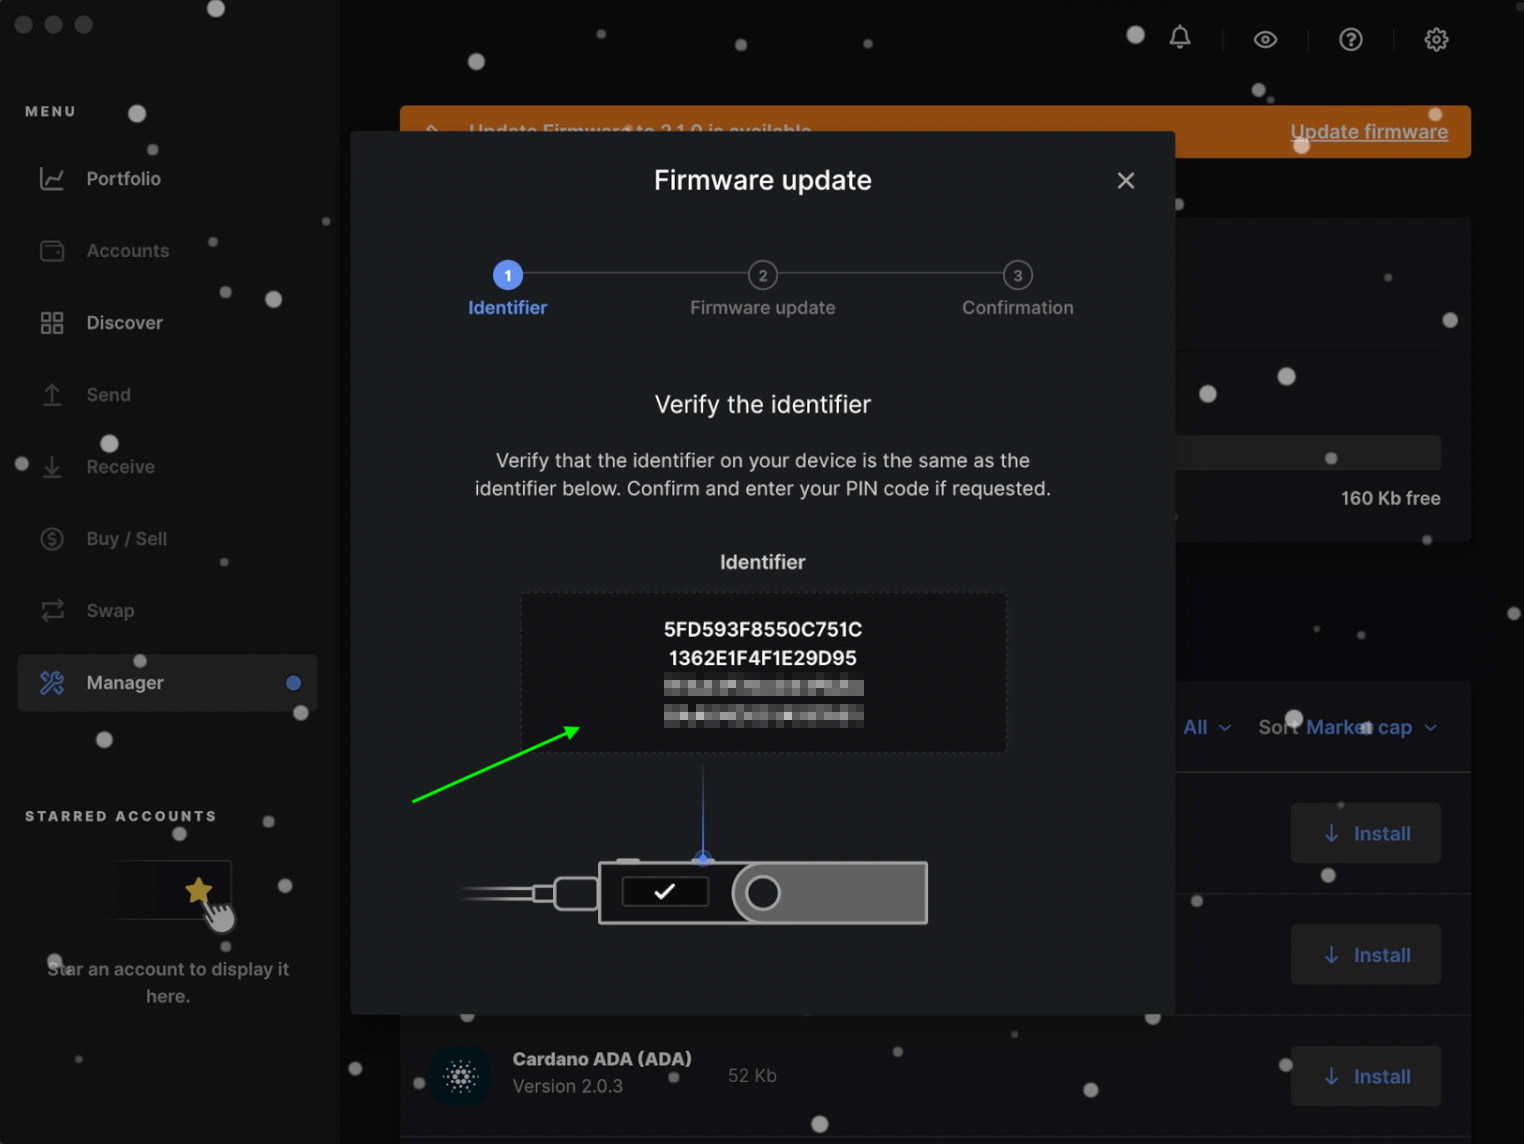
- When the download is complete, you will be presented with a screen like this, where you will need to verify the identifier. Cross-check the codes on your device, make sure they are the same, then click the right button on your device.
- Next, unlock your device with your PIN, and the firmware update will commence.
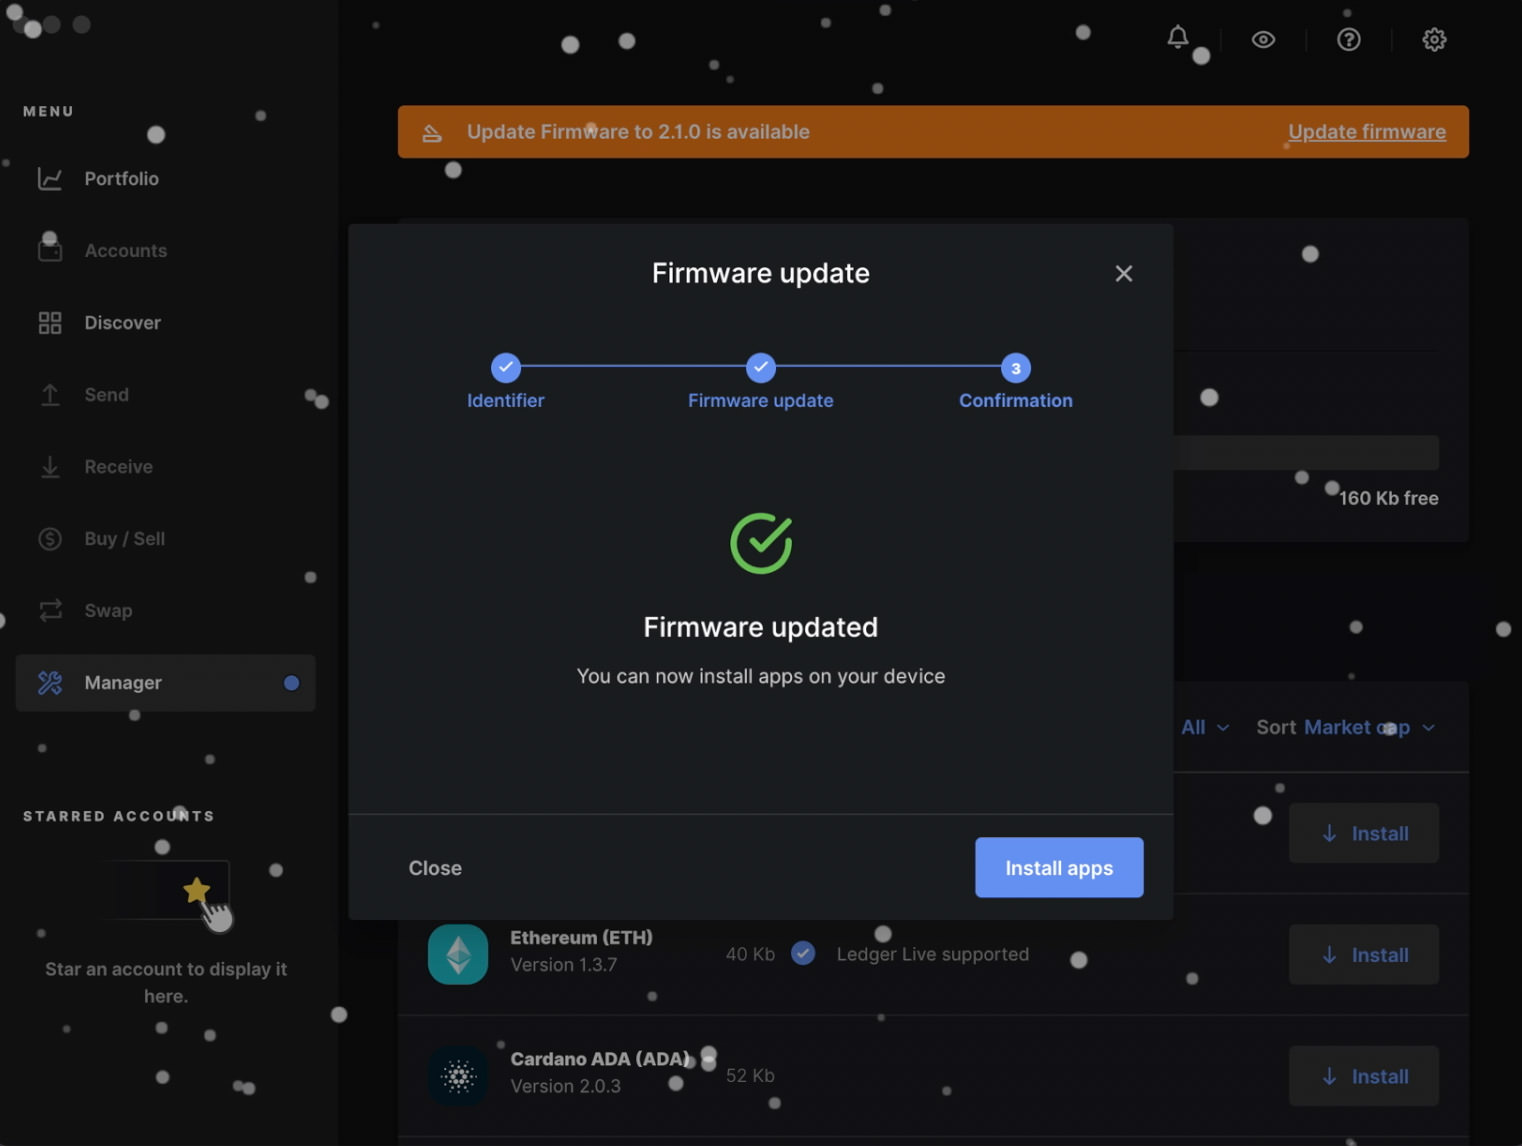
- And when you see this screen, that means your firmware has been successfully updated.

6. Adding Crypto Accounts in Nano S
Now, before you can start sending cryptos to your Nano S hardware wallet, you will first need to create an account for each of the respective coint.
In this example, I’m going to show you how to create an Ethereum account in the hardware wallet.
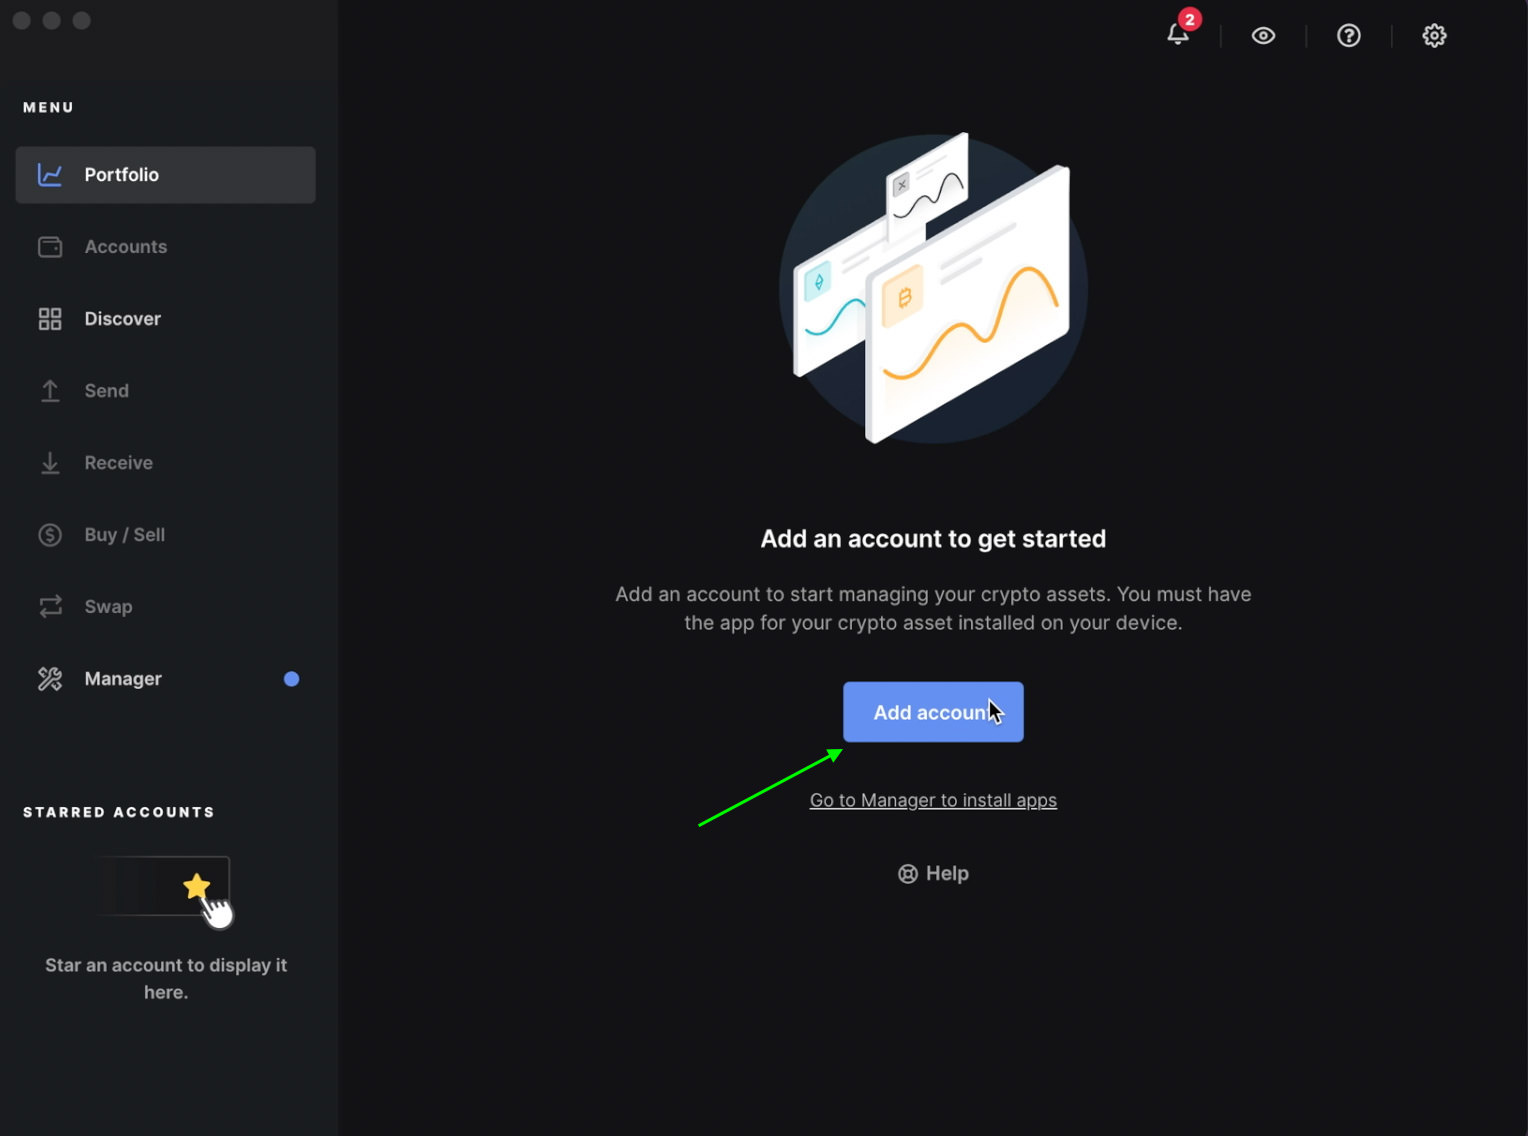
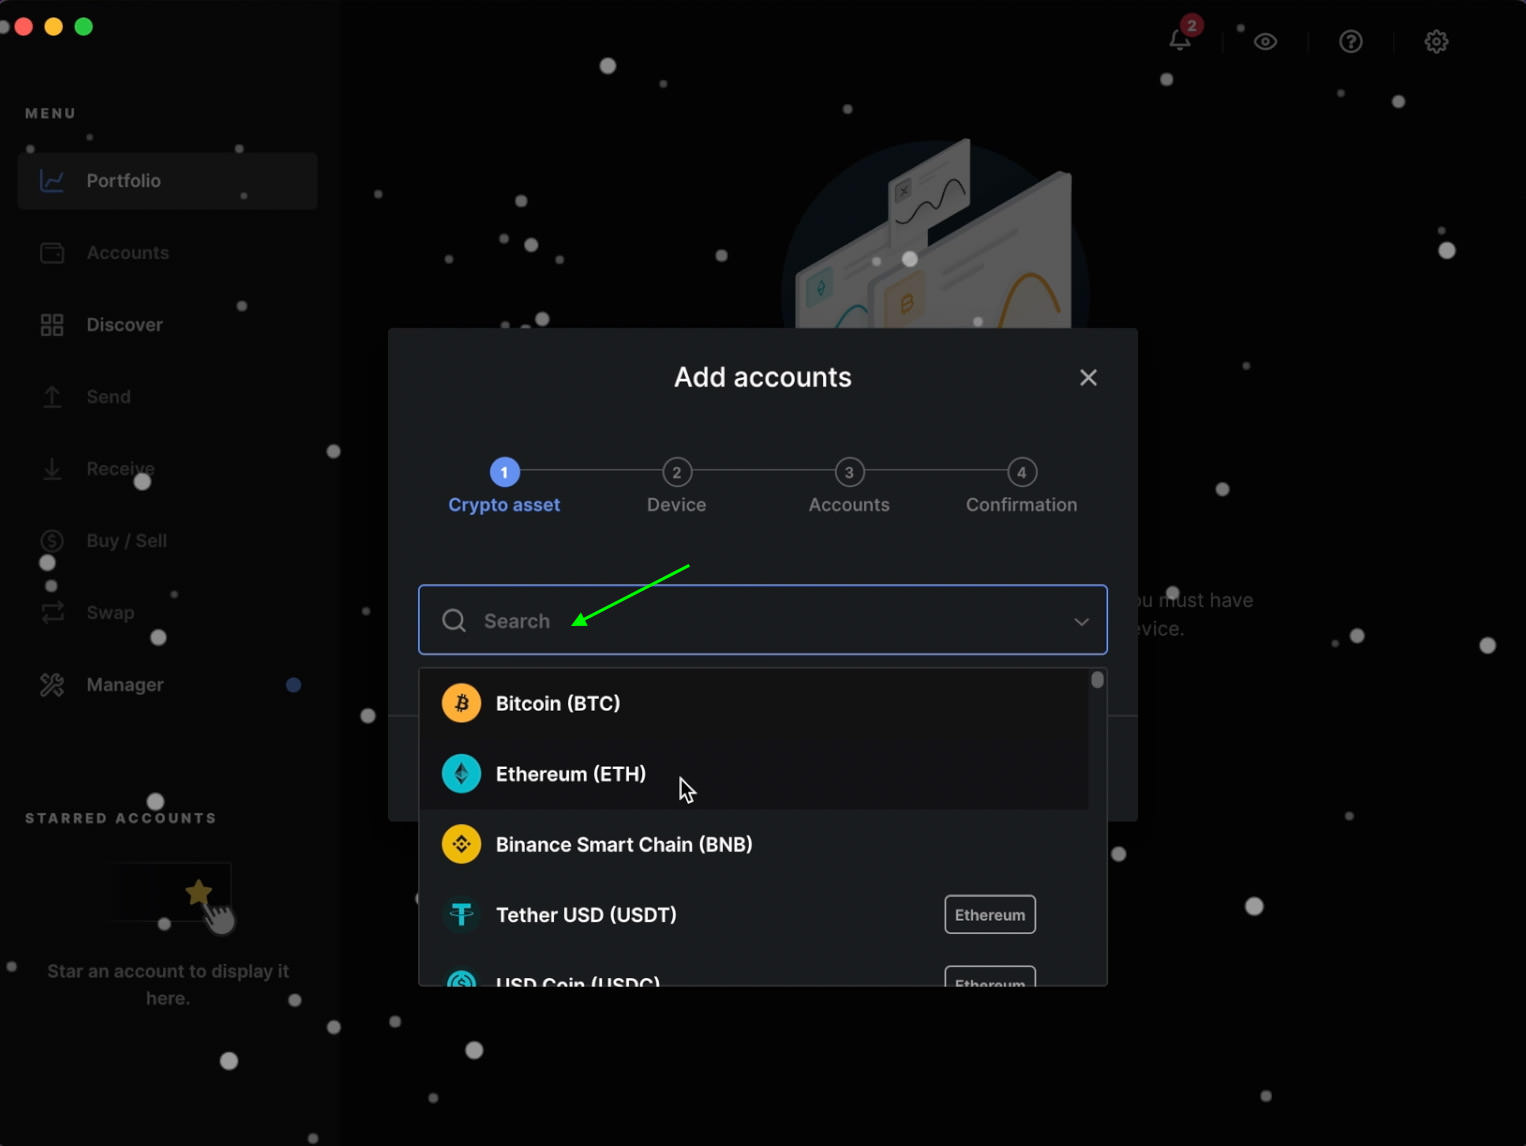
- Click Portfolio on the left sidebar, then click on the "Add account" button.
- Search for the required cryptocurrency, in our case, we will go ahead with creating an Ethereum account.
- Once done, click Continue.
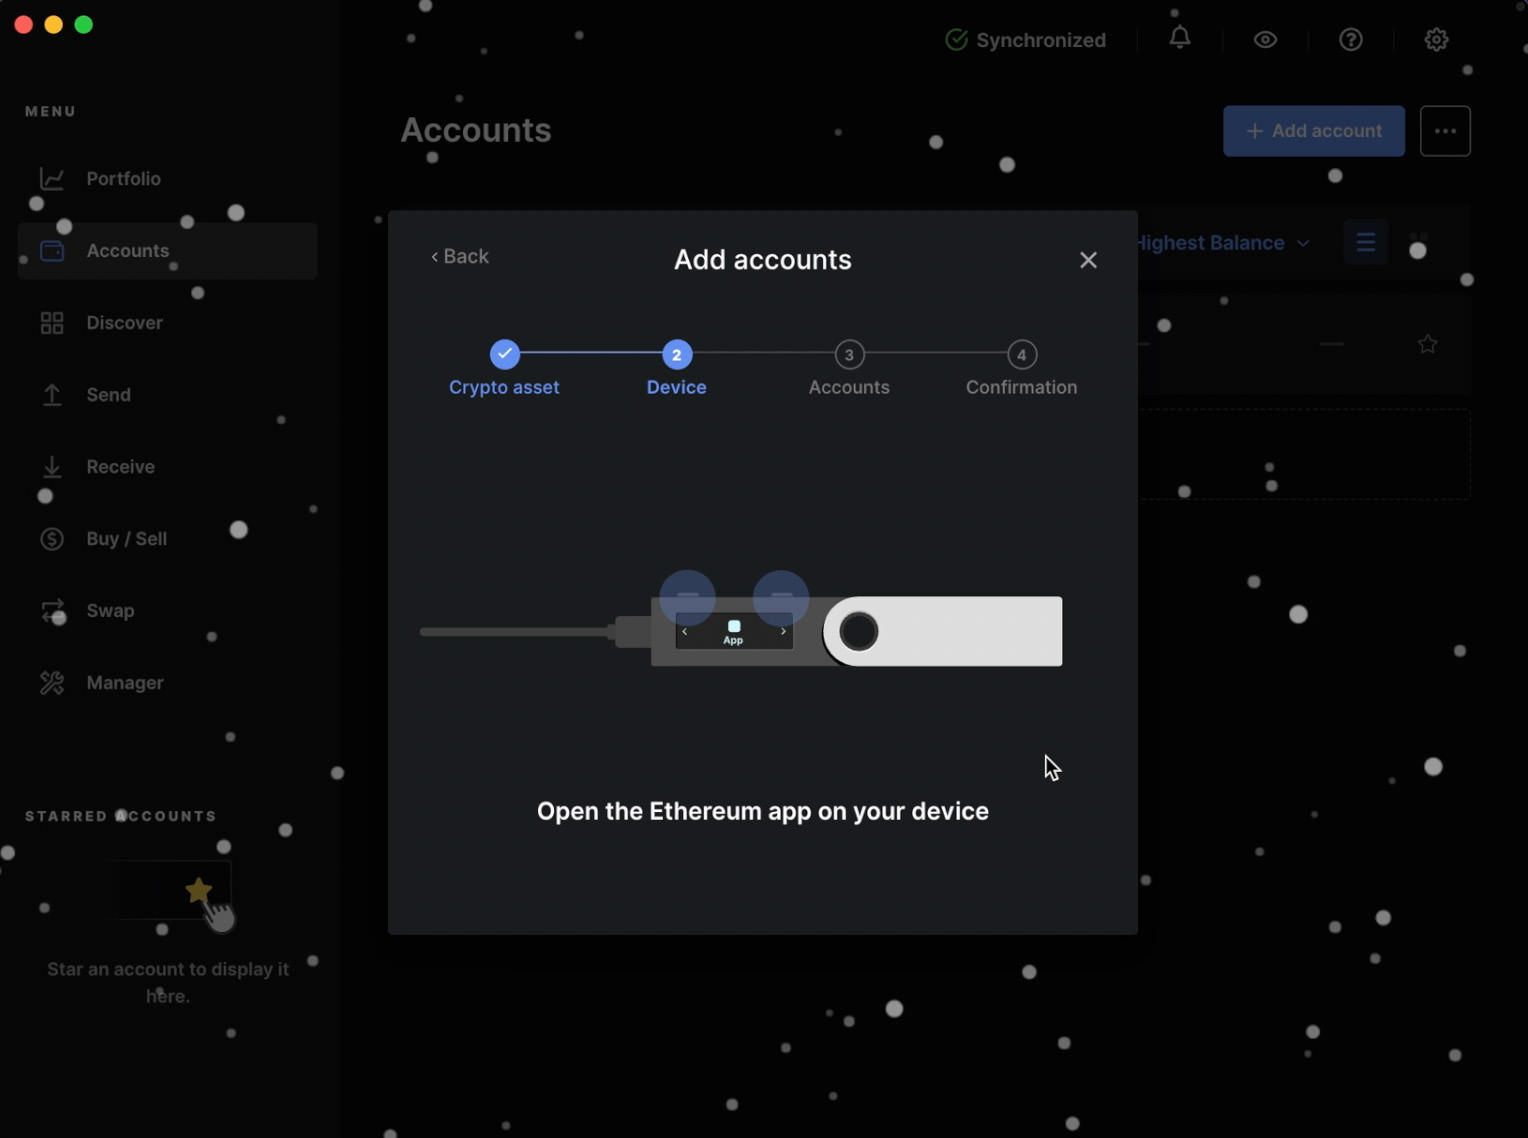
- Now, go to your Nano S device. If it isn’t connected, you need to connect it and enter your PIN. If it’s connected then click both buttons simultaneously to open the Ethereum app.
- The synchronizing process will then start and would take around 5-10 seconds.
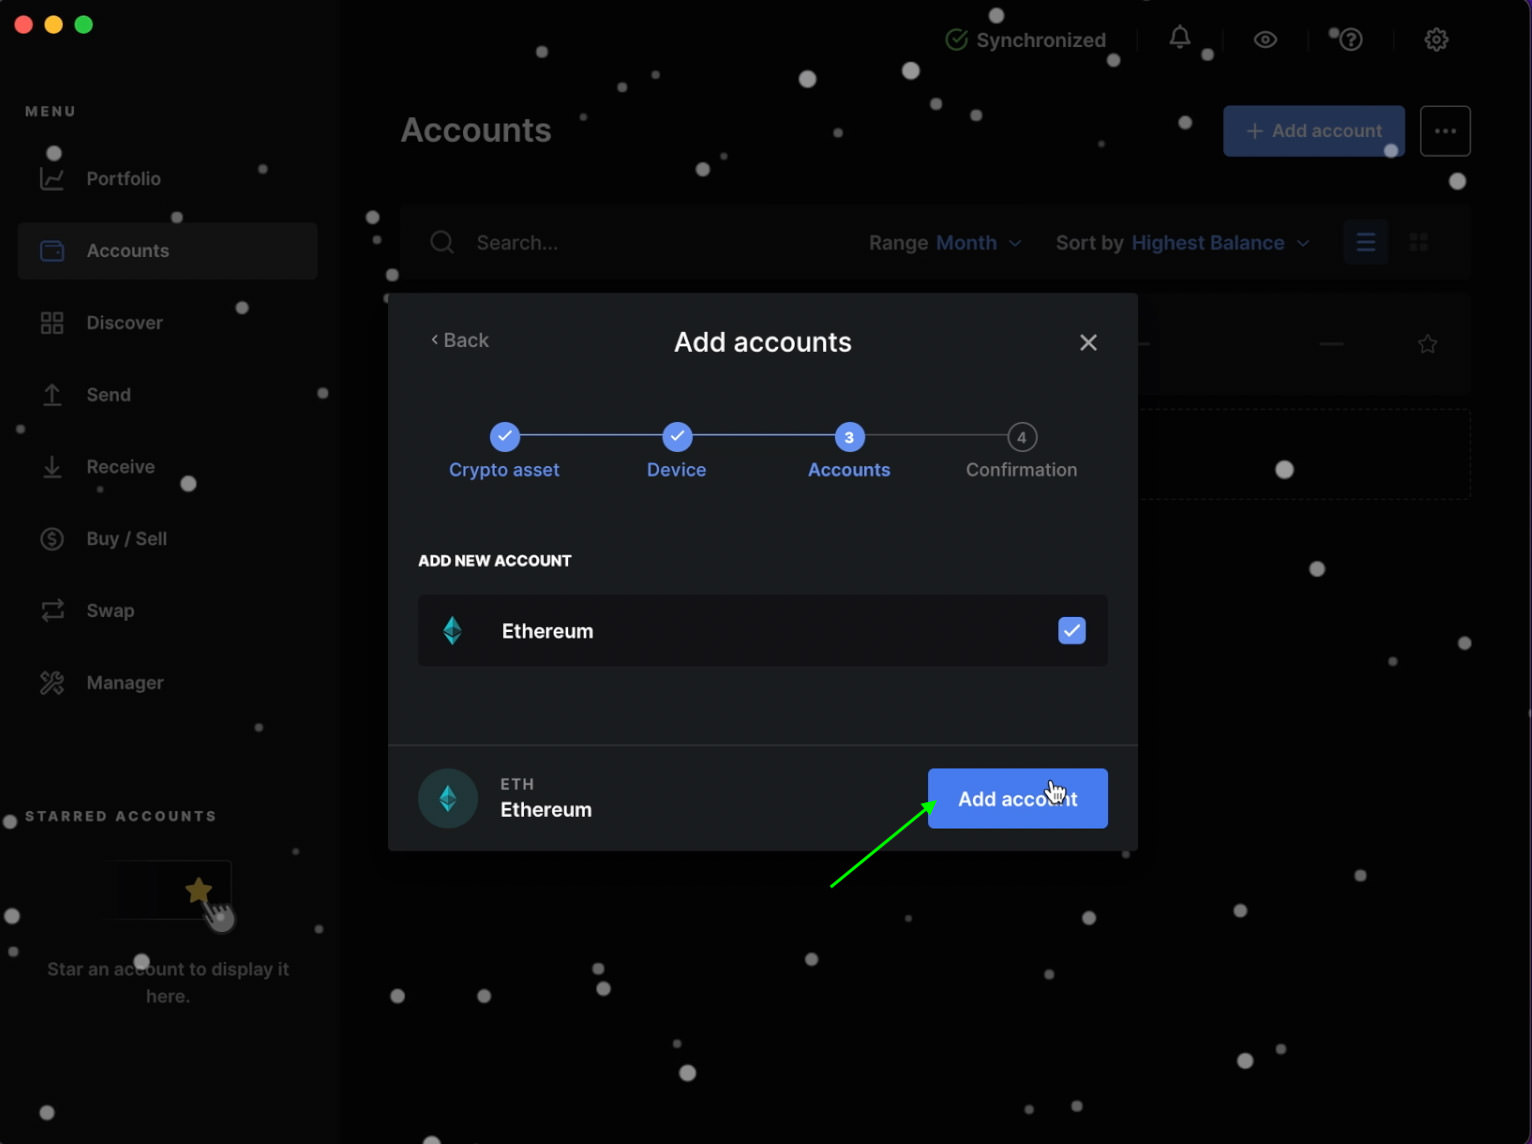
- Give your new Ethereum account a name, click on the "Add account" button and then click Done on the next page.
- That’s it. You should now see your crypto (in my case, the Ethereum) account being listed in the Accounts page.


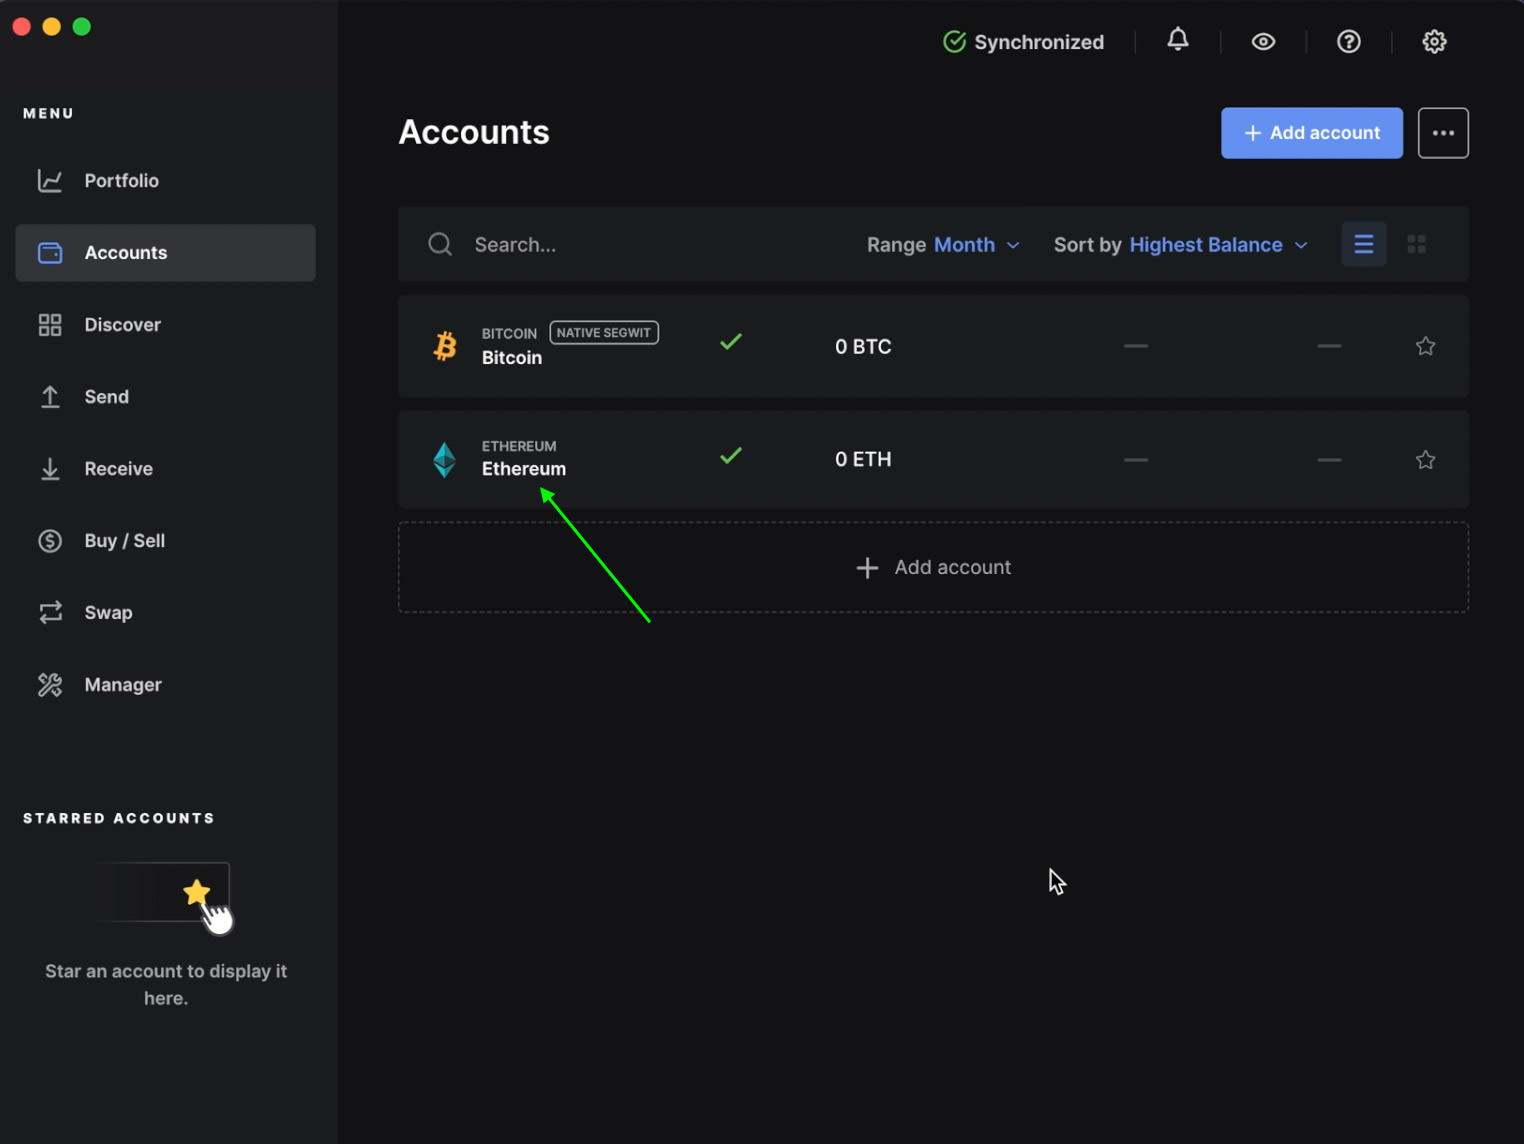
Note: Again, you will need a different account for each cryptocurrency you intend to store in your hardware wallet. I.e., To store Bitcoin, Ethereum, and Dogecoin in your Nano S hardware wallet, you will need to repeat these steps to create each a different account.
7. Sending crypto to Nano S hardware wallet
Now, assuming that we’ve got few different cryto accounts created, let’s proceed to transfering some coins into it.
Here, I’m going to show you how I send Dogecoin from my Coinbase software wallet to this Nano S hardware wallet.
On the Desktop app…
First, we will need the Dogecoin’s wallet address. To retrieve it:
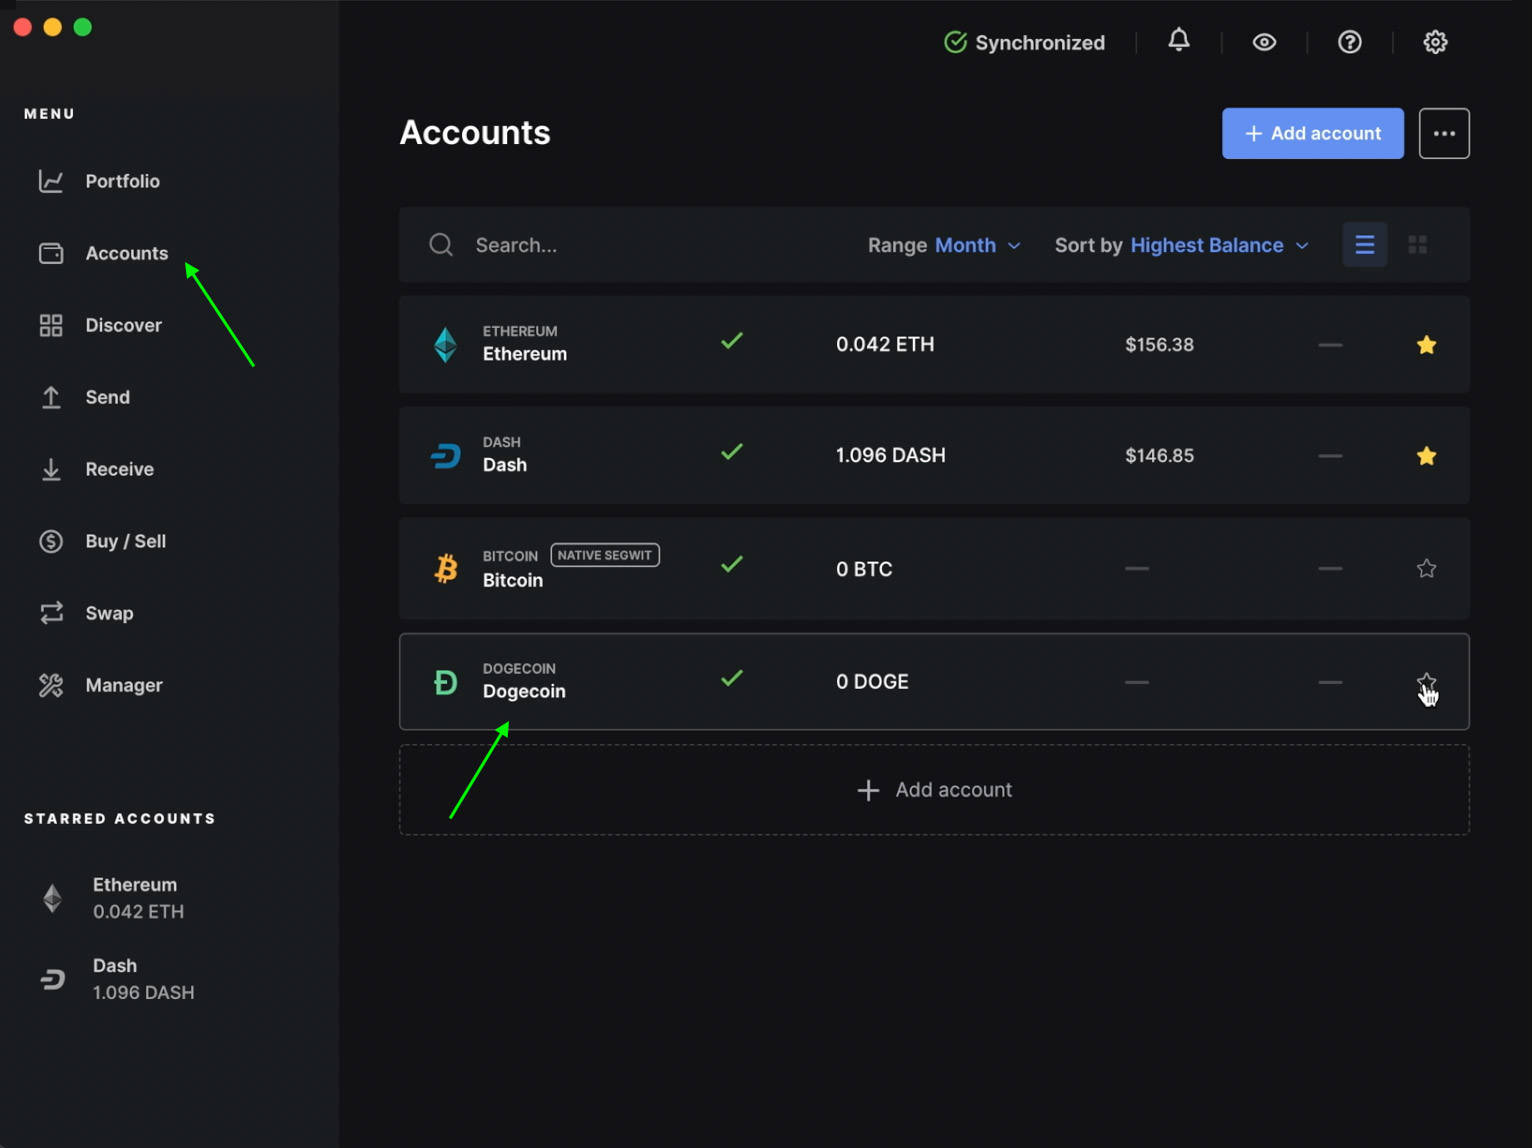
- Go to Accounts on the left sidebar, then click Dogecoin.
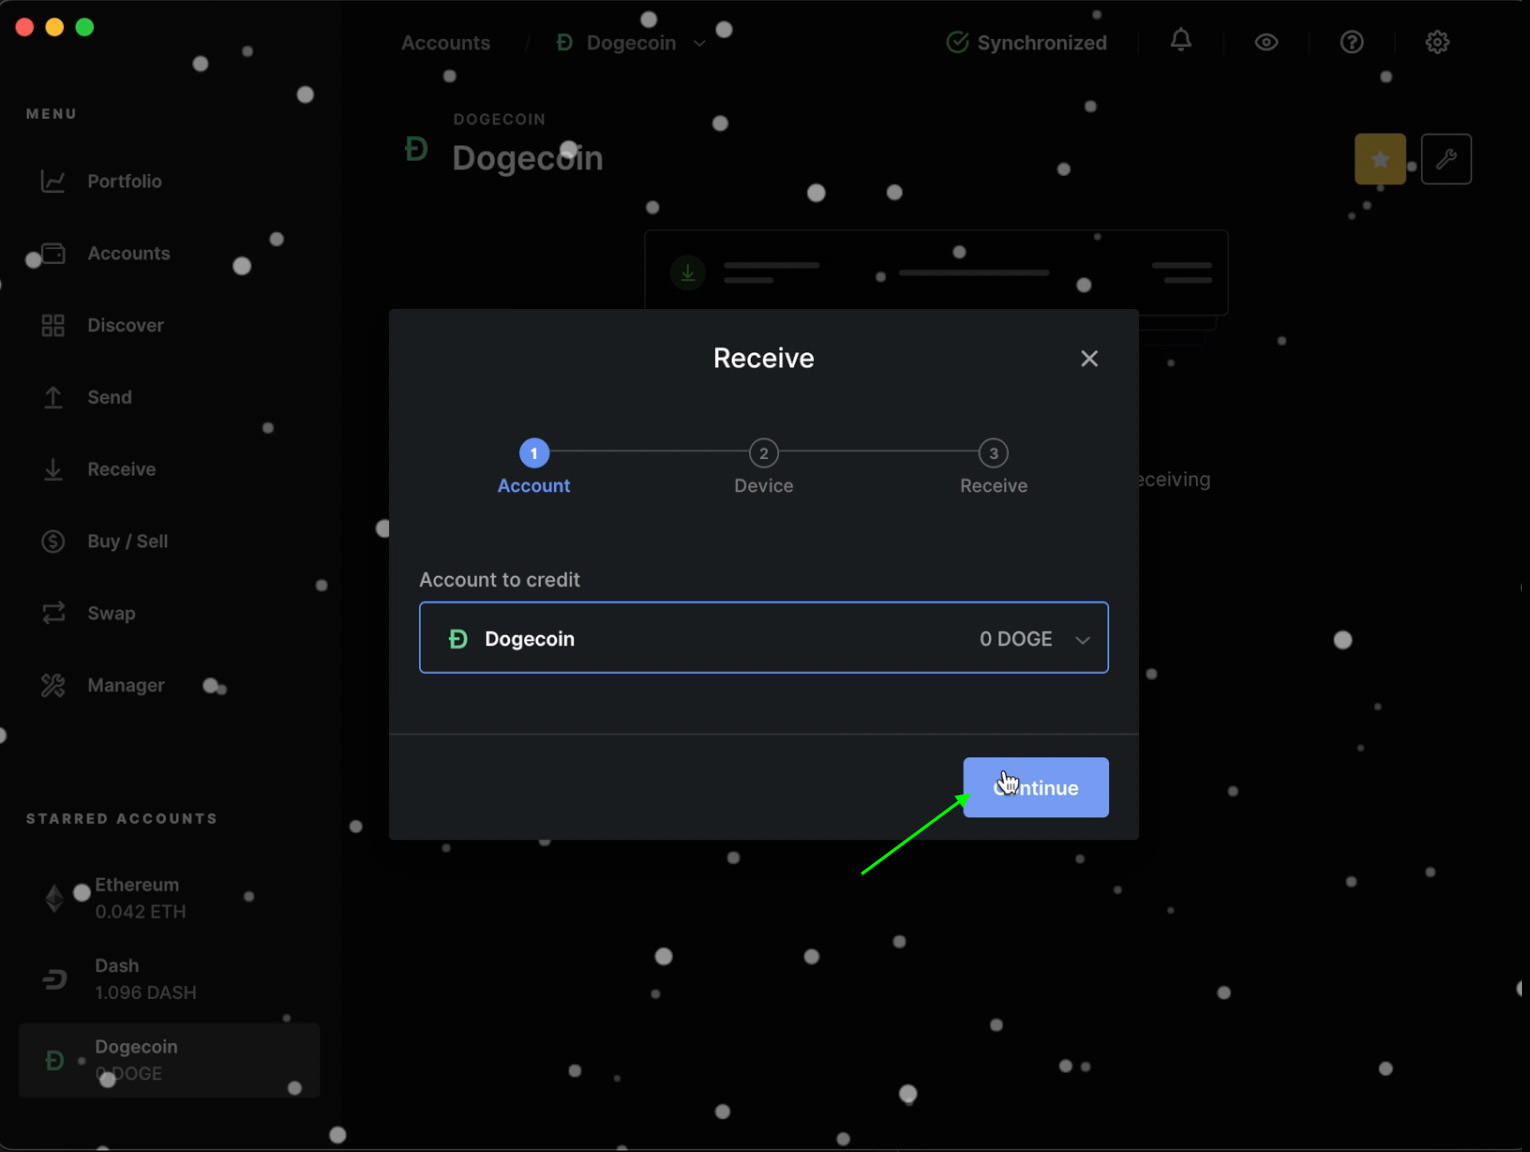
- Click Receive and then click Continue.
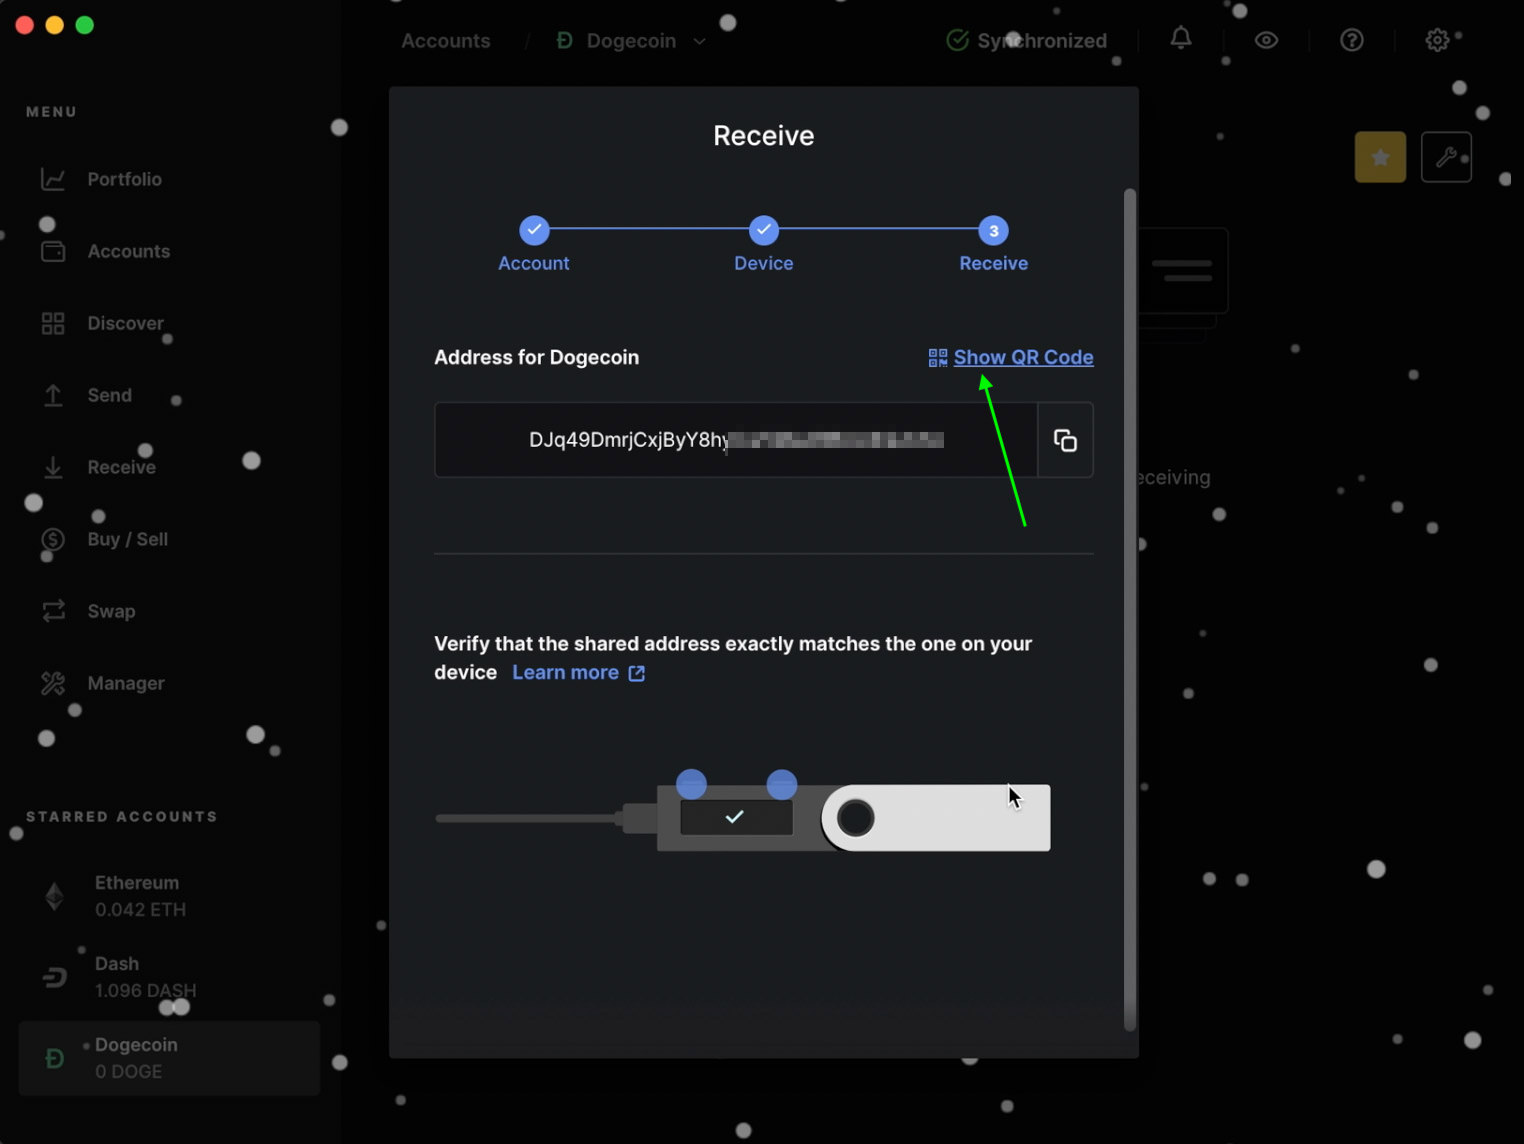
- The Dogecoin address will then be displayed to you.
- Click "Show QR Code" to bring up the Dogecoin address in QR code.
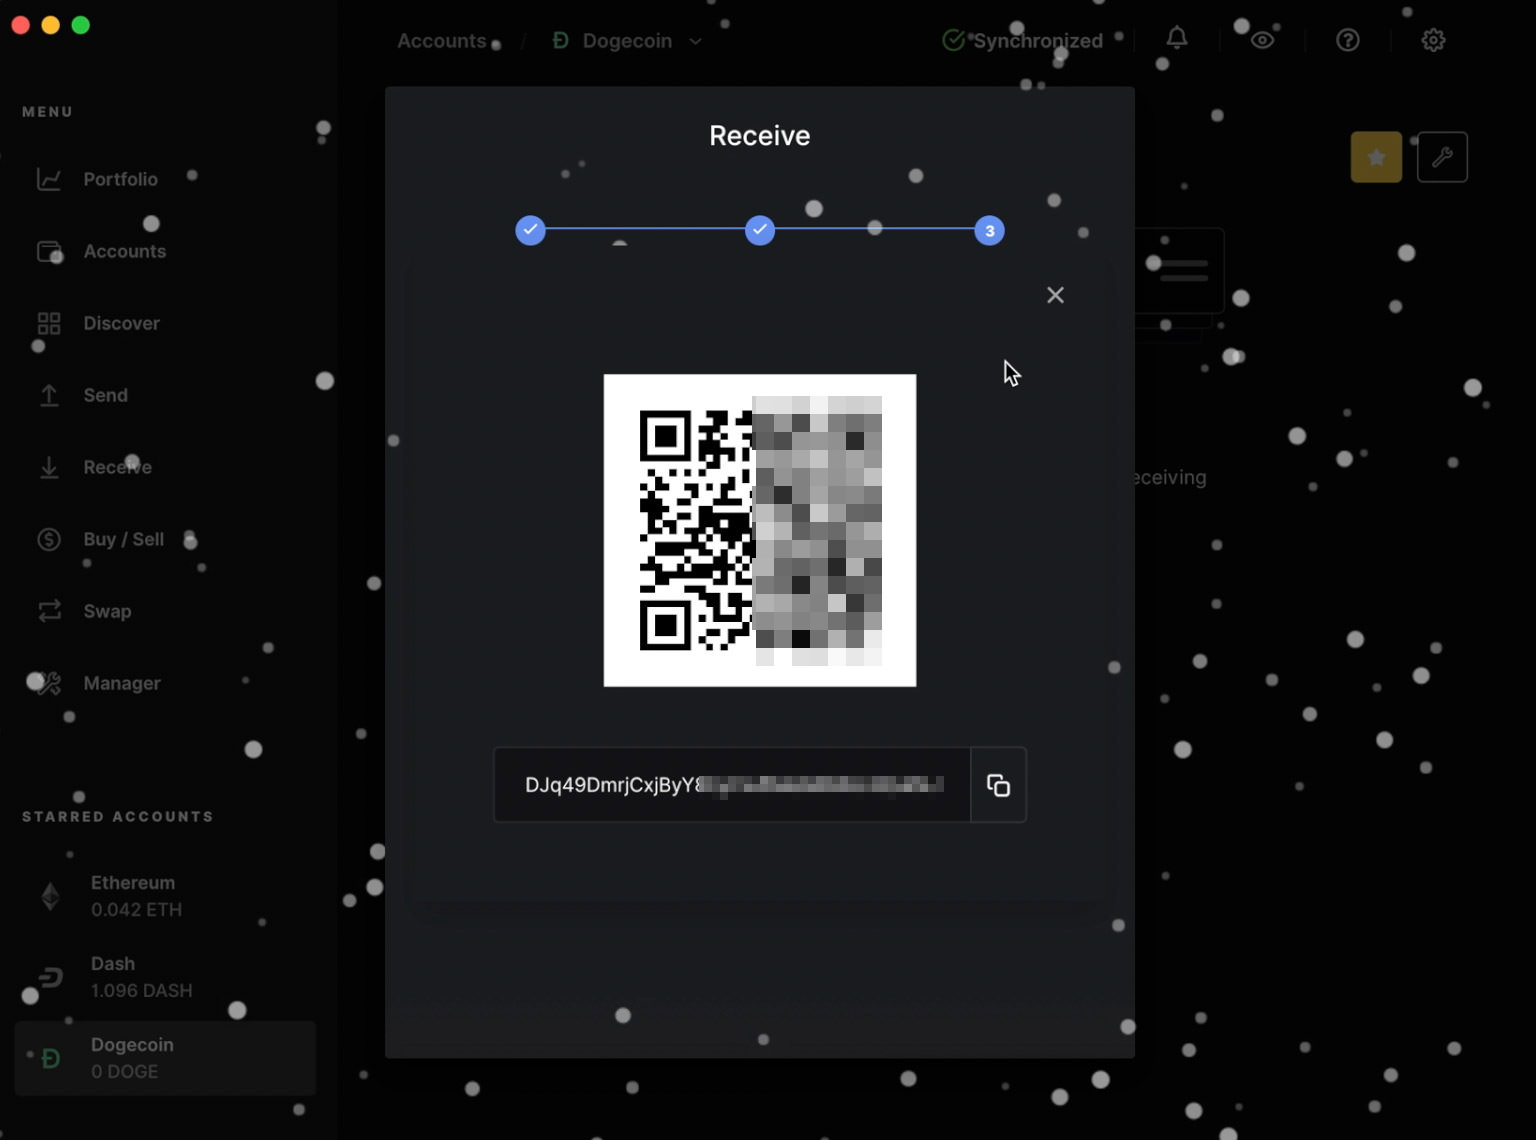
Note: Any Dogecoin successfully sent to this address will be stored in the Ledger Nano S hardware wallet.
On the mobile phone…
Now, on the mobile phone, I’m going to launch the Coinbase Software Wallet app so I can then transfer some Dogecoin in it over to the Nano S device.
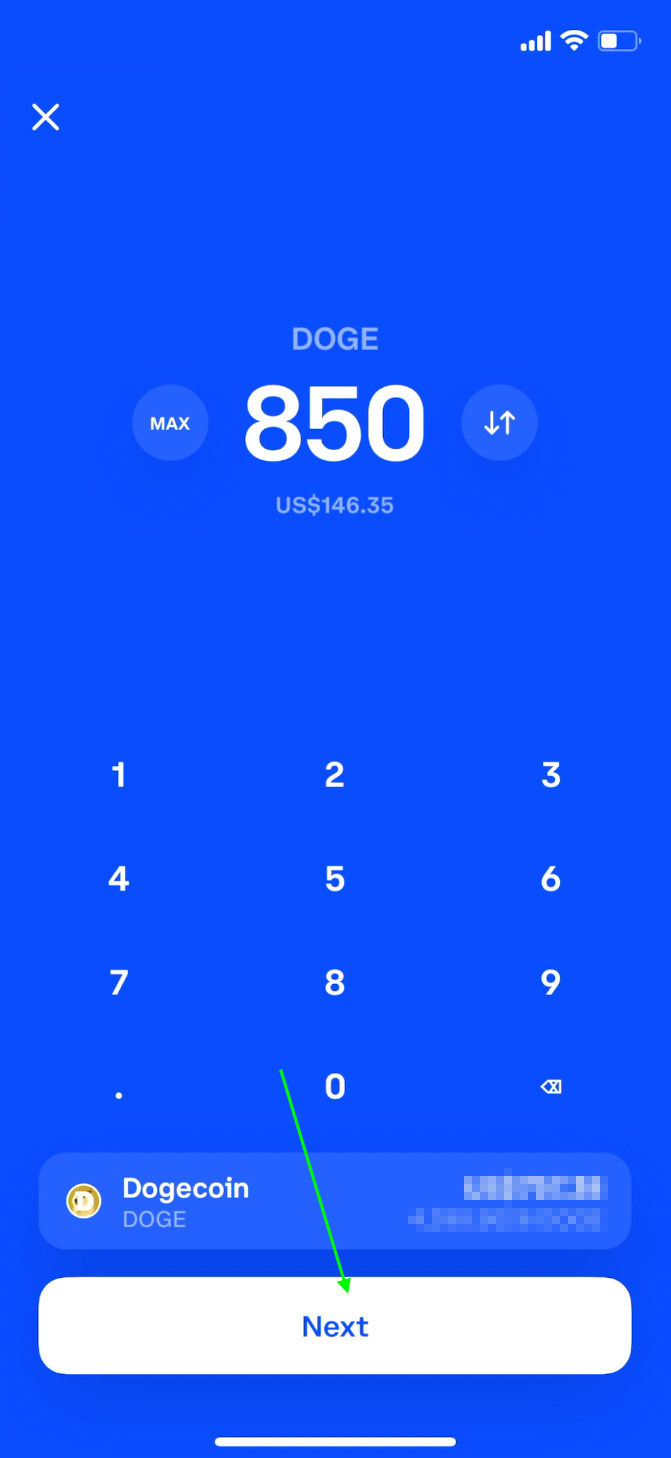
- In the Coinbase wallet, enter the number of DOGE to send, then tap Next.
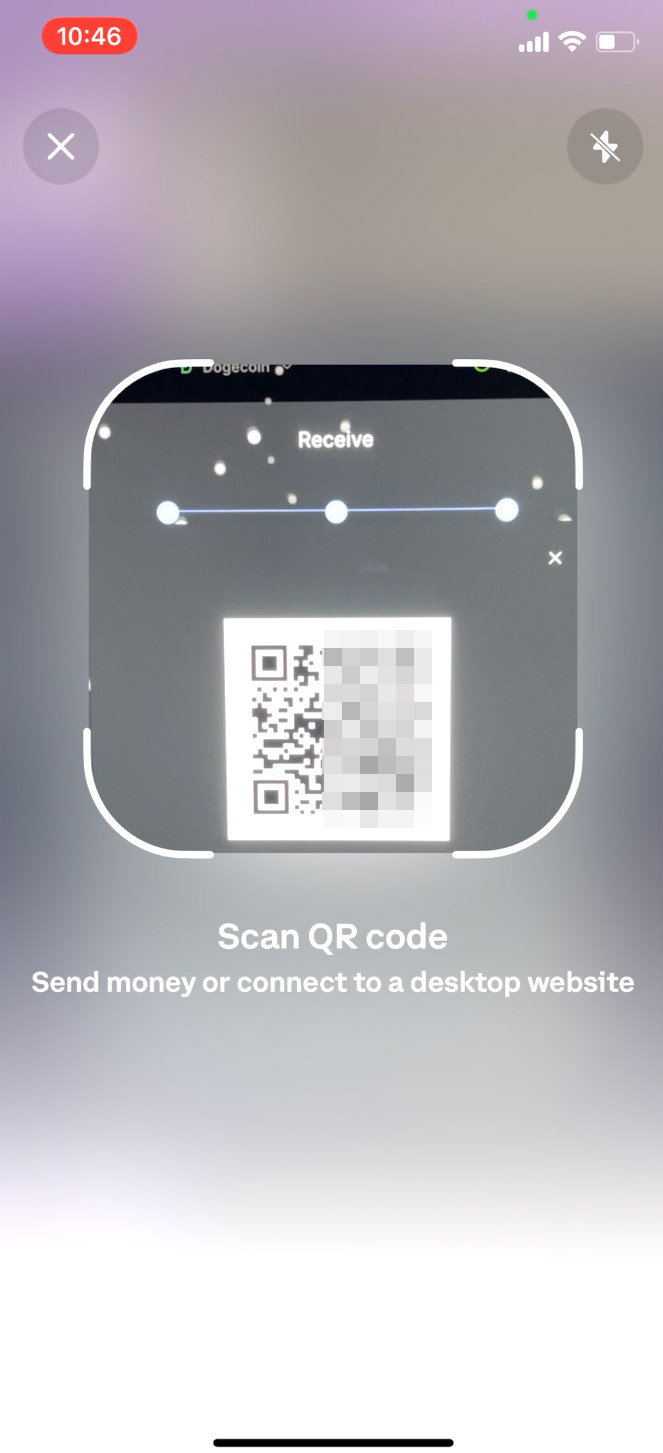
- On the next screen, tap on the small QR code icon to activate the phone’s camera.
- Now point the camera to the QR code on the Desktop app to retrieve the Dogecoin address.
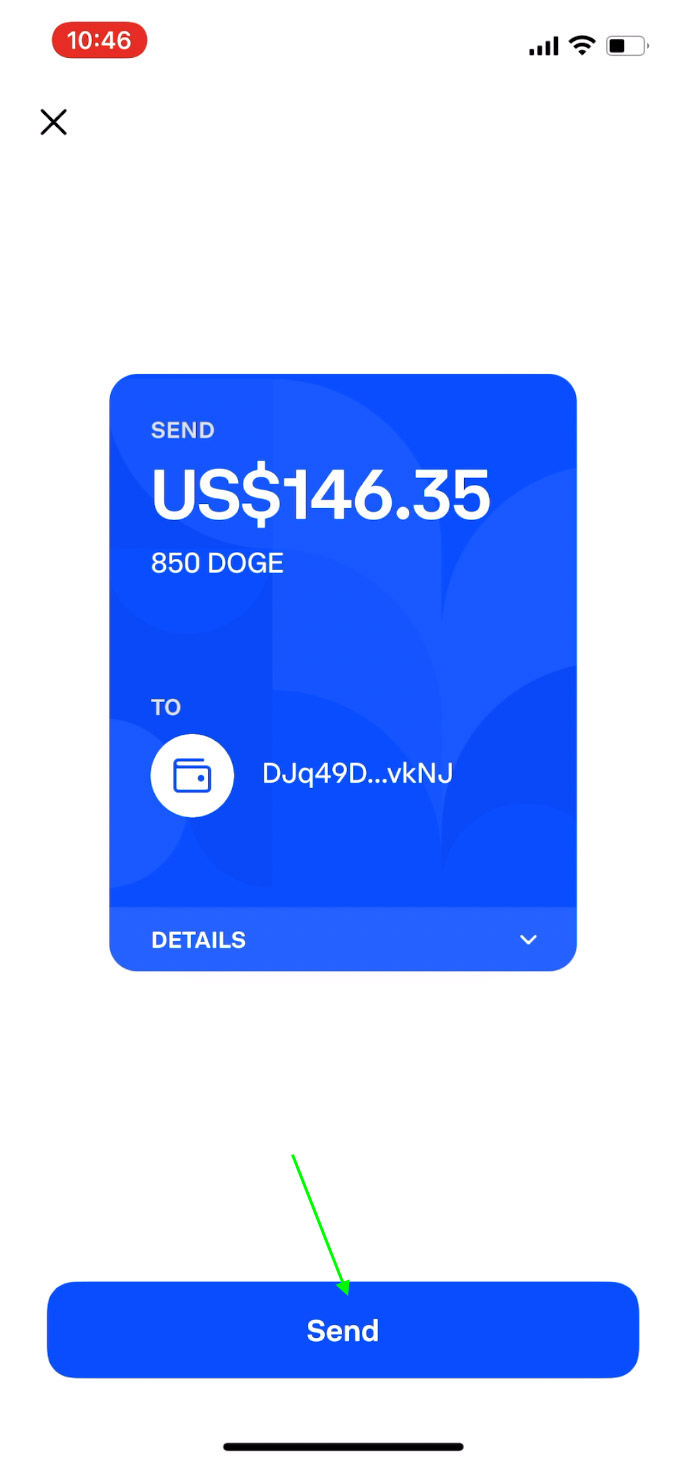
- Confirm the amount and the address, and then tap Send.
- It might take a while for the transaction to be completed. And once it’s done, you will see the amount of Dogecoin being reflected in your Desktop app.
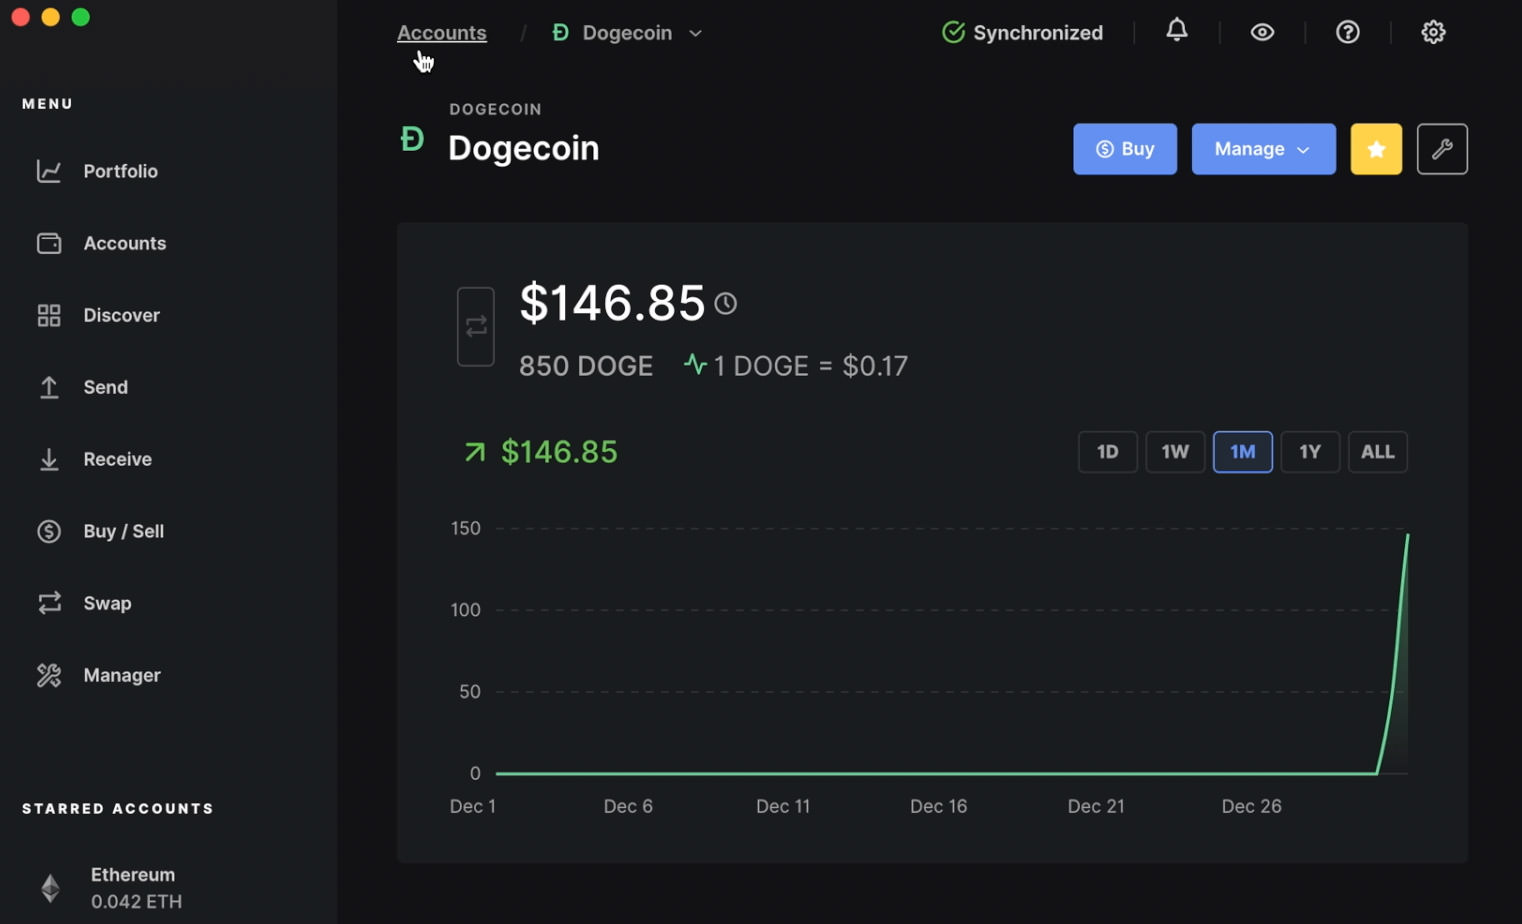
When you see this, that means your Dogecoins has been successfully transferred from the Coinbase software wallet to Ledger Nano S hardware wallet.
And that concludes our whole walkthrough. I hope you found this useful.