How to Create a Painting Photo Effect With Photoshop
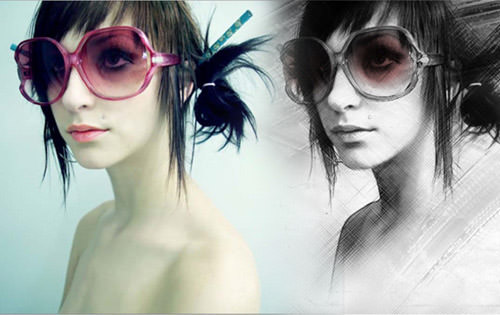
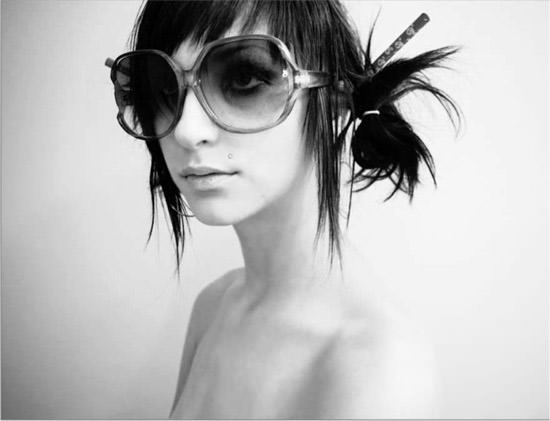
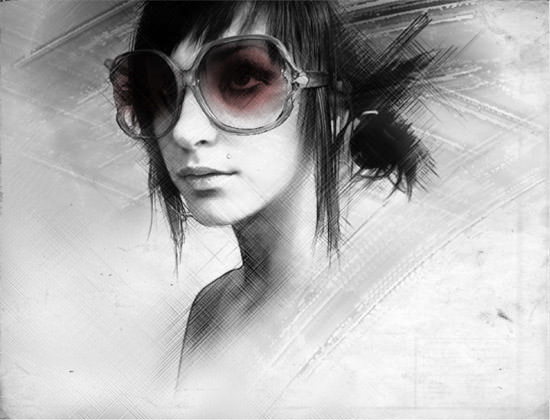
Want to inject a little uniqueness in your ordinary portrait photo? In today’s Photoshop tutorial, we show you how to touch up your photo, giving it some painting and sketching effect as shown in image below.
The steps are pretty simple and straight-forward. Before we get started, we’re going to need a few things. We recommend that you download them before going into the tutorial.
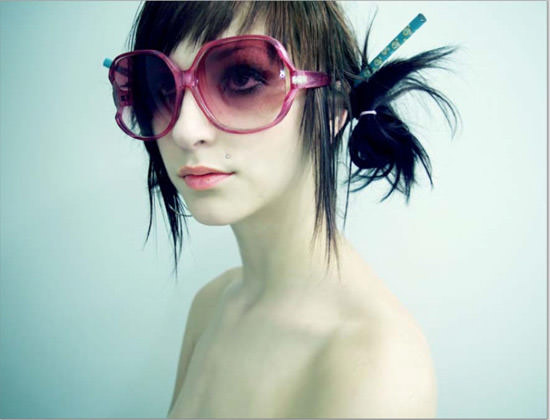
- Girl photo by Megancatfish (Deviantart)
- Grunge paper texture by Bashcorpo (Deviantart)
Let’s get started!
Step 1
Start by creating a new canvas of 600×400 (or any sizes you think fit) in Photoshop. Create a new layer, call it "Layer 1" and place the photo we downloaded earlier inside.
Step 2
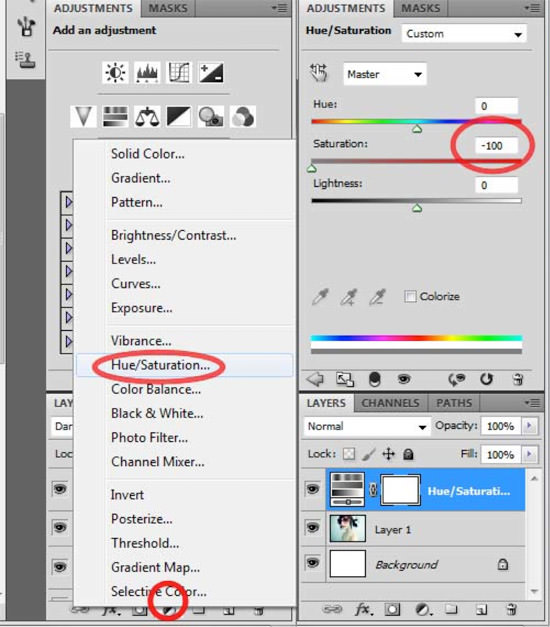
In this step, we’ll first turn it ito a black and white photo. You can use any technique, but we are going to make use of the Hue/Saturation.
Look for Hue/Saturation under Adjustments palette (Windows > Adjustment). Decrease its Saturation value to -100. A "Hue/Saturation 1" layer will then be added to your Layers palette.
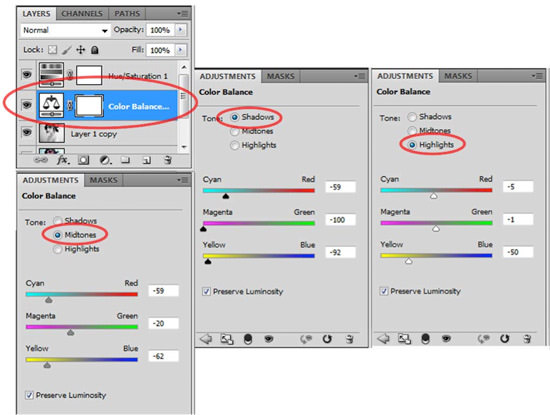
With "Layer 1" selected, find and add Color Balance under Adjustments palette. A "Color Balance 1" layer will then be added to your Layers palette.
Under the Color Balance’s Adjustment palette, switch Tone to Shadows and the following values:
- Cyan/Red: -59
- Magenta/Green: -100
- Yellow/Blue: -92
Then switch Tone to Highlights, and enter the following values:
- Cyan/Red: -5
- Magenta/Green: -1
- Yellow/Blue: -50
Your temporarily result will look something like the image below. Let’s go ahead and merge all the layers. To do that, we’ll first select all 3 layers "Hue/Saturation 1", "Color Balance 1" and "Layer 1" and then we hit Control + E (or Layers > Merge Down).
Let’s call our new marged layer "Girl"
Step 3
Create a new layer with command Ctrl + Shift + N, fill it with white color with command Ctrl + Backspace. Move it bottom so it stays below the "Girl layer"
Double click "Girl" layer to bring up the Layer Style dialog. Under the Blend If: section, look for the white triangular of This Layer:, hold the Alt key, and drag the white triangular towards the left until you reach the number 191/255.

After that, merge all layers with command Ctrl + E. Make sure our layer’s name is still "Girl"
Step 4
Hit Ctrl + Shift + N to create a new layer under "Girl" layer, fill it up with white color with command Ctrl + Backspace. Make sure the "Girl" layer is selected, hit Ctrl + J seven times to create seven new copies. Turn all Girl copy X layers off by clicking on the eye icon on the left of Layers palette.
This leaves us with the original "Girl" layer. With it selected, do a Motion Blur (Filter > Blue > Motion Blur) the follwing values for:
- Angle: -22
- Distance: 484.
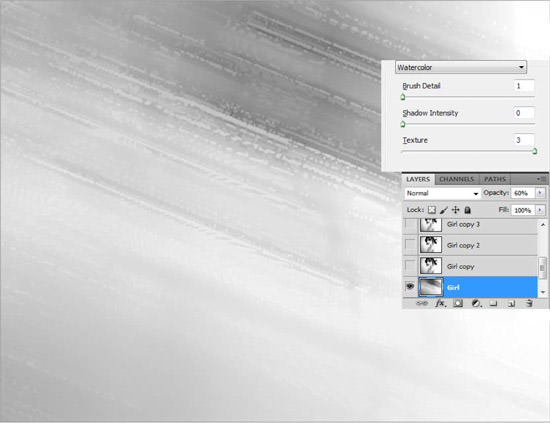
Next, let’s add some Watercolor effect (Filter > Artistic > Watercolor) and set the following values for:
- Brush Details: 1
- Shadow Intensity: 0
- Texture: 3
Hit OK, and set the layer’s Opacity to 60% and name it "Wet Brush 1".
Step 5
Moving up the Layers palette, look for the "Girl Copy", click on its eye icon to make it visible. Apply Motion Blur (Filter > Blur > Motion Blur) with the following values:
- Angle: 22
- Distance: 247
Then we add Watercolor (Filter > Artistic > Watercolor) like we did in Step 4. No change to Watercolor settings, hit OK when done. With the layer selected, set its Opacity to 85%.
Now, let’s give it a little hand-sketching feel. With "Girl Copy" later still selected, go into transformation mode with command Ctrl + T. Rotate it 90 degree CW, hit Enter/Return to confirm its transformation.
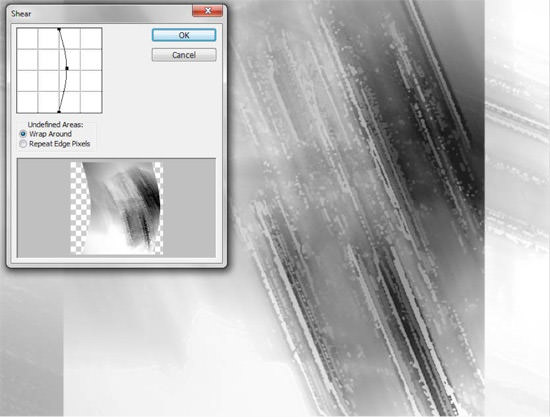
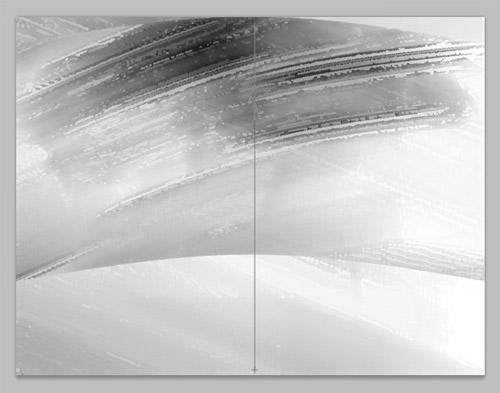
Give it a little Sheer effect (Filter > Distort > Shear) as showned in the image below, and then rotate it back to 90 degree CCW.
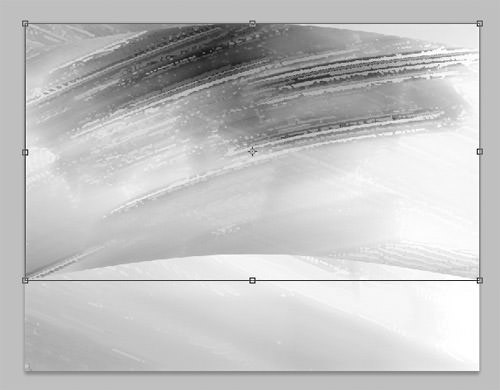
Hit Ctrl + T again to go into transformation mode. Move it back to fit the canvas, and decrease its height for about 40%.
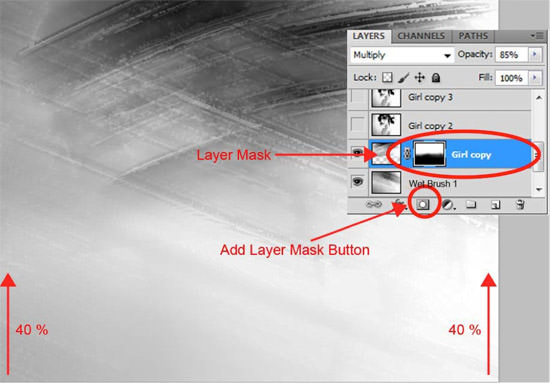
With "Girl Copy" layer still selected, click Add Layer Mask button at the bottom of Layers palette to give it a mask layer. Select the Gradient Tool with the command G, and give the mask layer a gradient of white (top) and black (bottom).
Now, you may notice some hard edges and we are going to clean it up. Select Brush Tool with the command B with the following values:
- Size: 150px
- Hardness: 0%
- Opacity: 30%
Paint on the hard edges and corners repeatly to smoothen things up.
Step 6
Select "Girl Copy 2" layer, click the eye icon to make it visible. Get Sprayed Strokes (Filter > Brush Stroke > Sprayed Strokes) and set the following values:
- Stroke Length: 20
- Spray Radius: 20
- Stoke Direction: Right Diagonal
We proceed to getting some Angled Strokes (Filter > Brush Stroke > Angled Strokes) and give it the following values:
- Direction Balance: 100
- Stroke Length: 50
- Sharpness: 10
Set the Opacity of this layer to 70% and double click it to bring up the Layer Style dialog. Under Blend if: section, hold Alt key and drag white triangular towards the left until you see the number 144/221.
Click OK to return to the canvas, select Gaussian Blur (Filter > Blur > Gaussian Blur) and give it a Radius value of 0.8px. Name this later "Dark Strokes" and set its blending mode to Hard light.

Step 7
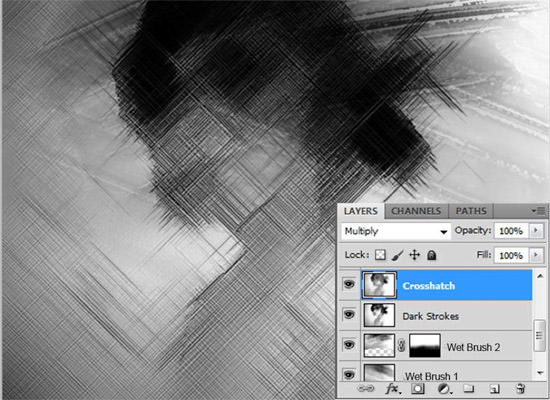
Select "Girl Copy 3" layer, click eye icon making visible. Give it a Crosshatch (Filter > Brush Stokes > Crosshatch) with the following values:
- Stroke Lenght: 50
- Sharpness: 14
- Strength: 3
Then, give it Gaussian Blur (Filter > Blur > Gaussian Blur) of 0.4px. Set the layer’s Blending mode to Multiply, and lastly, name the layer "Crosshatch"
Step 8
Yeap, you guessed it. Open up "Girl copy 4". Change its layer Opacity to 85%. Now, with "Girl copy 4" selected, hold the Alt key and click Add layer mask on the bottom of Layers palette. This allows us to add layer mask but hiding it at the same time.
Get the Brush tool with the command B, and select the following values:
- Size: 150px
- Hardness: 0%
- Opacity: 20%
Make sure the foreground color is white, start painting repeatedly on the face and body and to reveal them. Focus on main parts like eyes, lops and nose. Use White color to reveal parts you want to show, and Black to hide them. Our aim here is to maintain artistic and sketching effect; make it looks dirty, but not too dirty. You get the drift.

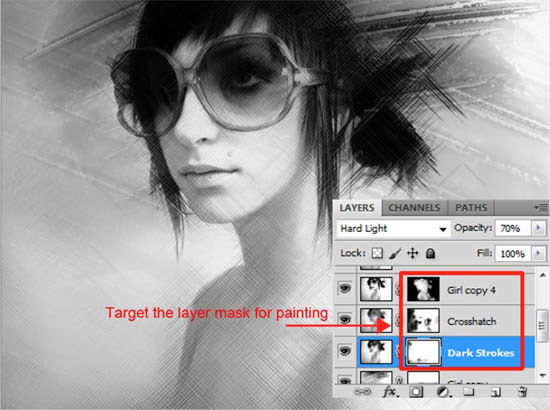
Once you are happy with the result, we fall back to "Crosshatch" layer. Select the layer, hold the Alt key and add a Layer mask. Do the same as you previously did – paint it with Black and/or White brush until you get similar result like the image below.
Step 9
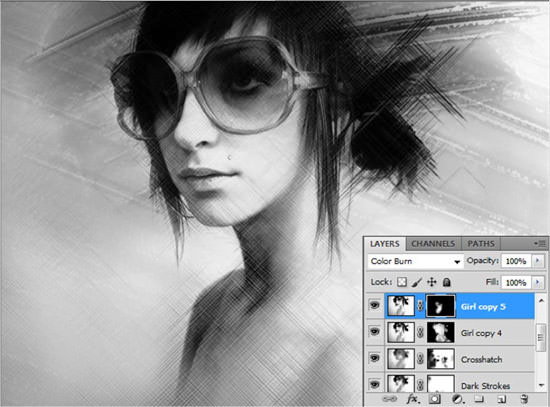
Next, we go to "Girls copy 5" layer. Double click the layer to bring up Layer Style dialog, change Blend Mode to Color Burn.
Again with the later selected, hold the Alt key and click Add layer mask button. Our aim here is to make the face and body darker so we grab the Brush tool with command B and repeately painting on those parts until you get result like the image below.
Step 10
Now we want to add some edges on it. Select the "Girl copy 6" layer, click on its eye icon to make it visible.
Look for filter effect Glowing Edges (Filter > Stylize > Glowing Edges), set the following values:
- Edge Width: 1
- Edge Brightness: 20
- Smoothness: 10
Click OK, then hit command Ctrl + I to invert it. Set the image’s Brightness/Contrast (Image > adjustments > Brightness/Contrast) to:
- Brightness: 150
- Contrast: 100
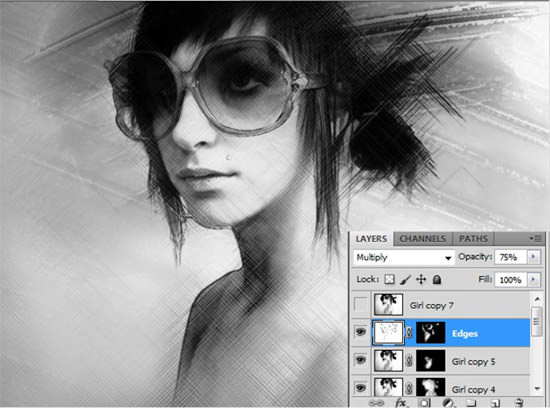
Set the layer’s Blending Mode to Multiply and Opacity 75%. Again, like our previous steps, hit Layer mask button while holding Alt key. Get the Brush B tool, paint gently on the image to reveal some smooth edges.
Name this layer "Edges".
Step 11
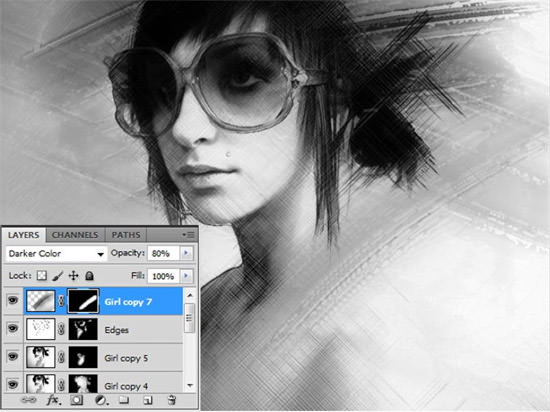
Moving on, turn on "Girl Copy 7" layer. Our goal here is to get some wet brush the shoulder, we’ll do something similar to what we did in Step 5.
Call up Motion Blur (Filter > Blur Motion Blur), set the following values:
- Angle: 0
- Distance: 600px
Give it Watercolor (Filter > Artistic > Watercolor), hit OK with default settings. Then we bend it with Shear effect (Filter > Distort > Sheer). Use command Ctrl + T to go into Tranformation mode, rotate the image a little to the left (or right) and hit OK.
Hold Alt key and click Add Layer mask, and paint some White Color with Brush B tool over the shoulder.
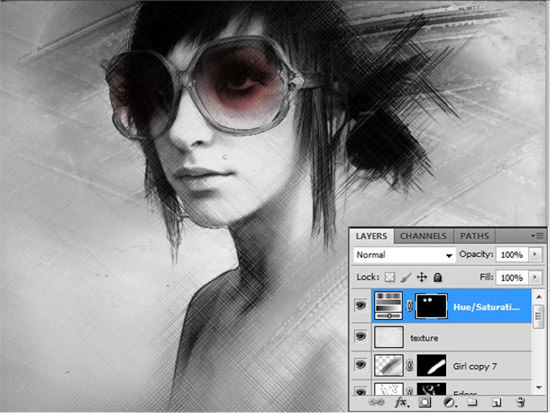
Step 12
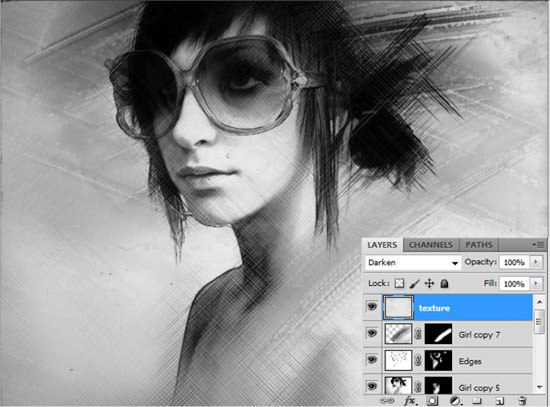
Now we’d like to enhance the texture effect for this art. Download Paper texture v5 by Bashcorpo, pull it inside our working PSD file and fit it on top of our layer. Hit Ctrl + Shift + U to Desaturate it, and change the layer’s Blending Mode to Darker Color.
Now, because the texture image is actually bigger than our image, you can move it around to see which part of the texture fits best.
Step 13
It’d will be nice to give the image some Sin City effect. Let’s go ahead and add some red color for the glasses. To do it, go to Adjustments palette (Windows > Adjustments) and click on the Hue/Saturation button. A "Hue/Saturation 1" layer will then be created. Check the Colorize checkbox, and the following values:
- Hue: 0
- Saturation: 20
- Lightness: 0
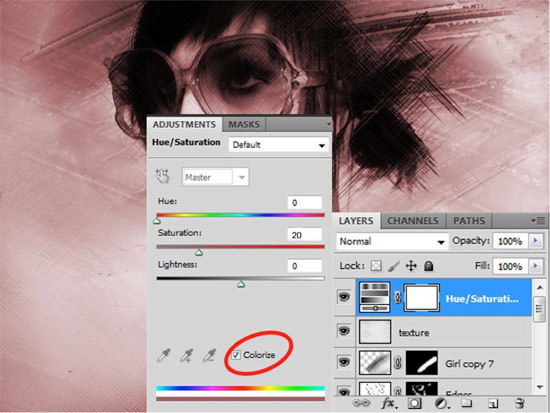
Select the Layer mask, and hit command Ctrl + I to hide all the reds. To reveal the red color over the glasses. let’s use a standard soft round Brush B with the following settings:
- Size: 80px
- Opacity: 30%.
Repeat clicking on the center of the glasses to get feather effect, like what’s shown in the image below.
Step 14
We are almost done! Now if you are unsatisfied with any of the effects, feel free to go down each of the layers and give it some final touch-ups with Brush B tool. Remember, White’s to reveal, Black’s to hide.
We hope you get a similar effect like the image below.
Download
Click here to download the PSD for this tutorial.