How to Create a TRON Minimal Design – Photoshop Tutorial
TRON is definitely one of the geek’s dream-come-true movie. It’s suit and vehicles are perfectly slick which is why the attempts to assemble objects that replicates tools in TRON has been surfacing around the Internet. As for designer’s, with the right clicks and tricks using Photoshop, a TRON fiction does not need to be hard.
Today we will create a TRON wallpaper in Photoshop using stock photos and vectors. We will give you a precise guidance on how to do it and why certain method is better. You will get an in-depth comprehension of what you are doing. Buckle up for digital dream!
You will learn how to:
- Analyze your design from out-of-the-box point of views
- Create structured designs, based on hidden or related elements in your composition
- Use shortcuts for a faster work flow
- Make complex selections and cutouts via Channels
- Effectively use general tools
- Add perspective to your design
- Combine vectors with pixels
- Create light effects
- Use blending modes
- Use layer styles
Difficulty: Beginner – Intermediate. Completion time: 1 hour. Tools: Photoshop CS3, Illustrator CS3 optional.
Resources:
- Model 1 by Marcus J. Ranum
- Model 2 by Marcus J. Ranum
- Tech Vector Pack 3 by designious.com
- V5 Prophit font by dafont.com
NOTE: To install the font, extract on Desktop the .zip archive containing the font, then copy them. Go to C:\Windows\Fonts\ directory and paste them in.
Why can’t I just extract them directly to the Fonts folder?
Your operating system won’t allow your archiver to modify or add any file within the C:\WINDOWS\ directory, so that’s why you need to do this manually. If you have opened Photoshop, restart it, or else you won’t be able to see the newly installed font.
After I chose my resources, I started sketching up some lines based on the model. Below is a schematic of the inspiration sources for the glowing lines on the body: pose, muscles, apparel, body shape, weight distribution and bones.
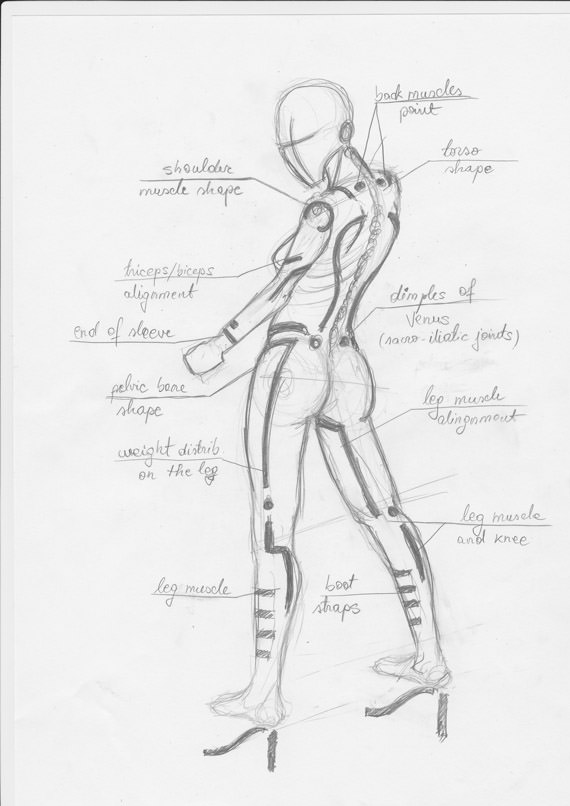
To enhance a model’s pose or body features, it’s not enough to just throw some random lines on.
Everything must have a source, be it shown or hidden. Keep in mind that my sketch is only one of the infinite possibilities you have, I encourage you to experiment.
Let’s begin!
Step 1
Go to File > New, and set it to 1920x1080px in RGB color mode at 72 dpi.

Step 2
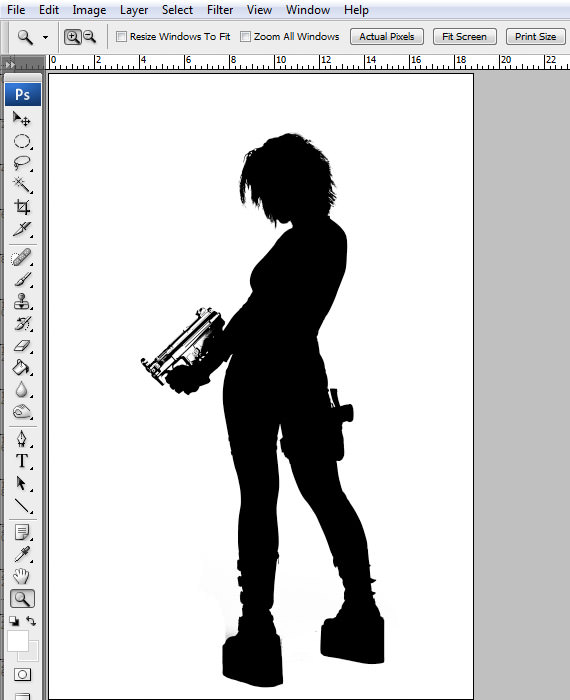
Open the Veteran_of_the_Psychic_Wars_11_by_mjranum_stock.jpg. In the Layers palette, F7 double-click the lock near the layer thumb. This is compulsory if we want to edit the image via Channels. You should now have a "Layer 0".

Step 3
Go to Layer > Duplicate Layer, CTRL+J. Now go to Filter > Other > High Pass. Use a 5px setting and hit OK. In the Layers palette, F7, set Blending mode to Overlay.
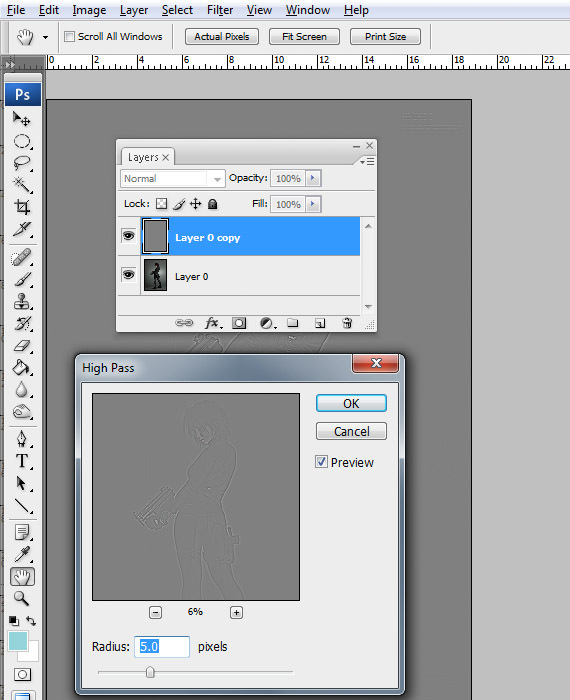
This will make the image more clear and it will allow you to make a more precise selection of the hair.

Step 4
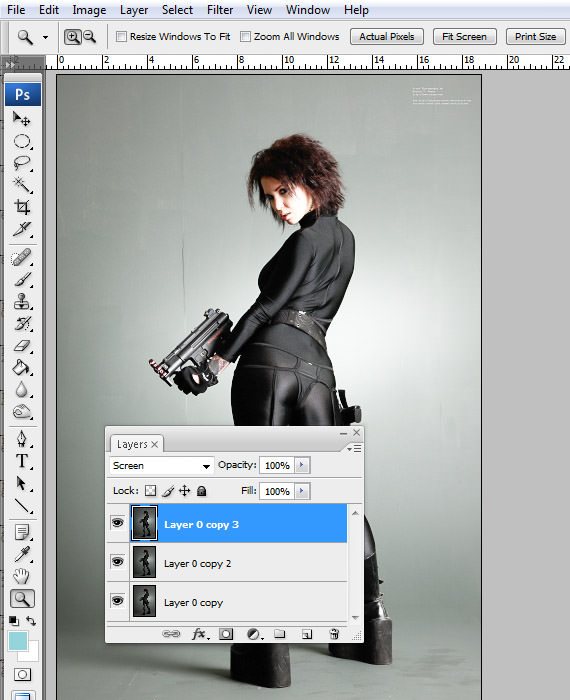
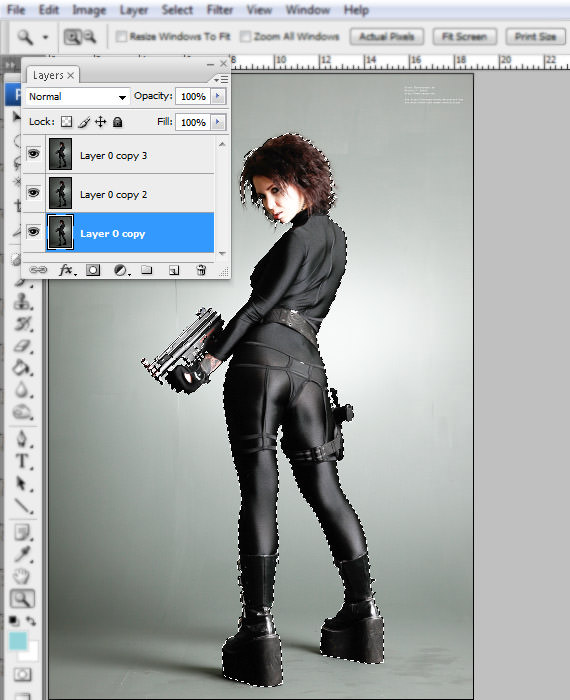
Go to Layer > Merge Visible, CTRL+SHIFT+E, then go to Layer > Duplicate Layer, CTRL+J. Set Blending mode of the copied layer to Screen, then duplicate it two more times. Now we have a nice contrast between the model and the background.
Step 5
Go to the Channels window Window > Channels and select the "Green" channel. Right-click it and select "Duplicate channel".

The "Green" channel provides the highest contrast of all the channels. We duplicate it because we need dummy channel to work on to further improve the contrast.
Step 6
Go to Image > Adjustments > Curves, CTRL+M and shape the curve as shown below. The lower half will darken the shadows and the upper half will lighten the highlights. Do this twice.

Step 7
Go to Layer > Adjustments > Levels and use the settings below.

Step 8
Grab the Brush Tool, B, set Hardness to 100% and cover with black the interior white spots in the hair, the face and the rest of the body.

We don’t need any details in the channel, just the outline of the model.
Step 9
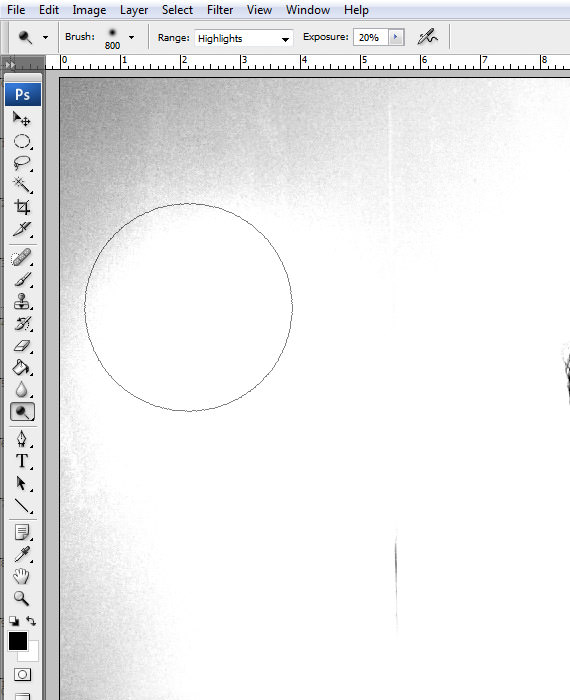
Grab the Dodge Tool, O, set it on Highlights and lighten any extra grays in the image.
Step 10
CTRL+click the "Green copy" channel thumb, go to the Layers palette, F7, Go to Select > Inverse, CTRL+SHIFT+I select the bottom-most layer and copy it, CTRL+C.
CTRL+clicking a thumbnail whether it’s channel or layer loads a selection of the contour of the clicked layer/channel.
Step 11
Go to Window > Untitled-1.psd our document and paste it, CTRL+V. Go to Edit > Free Transform, CTRL+T and resize it to fit the canvas, like below. Hold the SHIFT key to preserve its proportions. Hit Enter to exit Free Transform mode. To clear the clothing curls, use the Clone Stamp Tool, S: use ALT+click to pick source, then click on the curl.
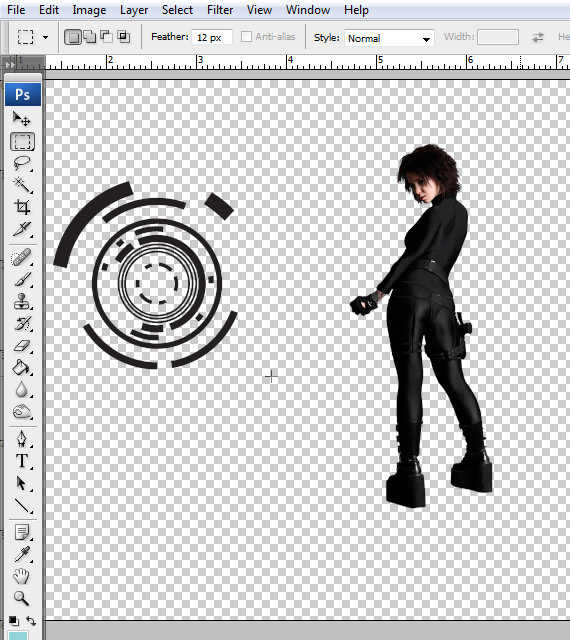
Do the same for the sword in the "model 2" picture, but use the Path Tool, P to cut it.

Step 12
Open the "Tech Vector Pack 3" .eps file. When prompted to input a file size, type in about 3000px for width. Hit OK.
For Illustrator, you simply open it in vector format. Photoshop can open .eps Illustrator 8 files, but in raster format. You can however open it in any size you want – the .eps file is vector!

Step 13
Grab the Rectangular Marquee Tool, M, select a round tech shape click-drag to create the selection rectangle, copy it, CTRL+C, go back to our document Window > Untitled-1.psd and paste it, CTRL+V.
Step 14
Go back to the vector pack file Window > designious tech shapes 4. eps, copy another shape and paste it into our document, like in Step 13.

Step 15
Grab the Selection Tool, V, check the "Auto Selection" box and click the first tech shape pasted in and duplicate it, CTRL+J. Now go to Edit > Free Transform, CTRL+T hold the CTRL key and click-drag the the top left corner, like below. Do the same for the top right corner. Hit Enter to exit Free Transform mode.

Step 16
Duplicate the first shape (original one) and place the copies as shown below. Grab the Path Tool, P, set it on Shapes and draw each glow line on the body, based in the sketch.

In the Layers palette, select all these shapes and hit CTRL+E to merge them.

Step 17
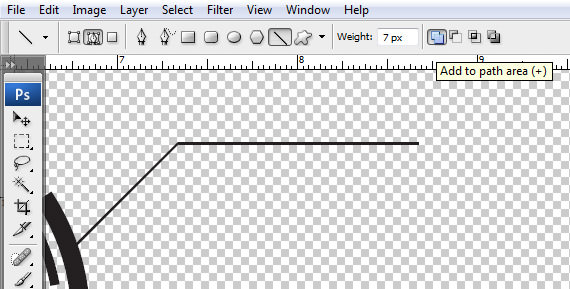
Grab the Line Tool, U, set it to Shape Layers and 7 px Width, draw an oblique line, then hold SHIFT key. Now change the line to "Add to shape area (+)" and draw a horizontal line. Hold SHIFT key to make it perfectly horizontal.
Step 18
Grab the Horizontal Type Tool, T, click-drag to create a type box and input a random text. Set the font to "V5 Prophit".
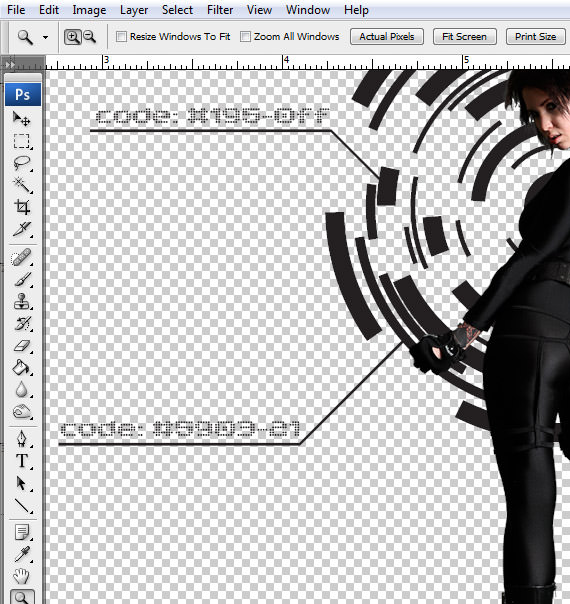
Step 19
Select the "Shape 1" layer and go to Layer > Duplicate Layer, CTRL+J. Place several copies like below. Do the same for the text. To change the type input, double-click the layer thumb in the Layers palette.

Step 20
Go to Layer > New Fill Layer > Solid color. Select a dark blue color and hit CTRL+SHIFT+[ to send it to back.
This will be a nice background for our image.

Step 21
Select the large shape, and click the "fx" button in the Layers palette, F7. Select "Blending Options". Use the settings below.
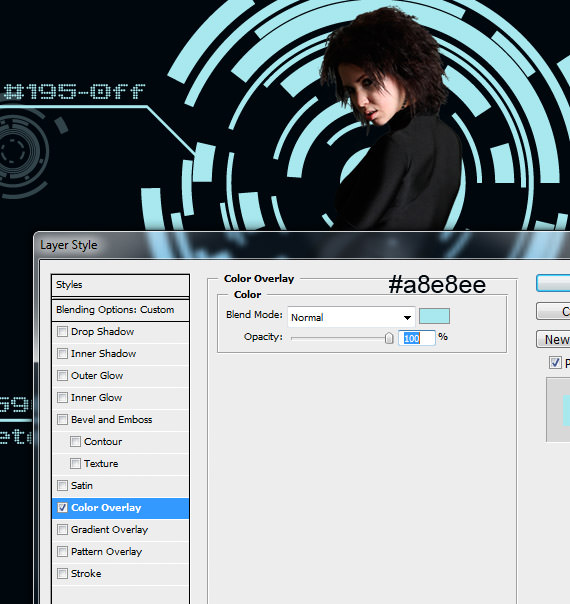

Step 22
ALT+click the "fx" icon that appeared near the layer thumb and click-drag it to the other round shapes. You can recognize them easily, they aren’t named "Shape ‘¦" and don’t have a "T" on the thumb.

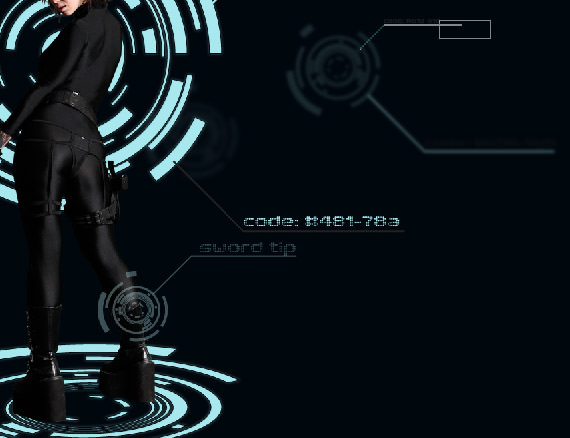
Step 23
Create a new layer above it (select the layer and hit CTRL+SHIFT+N to create a new layer, then select both layers and hit CTRL+E (merge layers)). For the selected shapes, go to Filter > Blur > Gaussian Blur. Use various settings from 2 to 6px, as you see fit.

To add more perspective, add more tech shapes over them.


Step 24
Grab the Selection Tool, V, select the small shape and lower its Opacity. 29% will do nicely.

Do the same for the other blurred shapes, but vary the Opacity a bit.
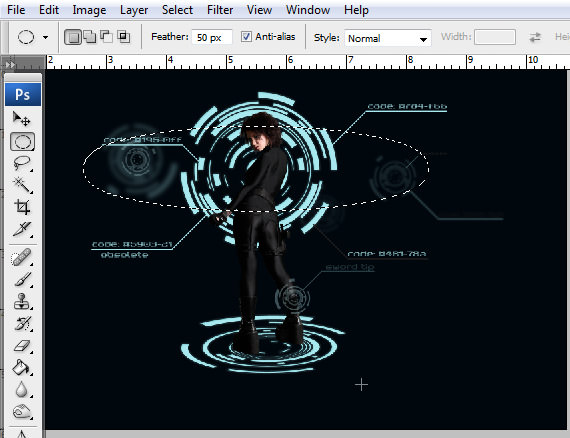
Step 25
Create a new layer, CTRL+SHIFT+N, Grab the Elliptical Marquee Tool, M, set Feather to 50 px and make a selection like below.
Step 26
Grab the Paint Bucket Tool, G, ALT+click one of the tech shapes to pick the color and fill the selection. In the Layers palette, F7, set the layer’s blending mode to Overlay. Do the same for the bottom side.
Step 27
Create a new layer, CTRL+SHIFT+N, grab the Elliptical Marquee Tool, M, set Feather to 30 px and make a selection like below. Grab the Paint Bucket Tool, G and fill the selection.

Step 28
Repeat Step 28 for the shape behind the model.
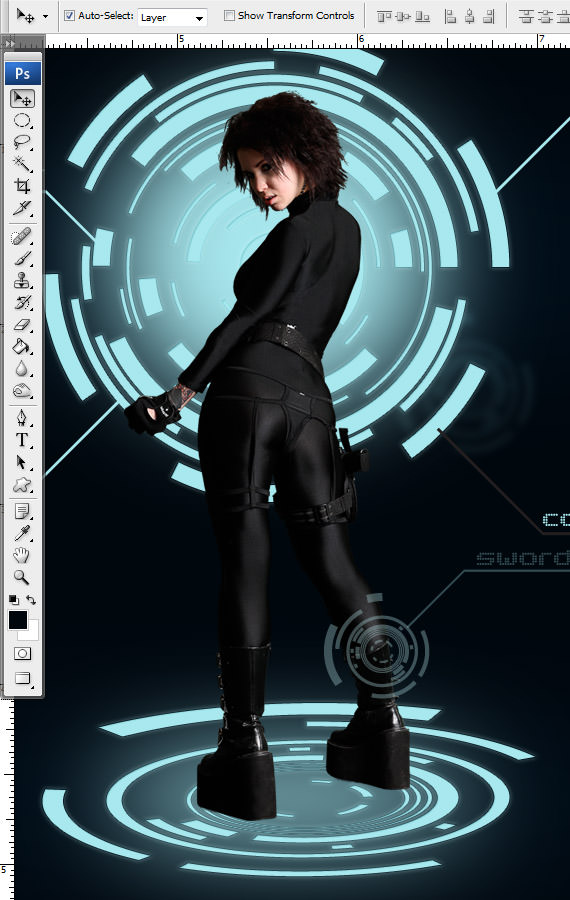
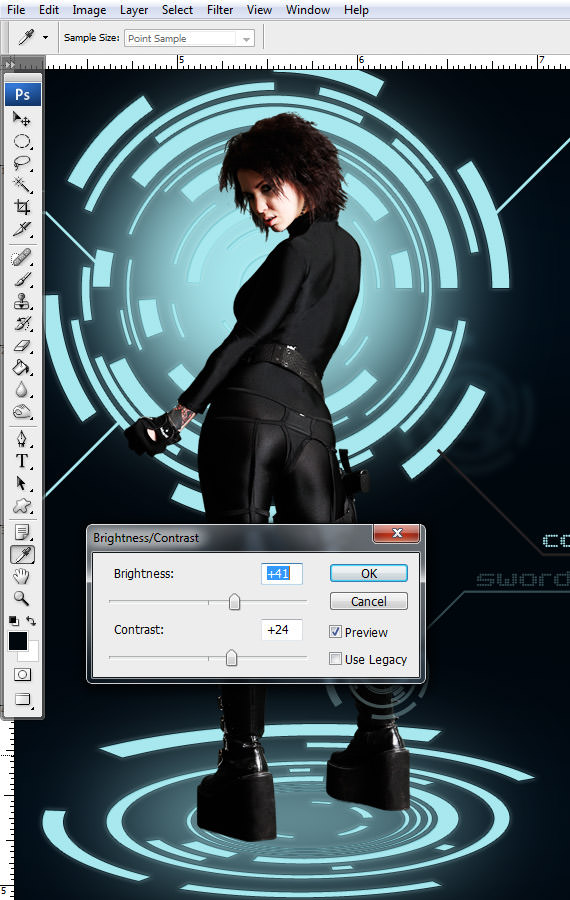
Step 29
Grab the Selection Tool, V and click the model. Now go to Layer > New Adjustment Layer > Brightness/Contrast and Black & White. For each, use the settings shown below. For the Black & White layer, set Opacity to 70%.
I prefer using Black & White over Hue/Saturation because it also provides a tones control, not just a desaturation.

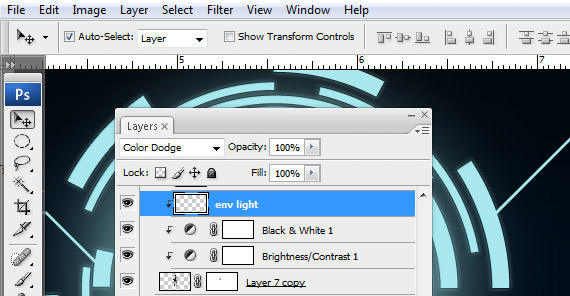
Step 30
Create a new layer, CTRL+SHIFT+N and ALT+click between it and the adjustment layer beneath it. Set Blending mode to "Color Dodge".
Step 31
Grab the Brush Tool, B, hit "3" to set the brush Opacity to 30%, set Hardness to 0%, ALT+click on the teal tech shape and paint over the body highlights, part of the hair and face.
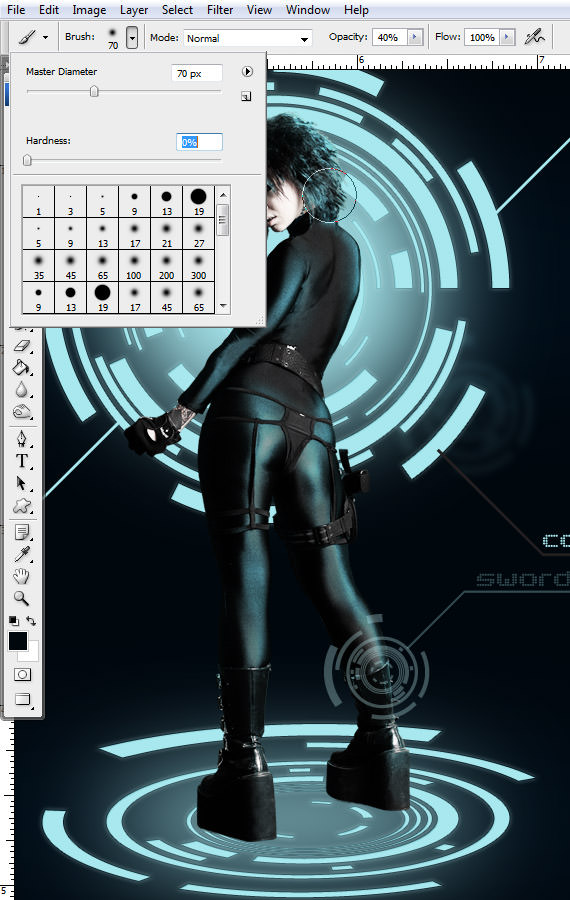
Step 32
Change the brush Opacity to 70% and paint over a few highlights, but in smaller areas.

Step 33
In the Layers palette, F7, select the top-most layer and go to Select > All, CTRL+A, then hit CTRL+SHIFT+C to copy a merged version of the document and hit CTRL+V to paste it.

Step 34 – Last step
Go to Filter > Sharpen > Unsharp Mask. Use the settings below or feel free to use your own. Don’t overdo it though, else the image will look too sharp.
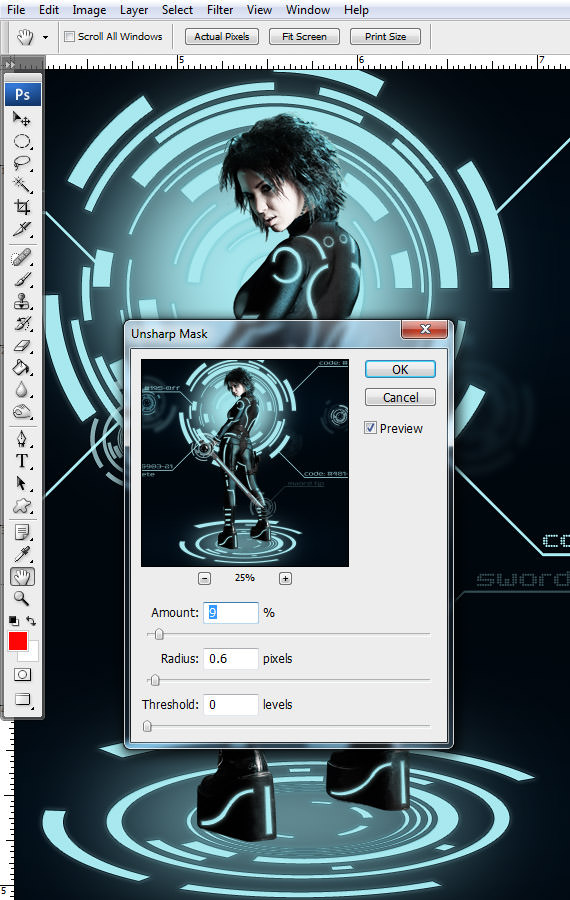
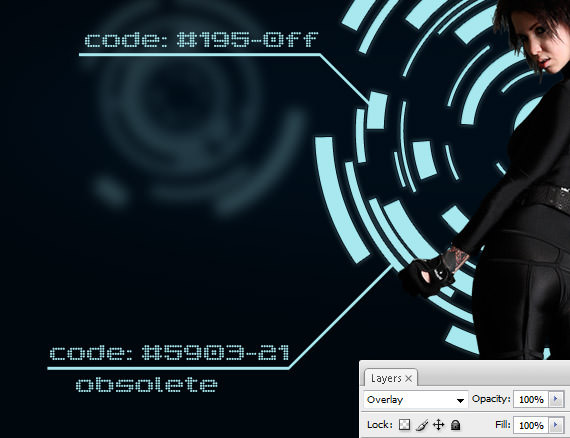
Here’s the final view of what you’ll be getting assume you followed through the entire tutorial correctly.

Downloads (PSD, Wallpaper)
Together with the tutorial, here are couple of files created for you.
- Tron tutorial PSD file.
- Tron Wallpaper– available in 1280x800px, 1280x1024px, 1920x1080px and 1680x1050px.