How to Enhance & Retouch an Image [Photoshop Tutorial]
Sometimes we have a precious moment in our lives captured in the wrong way. This is where Photoshop is used to fix this problem — to enhance and retouch our precious, yet less-than-perfect image to become precious perfect ones.
In this tutorial, I will share some of my favourite enhancing and retouching techniques. You may know some of my techniques, and others, you may not. So, let’s get started.
Step 1
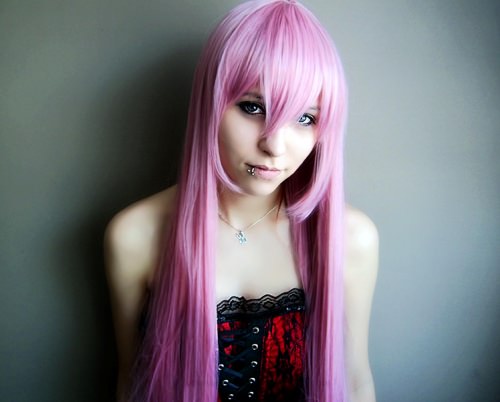
Open the Cosplay Girl image. Special thanks to Priestess Shizuka for her permission to use this image. You can find the image here. Crop it (Ctrl + C) to get rid of those black edges at the top and bottom.
Step 2
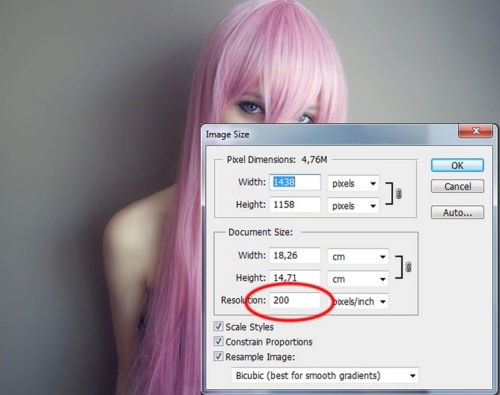
Notice that the image isn’t smooth enough, especially the hair, so I want to make it smoother by increasing the amount of the pixels. Choose Image > Image size, or hit Alt + Ctrl + I on the keyboard. In the resolution column, change the value to 200 pixels/inch or more. And then click OK.
Step 3
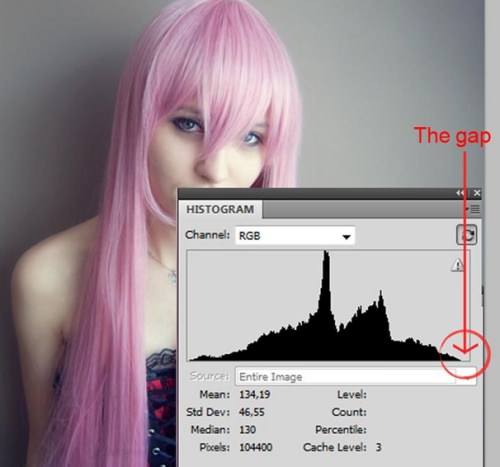
Now I want to level it, to make this image better. As you can see when we open the histogram (Window > Histogram), the histogram tells us that this image suffered an ‘unbalance’ tonal range. The gap at the light area (right side) means the highlight areas are not as bright as they could be. Thats why the image looks rather dull.
It will be good if we can trace the brightest, darkest and midtone pixels of this image to apply proper level adjustment on it. This is so Photoshop can convert the brightest pixels in this image to become pure bright (pure white), darkest pixels to be pure dark, and the midtones as well, for ideal tonal distribution.
To do that, duplicate the background layer by hitting Ctrl + J. Create a new layer under it by hitting Ctrl + Shift + N, and then, fill it with white color (Ctrl + Backspace).

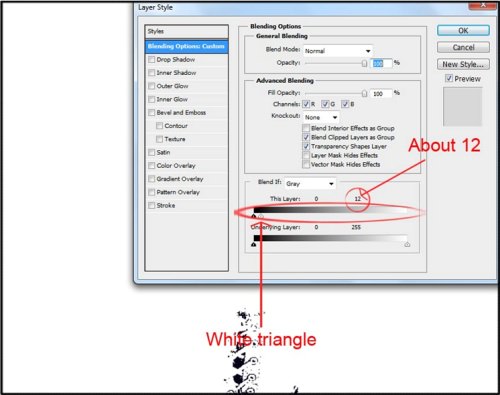
Step 4
Target layer 1, and double click it to bring up the Layer Style dialog box. On the Blending Options window, drag the white triangle to the left, until it almost meets the black triangle on the left post. The remaining spot is the darkest pixel in this image.
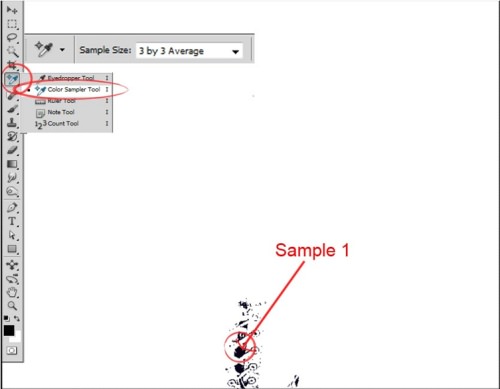
Step 5
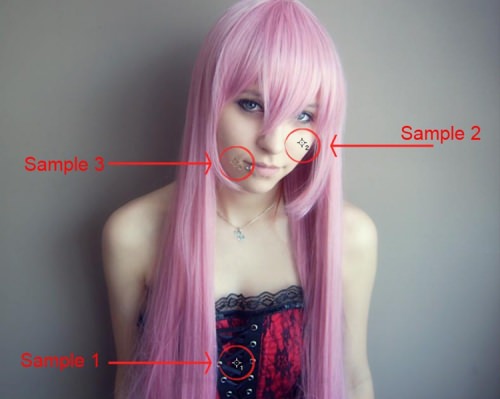
Take the Color Sampler tool, change the Sample Size to 3 by 3 Average, then point it to one of those remaining spots in this image. We’ve got sample 1 here — the darkest pixels.
Step 6
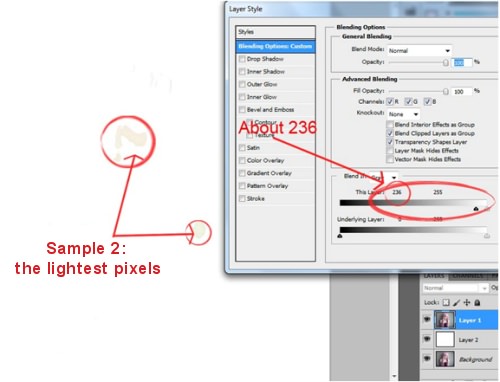
Repeat step 4, but this time in the Layer Style window, do the opposite by dragging the black triangle to the right.
Again with the Color Sampler tool, point it to the one of those remaining spots. We’ve got sample 2: the lightest pixels.
Step 7
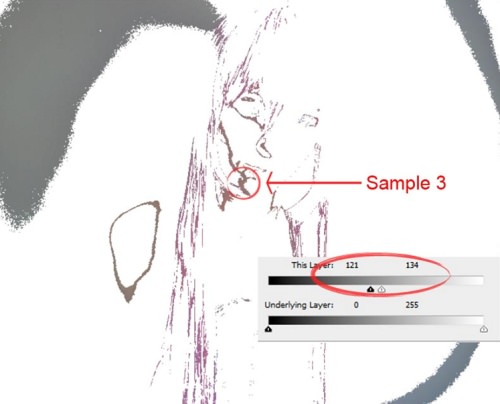
This time we want to trace the midtones. Repeat step 4, and in the Layer Style window drag the black and white triangles to the center, around 127.5 (= 255/2). However, when we drag it close to 127.5, the spot sample becomes too narrow, with a focus on the girl only, not the background, thus we should drag the black triangle to 121, and the white triangle to 134 (6.5 units either way of 127.5).
That will be the ‘equal’ value for both of them. Then, with the Sampler Color tool, take a sample from one of those remaining spots. Here we’ve got Sample 3: the midtones.
Step 8
Now target Layer 1, double click it to bring up the Layer Style dialog box, and then reset those triangles to the original post. Now, with the Sampler tool still active, you should indications as shown below:
You can use actual pixel mode when tracing those spots, to get more accurate results, but in this case, I think what we did before is enough.
Step 9
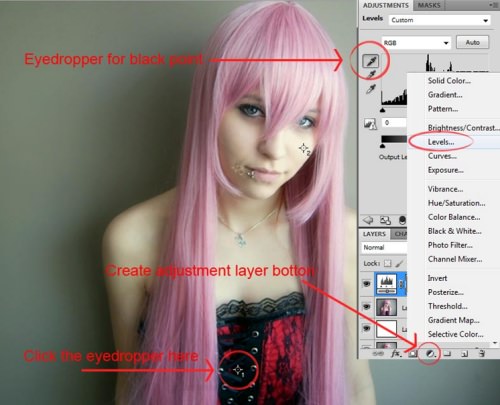
Now, create a Levels Adjustments layer above layer 1. On the Levels Adjustments window, use the eyedropper to set the black point. Click on the eyedropper, at black, then on Sample 1 that we made previously.
Step 10
For the midtones, click the eyedropper for gray point, point and click it to Sample 3. And last, click the eyedropper for white point, then point and click Sample 2.
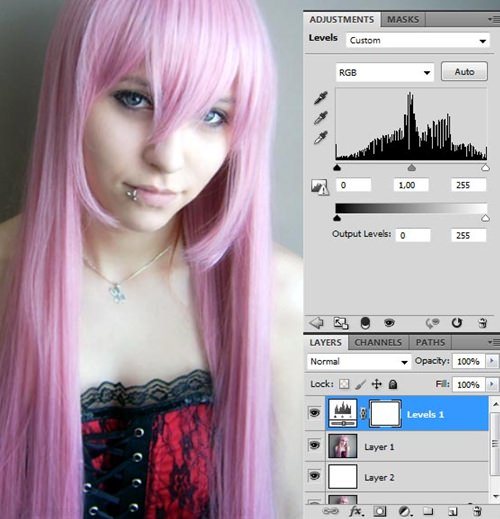
Now, what we’ve got here is an image with an ‘ideal’ tonal and color range. We’ve got pure black, pure white and the tonal spans mathematically ideal. With a quick visual check, you can see that the image is indeed getting better. That’s the best I can achieve for this image so far.
Step 11
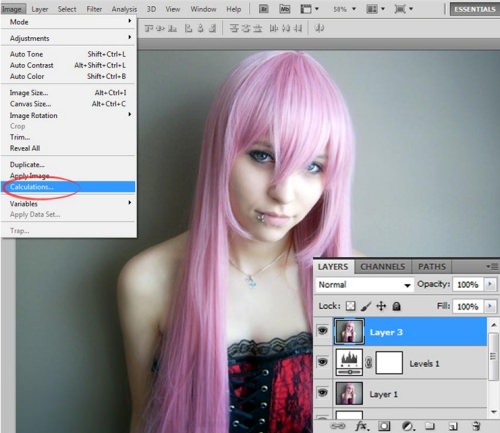
Now let’s add some details and emphasize some parts of the image. Of course, Photoshop can’t create any details, but it can reveal or enhance it. First, hit Ctrl + Shift + Alt + E to merge the layers without flattening all layers beneath it. Target this new layer, then go to Image > Calculations. This will bring us to the Calculations dialog box.
Step 12
After taking a closer look at each channel, you will see that the green channel contains the most details, so we’re going to use that channel as a ‘patch’. We’re going to multiply it to get a more significant result. In the Calculations dialog box, set the value as shown below.
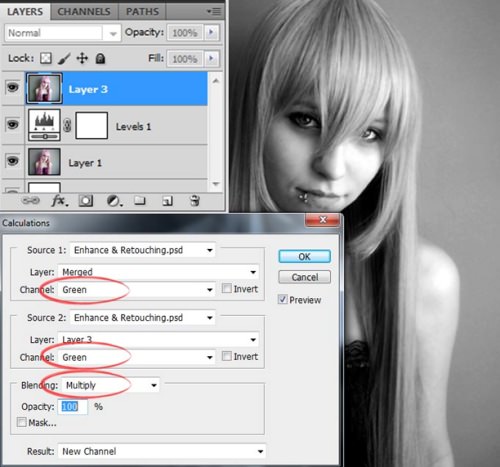
Step 13
The result will be located at the bottom of the Channels palette, name it ‘Alpha 1’. Click it, select all (Ctrl + A), copy (Ctrl + C), and then go back to the Layers Palette and paste it (Ctrl + V) on top of all the layers. Then set the Blending Mode to Soft light. Name it ‘Basic’.

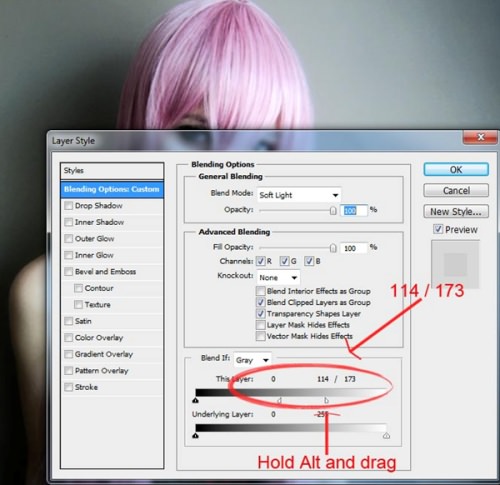
Step 14
The dark details distribute nicely, but there seems to be too much light. Let’s decrease it a little. Double click the Basic Layer to bring up the Layer Style dialog box, then while holding the Alt key, move the white triangle to the left; it will separate the triangles to give us a smooth transition.
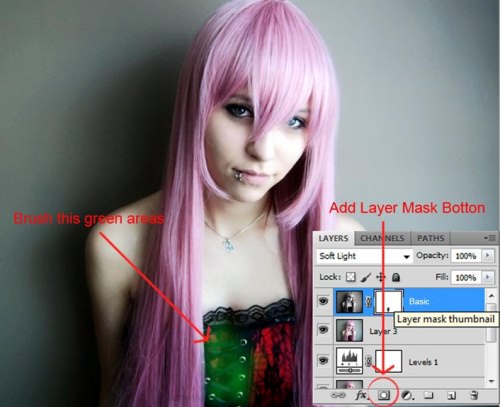
Step 15
On step 13, we may have lost some details on her clothes; so let’s fix that. To do that, add a layer mask for this Layer (Basic Layer), and brush that area with the soft black brush, to get back some detail from the underlying layer. I use a Soft Round Brush with size 50 px, Hardness 0%, and Opacity 20%. Make sure you target the Layer Mask Thumbnail on the Layers Pallete before brushing.
Step 16
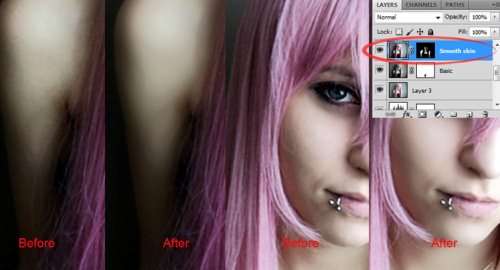
Now let’s smooth out the skin especially the right shoulder. To do that, hit Ctrl + Shift + Alt + E again and apply the median filter. Choose Filter > Noise > Median. Set the radius to 10 pixels. Again, apply a layer mask to this layer, Hide All by holding the Alt key when you click the Add Layer Mask button. Use a white smooth brush to cover the rough areas, but leave the hair and edges. Name this layer ‘Smooth Skin’.
Step 17
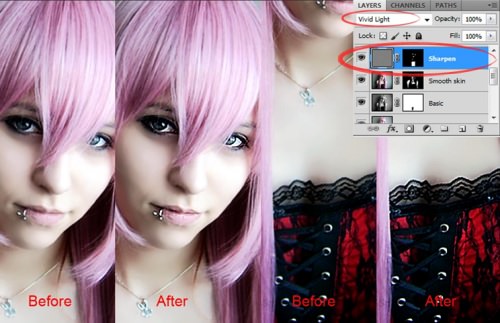
Now let’s sharpen the image. Like before, hit Ctrl + Shift + Alt + E, and name it ‘Sharpen’. Copy this new layer by hitting Ctrl + J. Hide the copy by clicking the eye icon on the Layers Palette. And then target the original Sharpen layer, go to Filter > Other > High Pass. Set the radius to 2 pixels, and change the Blending Mode to Vivid Light.
We can see now, how the details become more vivid in this image. However, the hair has also ‘sharpened’ and looks rough, which is not wanted, so, let’s add a layer mask again, reveal only some parts: eyes, nose, lips and clothes using a smooth soft brush.
Step 18
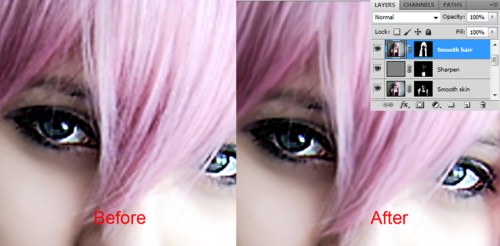
Now target the Sharpen Copy layer that we’ve made before. Make it visible. Name it ‘Smooth Hair’, because this time I want to smooth out the hair using this layer. Go to Filter > Stylize > Diffuse. Select Anisotropic, and then click OK. Add a Layer Mask, and hide all areas except the hair. Zoom in to see the result.
Step 19
Finally, create the Hue/Saturation adjustments layer on top. Set the Saturation value to 20 to give this image more color. You can compare this final result with the original image, by simply holding the Alt key, and clicking on the eye icon of the original layer image.
Final result
And walla, here’s our final image! You can download the PSD here.