How to Colorize Old Black & White Photo in Photoshop
Today we are going to do some photo manipulation with Photoshop. In the tutorial below, we are going to guide you through patching up spots in an old black & white photo and then colorizing it.
First we’ll run you through on removing white patches from photo and then we’ll proceed to coloring it. The steps are pretty standard. Load up your Photoshop, and off we go.
5 Tips for Black & White Photography
Monochrome photographs are timeless, mainly black and white photographs. They enhance emotional substance and have a disposition of... Read more
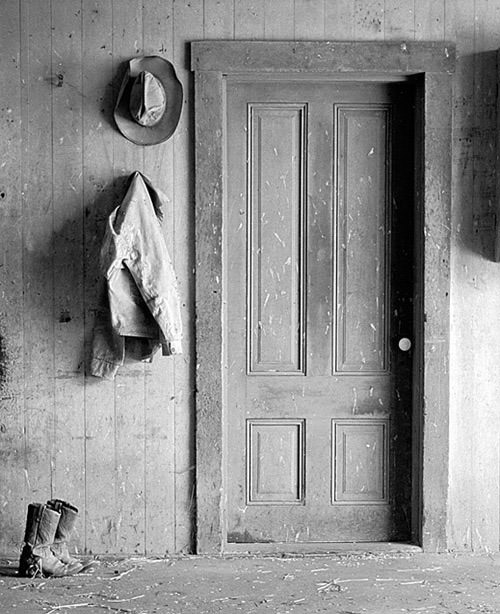
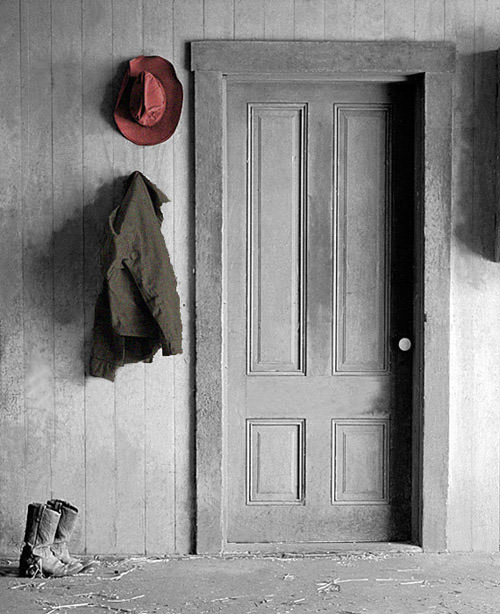
To follow through the entire tutorial, we suggest you download and use the following image.
Step 1
We’ll start by removing the white patches on the image. Choose Clone Stamp Tool and by pressing Alt key pick the plain and appropriate surface near all white patches and apply it on white patch. Continue this process until all patches get removed.
After removing all patches your poor image will look clean as shown in image:
Step 2
Next, we’ll proceed with coloring the image. It would be bad idea to colorize the image as a whole; we’ll do them one by one, an object at a time.
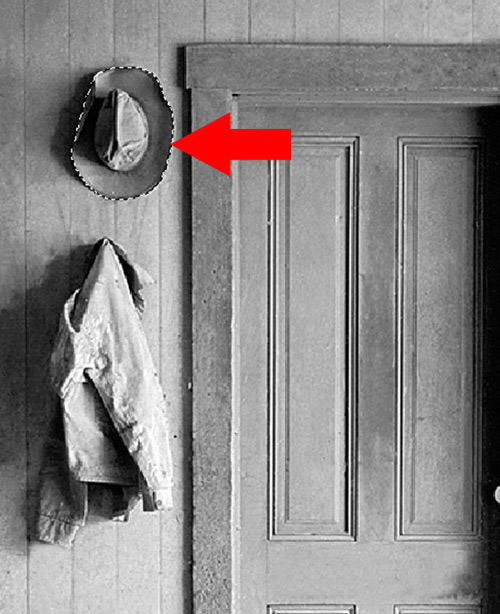
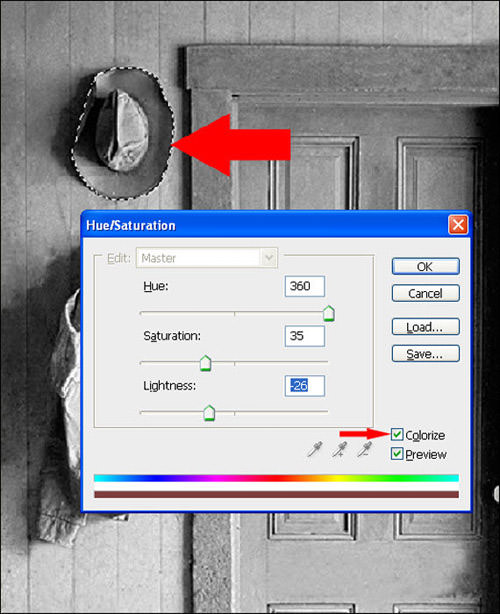
First, we’ll select the hat by making the use of Magnetic Lasso Tool – like this:
Step 3
To colorize it, we will use the Hue and Saturation (HSL) option. There are many ways to colorize an object, but HSL is perhaps one of the easiest and most flexible.
Proceeding to colorizing the hat, add these values to the (HSL) 360, 35, – 26 appropriately. (While using HSL, on that window, do not forget to turn on Colorize option.)
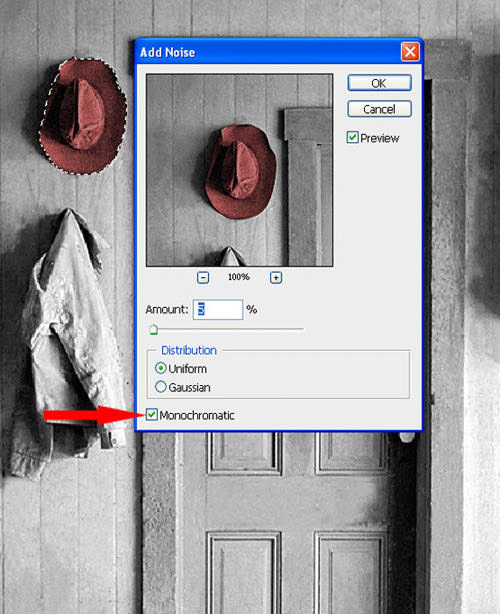
Step 4
After applying color, the hat may look a little plain. Let’s add some Noise to it. Select Filters -> Noise -> Add Noise and give amount "5" to it.
Check Monochromatic option to get a smoother noise effect. See the next image for its differences.
Step 5
Next, the coat. The process is same – only different HSL values, which are respectively: 42, 10, – 63.
To make the overall look of coat more natural, instead of using Noise tool, we take advantage of Grain Texture option. You can find it under Filter -> Filter Gallery -> in Texture tab -> Grain.
Select the following options – Intensity: "10", Contrast: "50" and Grain Type: "Soft".
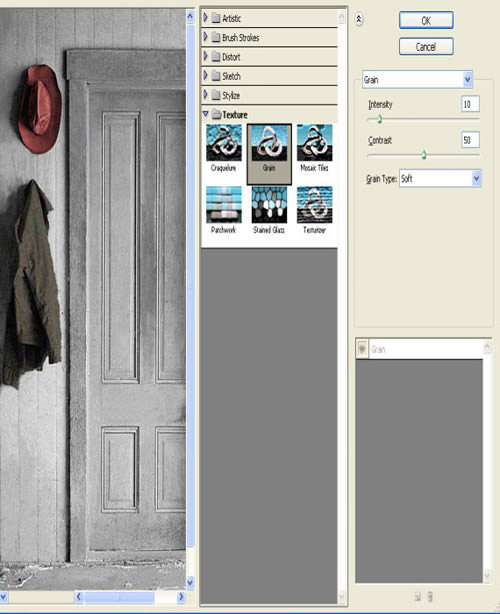
And then you will see the output:
Step 6
Moving forward – the shoes. To give shoes a shiny effect, we are going to use Image menu -> Adjustments -> Variations. Select "Midtones" and click Ok.
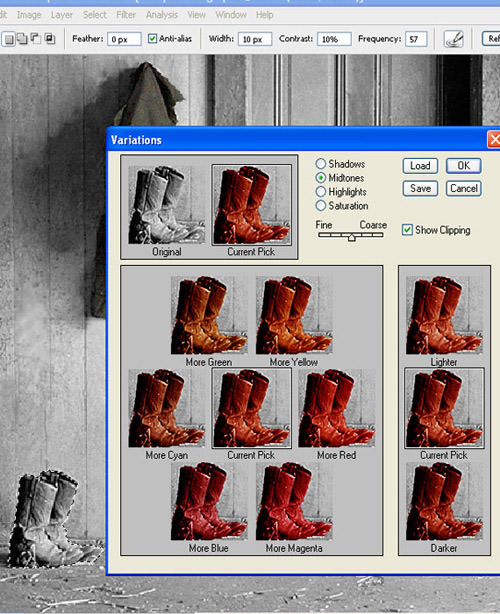
Try some combination of CMYK colors until you get a boot of this color:
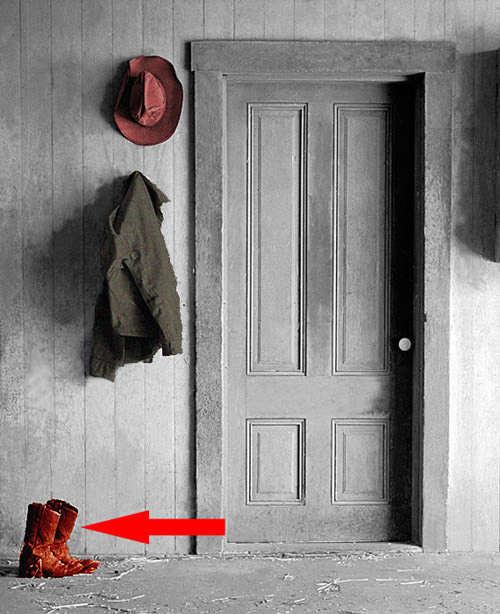
Step 7
Next up, the door. First, let’s color the door borders.

Select one side border of door by using Rectangle Marquee Tool. Add 15, 45, -53 values in HSL tool. Then select Filter -> Filter Gallery -> in Texture tab -> select Grain option and keep Intensity: "12", Contrast: "50" select Grain type: "Enlarged".
Follow the same procedure to all the borders of the door.
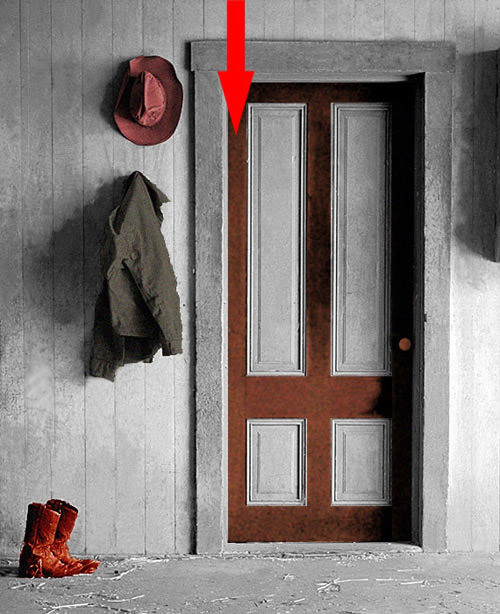
Step 8
Next, we proceed to coloring rectangles between the doors with the following HSL values: 55, 20, -26 and in Texture Grain, keep intensity: "12", contrast: "50" and Grain type: "Enlarged".
Step 9
We’ll wrap up coloring the door by adding colors to the borders, HSL values of : 25, 7, -69. Then under Texture Grain keep Intensity: "12", Contrast: "50", and let’s add extra noise by selecting Grain type: "Regular".

Step 10
After the door, we proceed coloring the soil. To color the soil, select that portion by using Magic Wand Tool and then keep HSL values: 20, 24, -56.
Step 11
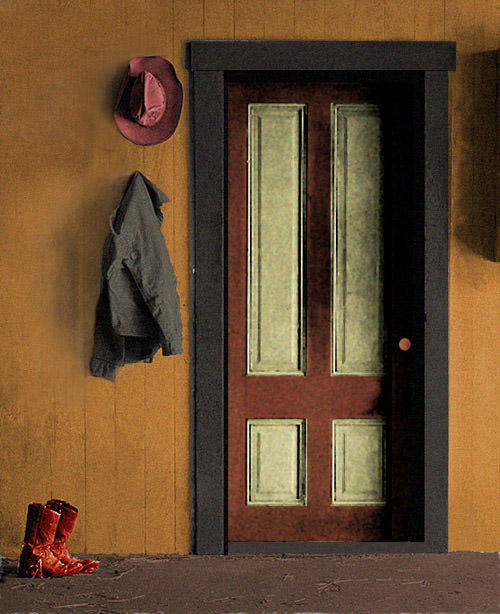
Last but not least, we will color the wooden background of the image. To give it a it a wood look and feel, we give it a HSL value of: 31, 53, -45, and then add Noise "5" by checking the Monochromatic option.
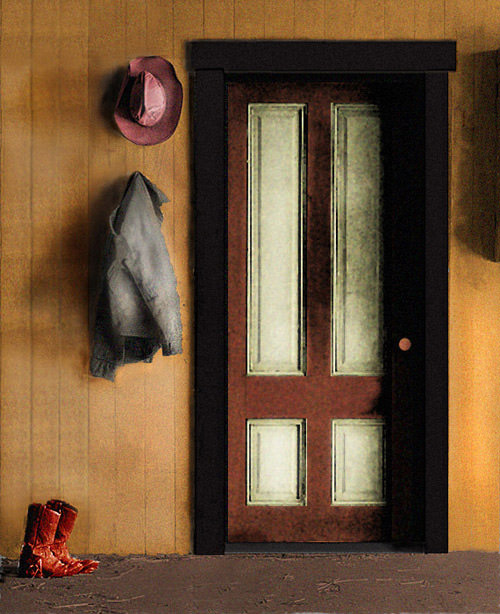
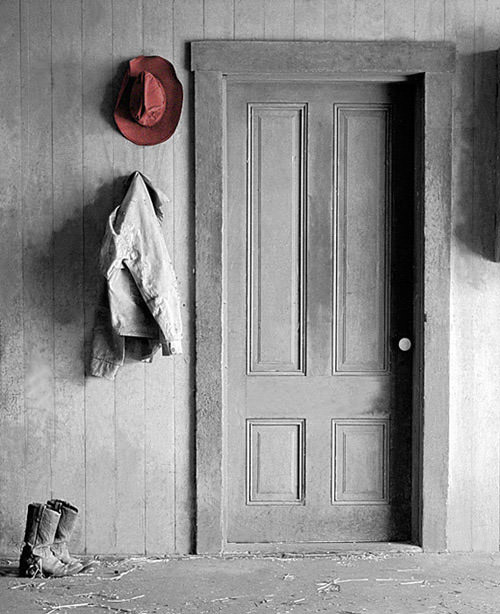
After all this procedures finally you will see the output like this:
Color Correction
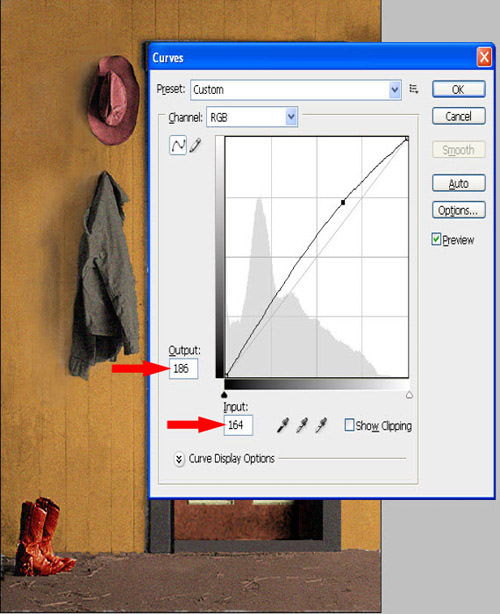
We are done coloring the image. Now, we proceed to the final and most important part – color correction. Color correction when done right, will give image its correct mood and make it more realistic.
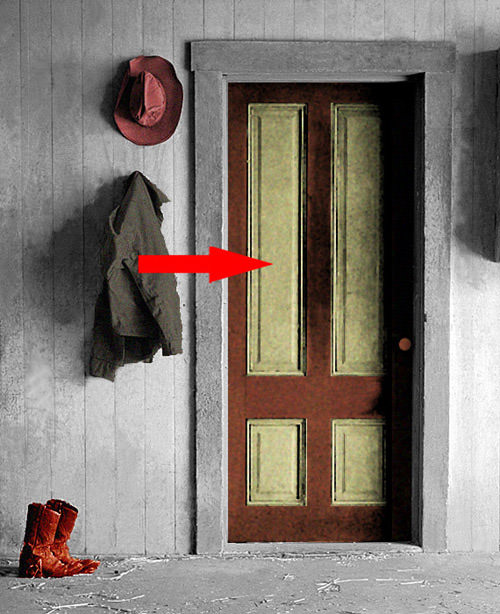
To increase the brightness of the image, we go to the following option: Image menu -> Adjustments -> Curves, and add "186" for Output and "164" for Input.
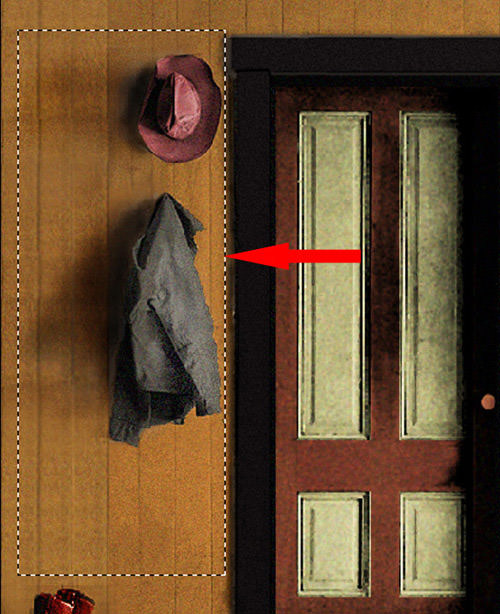
Let’s brighten up the following section of the image (where arrow in pointed to). First we select the portion with Rectangle Marquee tool. Then go to Filter -> Filter Gallery -> Distort tab and select Diffuse Glow with the following values: Graininess: "0", Glow Amount: "11", Clear Amount: "15". And finally, proceed to Image menu -> Adjustments -> Curves and add "200" for Ouptut and "188" for Input.
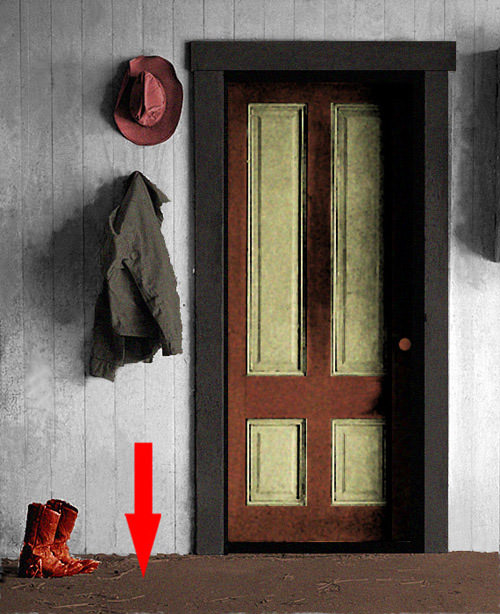
Follow the above process for the remaining parts of image but with different values in Diffuse Glow: Graininess: "2", Glow Amount: "5", Clear Amount: "15". Curves’ not required.
To darken the shadows of the hat and the coat, let’s use the Burn Tool and by selecting Range: Midtones and decreasing the Exposure value to "20%" apply it on shadows part appropriately.
We’ll use the Dodge Tool to brighten up the coat and hat so it looks as though the lights are coming in from the right side, and to give a sense of thickness for the door borders, we use the Burn Tool.
And here’s how your final output will look like (or similar) after some color corrections.