How to Move Coins From Binance to Coinbase Wallet
There can be any number of reasons why people move their cryptos from one platform to another or from a platform to a wallet (or vice versa). Some may be looking for a better (lower) transaction fees, others would want to store them securely in a wallet (hardware or software). No matter what your reason is, moving crypto can be a complicated job, especially if you’ve not done it before.
Hence, I’ve compiled this article to help you understand how to move your cryptocurrency showing you an example of how I move AXS coins from Binance.com into my Coinbase Wallet.
So, either you intend to move your coins from one platform to another or just want to have an idea about the process involved, the following guide will give you a good look at the matter. Let’s take a look.
6 Ethereum Wallets to Keep ETH and Other Crypto Safe
Ethereum is a rapidly growing digital currency that thousands of people are using for trade. However, it's not... Read more
What happens when a transfer is initiated
To walk you through the entire coin-transferring process from point A to point B, we will be using the following as an example:
- Coin – AXS (Axie Infinity)
- Point A – Binance Platform (Coin’s current location)
- Point B – Coinbase Wallet (Coin’s final destination)
To put it simply, when you transfer a coin from Point A to B, it first leaves the platform and then gets validated by the blockchain (which could take a while) before it ends up at its destination.
Test transfer with a small amount
Test-transferring a small amount allows you to be familiar with the entire transfer process and get a good idea of how long the process is going to take before the coin is reflected at the destination.
Moreover, any information entered wrongly in the process (i.e, destination address, network type, etc) may cause coins to be lost, or at least troublesome to recover. Therefore, it is advisable to initiate a test transfer with a small amount of coins.
Ready to transfer some coins? Let’s get started.
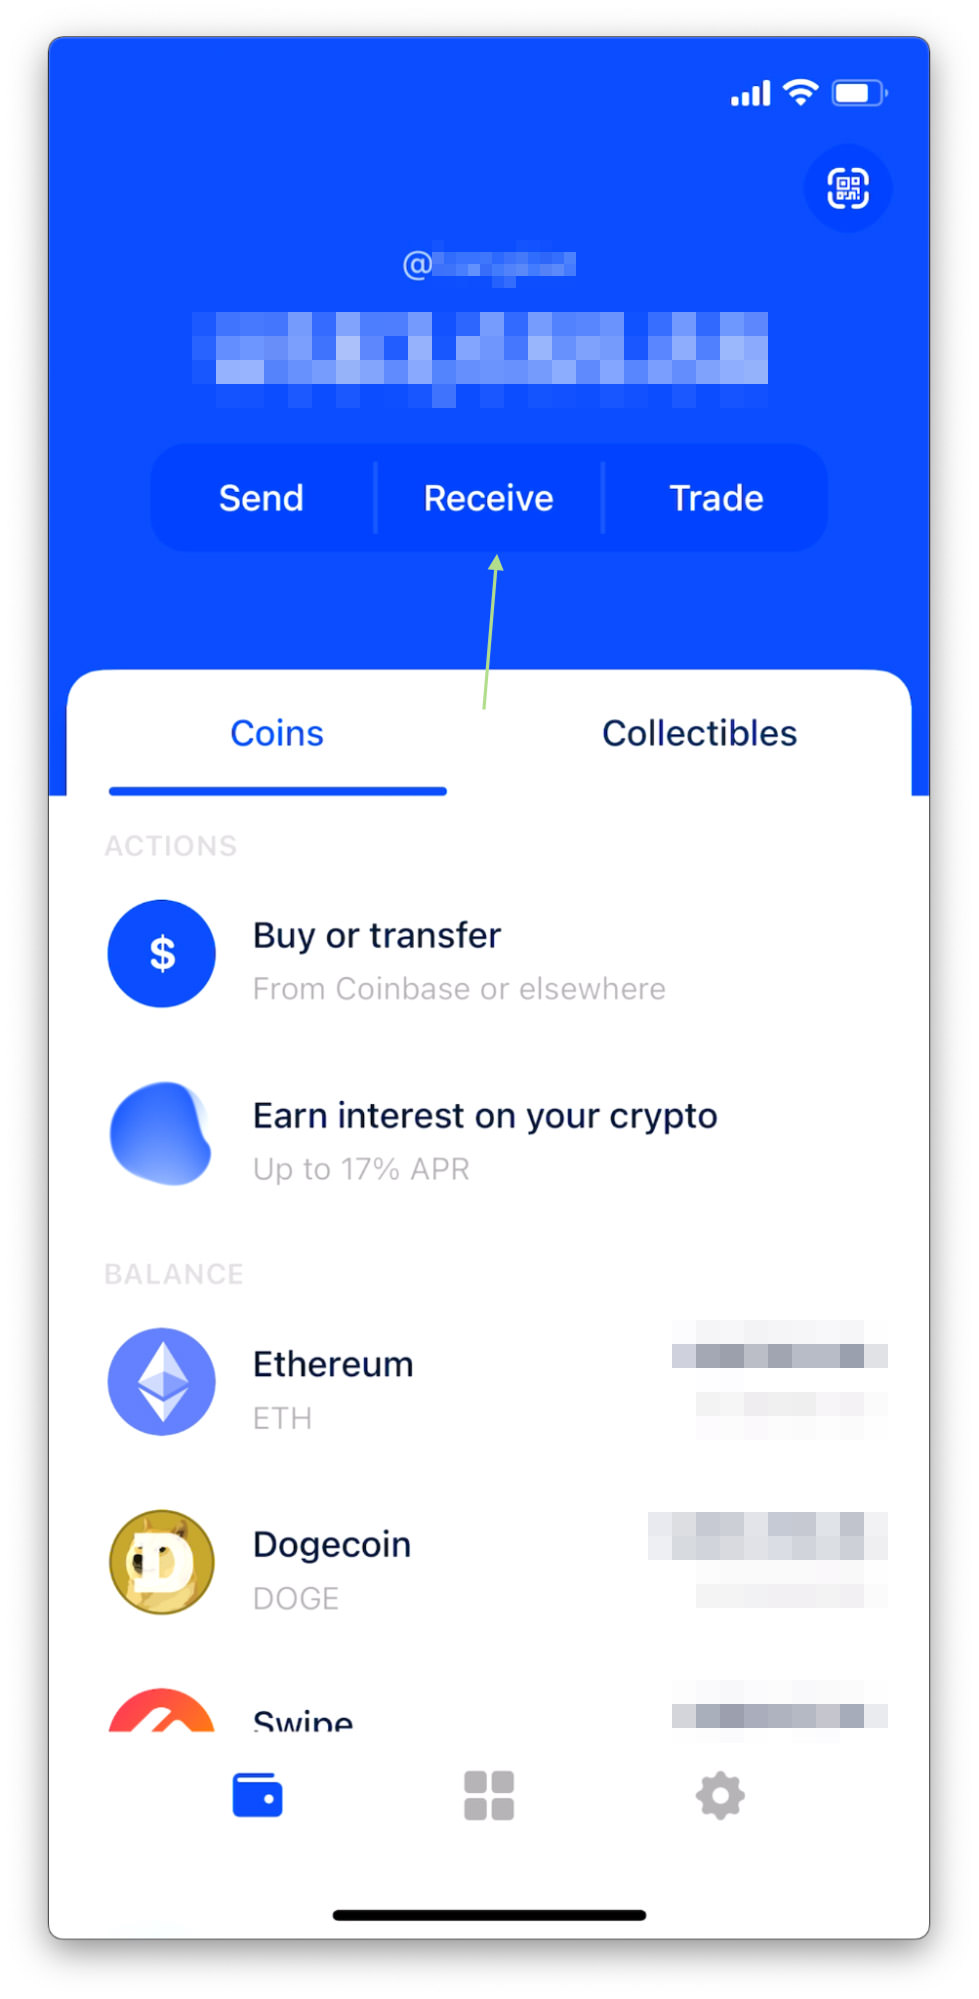
Step 1 – Retrieve destination address
- Open your Coinbase Wallet app and tap the Receive tab.
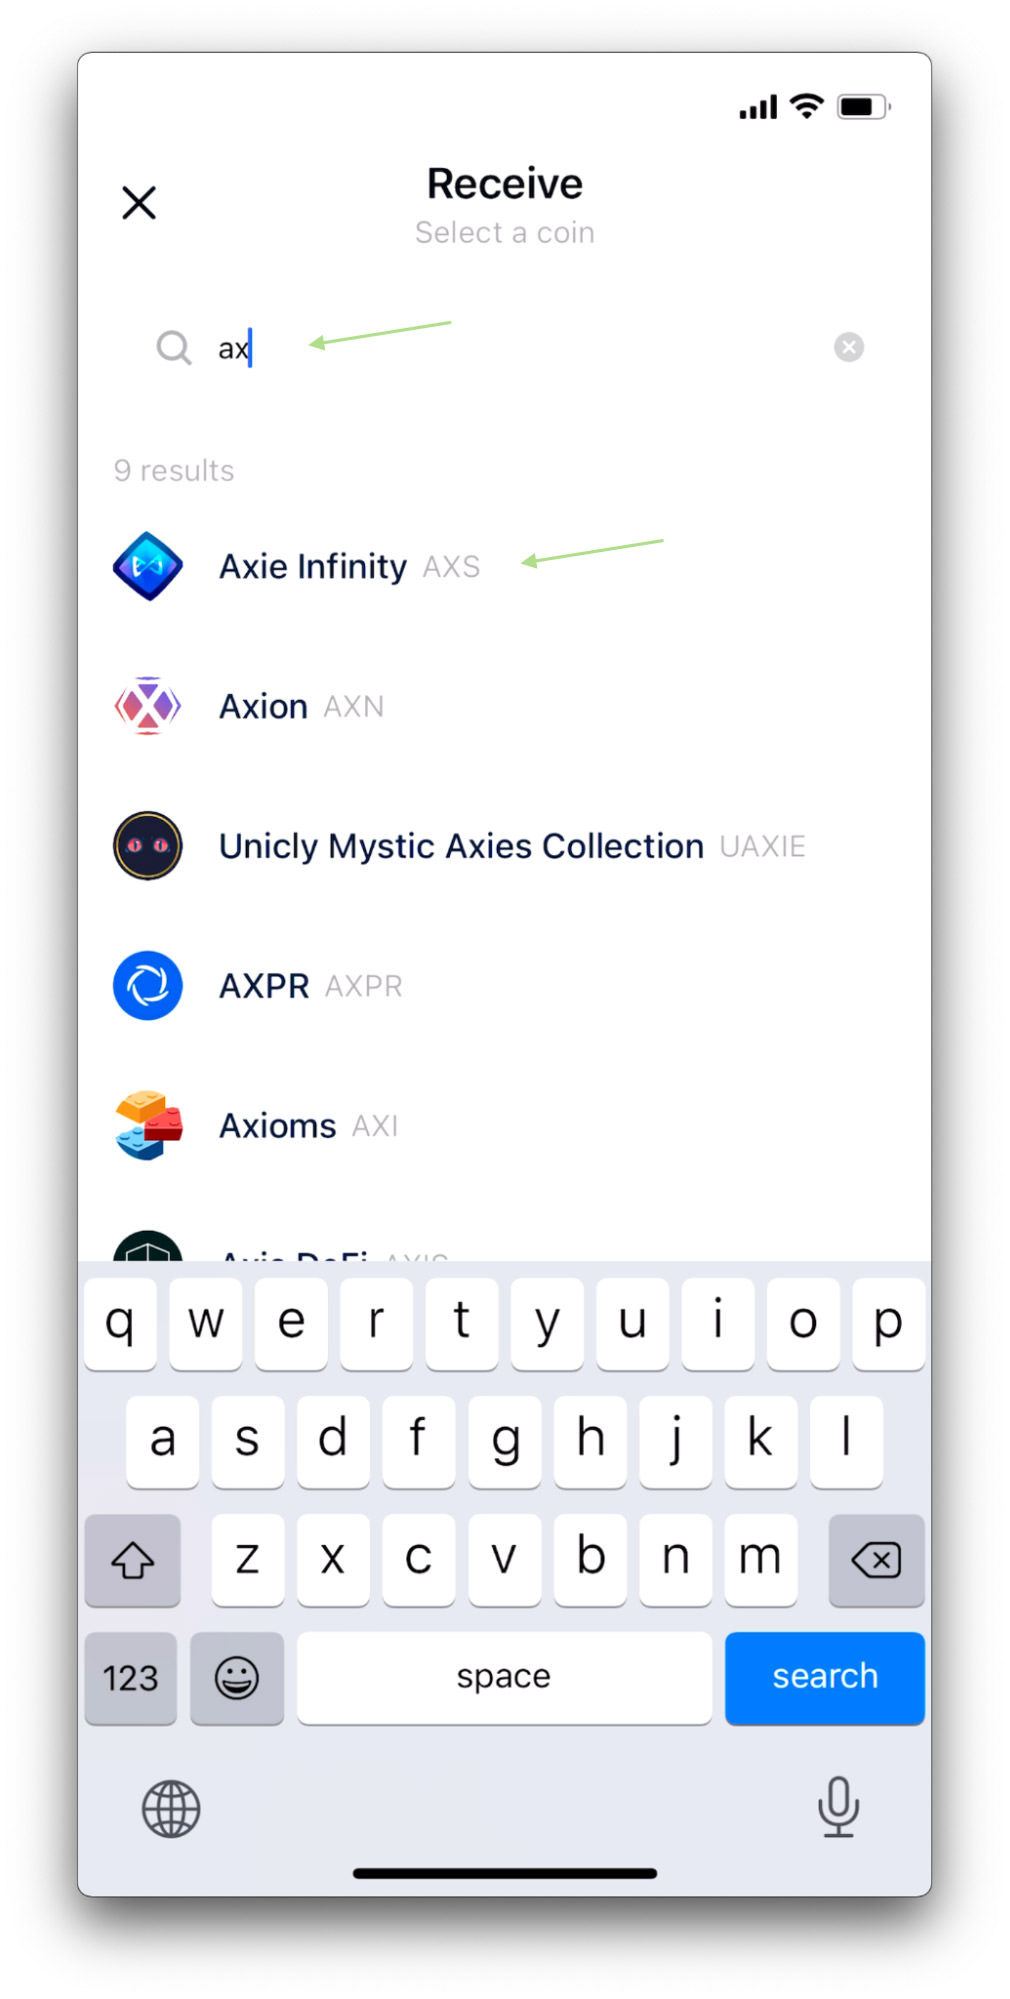
- Type in “AXS”, or “Axie Infinity” and then tap on the right one in the search result.
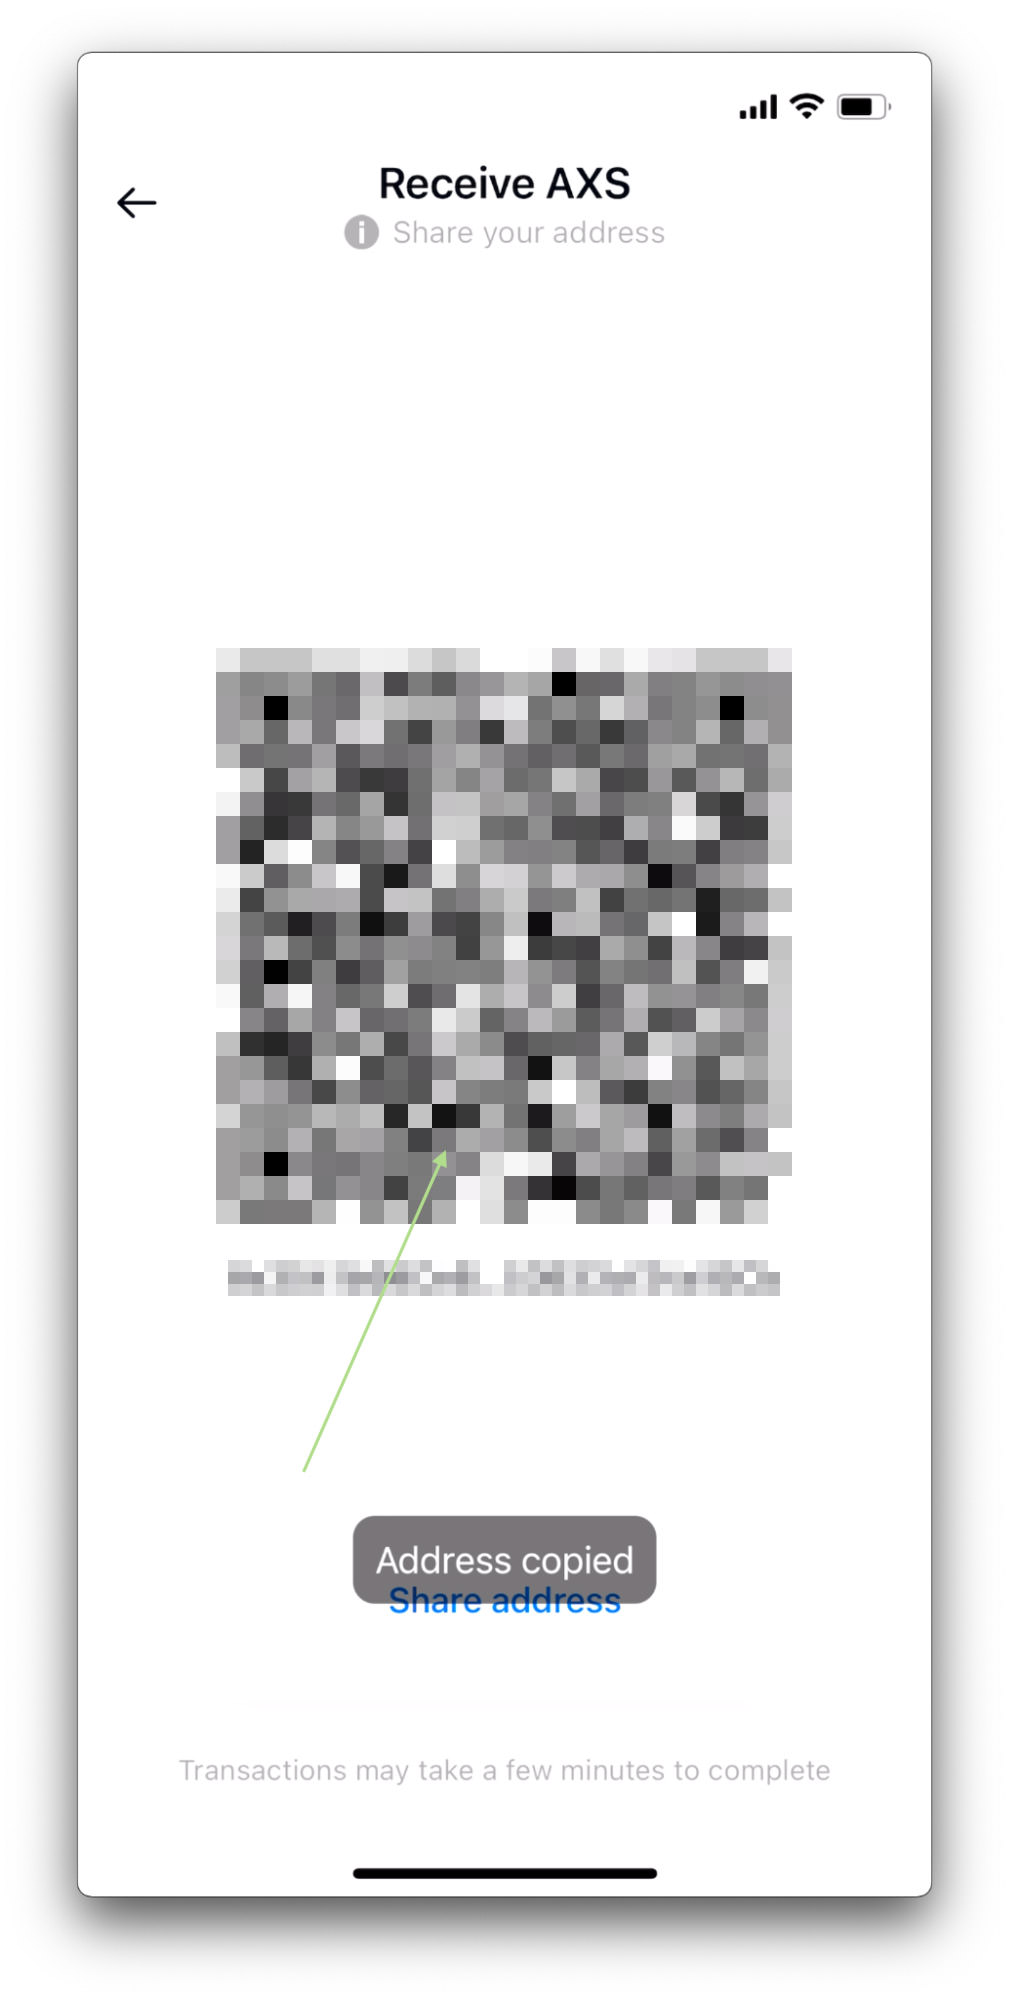
- Tap the QR code to copy your AXS wallet address.
Step 2 – Add address to whitelist in Binance
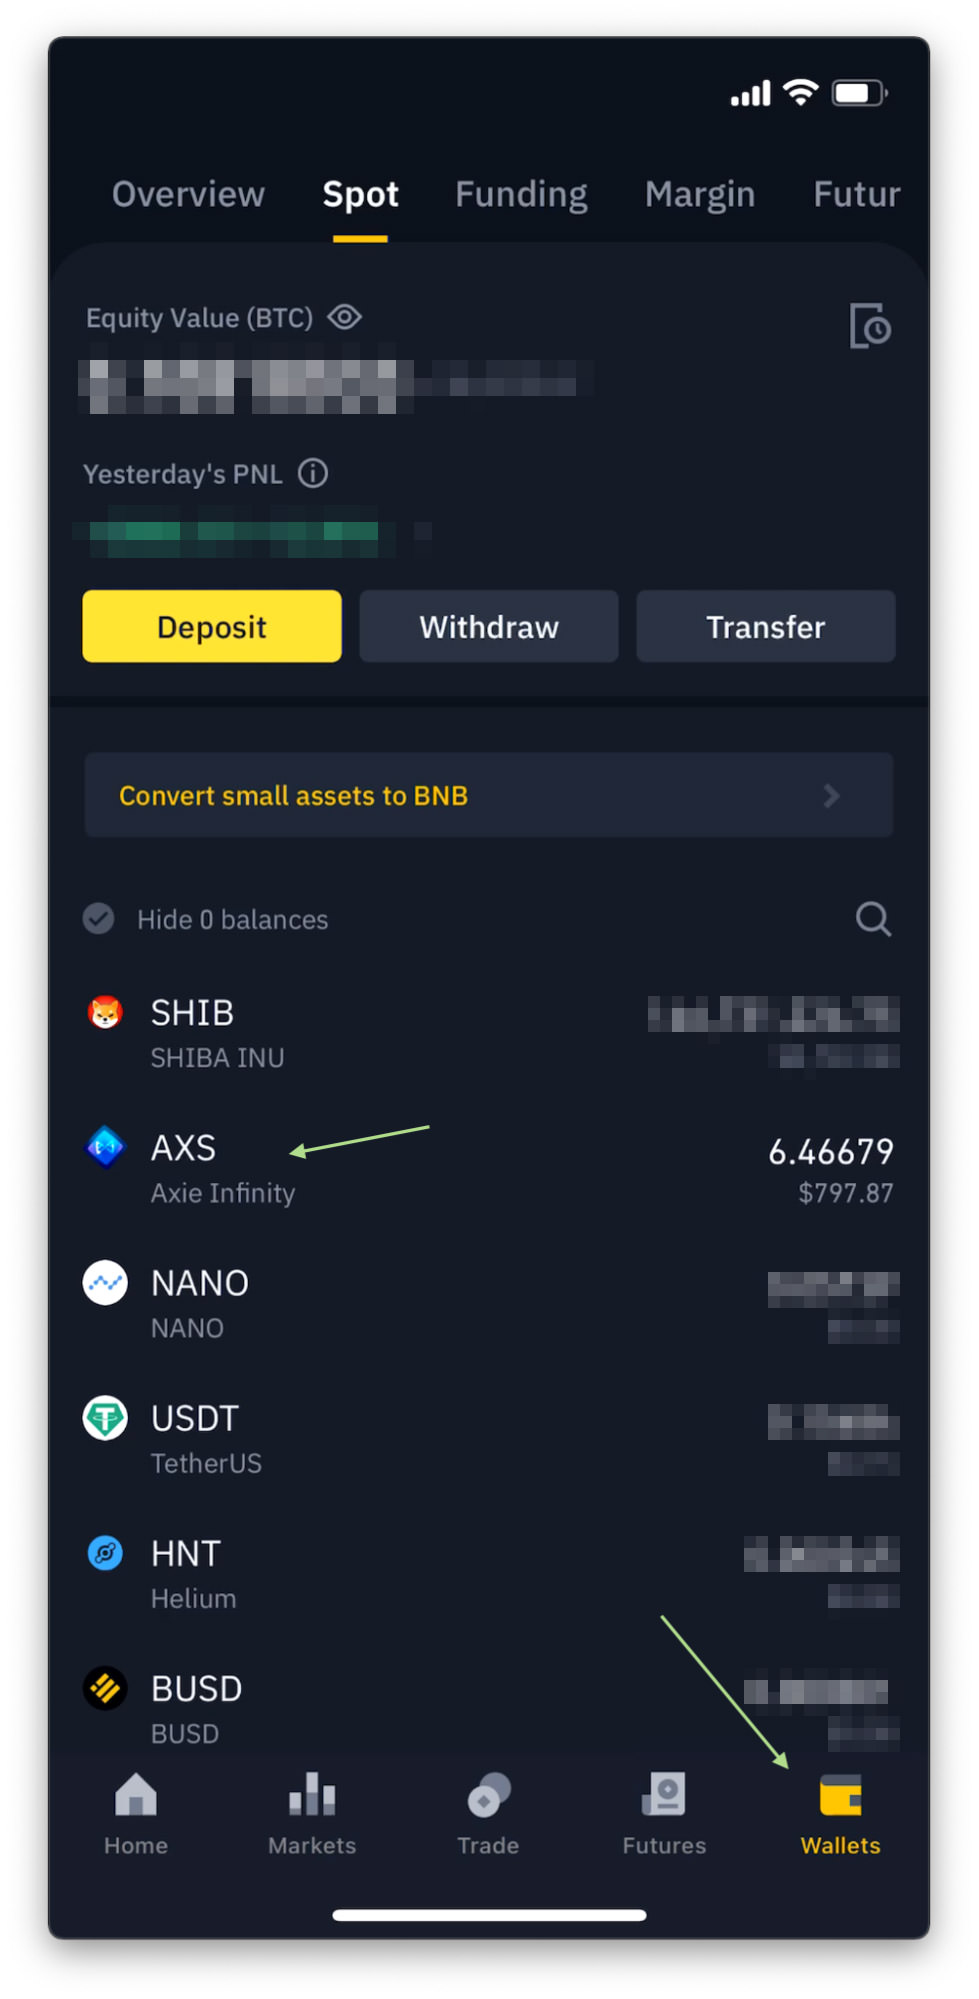
- Go to your Binance app, tap Wallet (bottom right), and then tap AXS.
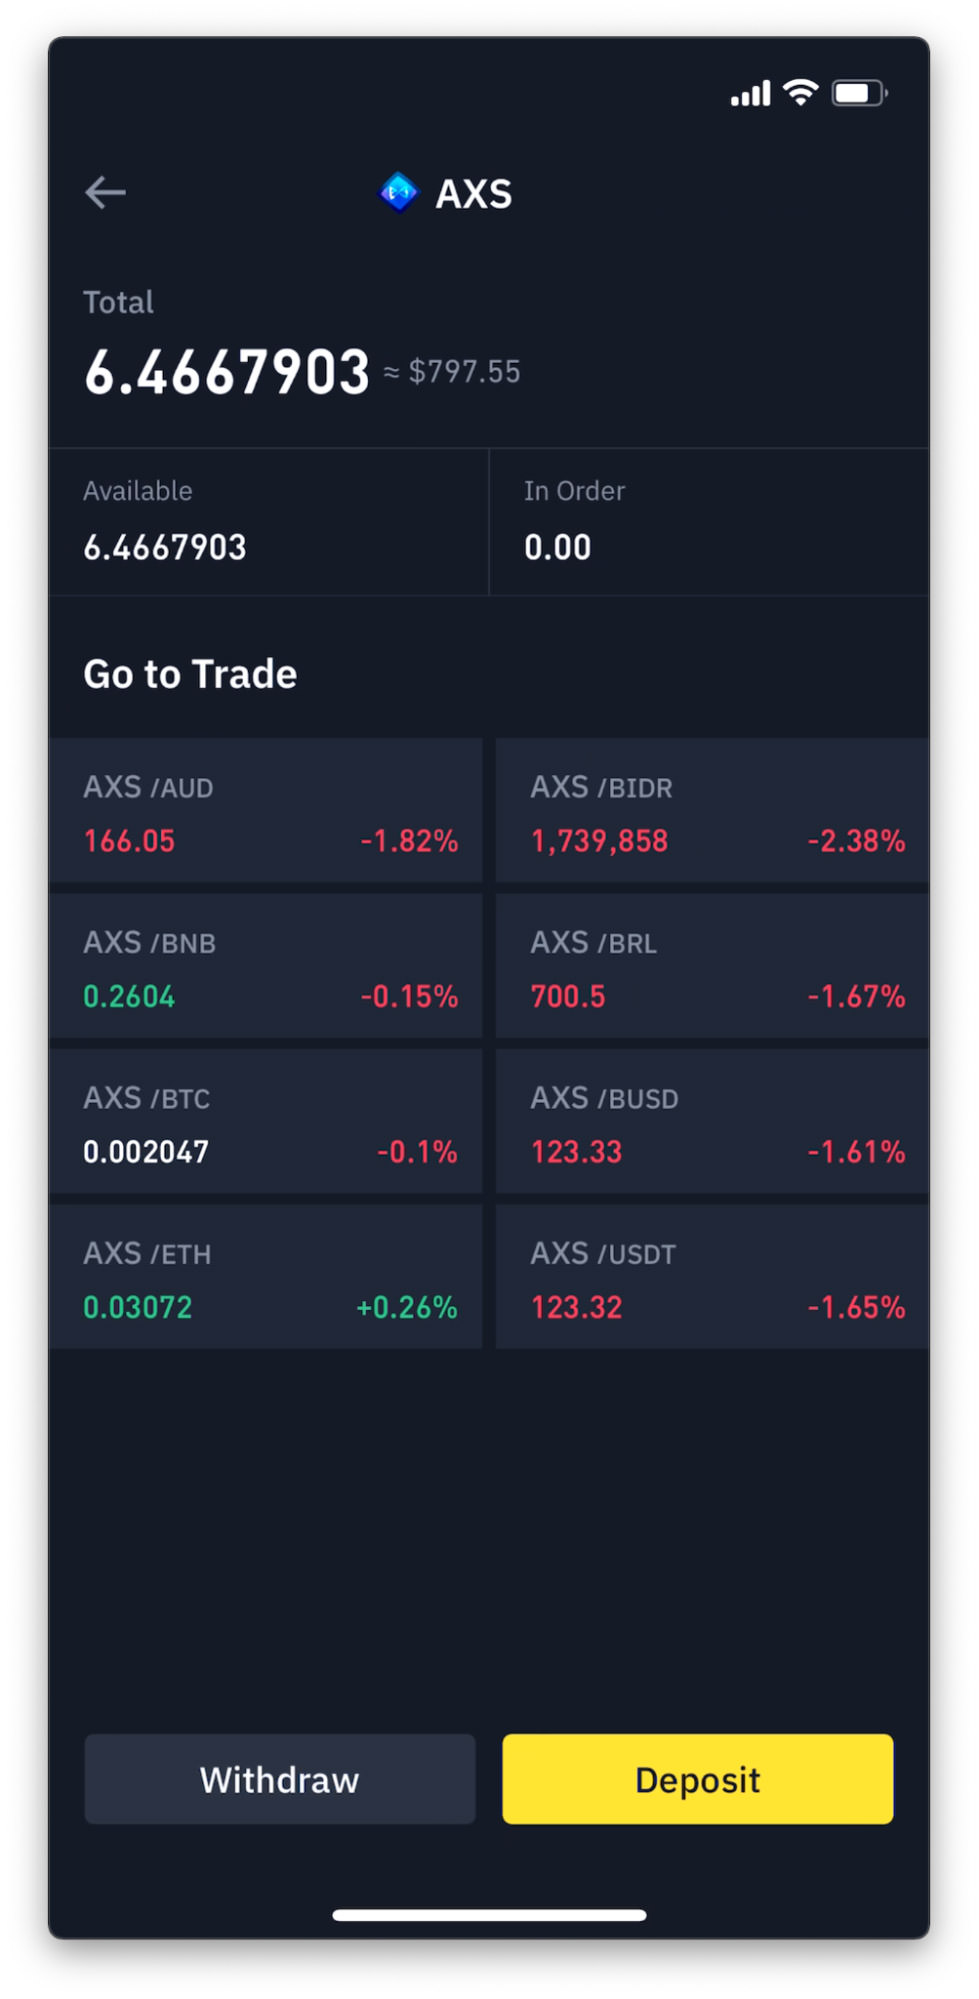
- On the AXS page, tap the Withdraw button (bottom left).
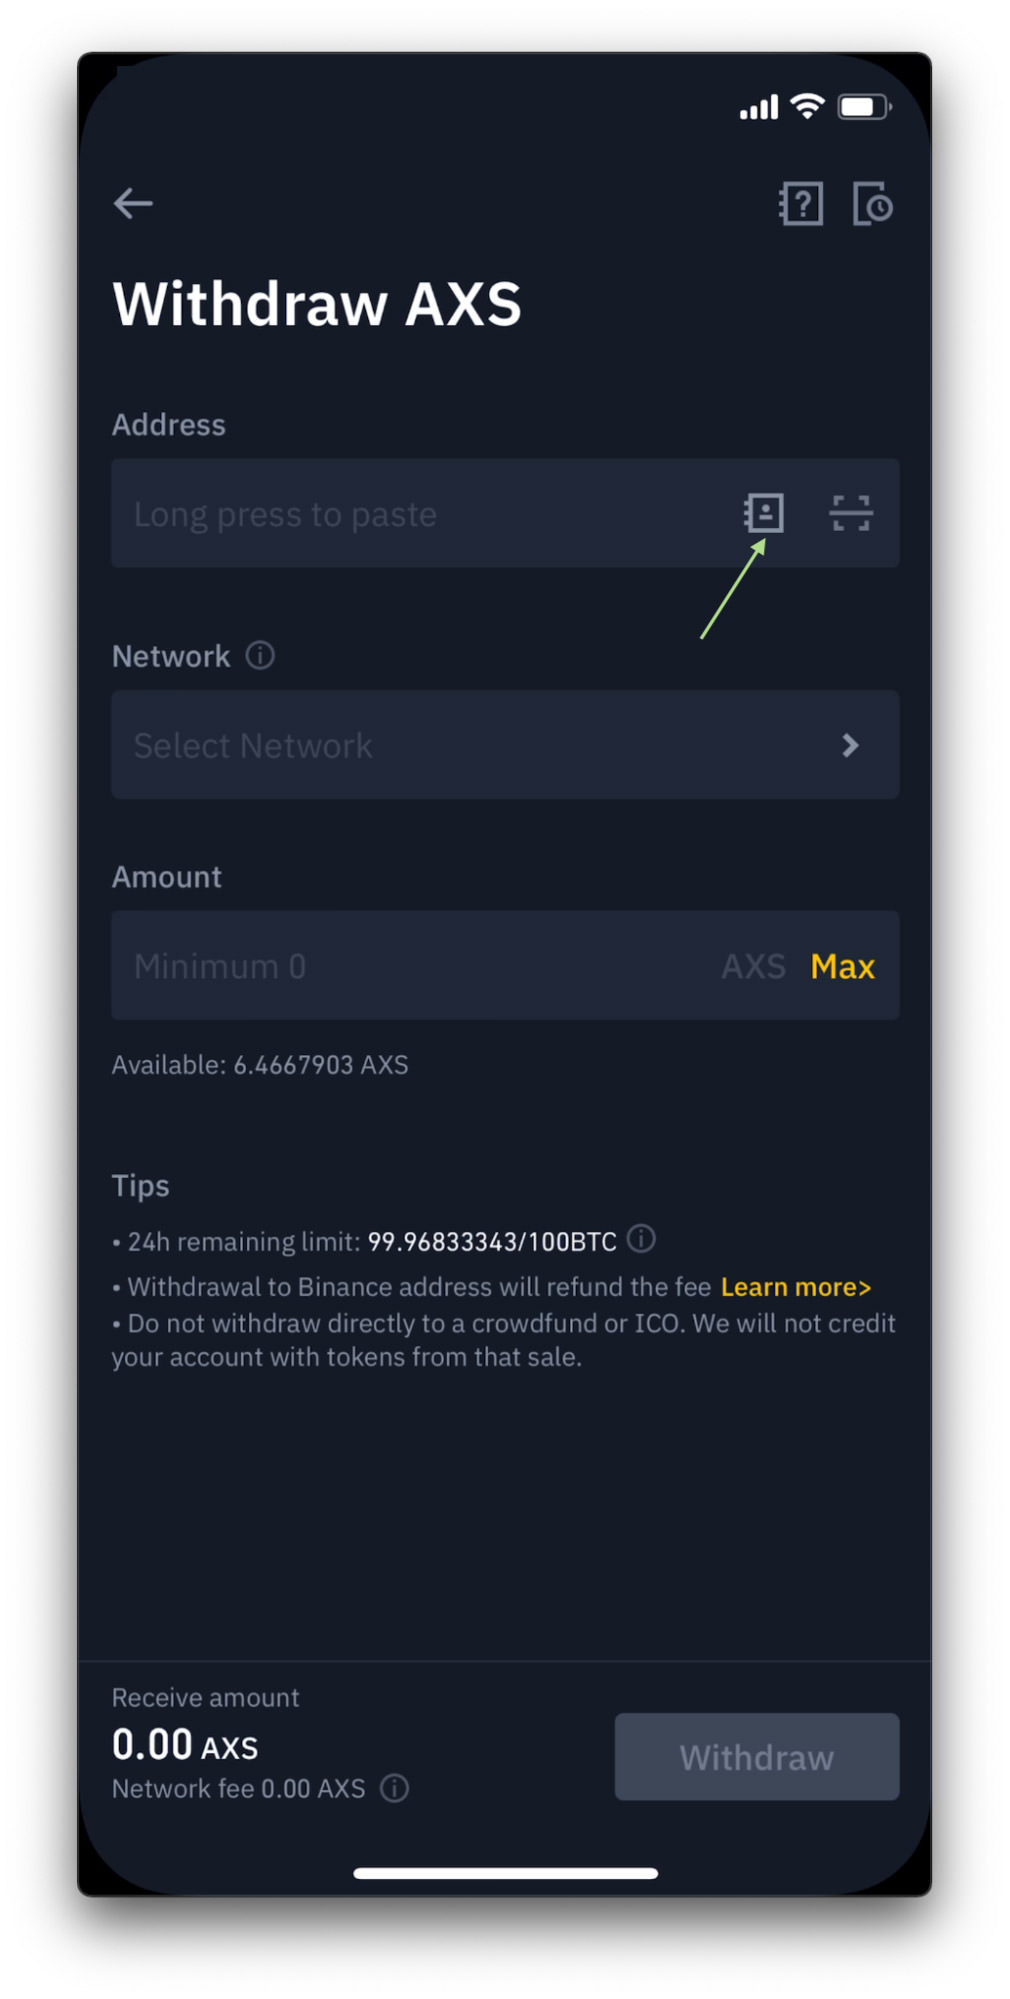
- Assuming this is your first time withdrawing (transferring cryptos out from Binance), you will first need to add and whitelist your destination’s address, i.e. your Coinbase Wallet’s AXS address.
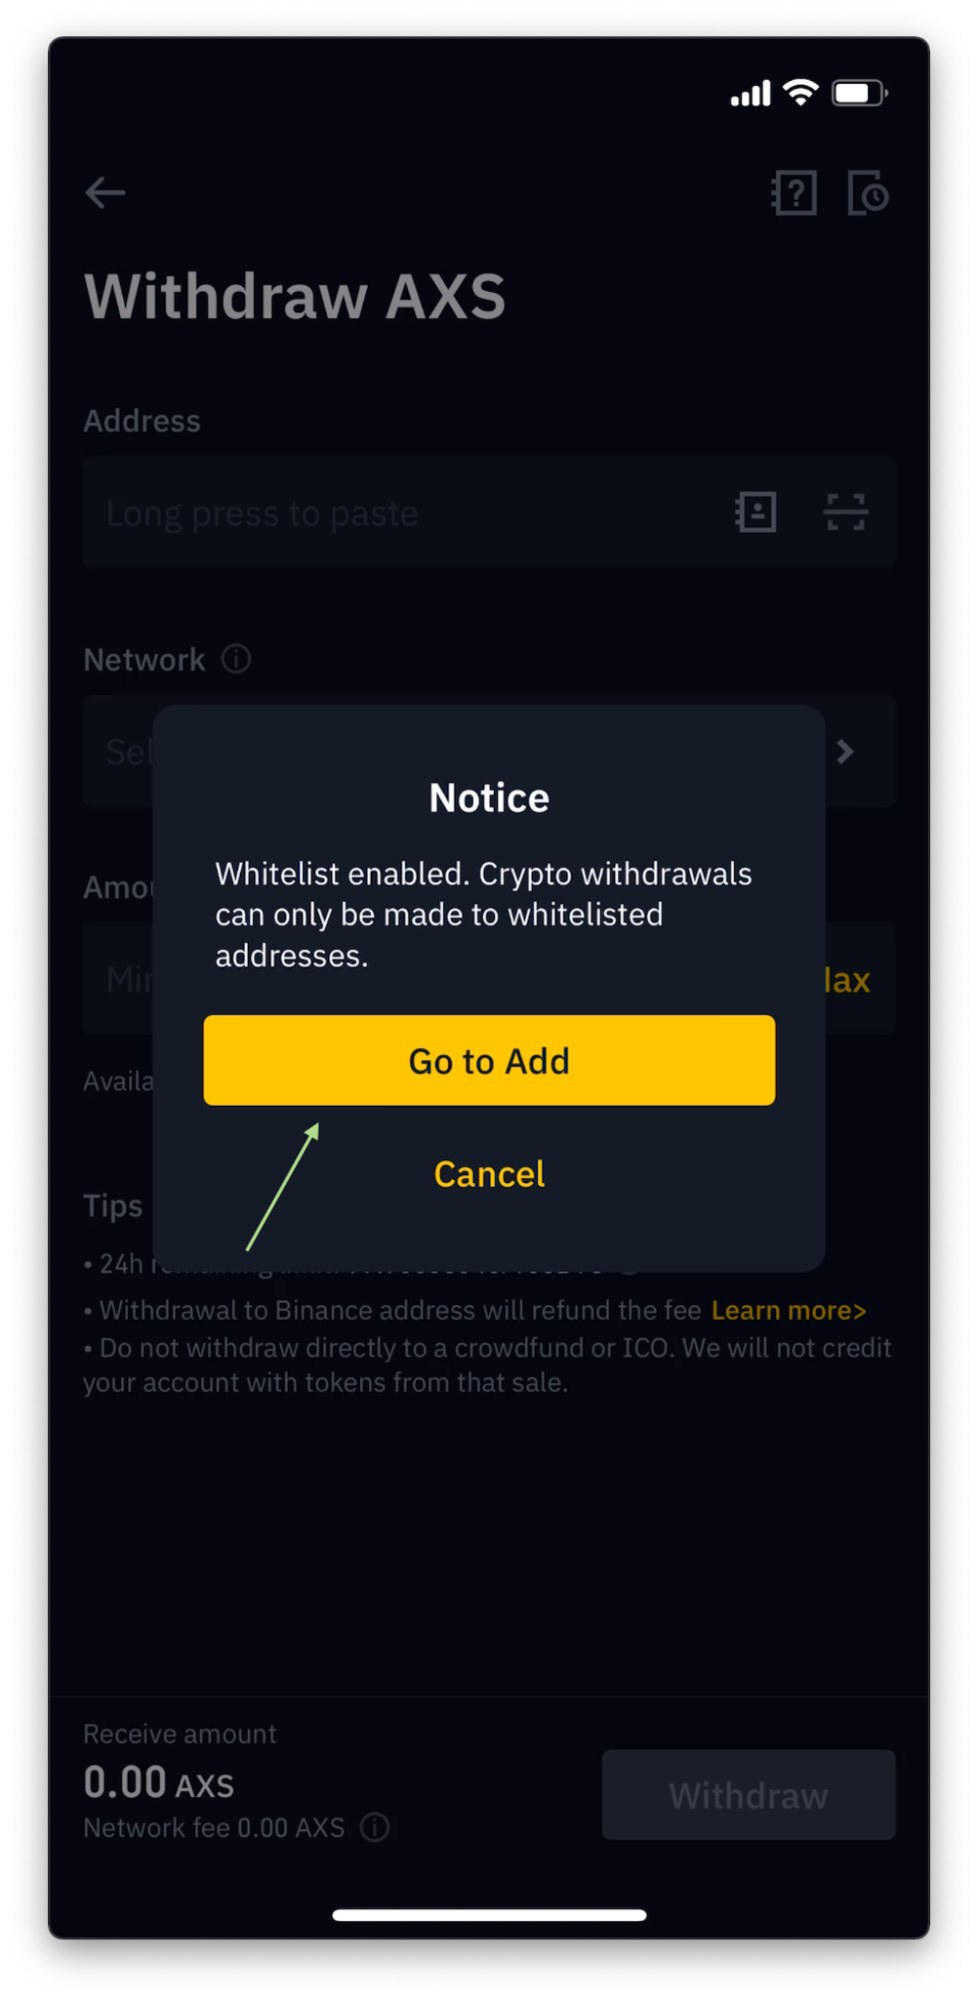
- Tap on the bookmark-alike icon under Address and then tap “Go to Add” to initiate adding and whitelisting your destination address.
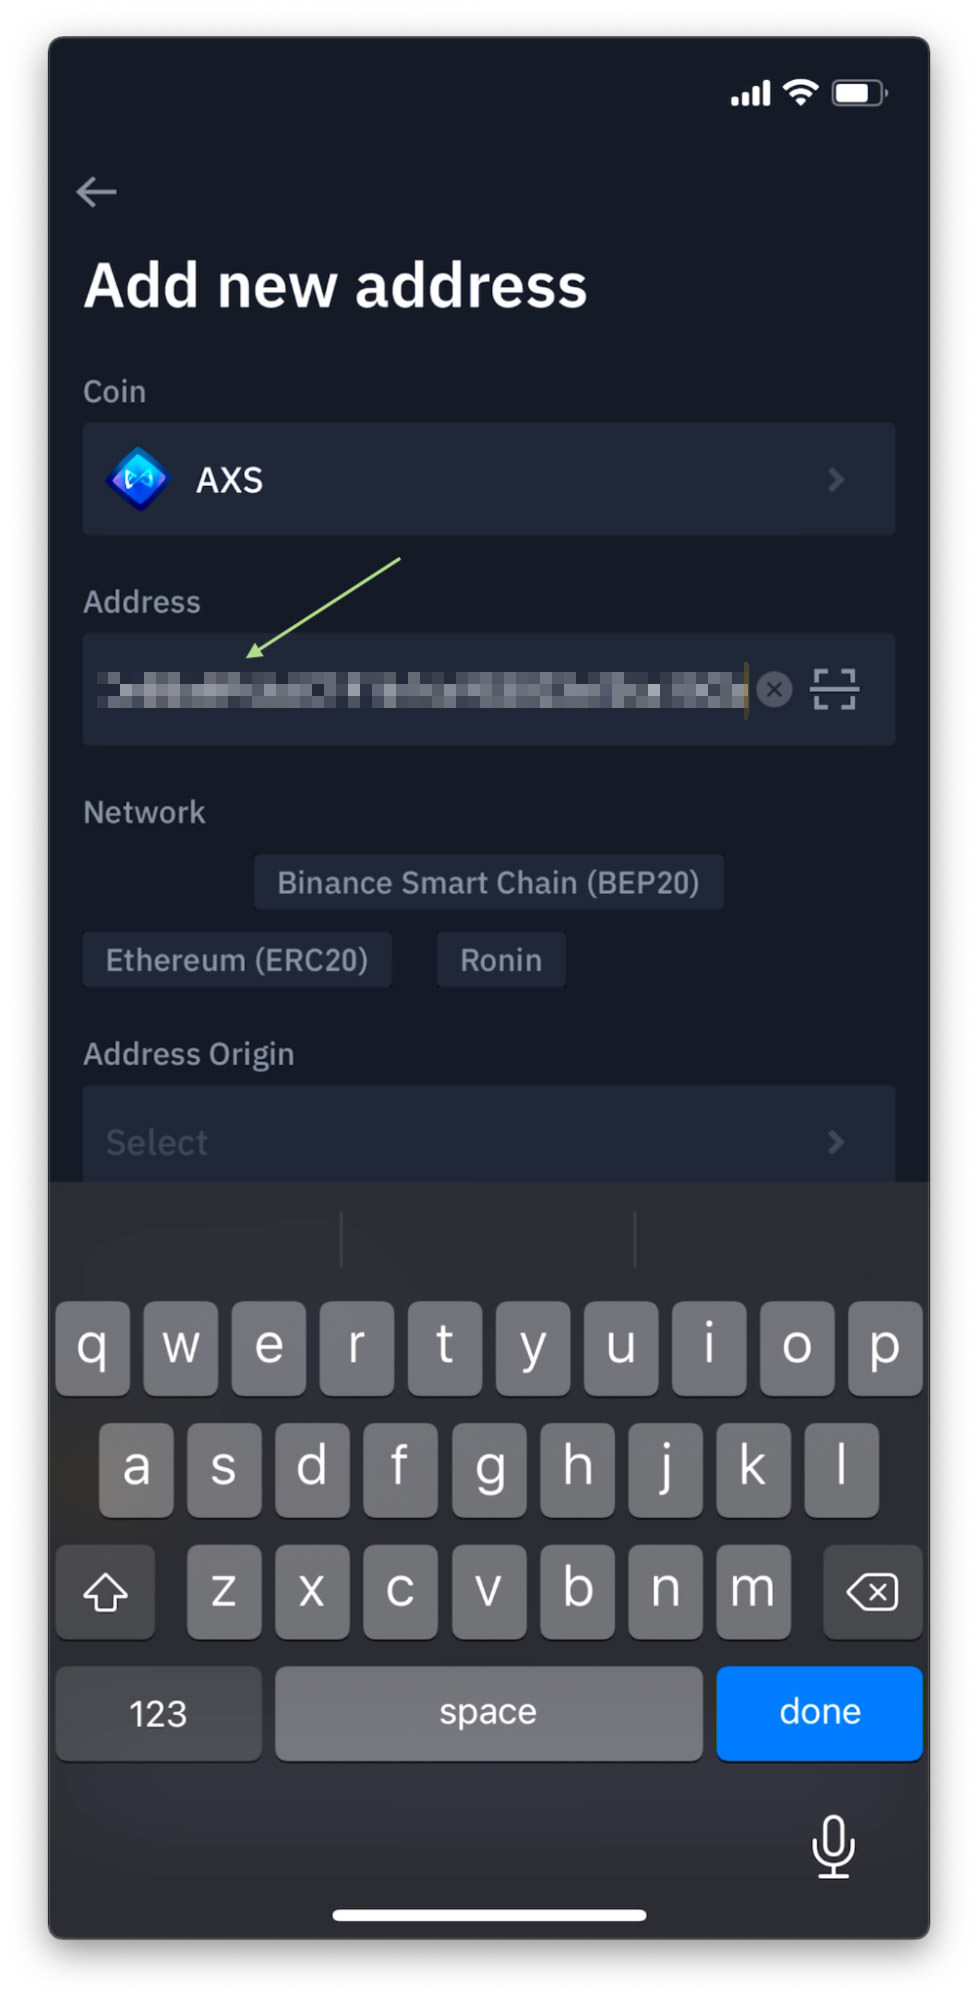
- Paste the address copied from the Coinbase wallet earlier into the Address field.
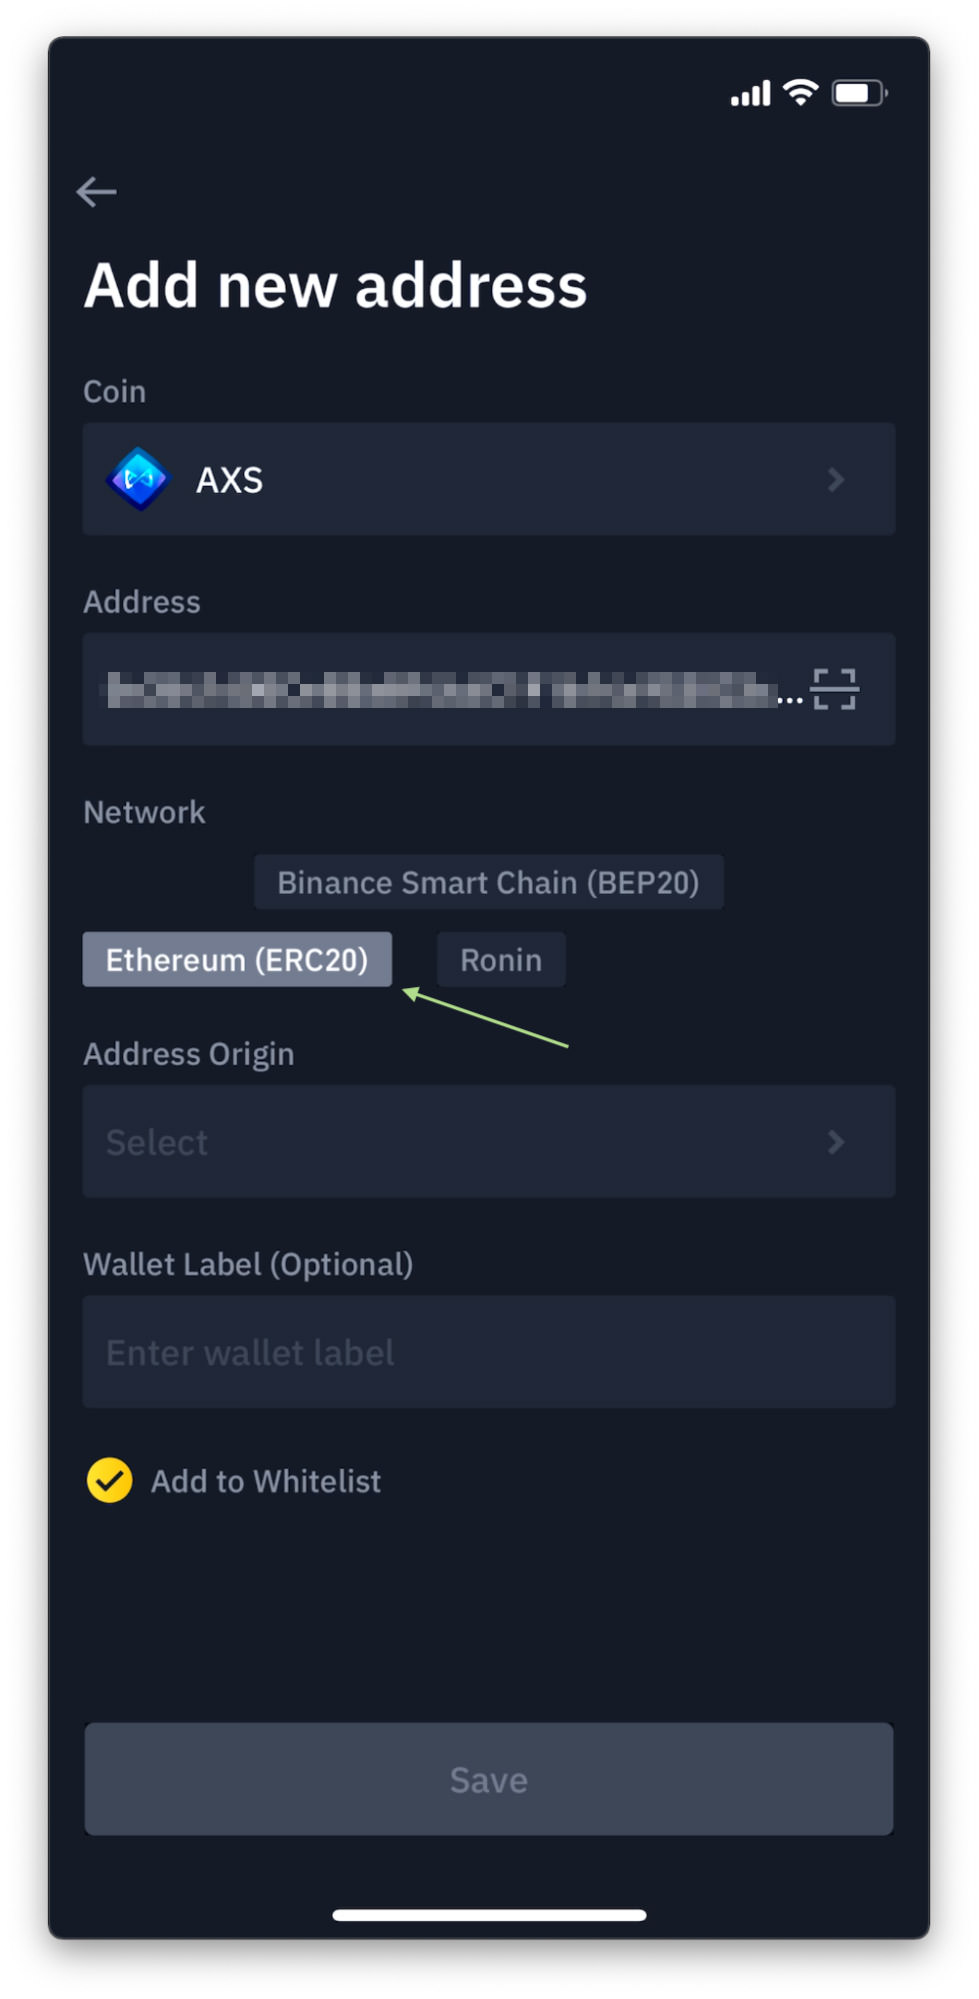
- Now, you’ll have to choose the network. For AXS, we will use the Ethereum (ERC20) network. Note: You should be careful of your network selection. A wrong network may result in coins being lost in the transfer. Click here to learn more about which network to select for your coin.
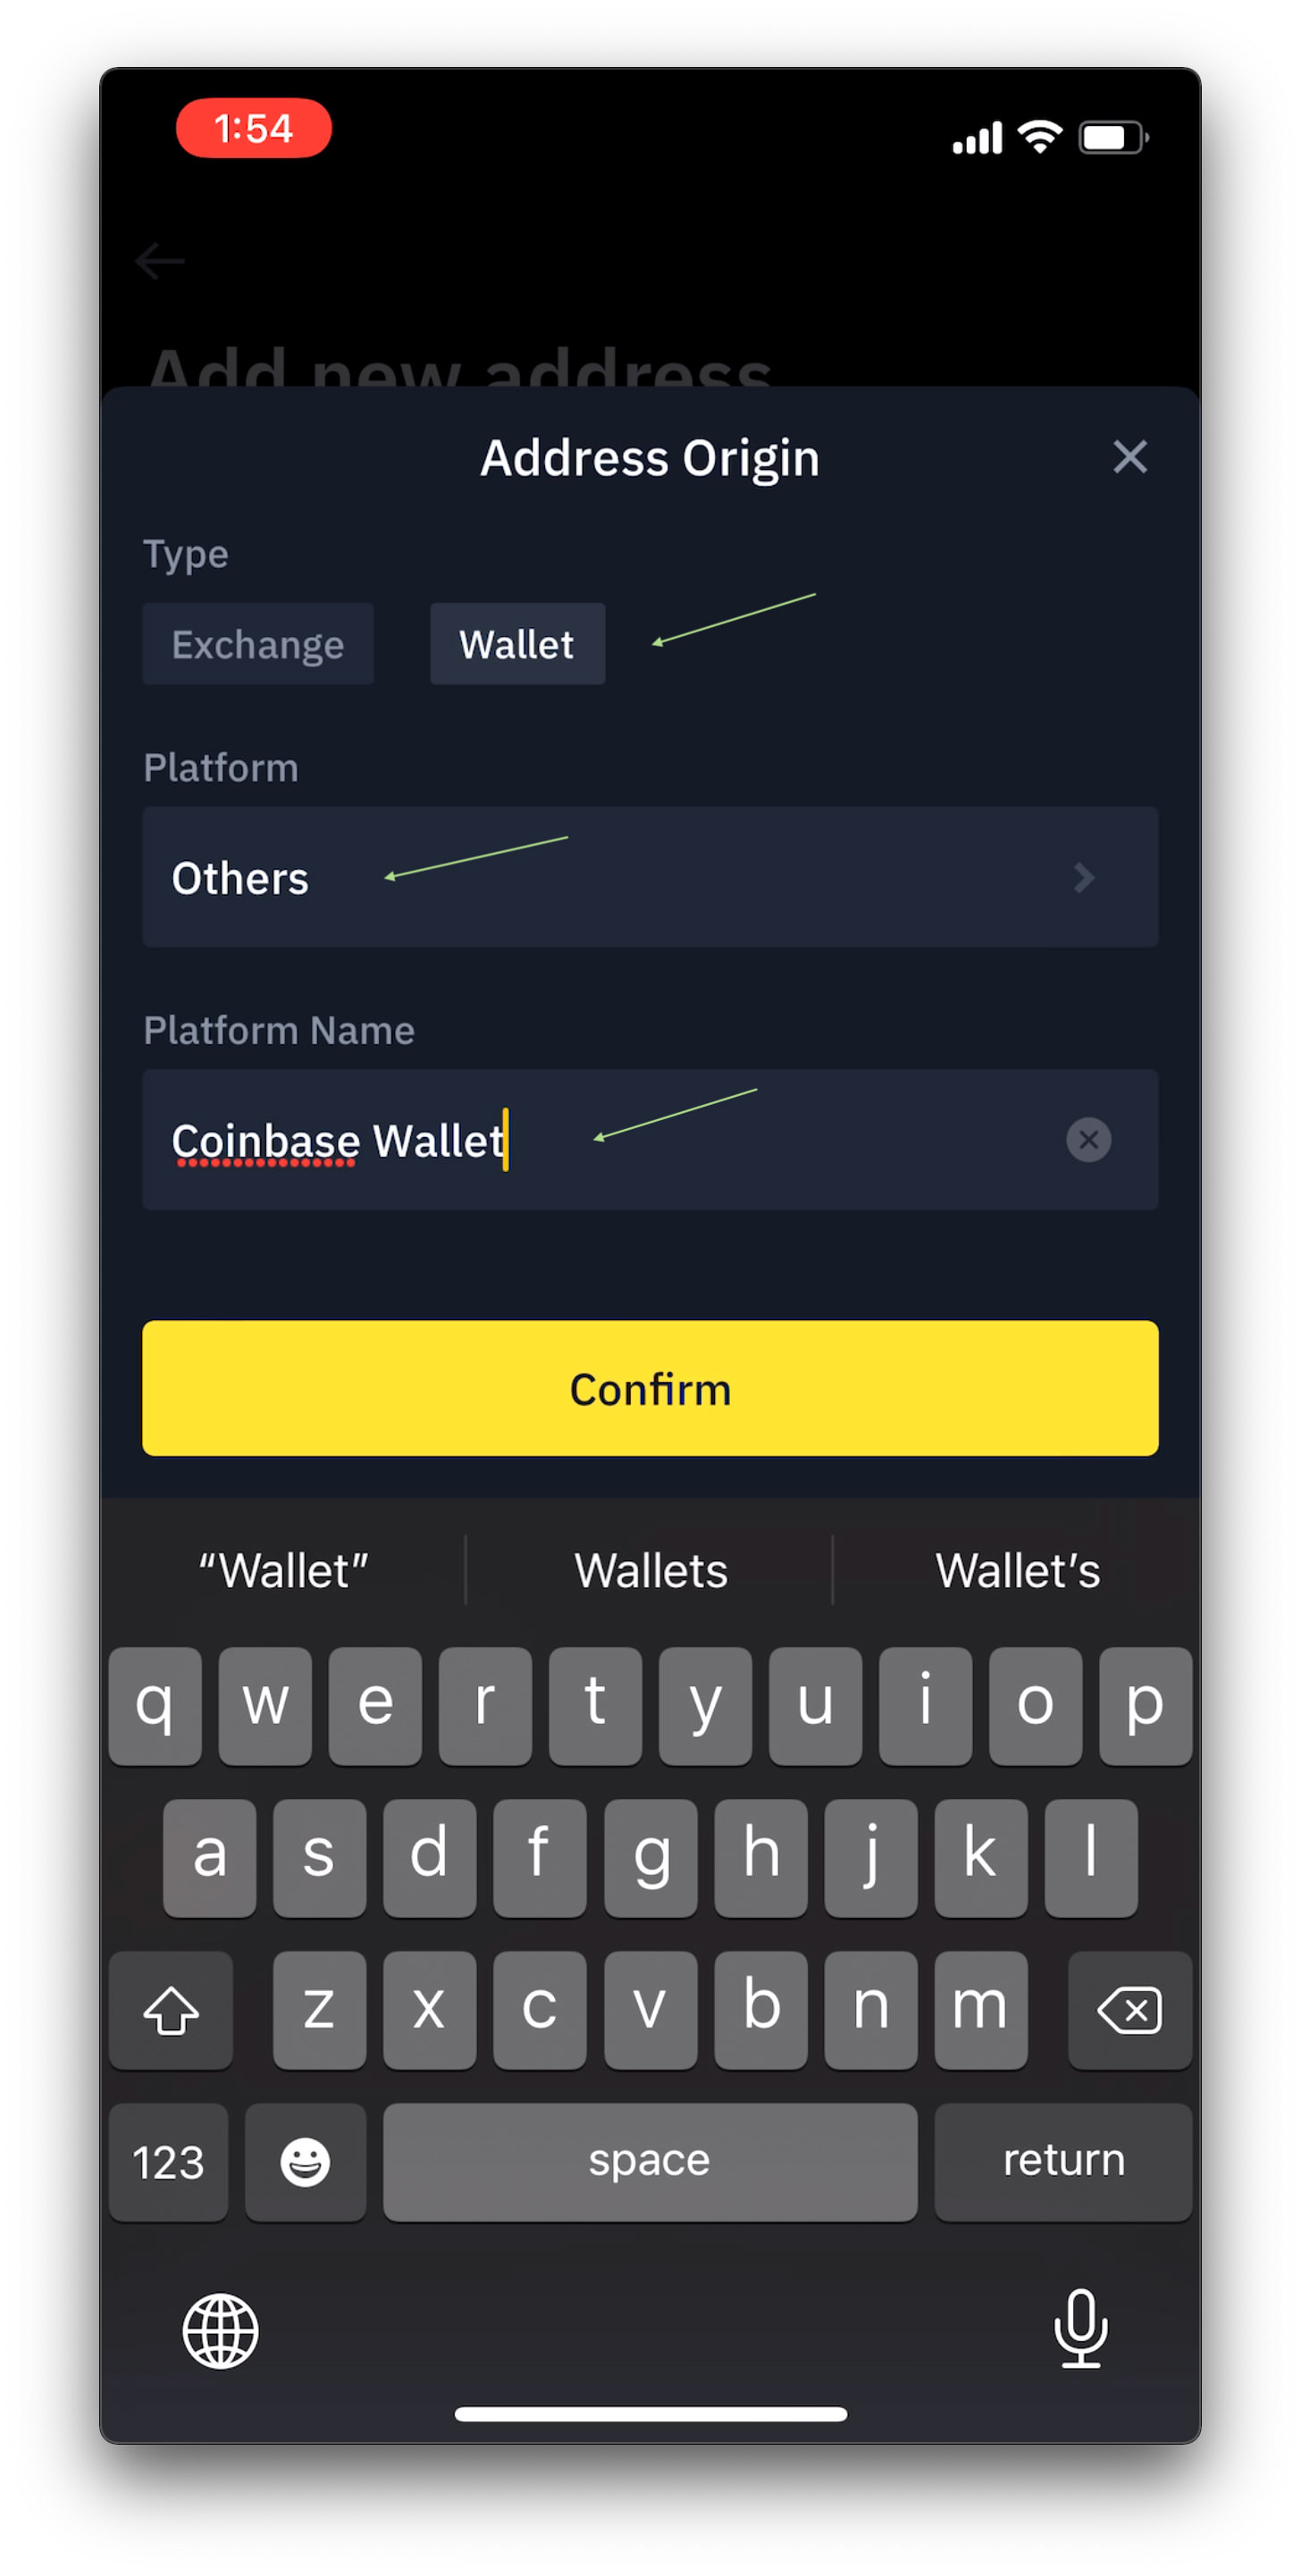
- Moving on, tap Address Origin, then for Type select Wallet and for Platform select Others and give it a name. For this tutorial, I’ll give it a self-descriptive name – Coinbase Wallet. Once done, tap Confirm. Note: We chose Type > Wallet because we are transferring to an address in Coinbase Wallet (a software wallet), and not an address in Coinbase.com (the platform).
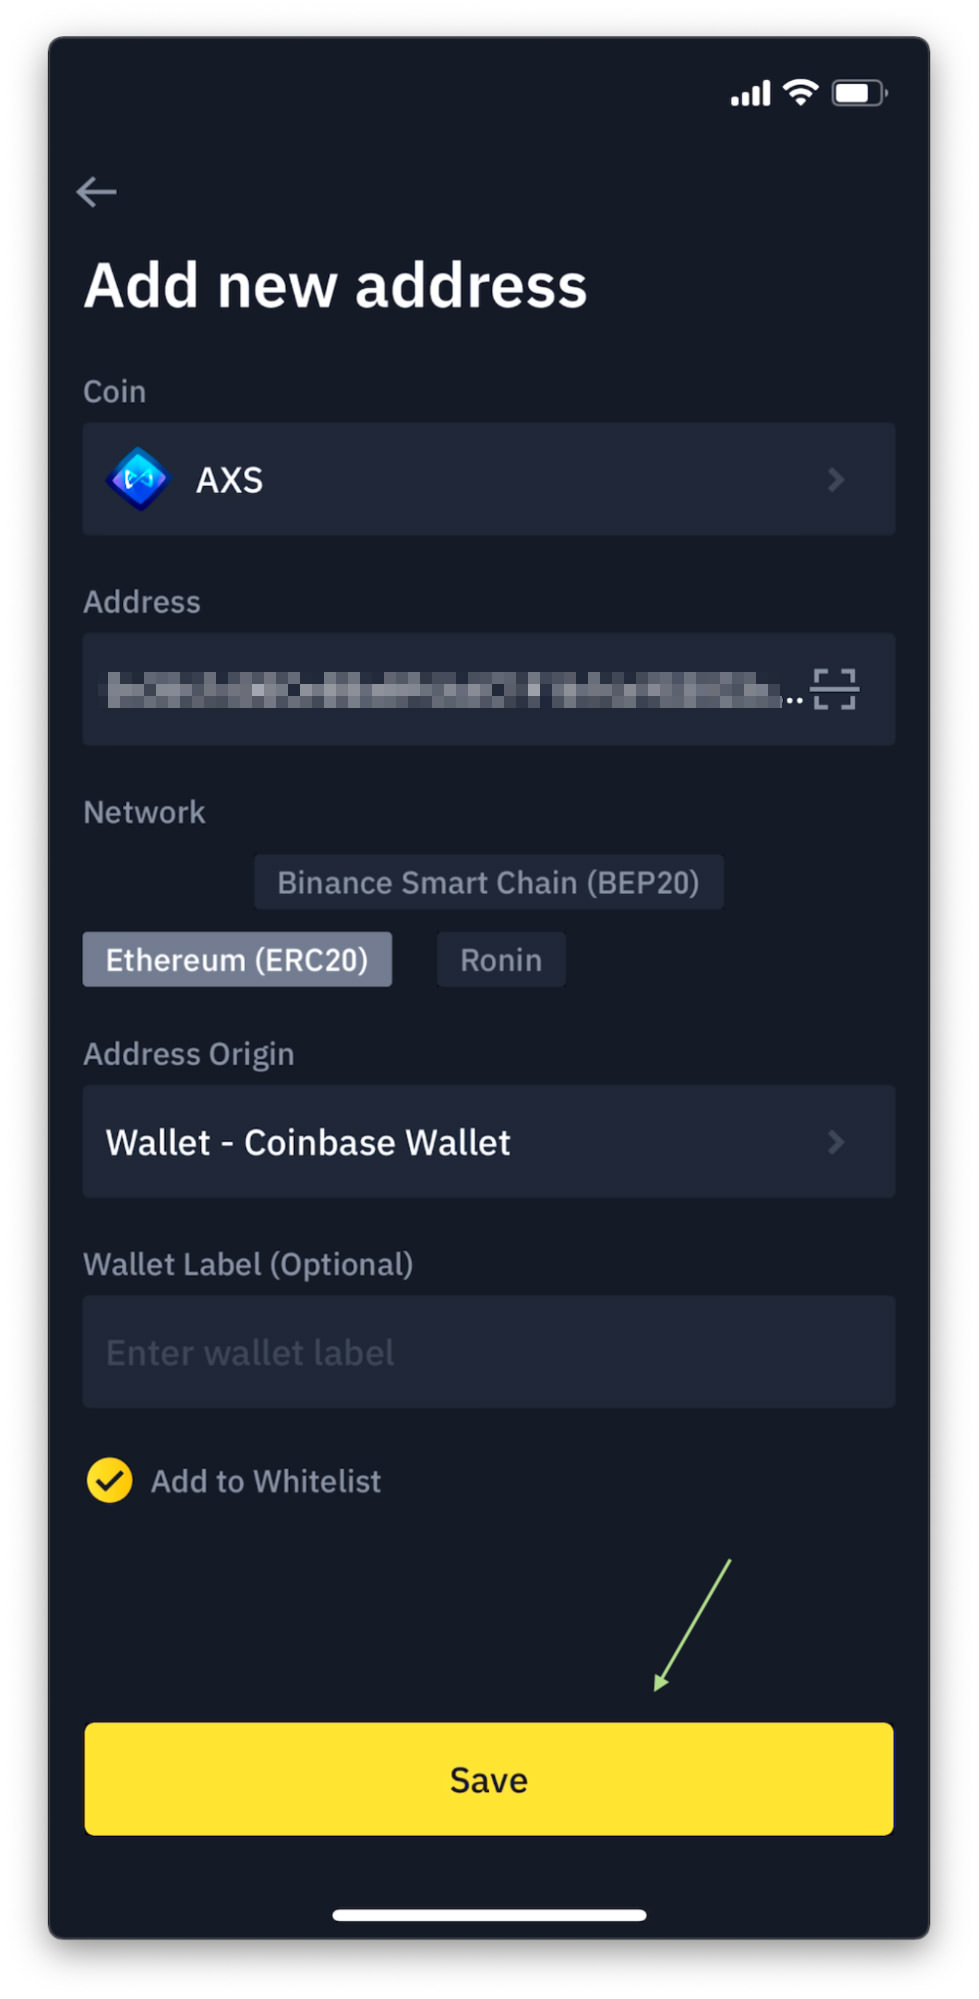
- Check to make sure all information (Coin, Address, Network, and Address Origin) is correct, then tap Save to add and whitelist the address.
- Before the address can be added and whitelisted, your identity needs to be verified. Tap Send Code to verify both your phone number and email address.

Step 3 -Transfer your coin
- Once the verification is complete, you will be directed back to the Withdraw page. This time, tap the Address field, select the address added in earlier, and tap Confirm.
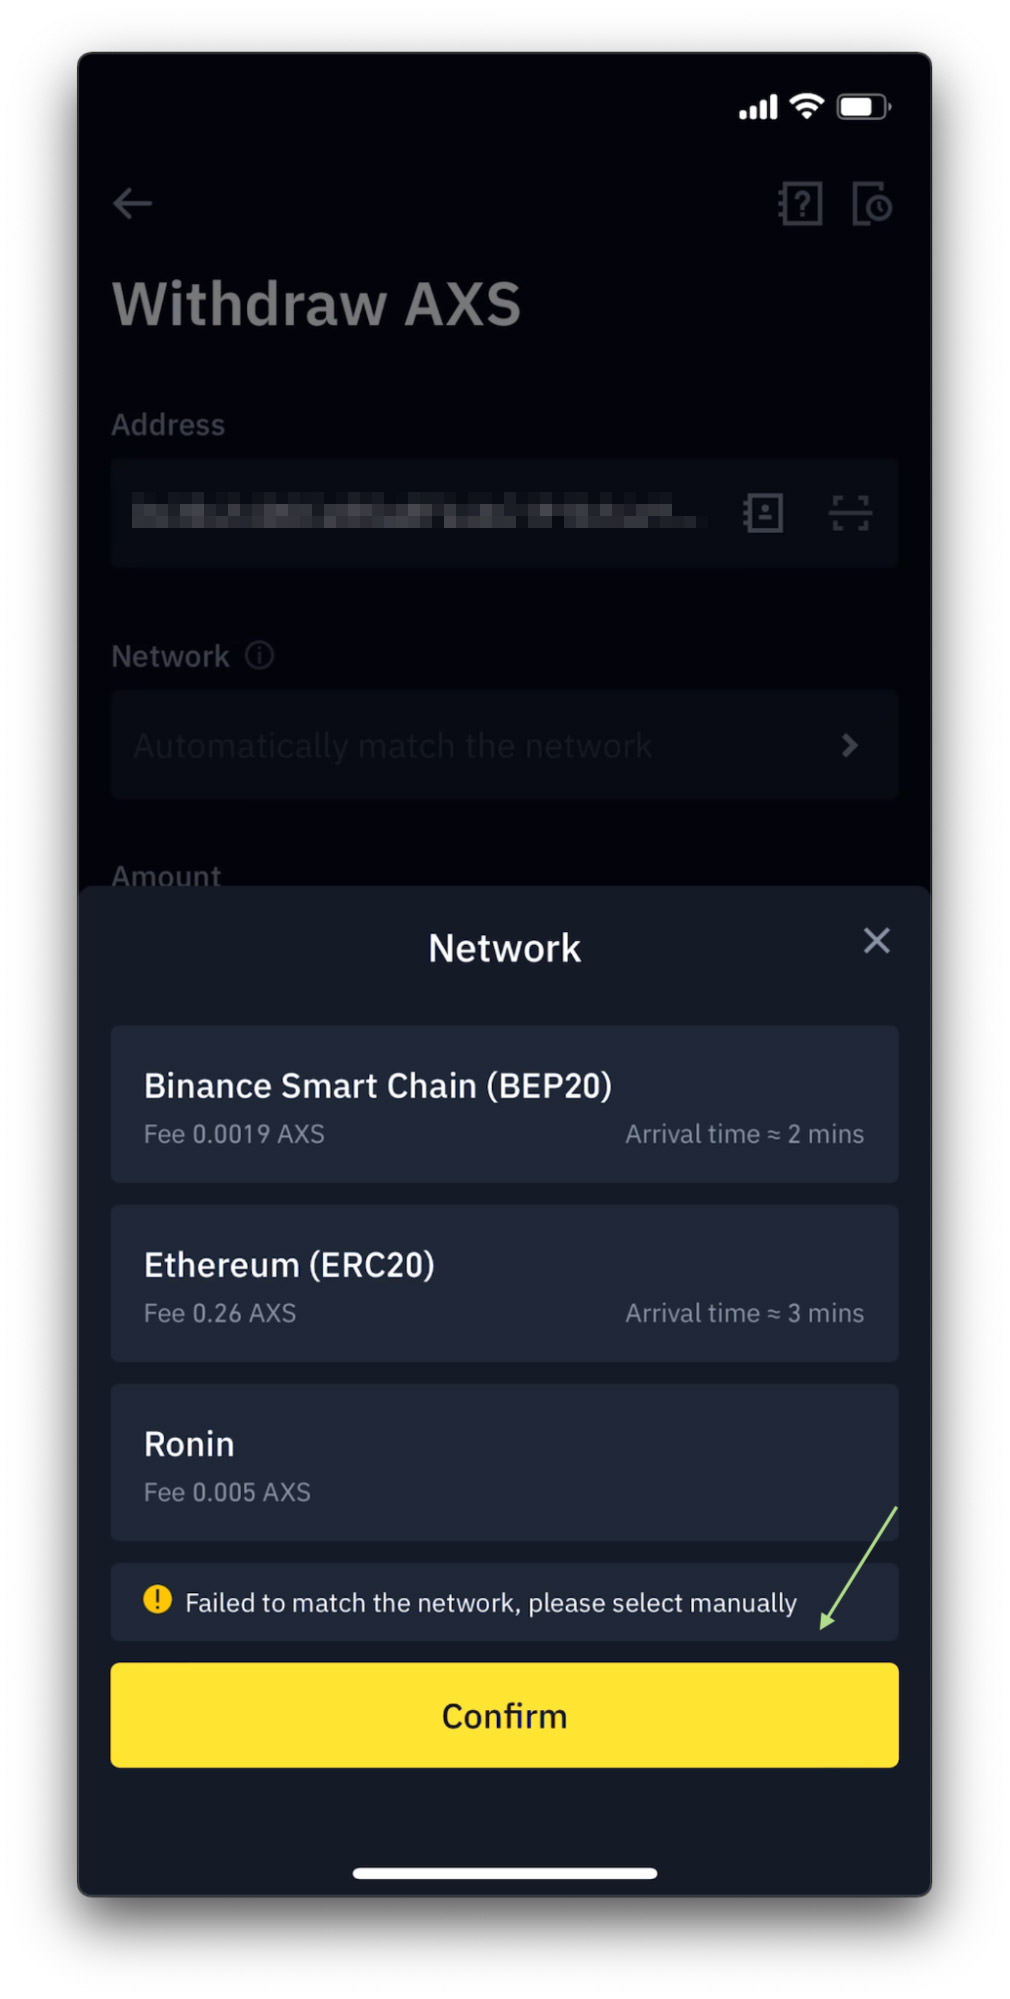
- The network should be automatically selected, but in case it’s not, manually select Ethereum (ERC20) for this transfer. Click here to learn more about which network to select for your coin.
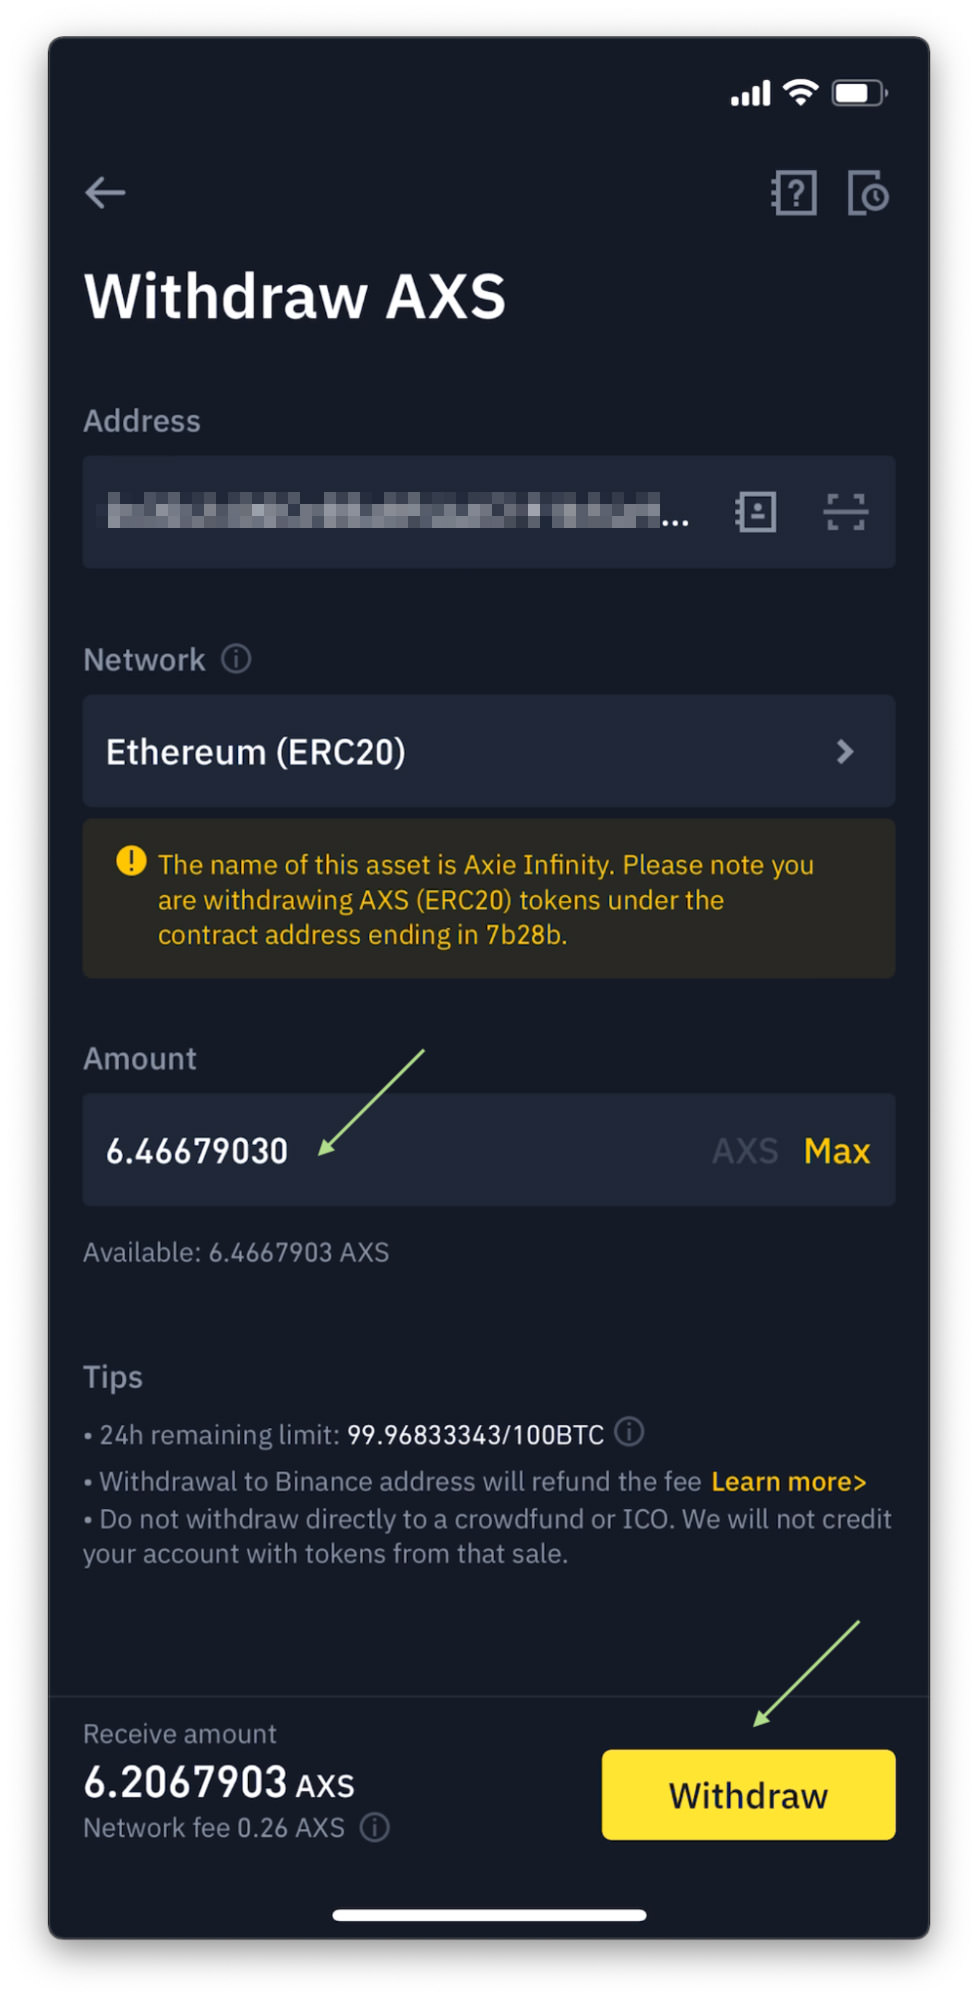
- Tap Amount and enter the amount of AXS you want to transfer to your Coinbase wallet. Once you make sure everything is correct, tap Withdraw. Note: Why you should try out with a small amount.
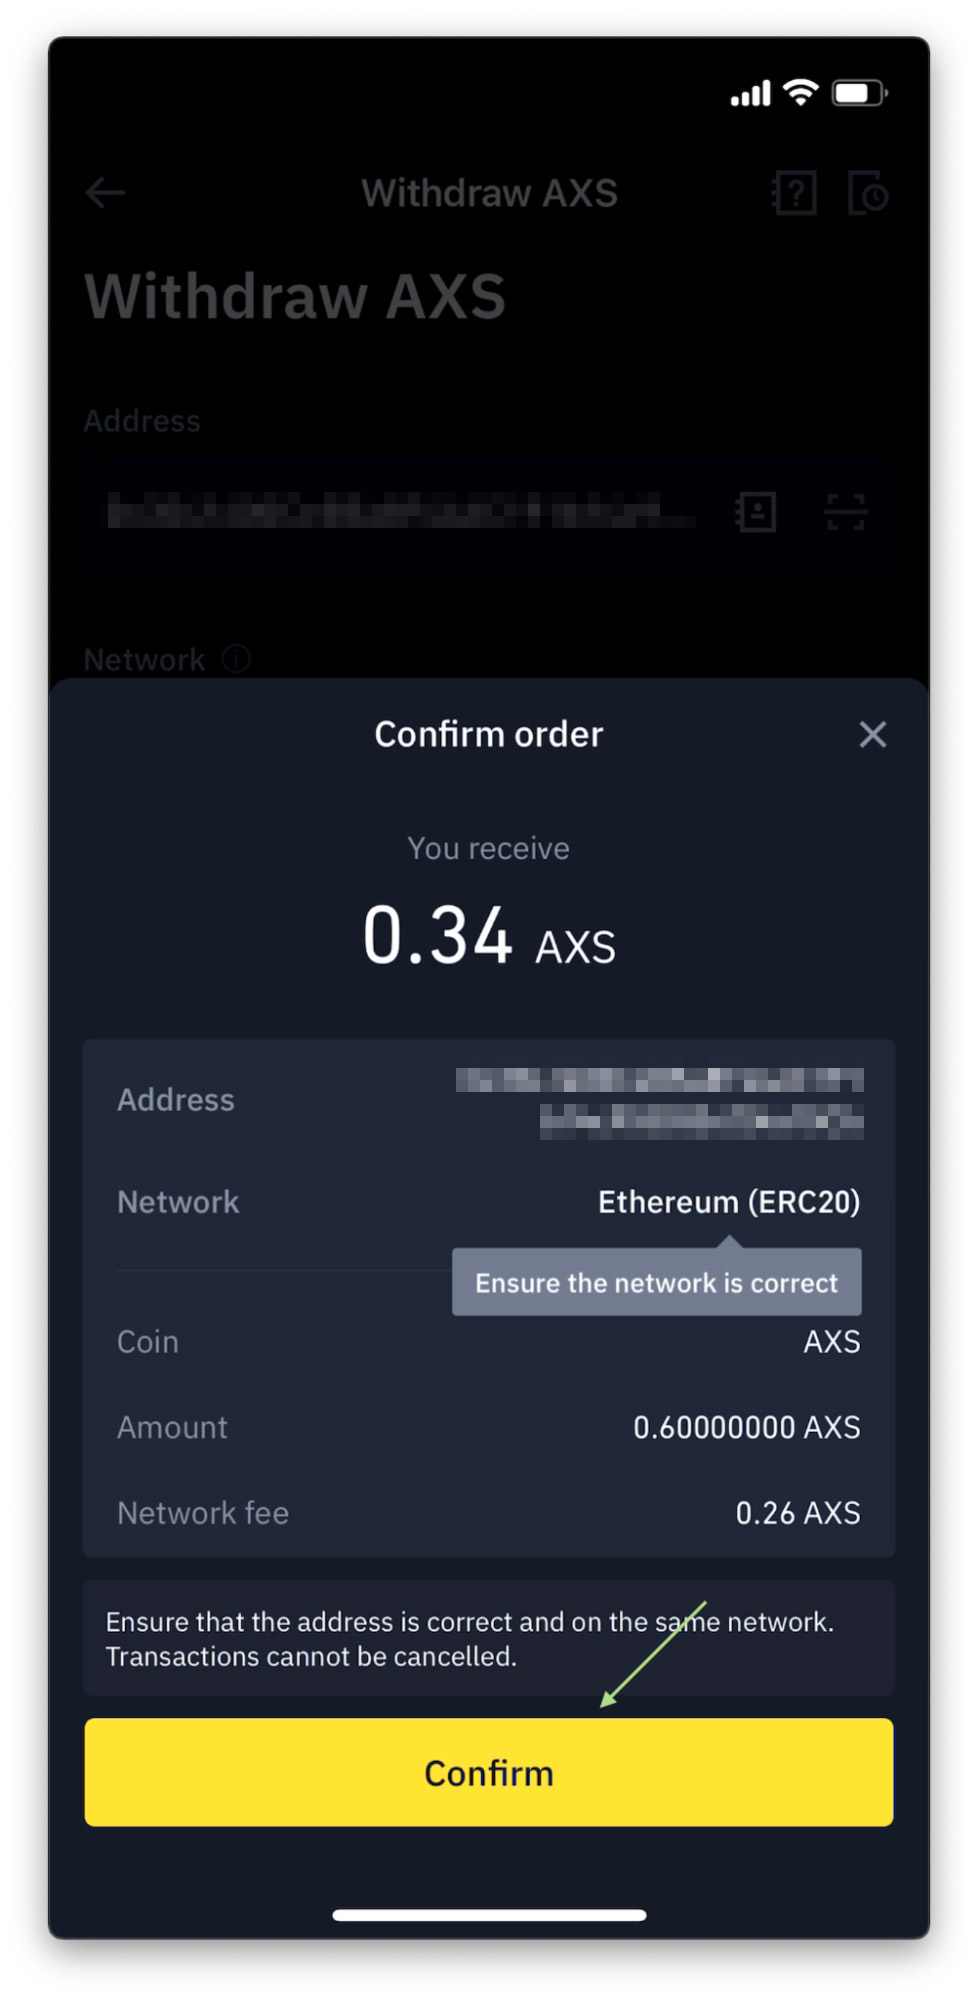
- Check all information (Address, Network, and Amount) again and if everything looks good, tap the Confirm button.
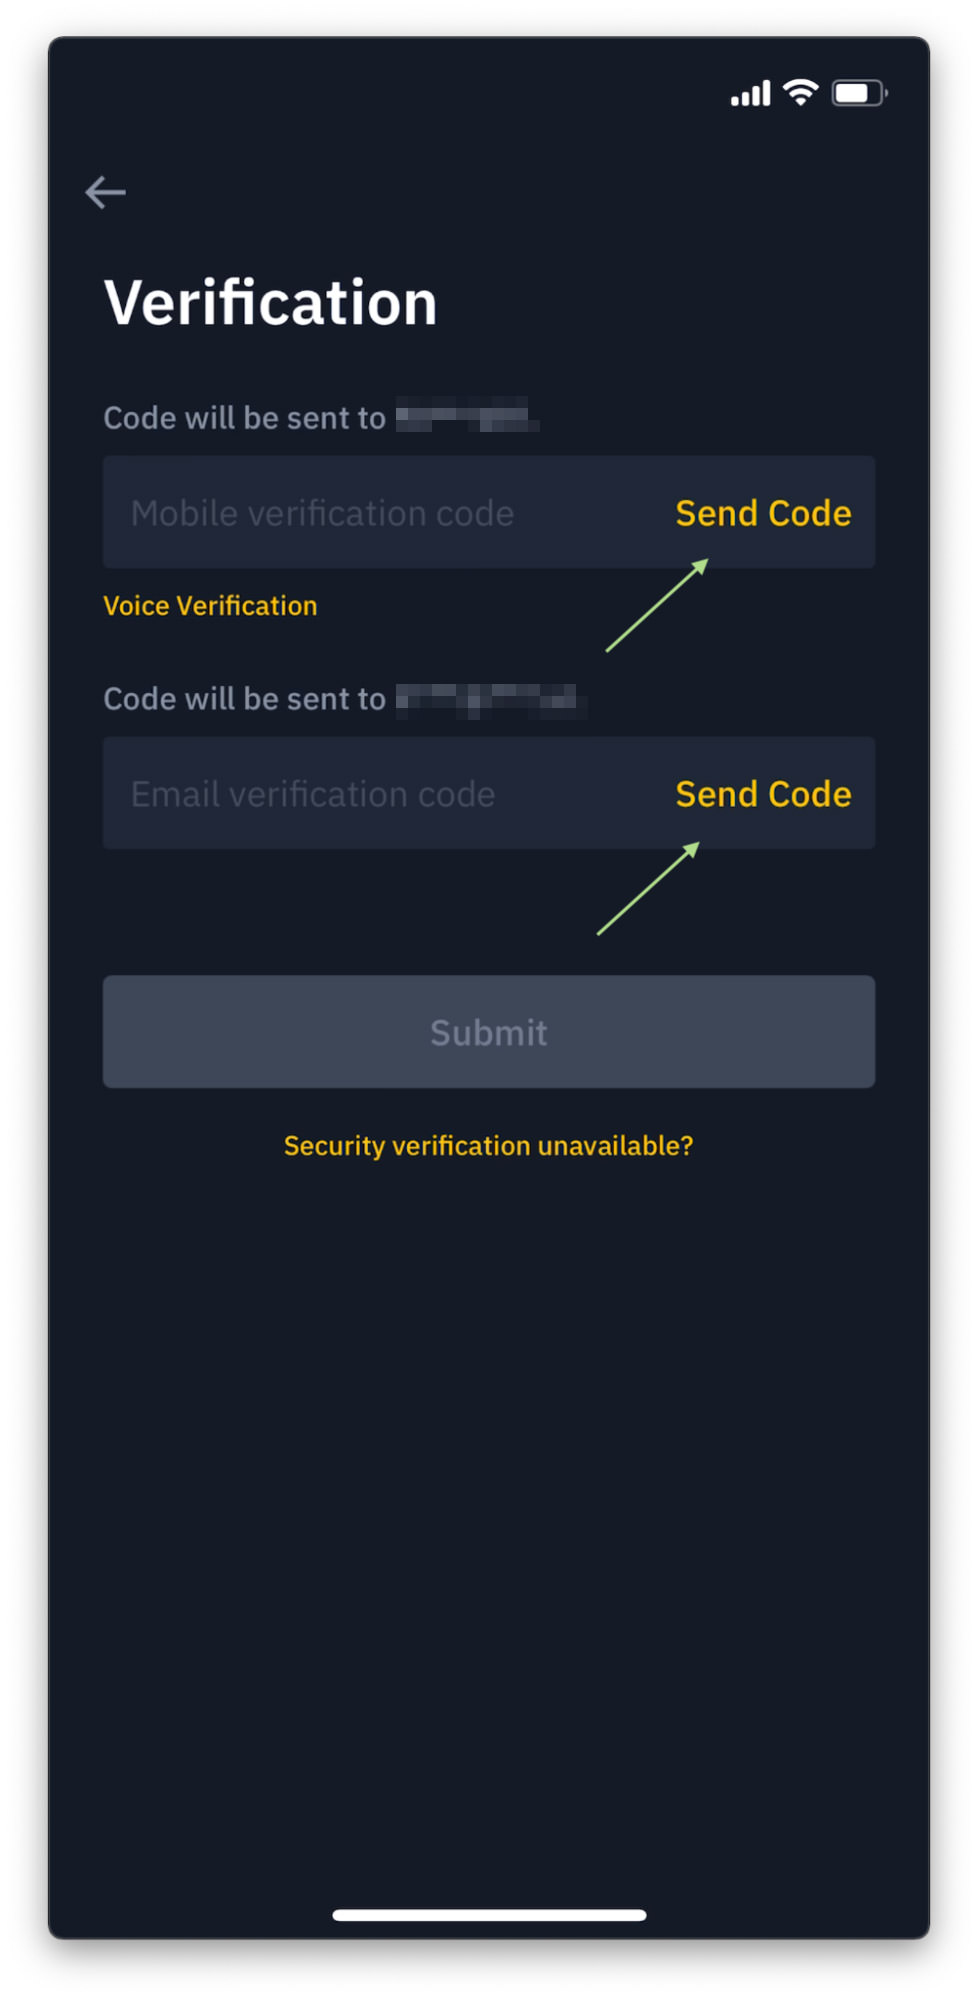
- Before you can transfer your coin out of Binance, your identity needs to be verified again. So go ahead and tap the Send Codes one more time.

Step 4 – Check its progress
If verification is a success, you will end up on a page that says ” Withdrawal Request Submitted“, like the following. This means Binance has started to process your transfer request.
When “Withdraw request successfully” is checked, that means your coin has successfully transferred to your Coinbase wallet. As mentioned above, the successful transfer may take minutes to hours, sometimes even days, depending on the coin, or the network used.
In our case, AXS was successfully transferred in less than 10 minutes.
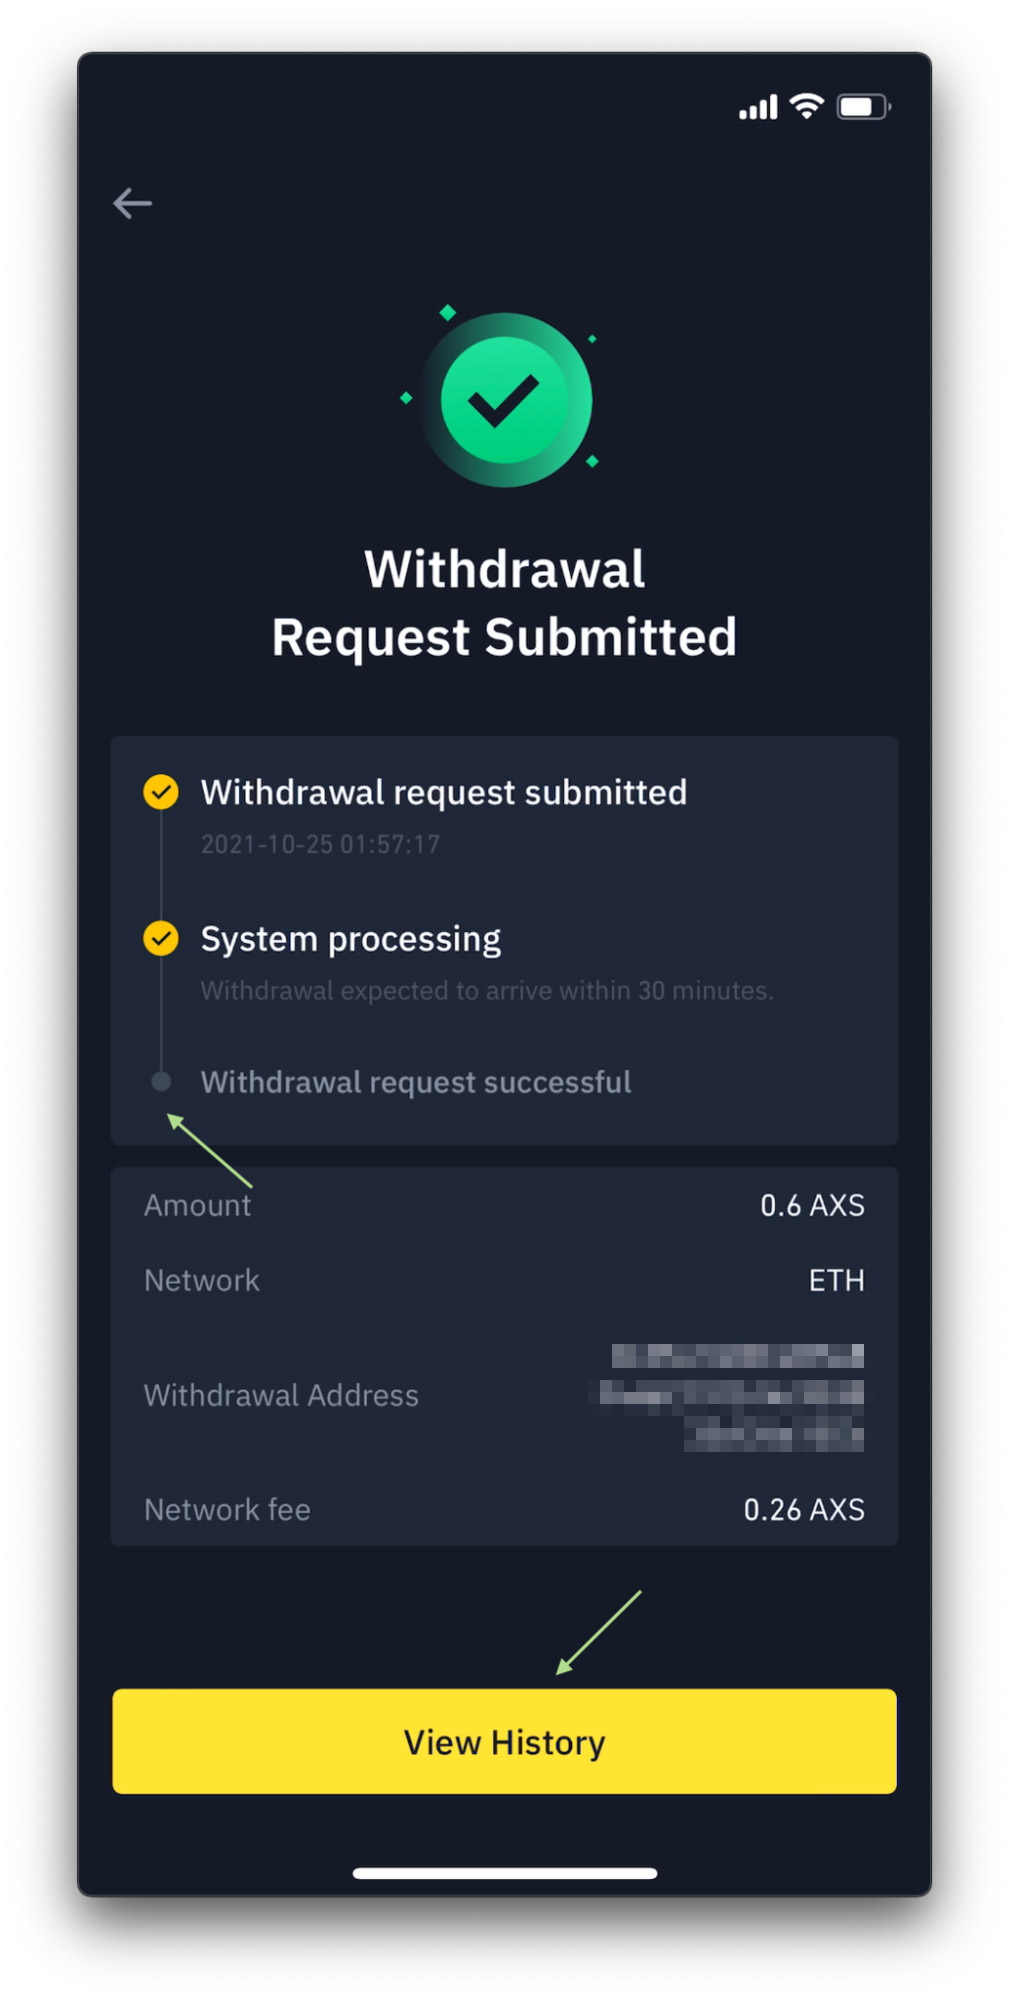
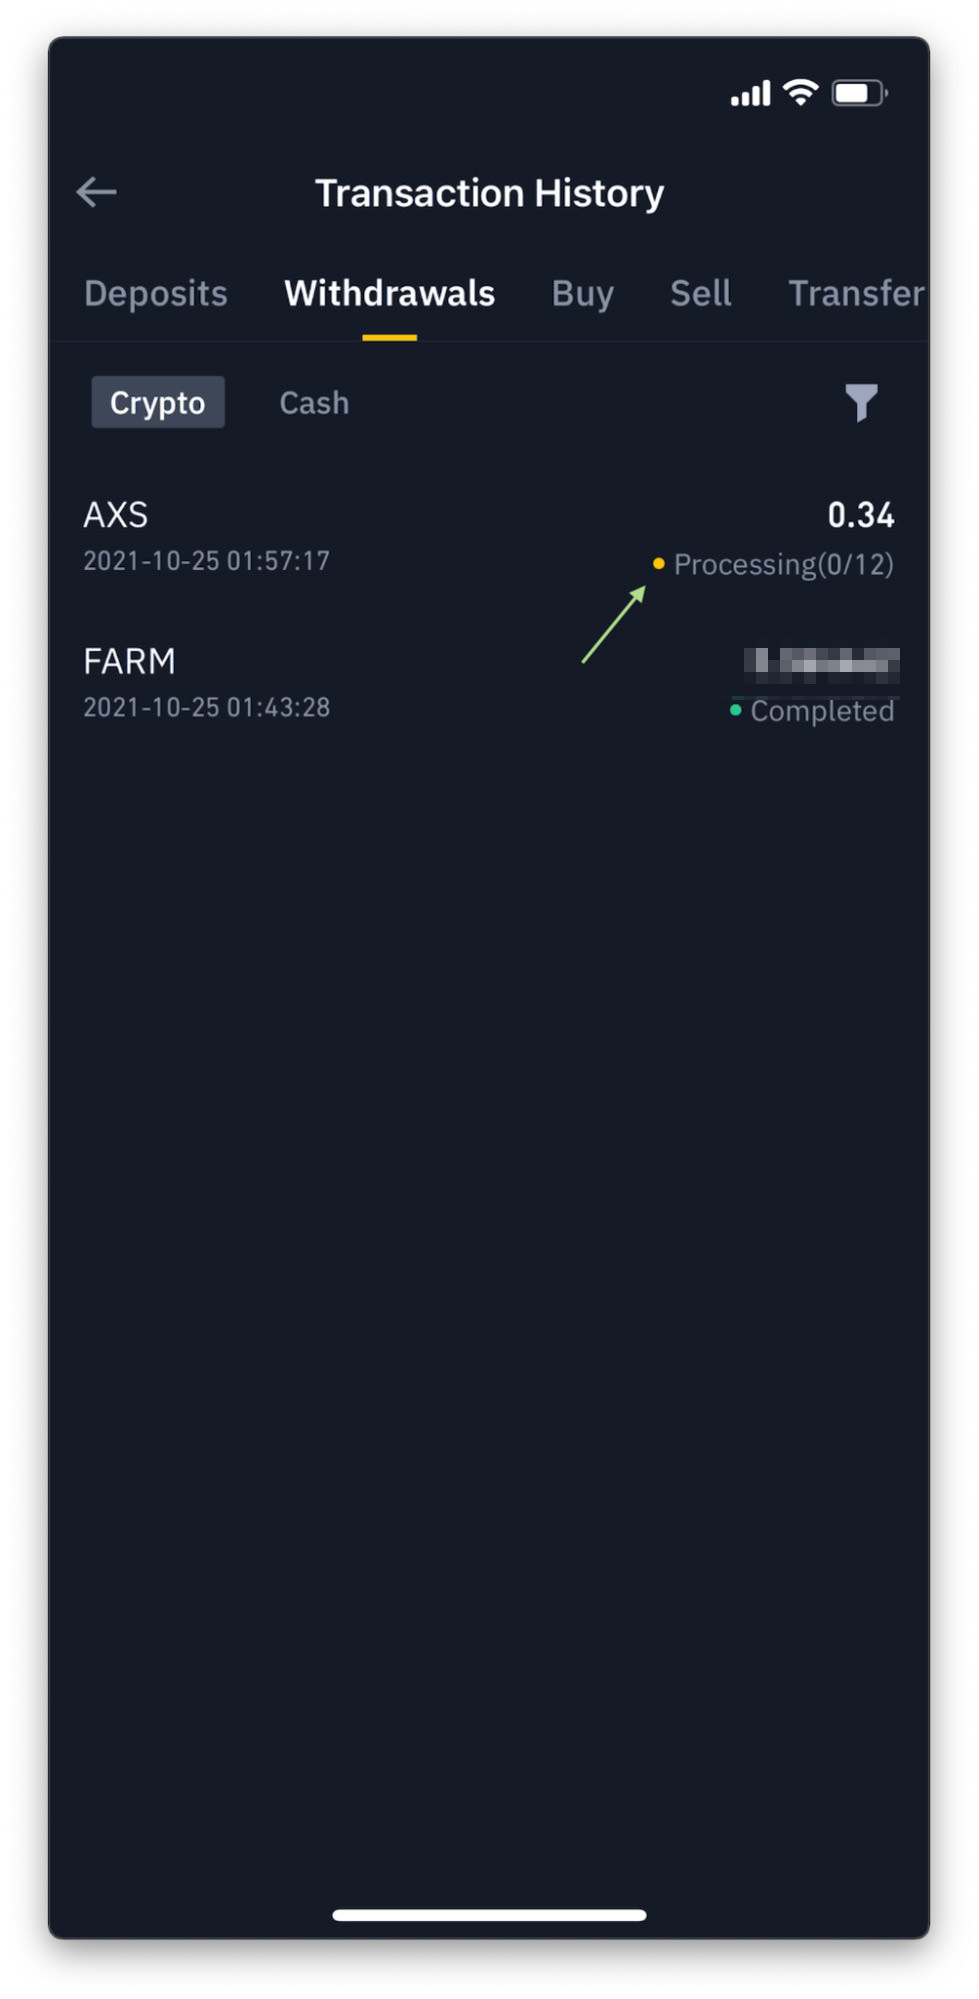
You can also tap “View History” to see the progress. When the orange bar of Processing (X/XX) changes to a green Completed, that means your coin has been successfully transferred and reflected in your destination address, in our case, Coinbase wallet.