How to Run Android OS on Your Windows PC
Did you know you can not only run Windows apps on Android, but also run the Android OS on your Windows device? This guide is for those looking to explore the latest Android release for testing, fun, or Android app development.
As an open source mobile technology, Android allows anyone to access its code and system images through the Android Open Source Project (AOSP). This accessibility is what makes running Android on Windows possible.
Virtualizing Android on a Windows PC is straightforward. It involves downloading some tools, installing them, configuring, and running them. We’ll walk you through the necessary steps and provide solutions for common issues you might encounter.
How to Tighten Security on Android Device
Simple strategies you can follow to keep your Android phone or tablet secure from malware and vulnerabilities. Read more
Note: While this tutorial uses Android 4.2.2 JellyBean and the 64-bit Android SDK Bundle on Windows 8, the process should be similar for other versions of Android and Windows.
Prerequisites for Running Android on Windows
Before we begin, let’s review the essential requirements needed to run Android in a virtual environment on your Windows PC.
- Windows PC: Any computer running Windows XP or later will suffice, including XP, Vista, 7, 8, and newer versions.
- Java: You must have Java 6 or later installed on your computer, as it’s essential for the Android SDK Bundle. Always install the latest Java version compatible with your system.
- Android SDK Bundle: You need the latest Android SDK bundle. Download and extract it into a directory. You’ll find a folder named “adt-bundle-windows-….” This is your “Android SDK Folder” for this tutorial, containing the “eclipse” and “sdk” folders, along with the “SDK Manager.exe” file.
- Android SDK Packages: Launch “SDK Manager.exe” from the Android SDK Folder. Ensure “Android 4.2.2 (API 17)” is selected to get the required SDK packages for running Android virtually.

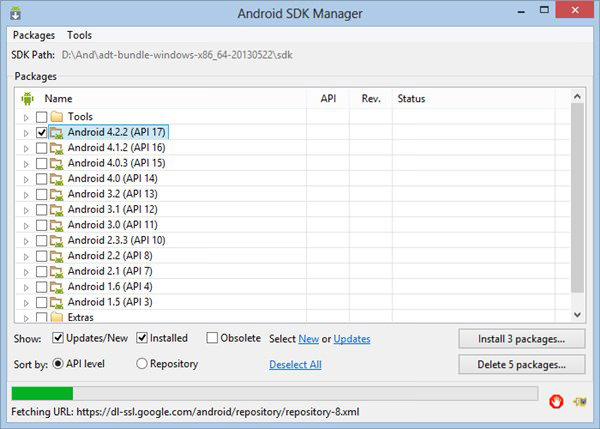
Note: To reduce download size, deselect unnecessary sub-packages within the Android release. Expand the selection by clicking the greater than sign (>) next to the release, and only select these sub-packages:
- SDK Platform
- ARM EABI v7a System Image
- Google APIs
Afterwards, click Install packages… to download and install the necessary packages.
Create and Run Your First Android Virtual Device (AVD)
It’s time to create your first Android Virtual Device (AVD).
- Start by opening “SDK Manager.exe” from the Android SDK Folder. Navigate to Tools > Manage AVDs. This will open the Android Virtual Device Manager.
- Click on the New… button (top right) to open the Create new Android Virtual Device (AVD) window. Set up your new AVD with the following specifications:
- Your AVD will now appear in the list of available devices in the AVD Manager. Congratulations on setting up your first Android Virtual Device!
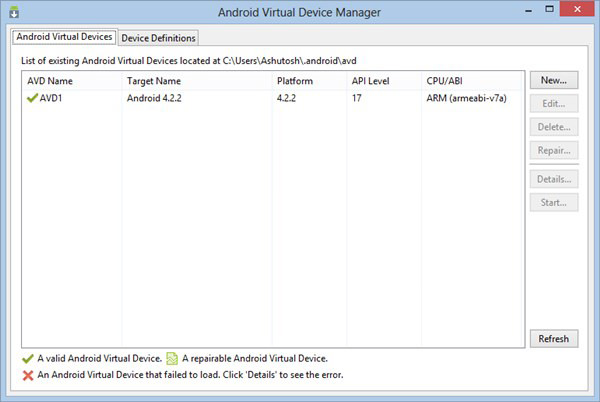
| AVD Name: | Any name |
| Device: | Galaxy Nexus (4.65″, 720 x 1280: xhdpi) |
| Target: | Android 4.2.2 – API Level 17 |
| CPU/ABI: | ARM (armeabi-v7a) |
| Keyboard: | Checked |
| Skin: | Checked |
| Front Camera: | None |
| Back Camera: | None |
| Memory Options – RAM: | 768 MB |
| Memory Options – VM Heap: | 32 |
| Internal Storage: | 200 MiB |
| SD Card – Size: | 500 MiB |
| Emulation Options- Snapshot: | Unchecked |
| Emulation Options – Use Host GPU: | Unchecked |

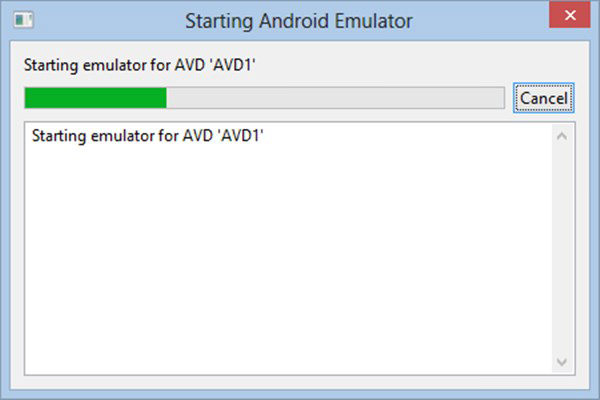
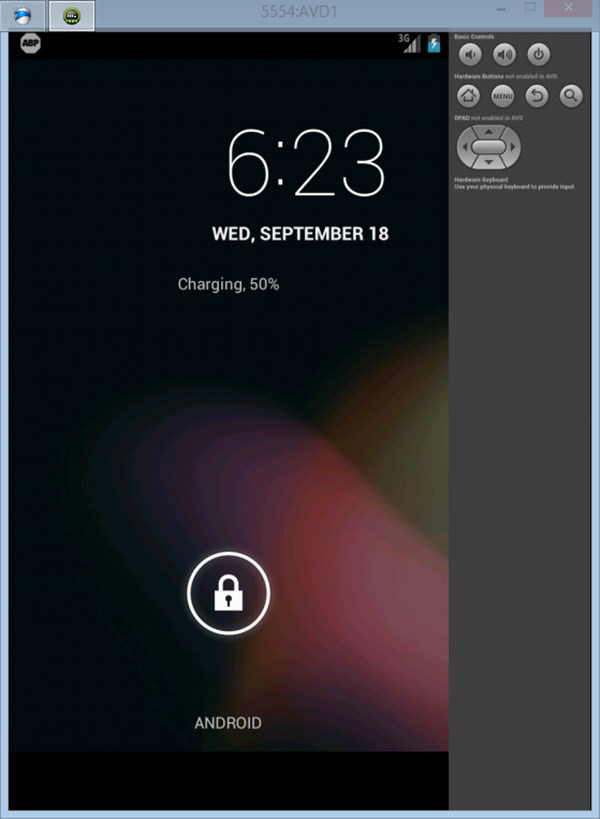
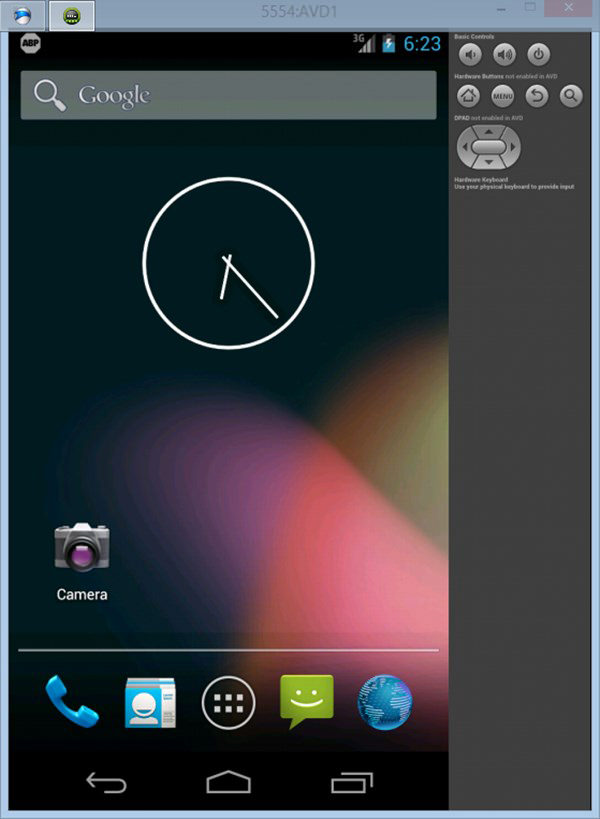
To launch it, select the AVD in the AVD Manager, click on Start, then Launch. Wait for the device to boot up and then start exploring the Android interface.
Now, Android is up and running on your Windows PC. Explore the interface, especially if this is your first time, before moving on to the next section: trying out Android apps.
App Installation in Android Virtual Device (AVD)
While the Google Play Store is the main source for Android apps, it’s not available in the Android Virtual Device (AVD). However, you can still install apps using the Android Debug Bridge (ADB). We’ll also guide you on how to uninstall unwanted apps.
Installing an App
Let’s walk through the steps to install an app using the UC Browser Mini as an example.
- Ensure your AVD is running, then download the APK file for UC Browser Mini from AppsZoom. Search for the app, open its page, click on the Download tab, and choose the option to directly download the APK file.
- Copy the downloaded APK file to the “Android SDK Folder\sdk\platform-tools” directory.
- Open the command prompt from the Start menu or screen and navigate to the platform-tools directory by typing:
cd <Android SDK Folder file path>\sdk\platform-tools
For instance, if your Android SDK Folder is located at “D:\And\adt-bundle“, the command would be “cd D:\And\adt-bundle\sdk\platform-tools“.
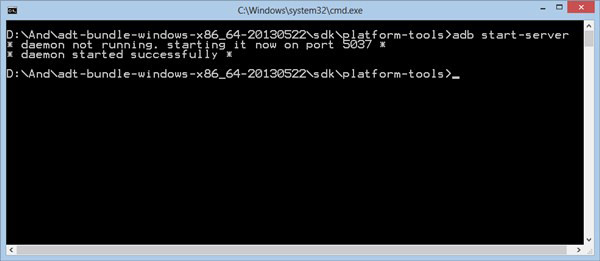
- Start the ADB server by typing “adb start-server“. You should see a confirmation that the daemon started successfully.
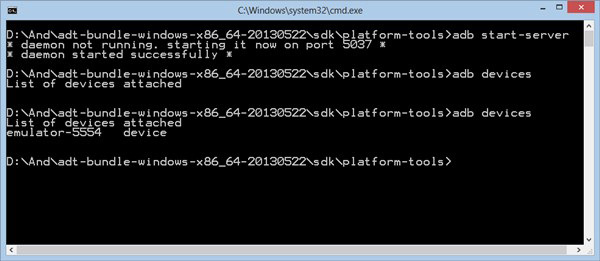
- Check if your device is connected by typing “adb devices“. It should list a connected device named “emulator”. If no devices appear, ensure your AVD is running, then retry.
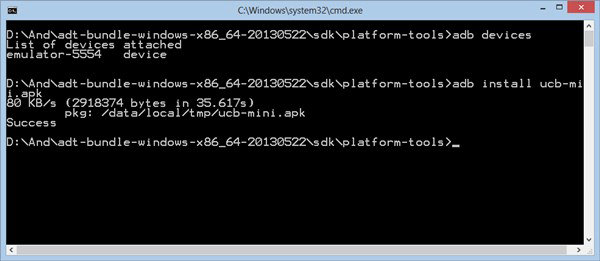
- Install the app by typing “adb install <APK File>“, replacing “<APK File>” with the name of the APK file you want to install. For example:
adb install ucb-mini.apk
- Wait while ADB pushes the APK file to the AVD and installs it. This process may take some time depending on the app’s size. You will see a success message once the installation is complete.
Uninstalling an App
To uninstall an app within the AVD, navigate to Settings from the app launcher, then go to Applications > Downloaded. Select the app you wish to remove and click Uninstall. Confirm by clicking OK and wait for the uninstallation to complete.
Troubleshooting
Lastly, here are some of the problems you might encounter and the suggested solutions.
Internet not working in the AVD.
Please check if your firewall or internet security program is blocking Internet access for the program named "emulator-arm.exe".
Can’t set the RAM greater than 768MiB for the AVD.
Setting the RAM for AVD greater than 768MiB on Windows will cause the AVD to crash because of non-allocation of required memory due to platform restrictions. Please choose a maximum of 768MiB if you are experiencing crashes or errors.
AVD running too slow or hangs
Running the latest releases of Android on 768MiB of RAM can make it slow. Additionally, it will become slower if you’ve installed many apps in the AVD. If you need a fast and responsive AVD, then create a new AVD with an older release of Android (Android 4.0 ICS or older versions will run better).