How to Recover Lost Data on macOS and Windows
Either you are using a macOS or Windows computer, your files and folders can get deleted either by mistake or through someone’s deliberate actions. But don’t rush to a software repair shop or try out unreliable tools on your own.
In this post, I am going to mention some of the proven and absolutely free ways to recover lost data in macOS and Windows system. These methods include data recovery through built-in tools of each OS and using Stellar – a free and reliable data recovery software.
So take a look at the following methods mentioned in a step-by-step process and see which one would work best for you.
How to recover lost data in Windows
Millions of people use Windows computers because it is one of the best operating systems in the market. However, no matter how good a system is, your data is always prone to getting deleted or lost.
Following are some of the ways with which you can recover your lost data from a Windows computer.
Method 1. Recover lost data through the Command Prompt
When you’re working on a Windows computer and delete some file, it goes to the Recycle Bin of your computer from where you can simply Select the file and click “Restore” to send it back to where it was previously stored.
On the other hand, in case you Shift + Delete some file to permanently delete it, and want to recover it, the Command Prompt in Windows computers may help you recover it. Here’s how to do it.
- Press Windows + R and type cmd and hit OK to open the Command Prompt window.
- At the prompt type
chdsk [drive name]: /fand hit Enter. Example:chdsk D: /f, then hit Enter. - Now type
[drive letter : \ >attrib –h –r –s /s /d *.*]orattrib -h -r -s /s /d [drive letter]:*.*and hit Enter. This command will recover all files in the entered storage device.

Method 2. Recover lost data via Backup
If you are not able to find some files in your Windows computer or you modified or deleted a certain file that you want to recover, you can try to get it back through the Windows backup.
This option, however, works if you have already set a backup of your files. Let’s take a look at how it works.
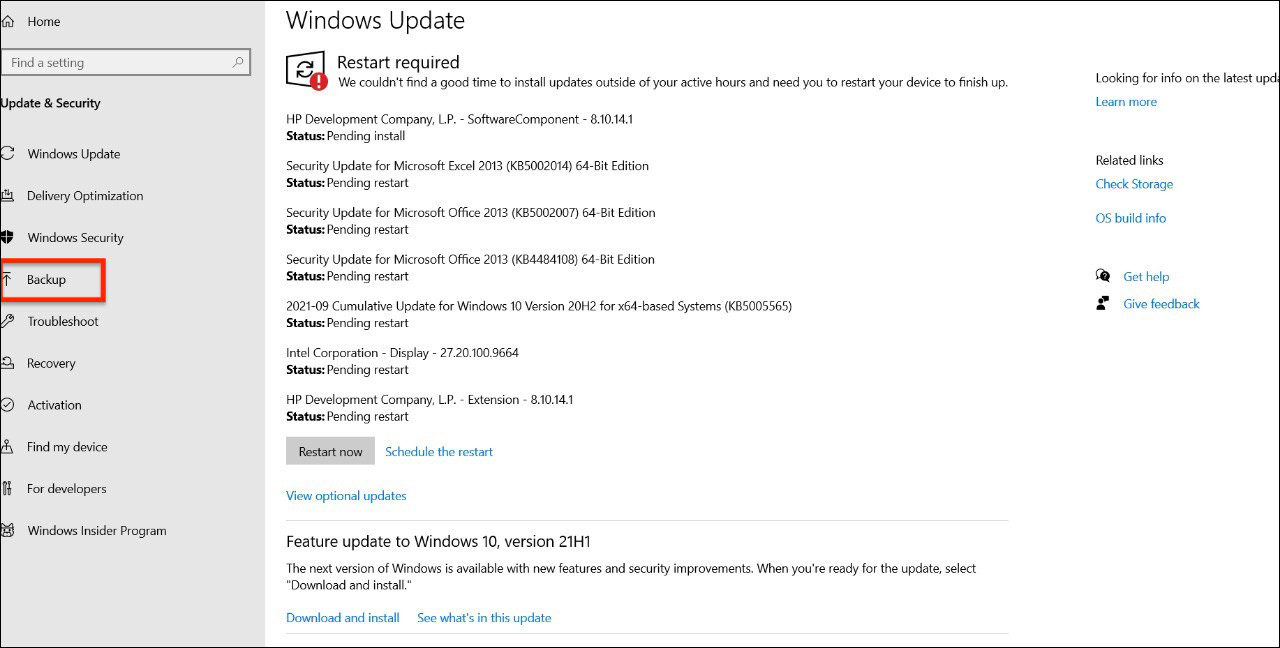
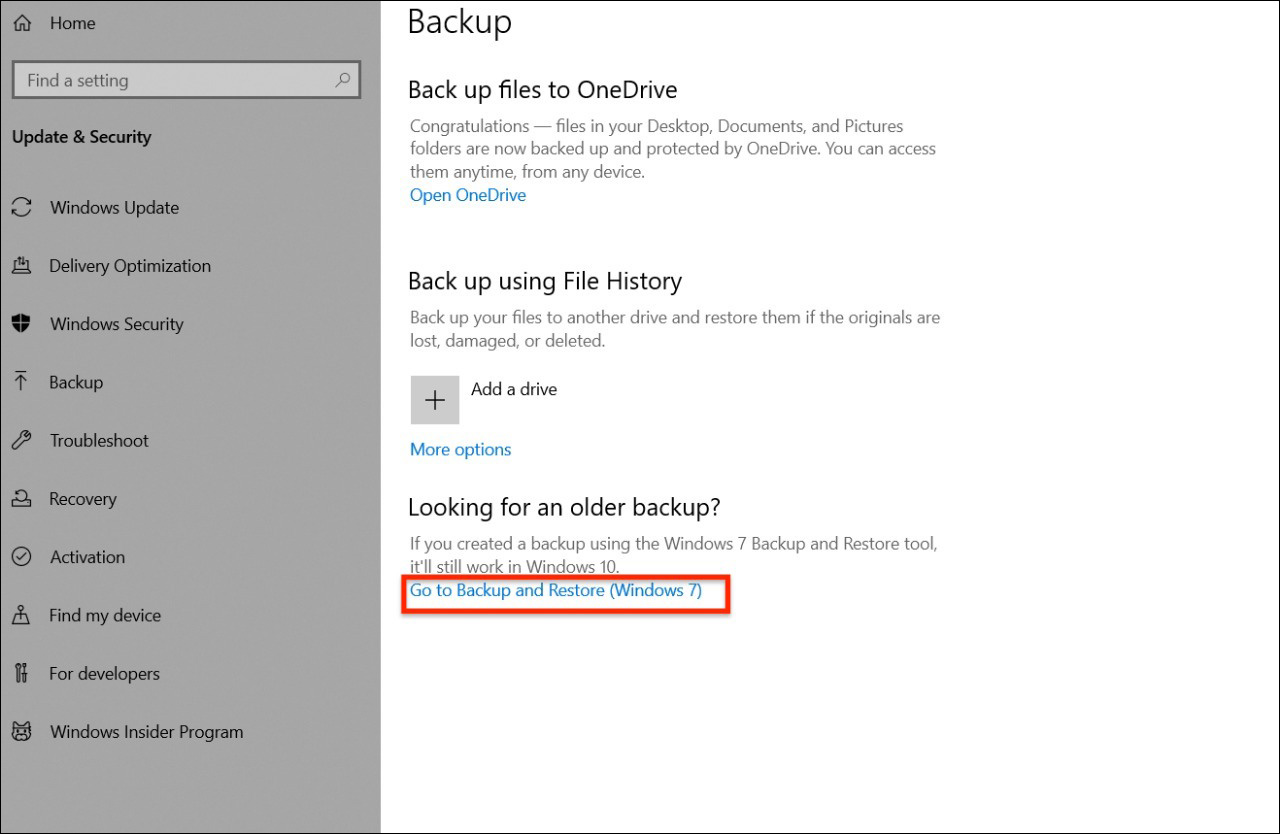
- Go to the Start > Settings > Update and Security and click on Backup.
- Here, select Backup and Restore (Windows 7).
- Now click Restore my files > Browse for files or Browse for folders to select the backup that you previously created.
- Select the location where you want to restore your files and click Copy and Replace to finish the process.
Method 3. Recover lost data using Stellar
While the two aforementioned methods may work in some instances, however, they do not offer a hundred percent success rate. Also, in case of data recovery through Backup, the method only works if you have already activated this option for your files.
On the other hand, Stellar is an advanced data recovery tool that gives you a complete and customized data recovery experience in a few simple steps. Here’s how to do it:
Note: Before starting the recovery process, you need to download and install Stellar data recovery software in your Windows computer.
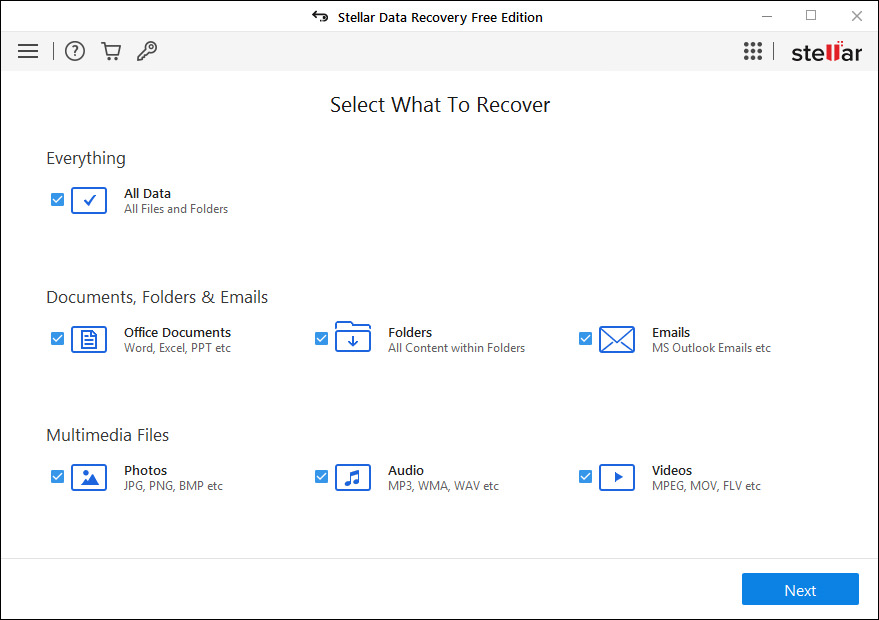
- Launch the Stellar app on your computer.
- It will ask you to Select What to Recover. You can either select All Data or select among different documents, folders, or files. Once you make the desired selection, click Next.
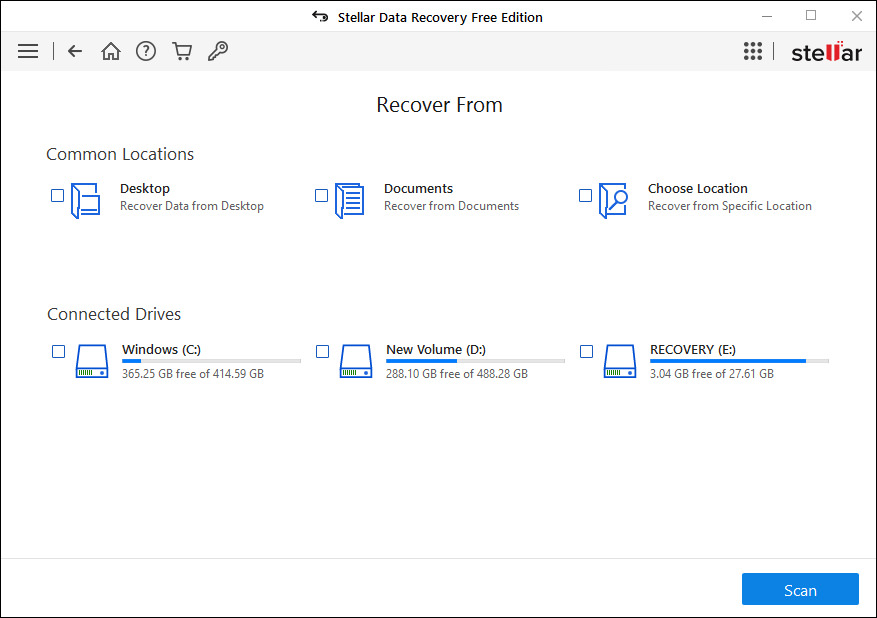
- It’ll then ask you where do you want to Recover From. Here you can select the location where the files were last located i.e. Desktop or any of the internal drives.
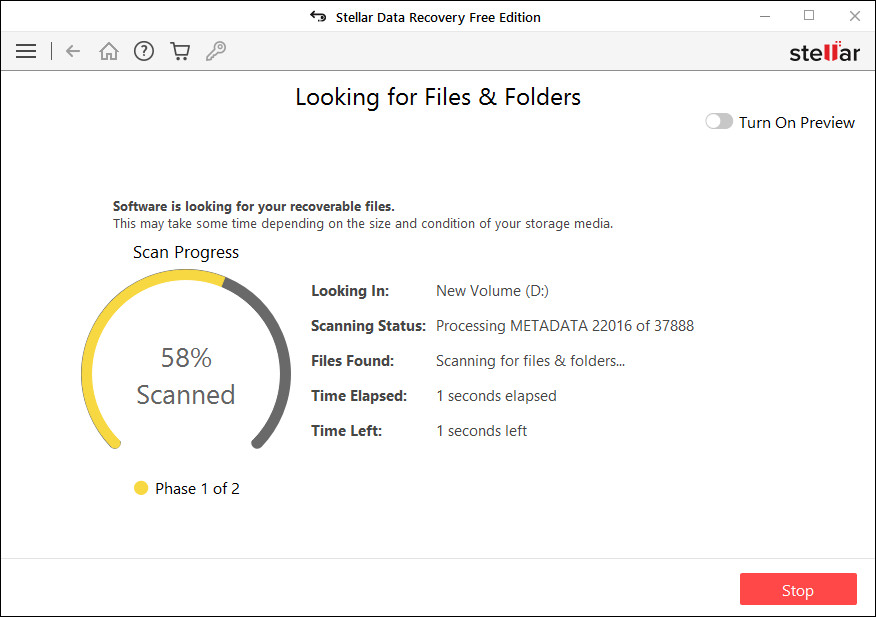
- Once you select the location, click Scan.
- The tool will start scanning your computer to look for deleted files and folders.
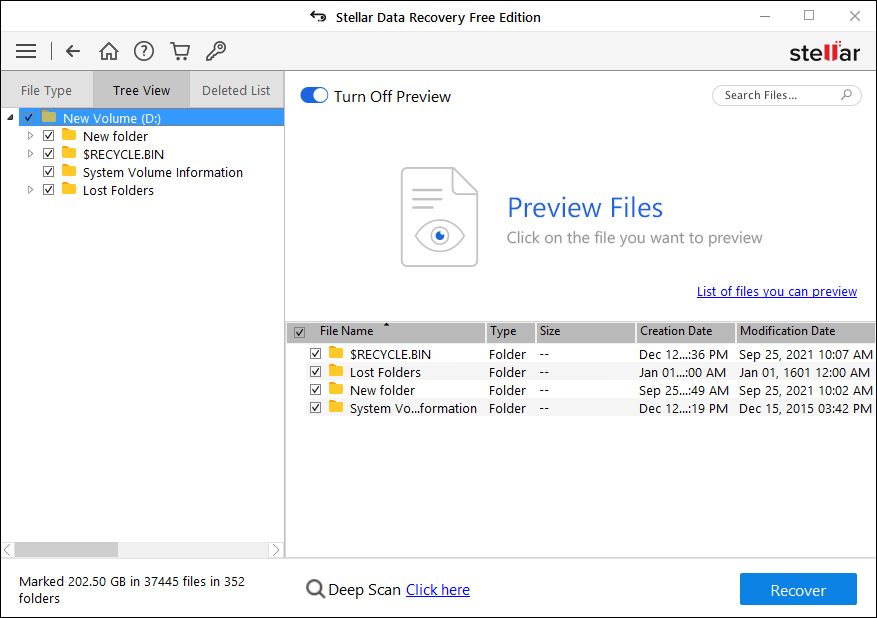
- Once done, it’ll show you all the files that are deleted so you can preview and select which files you want to recover and then click Recover. All the files will be added back to the place they were deleted from.
How to recover lost data in macOS
Similar to Windows, macOS users can also lose their data and files either by accident or through someone’s fault.
Whichever the case is, you can take some measures to recover the lost data from your mac using any of the following methods.
Method 1. Recover lost data through Terminal
Terminal is a default app of macOS that can be used to find and retrieve any file that you send to Trash.
Though there are other ways to recover a file from Trash, however, when there’s too much data in the Trash or it’s been long since you sent the file to Trash, you can use this method.
- From the Applications, go to Utilities > Terminal and open the Terminal app.
- In the command window, type in
cd.Trashand press Enter to navigate the Trash folder. - Now type
ls -al ~/.Trashand hit Enter to see all the files in the Trash folder. - Now type
mv [filename] ../to find the file(s) that you want to recover back to its folder.
Method 2. Recover lost data via Time Machine
macOS has a built-in app rightfully called the Time Machine as it allows you to backup your computer’s data so you can recover it in case you lose some or all of it.
However, you can only restore your files through Time Machine if you have already created a backup for them in the app. Following are the steps that you can take to recover data through Time Machine:
- Go to System Preferences from the Apple menu and click on the Time Machine icon.
- Check the box that says Show Time Machine in the menu bar and you’ll see the Time Machine icon on the top right corner.
- Now click on the Time Machine icon in the menu bar and then click Enter Time Machine from the dropdown menu.
- It will give you access to all the files that you have backed up. Once you find the data that you require, click Restore to get it back.


Method 3. Recover lost data using Stellar
While the two aforementioned methods work in some instances, they do, however, have their limitations. Like, using Terminal to recover lost data will only be able to retrieve files from the Trash and not the ones that have been permanently deleted from your computer.
Similarly, recovering data through the Time Machine method will only work if you have already created a backup of your data.
So in case you want to recover any files that you have permanently deleted from your Mac and for which you did not create a backup as well, then you can simply take help from the Stellar data recovery tool that allows you to recover any type of file from your Mac, external hard disk or corrupted media.
Please install the Stellar app in your Mac in a few simple steps and follow the instructions below to recover your lost data.
- Launch the Stellar app on your Mac.
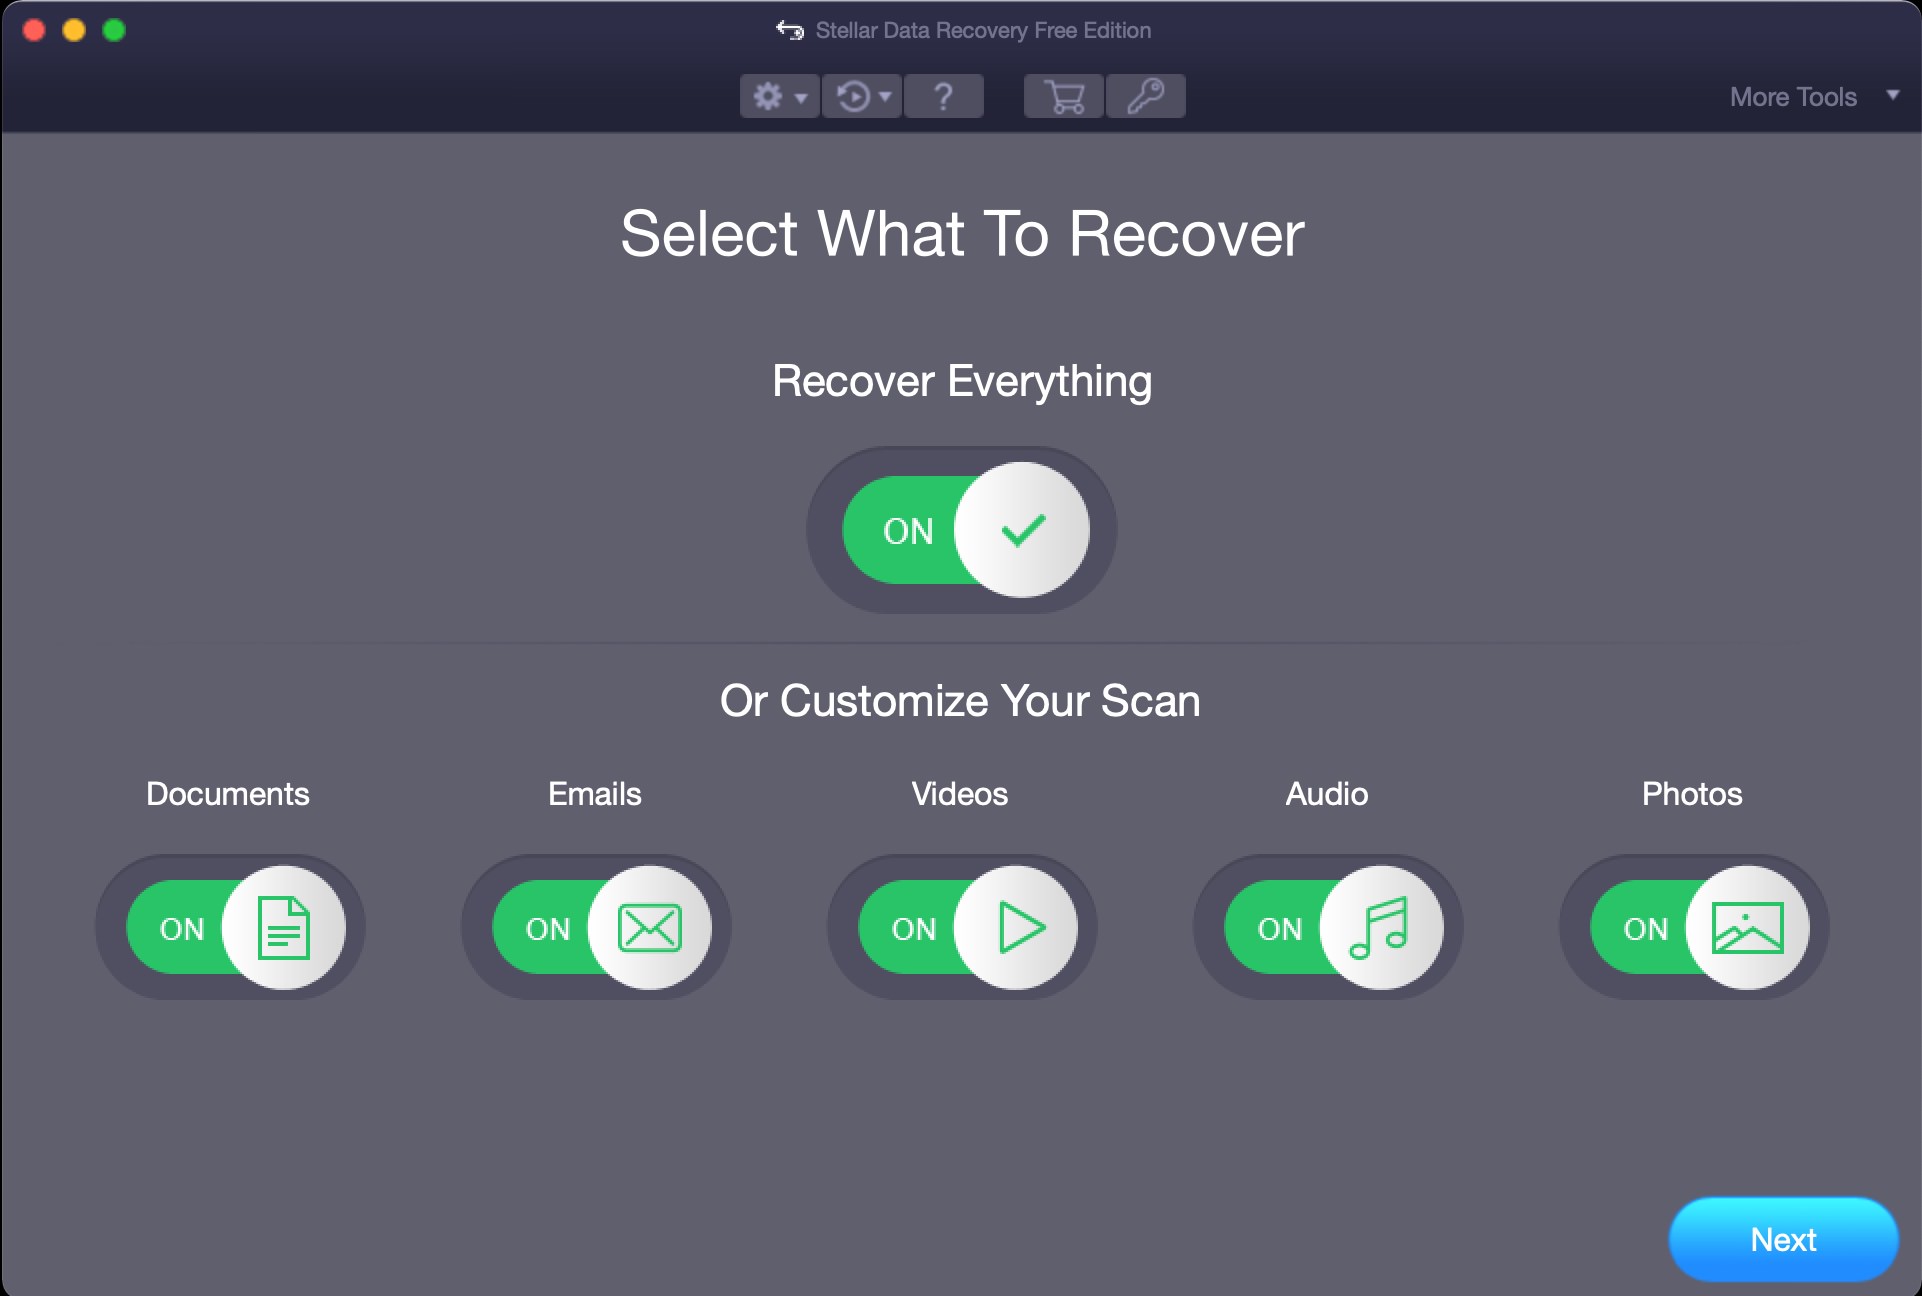
- You will see a Select What to Recover window with different data options from where you can choose either Document, Emails, Videos, Audio, or Photos or simply go for Recover Everything to retrieve all kinds of data files and click Next.
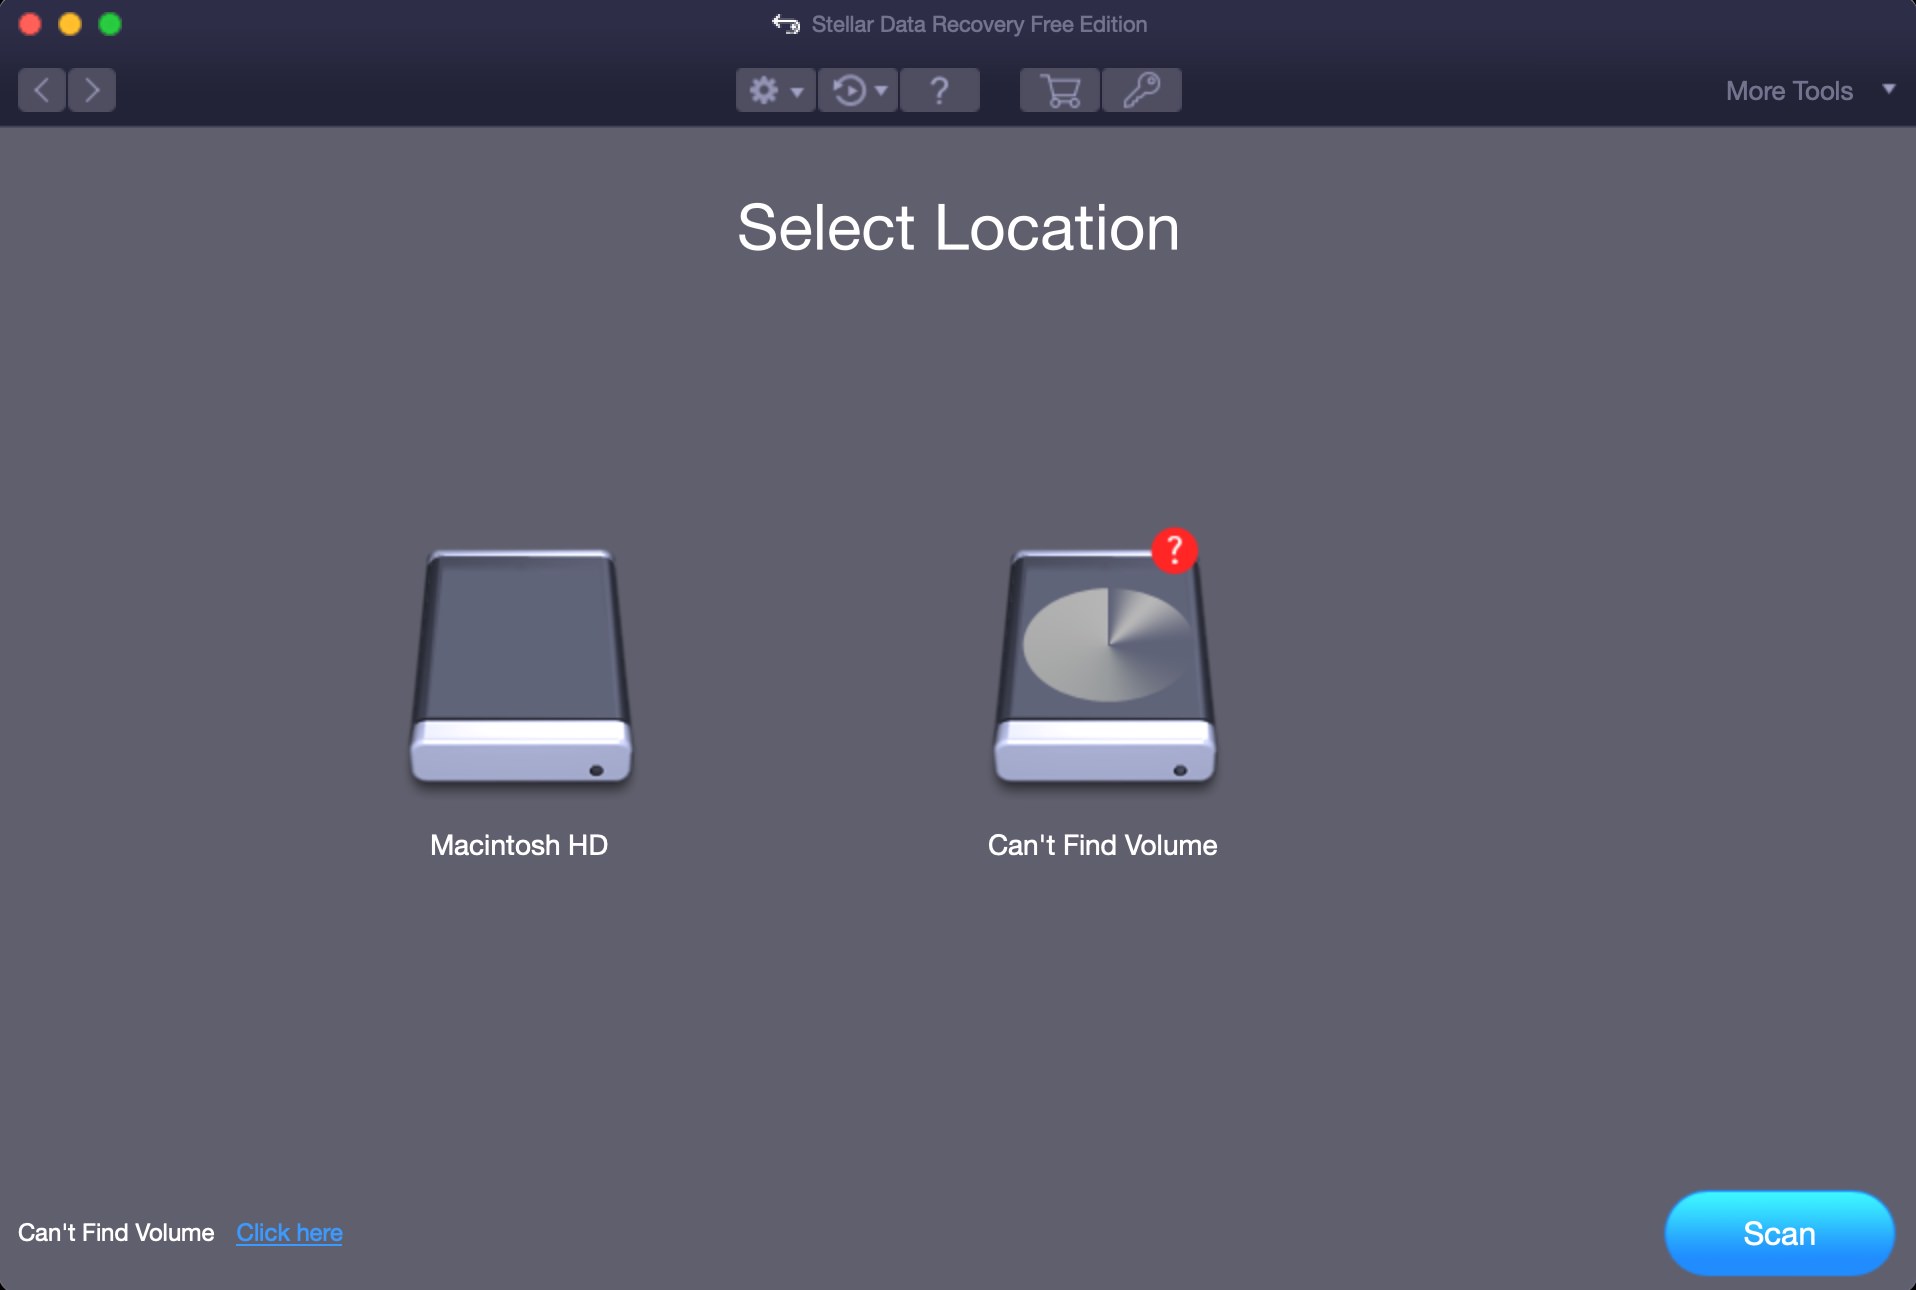
- Next, from the Select Location, you can choose which drive you want to recover the data from i.e. the internal Macintosh HD or any external drive. Once you select the drive, click Scan.
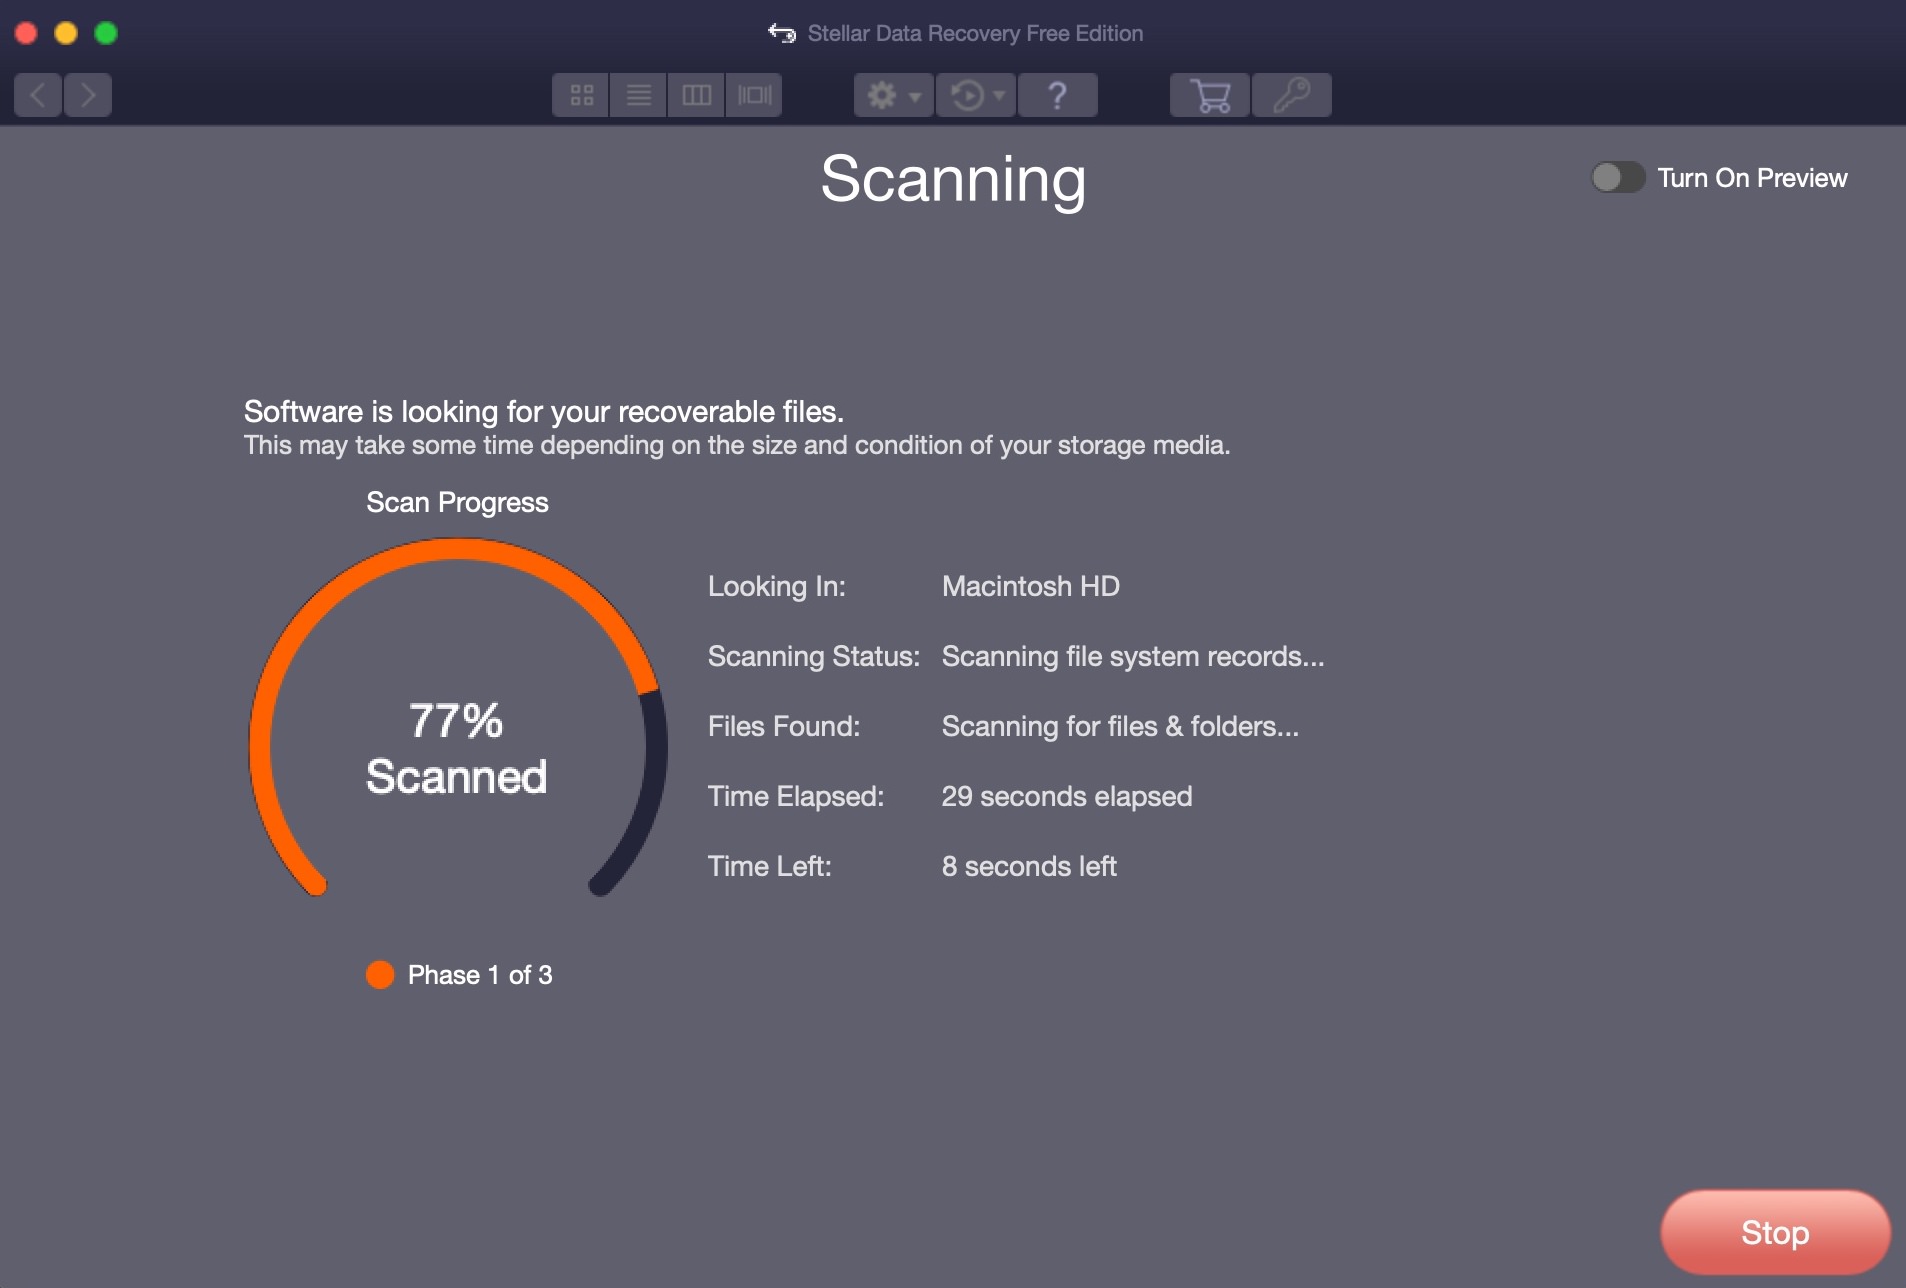
- The scanning process will start and you will see the scan progress.
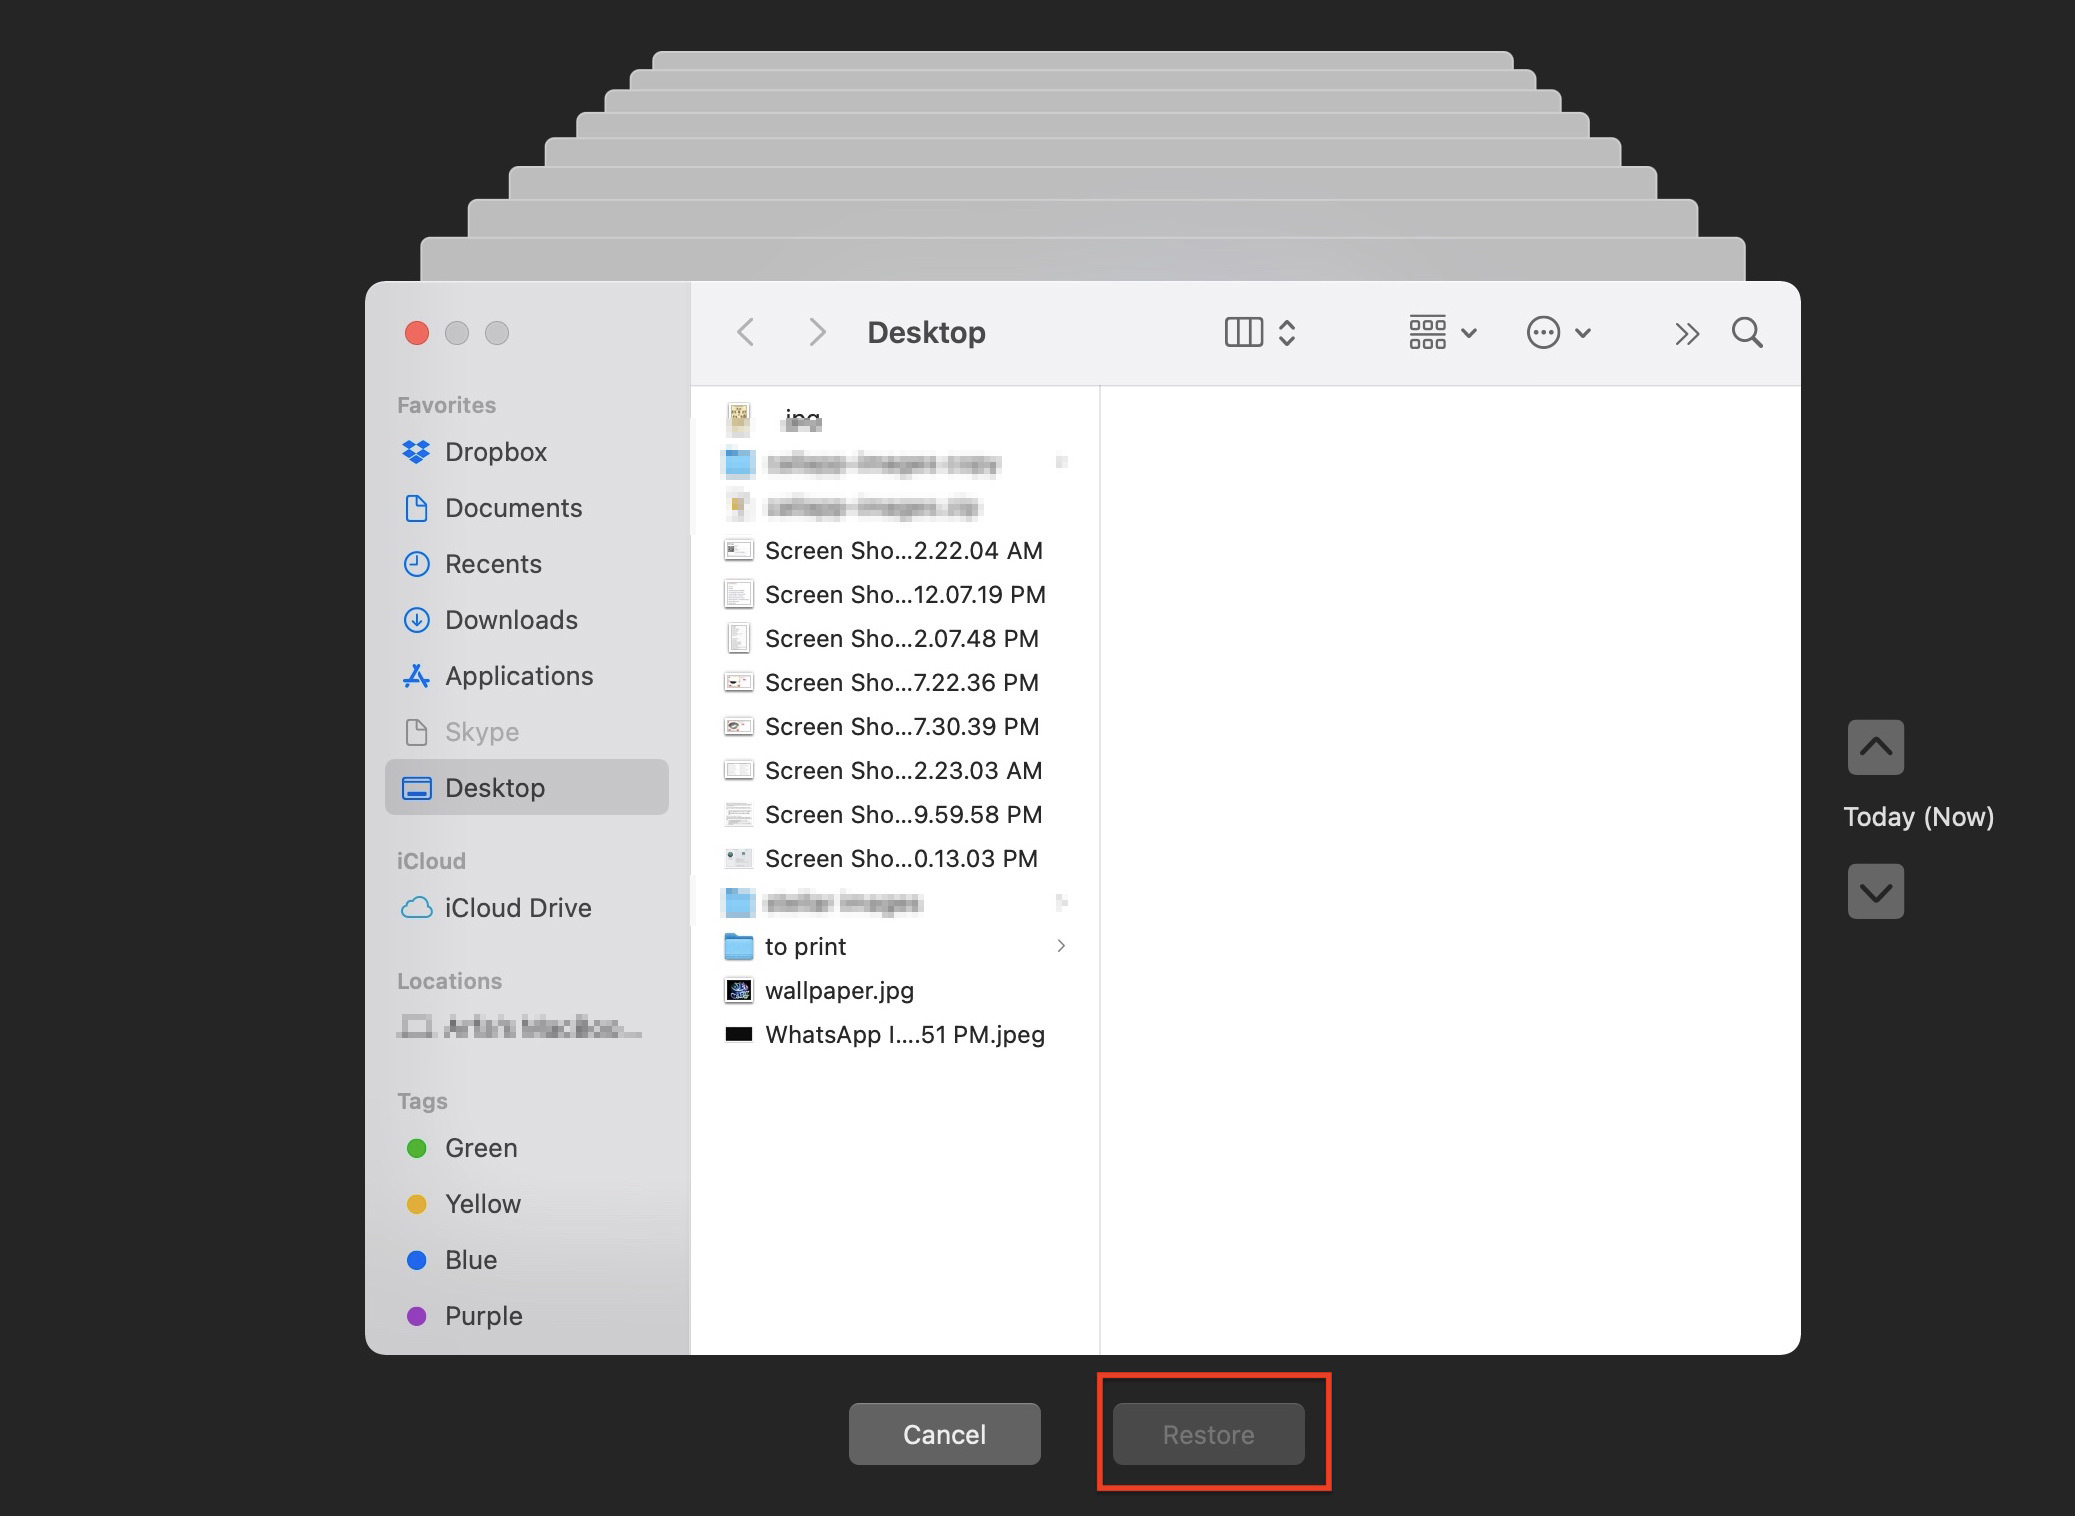
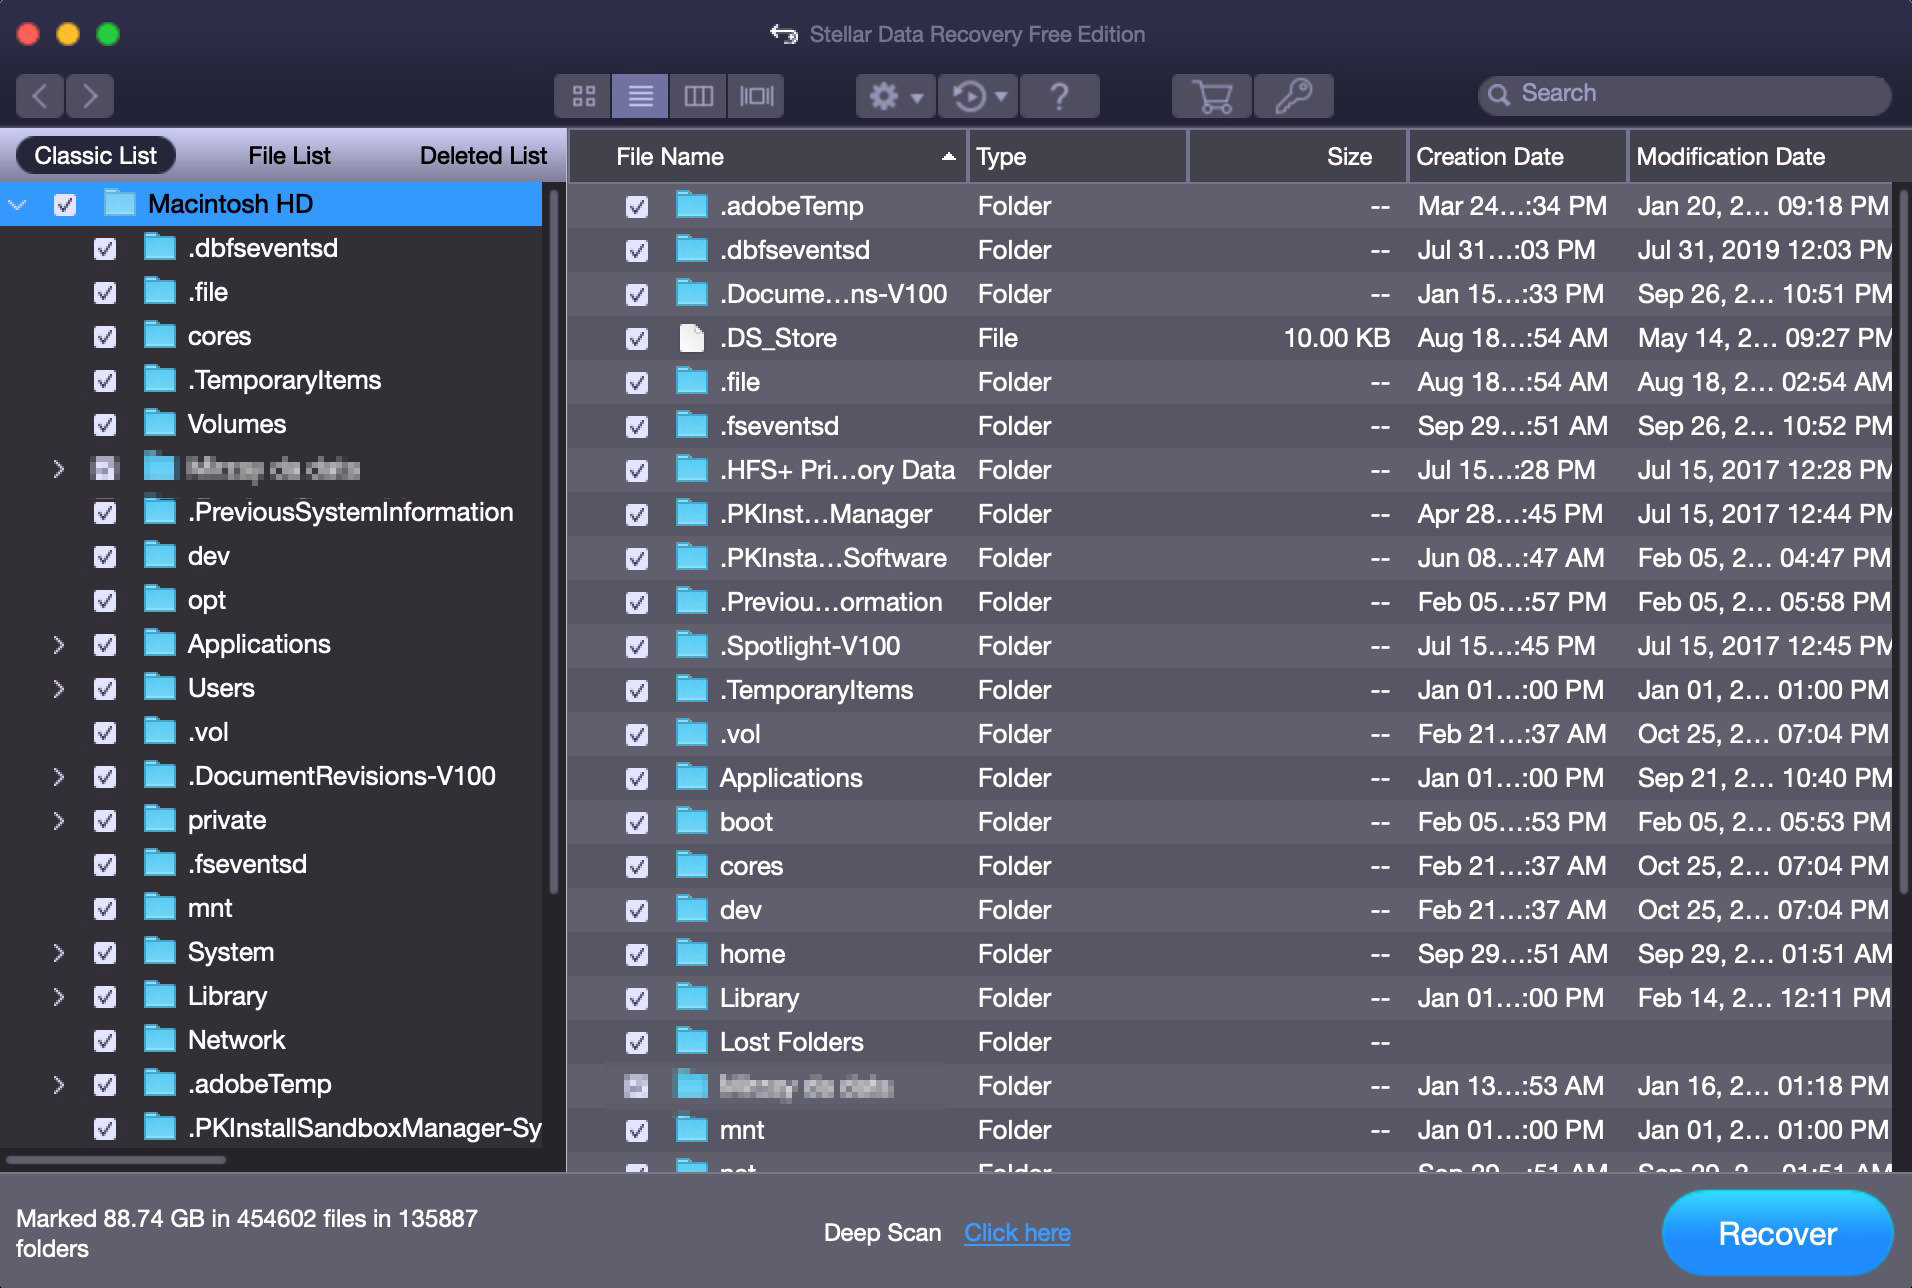
- Once the scanning is complete, you will be able to preview all the deleted files and folders from where you can select the ones you require and click Restore and the selected data will be recovered to your Mac.
A bit more about Stellar
We have mentioned Stellar data recovery tool as one of the methods to recover any kind of lost data from your Windows or Mac computers. But there are many other interesting features that the tool has to offer, that too, absolutely free.
- With Stellar, you can recover any type of file with hundreds of supported formats
- Search your lost files by name or format.
- Recover your data in a few simple steps through an easy-to-use interface.
- You can preview all the recoverable files in any format so you can select and recover only the ones that you require.
- Recover the data that you have permanently deleted from your Trash or Recycle bin.
- Retrieve data from SSD, portable HDD, RAW partitions, USB, and SD card.
- You can retrieve the data lost or deleted from BitLocker encrypted drive in a few steps.
- Get all the data lost as a result of formatting USB drive, SD card, or a partition.
Though it’s wonderful how much you can do in the free version (mentioned above), however, the paid versions can open up even more possibilities and features for the users.
- Recover all kinds of data from a crashed or unbootable Windows or Mac computer.
- Scan and locate deleted files from missing or lost partitions with the help of the Deep Scan feature.
- Repair corrupted files like photos and videos saved on your computer and taken from any device.
- Recover from any virtual drive having HFS, HFS+, ext2, ext3, ext4 file systems as well as offering native support for recovery from VMDK, VDI, VHD and VHDX files.
- Dual monitor support so the data recovery process doesn’t affect your productivity.
To Wrap it up
If, due to any reason, you lose some data and files on your Mac or Windows computer, don’t consider this the end of the world, not at least you’re done trying all of the aforementioned methods of data recovery.
Even though all the methods of data recovery that I’ve mentioned are free, the most reliable and comprehensive way to recover all kinds of data from any of your drives is through the Stellar data recovery tool. It offers so many features to give you a customized data recovery experience that you’ll only know once you try the tool yourself.