How to Record Audio Only in Zoom Sessions
With the rise of online meetings and webinars, many are seeking ways to preserve a record of the meeting after it concludes, or to retain just the audio, as video files can consume more hard disk space.
This practice aids in tracking significant conversations for future reference or possibly transcribing them later for further review.
This guide focuses on methods for recording and retaining a copy of the audio from a Zoom meeting after it has ended.
Is It Possible to Record Only Audio in Zoom?
Indeed, Zoom’s built-in local recording feature allows you to record just the audio. But, this feature is only accessible to premium users. Unfortunately, it’s not available for those with a free Zoom account.
3 Ways to Record Only Zoom Audio
If you’re looking for ways to record only the audio in Zoom, keep reading. Below, we outline three methods to achieve this.
| Tools | Description |
|---|---|
| EaseUS RecExperts |
This tool is versatile for almost all recording situations. Whether you’re capturing audio from a virtual conference or another source, it guarantees top-notch quality. One of its standout features is the AI-powered noise remover, ensuring echo-free recordings. |
| Zoom Local Recording Feature |
The Zoom local recording feature is another great option for audio recording. It offers the unique advantage of recording separate audio tracks for each participant. Additionally, it provides timestamps and other useful options. However, it’s essential to note that this feature is exclusive to premium account users. |
| Audacity |
Audacity stands out as a universal solution for audio recording. Regardless of your operating system, you can easily record and make use of its multi-track audio editor for the best results. |
Method 1: Use a Professional Screen and Audio Recorder
If you’re on the hunt for a top-tier screen and audio recorder, give this tool a try: EaseUS RecExperts.
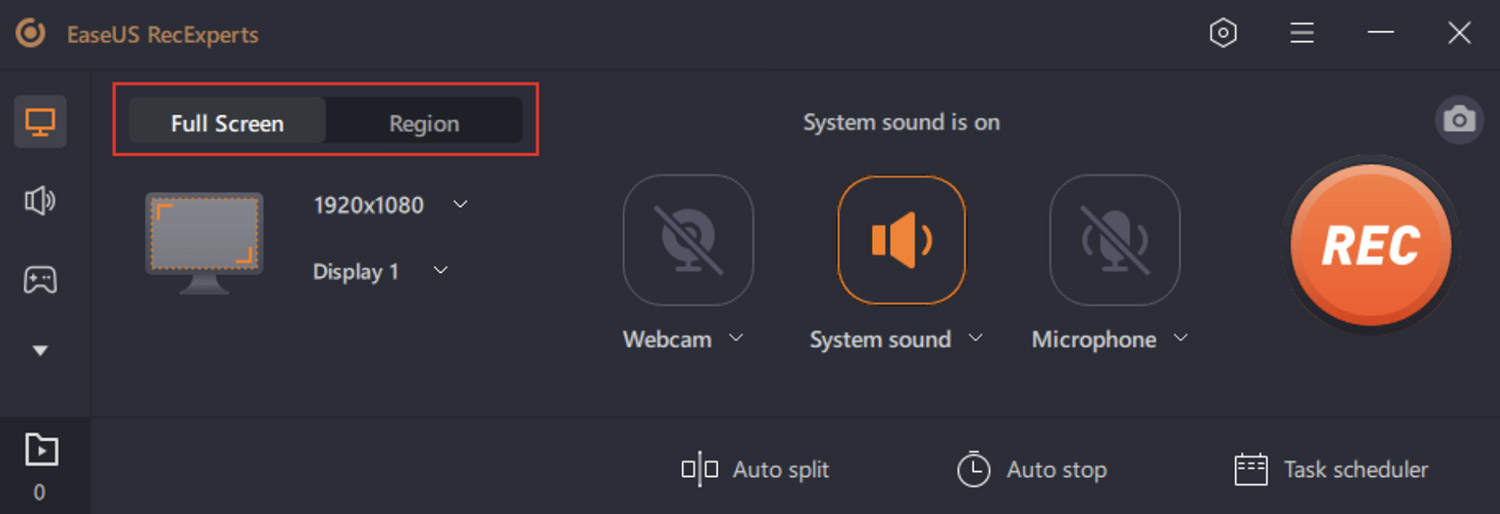
EaseUS RecExperts simplifies the process of recording system sound and microphone input. It’s suitable for capturing audio from platforms like YouTube. The software has a noise removal feature aided by AI, which can help reduce background noises.
Additionally, it provides basic features like a built-in media player for playback and some editing tools. If required, you can extract audio from video clips using this software. It also offers basic editing tools, including trimming and compressing recordings.

Method 2: Utilize Zoom’s Local Recording Feature
Zoom has risen in popularity as a go-to platform for video conferences and audio meetings. One feature that often goes unnoticed is its local recording capability.
While Zoom doesn’t have a direct function to record just the audio, this feature can be a workaround. Not only does it negate the need for third-party tools, but it’s also embedded right within Zoom. However, it’s essential to note that access to this function within the cloud recording section is reserved for paid users.
For those keen on understanding how to leverage Zoom’s local recording feature for podcasts or other audio needs, here’s a step-by-step guide:
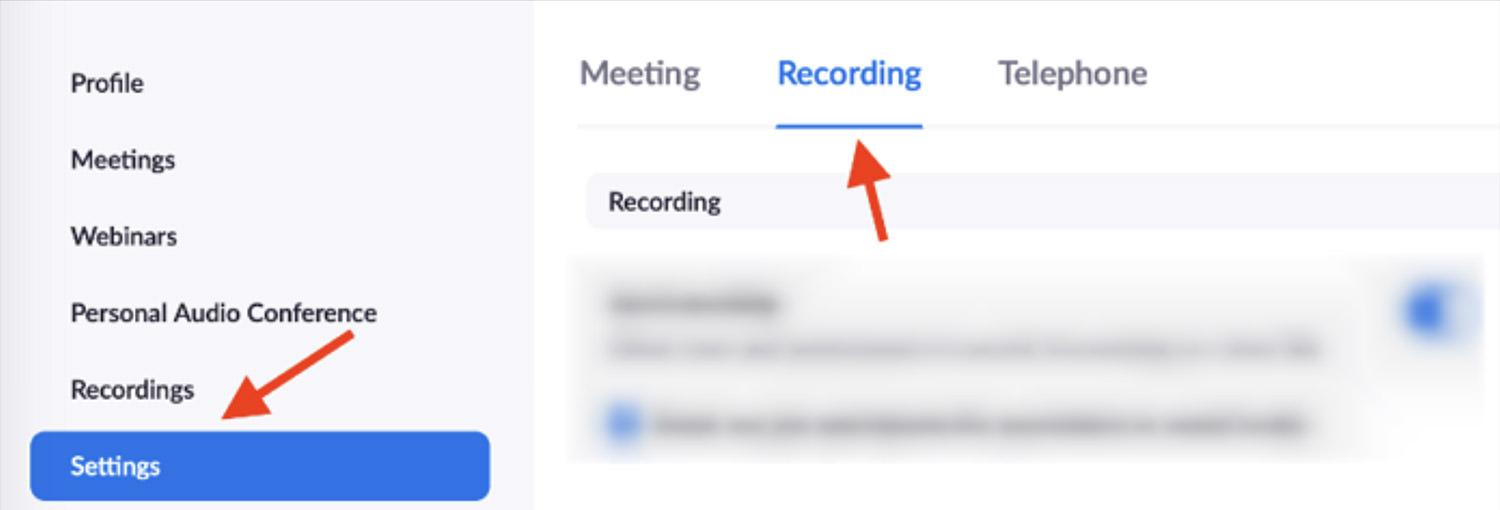
- Navigate to the Zoom website and select ‘My Account’ from the upper left corner. Under the ‘Personal’ section in the side column, click on ‘Settings’. Among the various tabs, select the ‘Recording’ option.
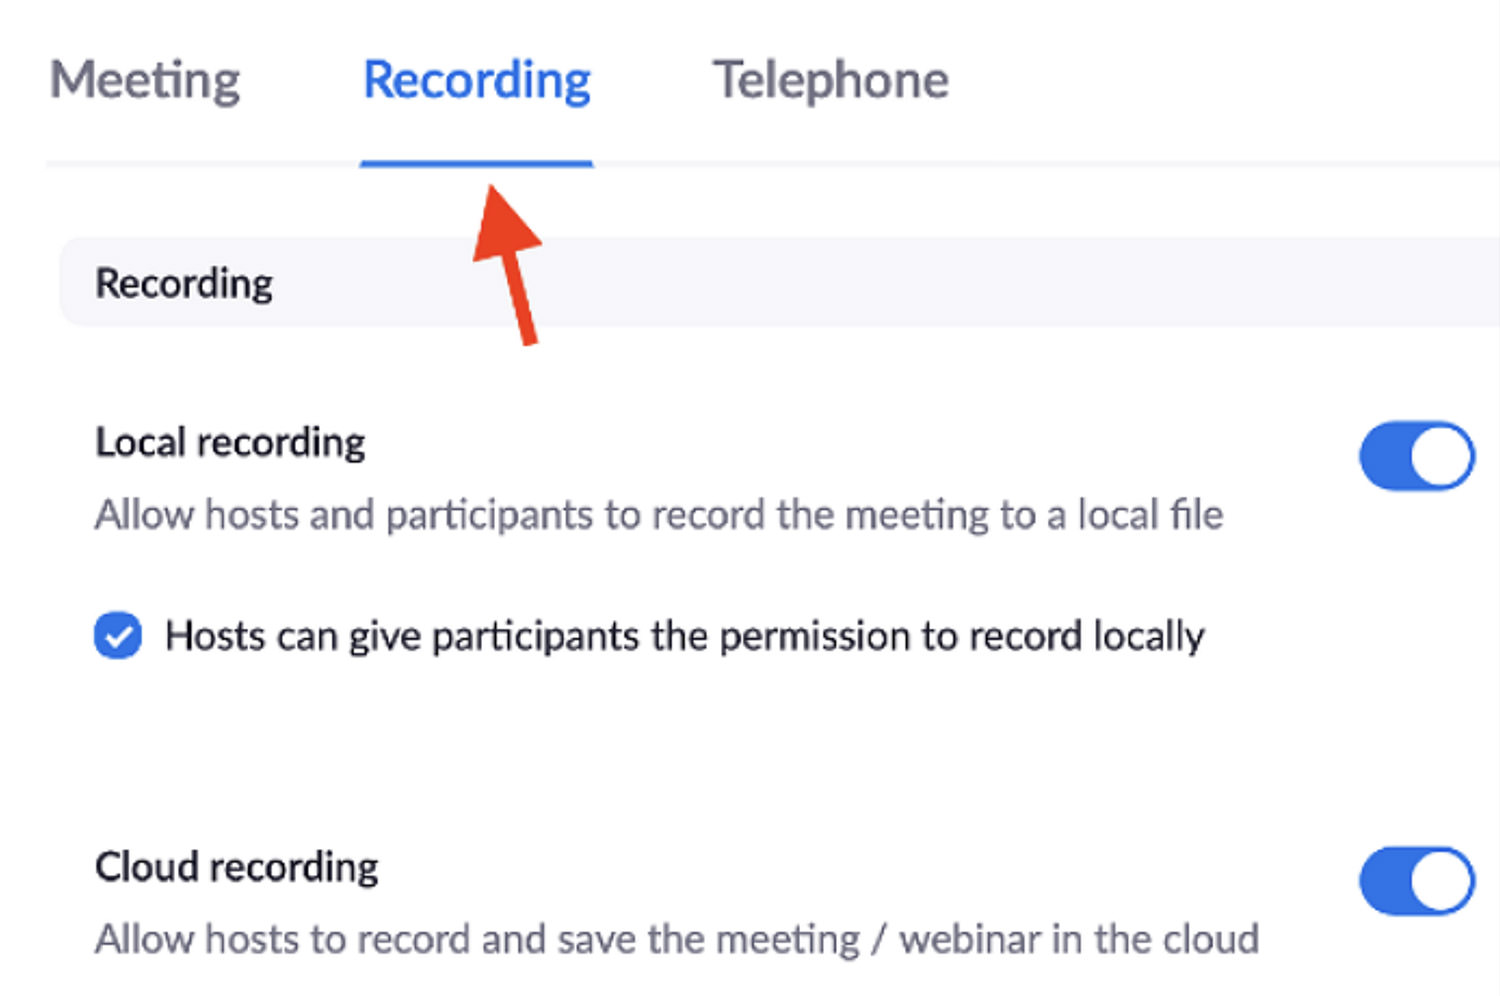
- Activate both ‘Local recording’ and ‘Cloud recording’ by toggling the respective switches. When prompted with a popup window, click ‘Change’. Additionally, ensure the box permitting the host participant to record locally is checked.
- Lastly, mark the options for ‘Record an audio-only file’ and ‘Audio transcript’. Fine-tune other settings as per your requirements. When you’re ready, join a Zoom audio meeting and hit the ‘Record’ button at the bottom. Once your recording is complete, simply stop it, and you’re all set!

Method 3: Recording Zoom Audio with Audacity
When the aim is to utilize free, open-source software to capture Zoom audio, Audacity emerges as a top choice. Beyond recording live audio via a microphone or mixer, Audacity also offers the capability to digitize recordings from older media sources.
Read Also: 20+ Free Desktop Audio Editors
Audacity stands out as a comprehensive audio tool allowing users to import, merge, edit, and export sound files in formats like MP3, AIFF, and WAV. Users benefit from high-quality sound and real-time effects.
However, while its multi-track functionalities are great, they might be perceived as sluggish for intricate audio files. Furthermore, newcomers might find the interface a tad challenging to navigate initially.
For those eager to record Zoom audio using Audacity, here’s how:
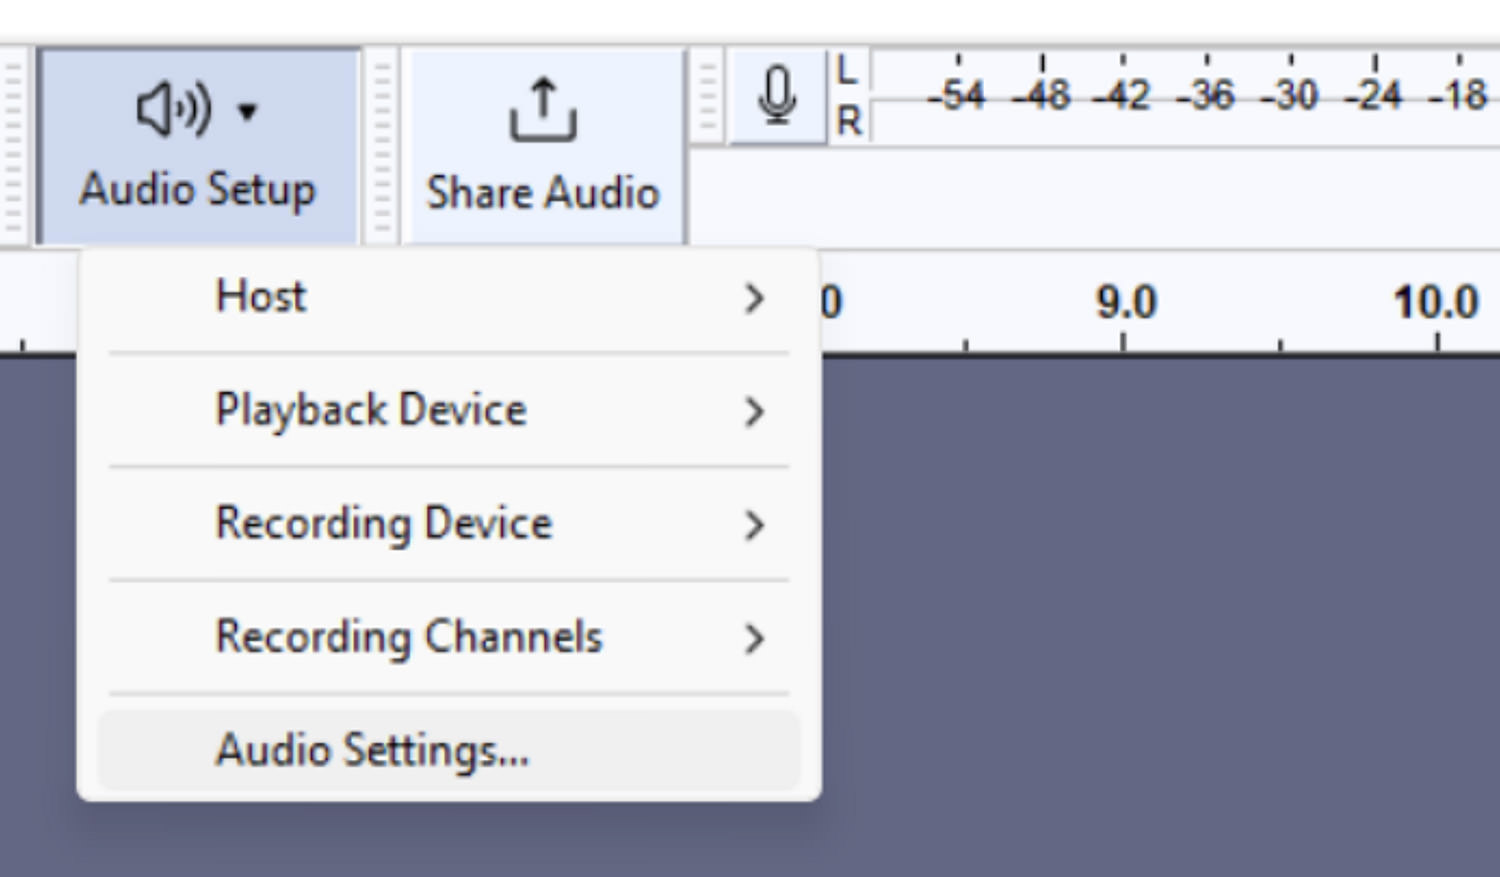
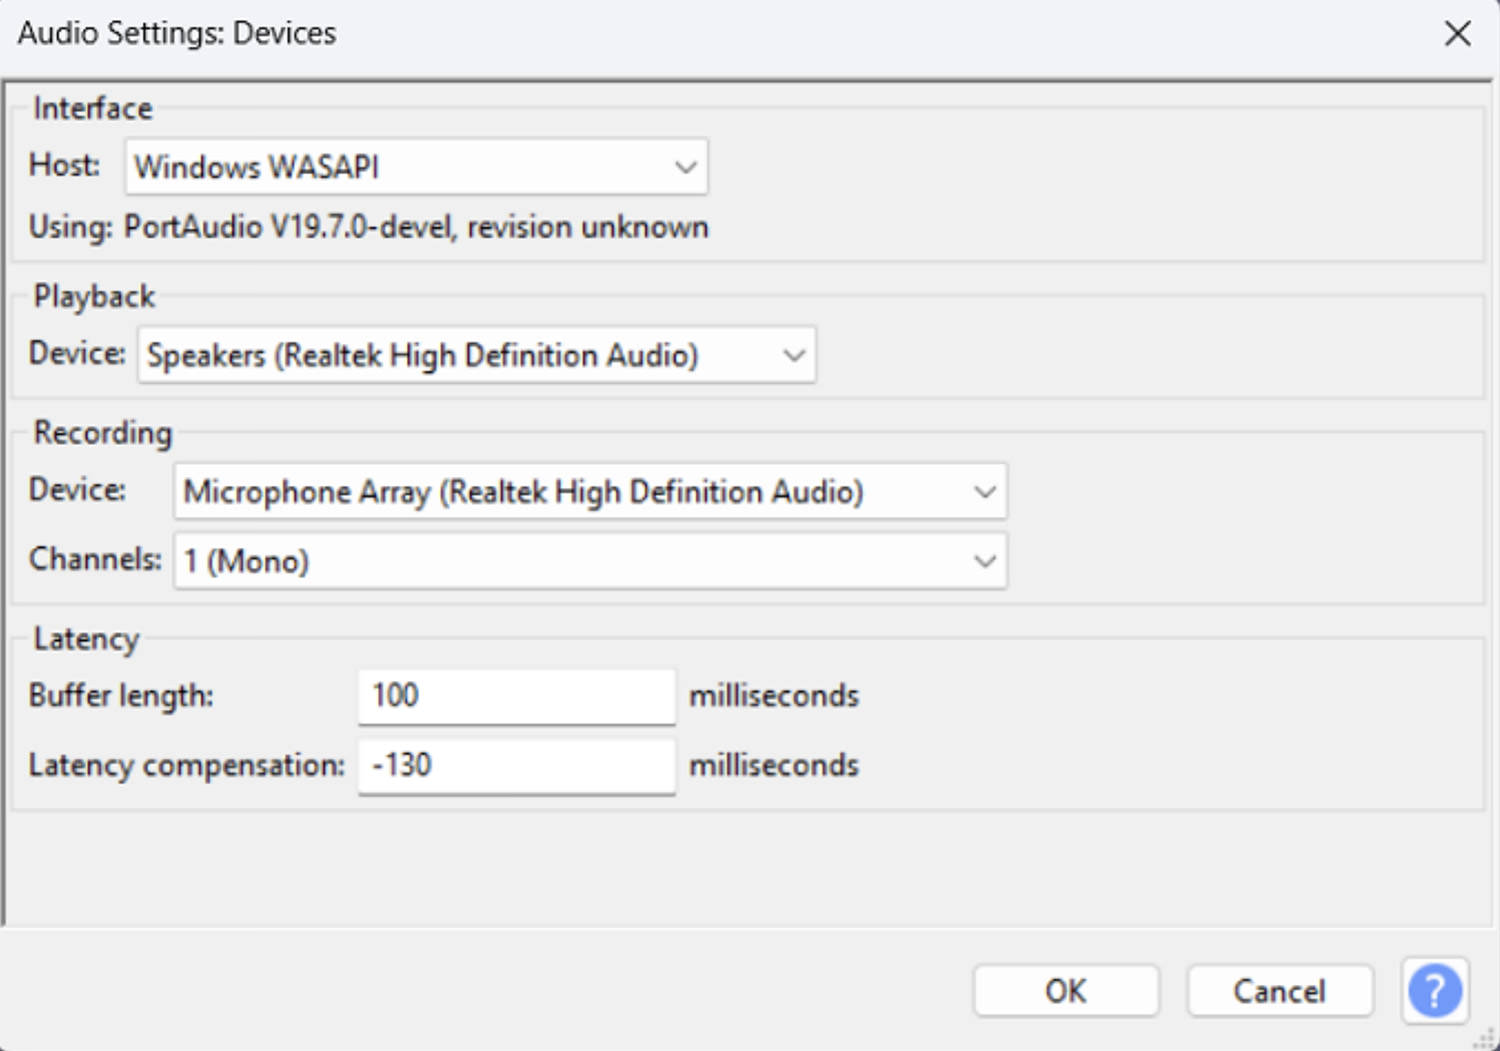
- Start by downloading, installing, and opening Audacity on your device. Concurrently, launch Zoom in your browser and enter the meeting. Navigate to the ‘Audio Setup’ section and select ‘Audio Settings.’
- From the ‘Host’ dropdown, choose ‘Windows WASAPI.’ Within ‘Playback,’ designate the default headphones or speakers you want to record with, and fine-tune any additional settings.
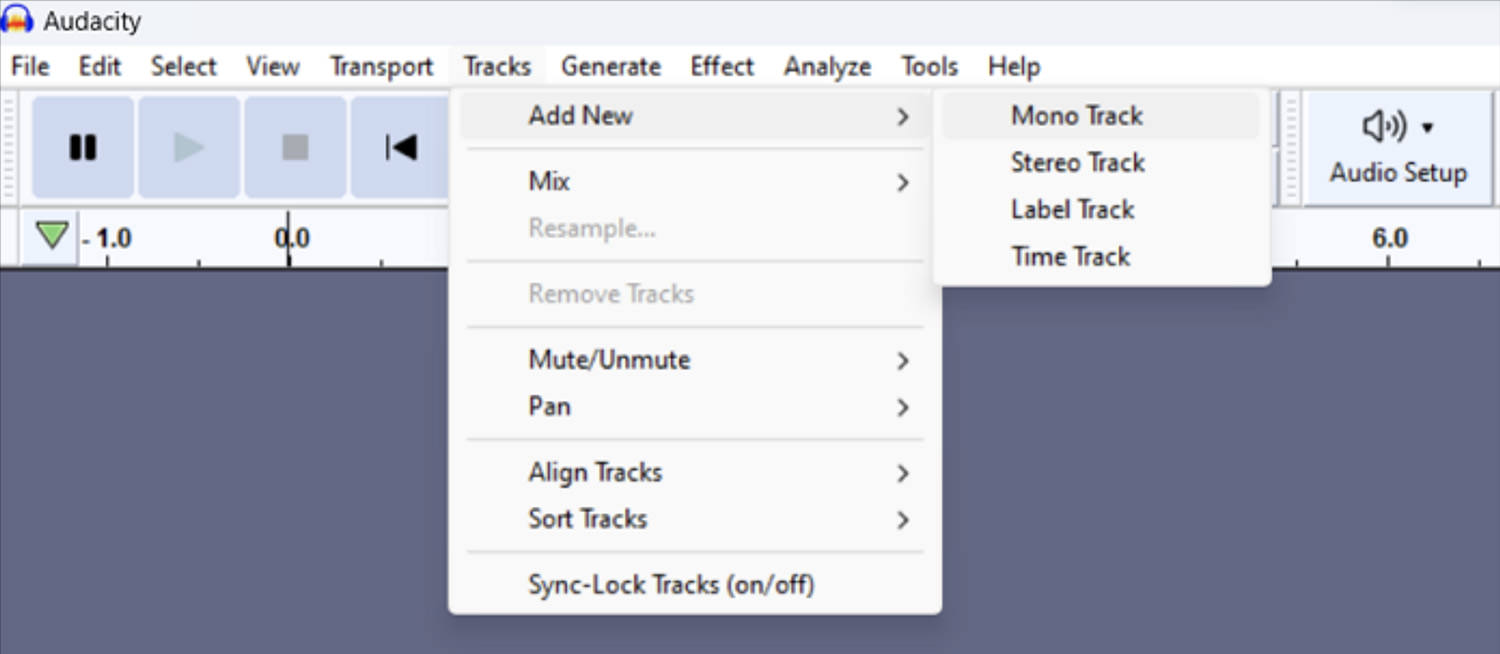
- Subsequently, click on the ‘Tracks’ option in the menu, followed by ‘Add New.’ Typically, users opt for either ‘Mono Track’ or ‘Stereo Track’ based on their needs.
- Once everything’s set, press the red ‘Record’ button to initiate recording. When you’re done, click the square ‘Stop’ button to finish.
And there you have it, three ways to record audio on Zoom. This includes utilizing Zoom’s built-in recording feature, as well as two distinctly different external applications. Hope this helps!