How to Remove Objects From the Background in Photoshop
During graphic designing, there often comes a time when you find an image really suitable for your project save for that one object. If you’re facing such a situation, then take a look at this tutorial where I’m going to show you a quick, yet effective way to remove any object from its background using Photoshop.
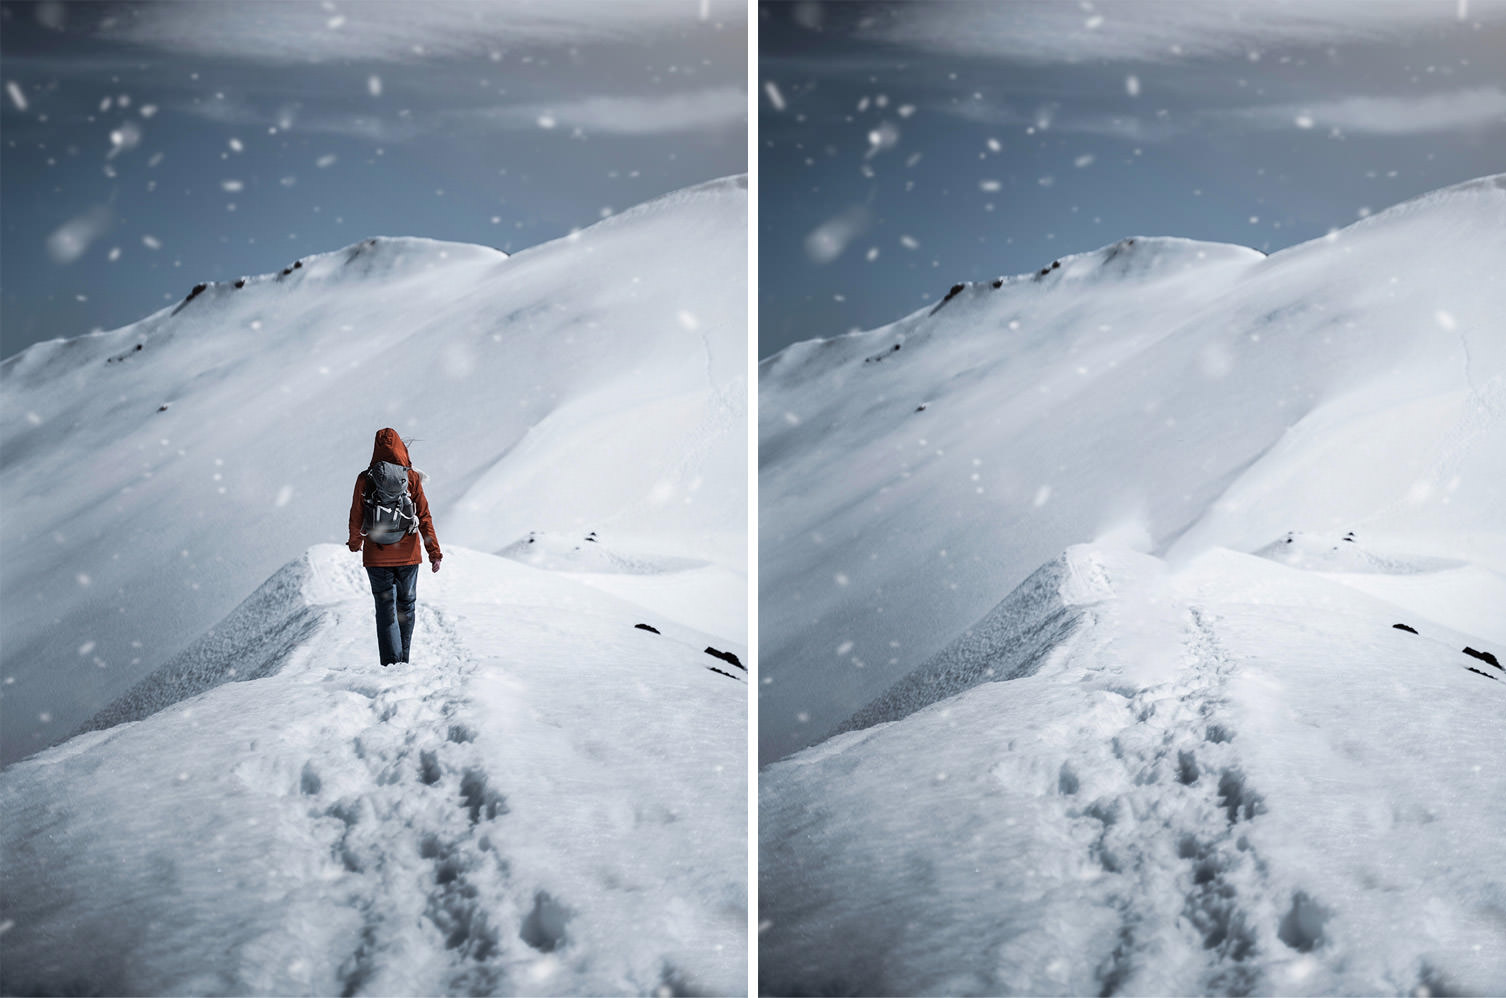
It’s really easy and merely takes a few steps to erase an object in Photoshop. But before we start, here’s a before and after of the image to give you an idea of what this technique will achieve.
Related: You can also now do this with Photoshop’s Generative AI. See how to install and use this feature.
How to Open .WebP Files in Photoshop
WebP is a new image file format developed by Google. The main feature of this format is that... Read more
To follow through with the tutorial, you can use the exact same image I use. The image can be downloaded here, or here.
- Open the image in Photoshop and select the Object Selection Tool from the left Toolbar.

- Drag it over the object you wish to remove.

- Now go to Select > Modify > Expand.

- Enter a value of anywhere from 10 to 100 (you might need to do some trial and error for the best result) and then hit OK.

- The highlighted object will be expanded. It should look something like this.

- Now, go to Edit > Fill. Make sure Content-Aware is selected, then click OK.

- And Voila! your object has now vanished!

Do try out this technique and let us know how it went for you.