How to Launch Opera Browser in Private Mode by Default
Opera is known for being a privacy-focused browser compared to other more popular ones. If you want to make it more secure, you can activate the private mode by default.
In the following, you’ll find a step-by-step guide on how to get Opera to open automatically in a private window each time. Both Windows and Mac users can follow the steps according to their respective operating systems. So, let’s see how to do it.
Also read: Browser Comparison: Opera vs. Brave vs. Vivaldi
Windows Users
Step 1
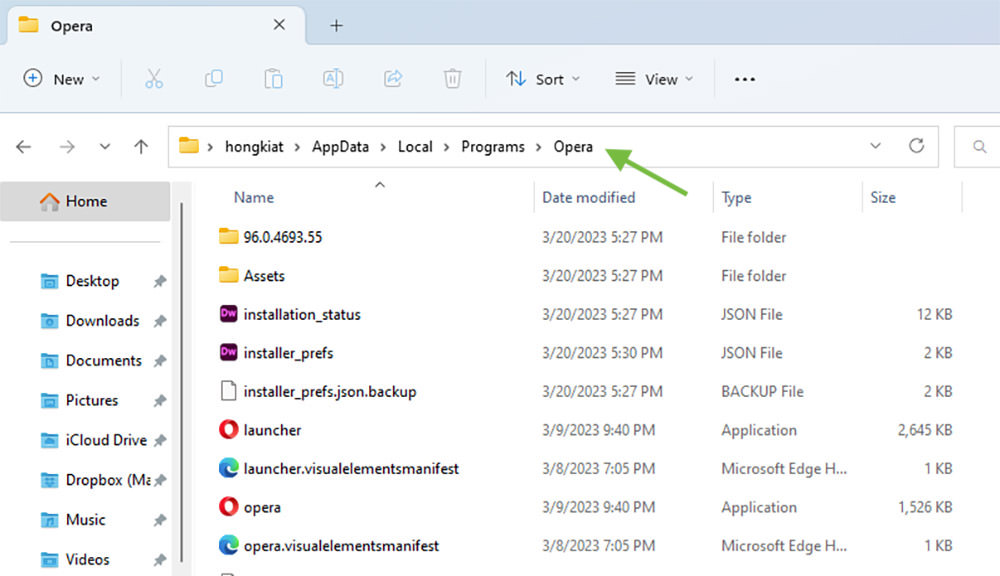
First, we need to locate where Opera is in the Windows files system. By default, the app should be inside C:\Users\user_name\AppData\Local\Programs.
Step 2
Right-click on the Opera app and then select “Show more options”

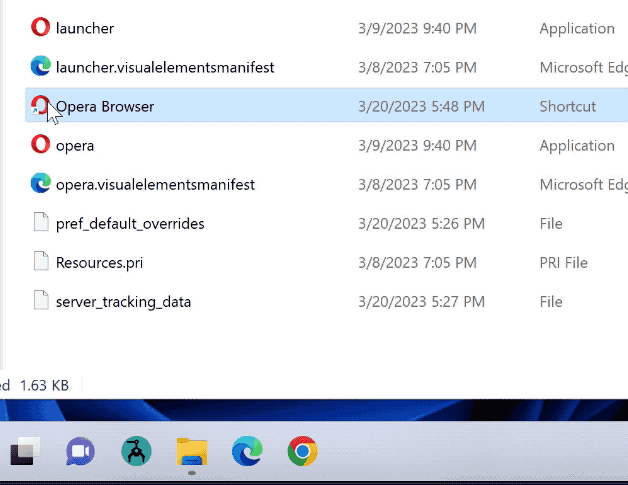
Step 3
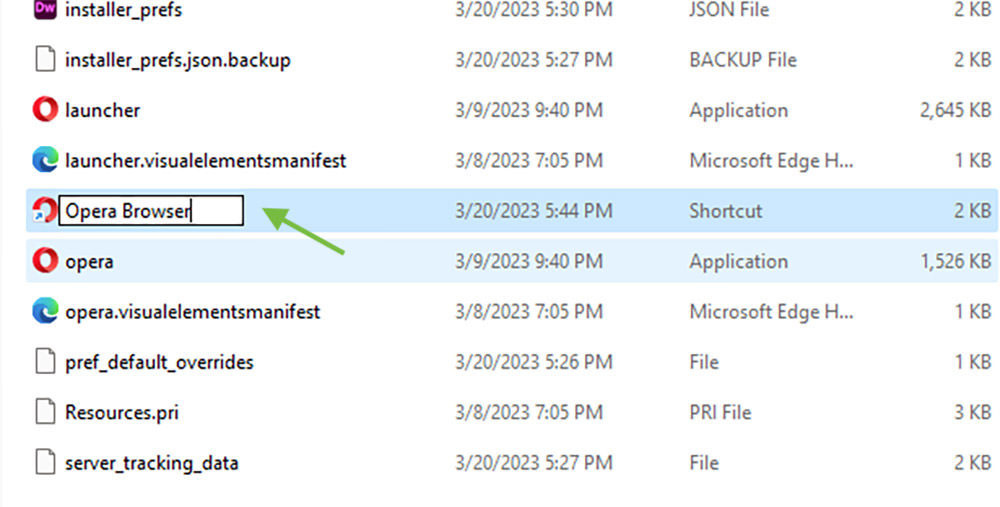
In the expanded menu, select “Create shortcut” and rename the created shortcut to “Opera Browser”.
Step 4
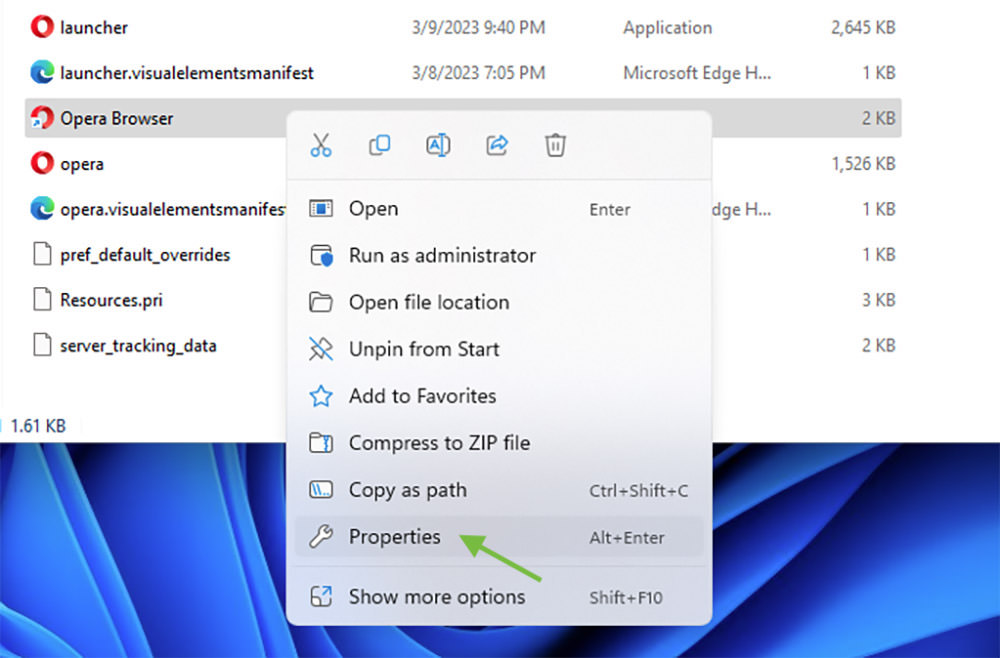
Right-click on the created shortcut and select "Properties".
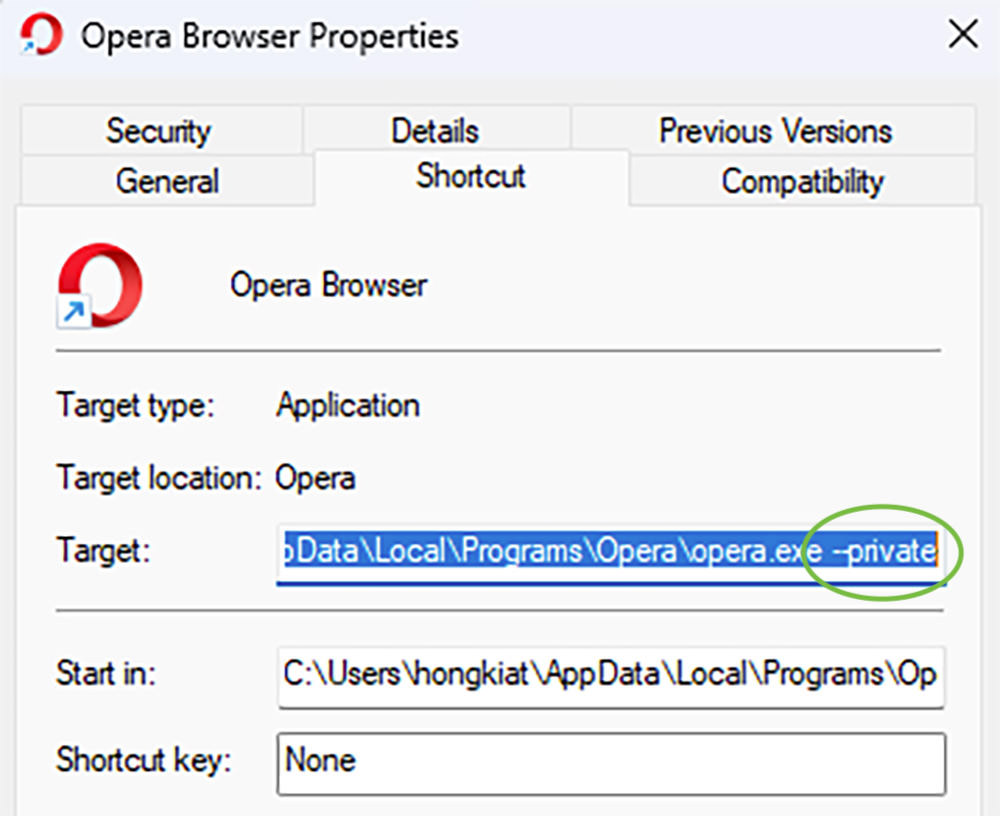
Step 5
Inside “Target:”, go to the end of the line, add a space, follow by “--private” without quotes, and then hit “OK”.
In short, we are replacing the following:
"C:\Users\username\AppData\Local\Programs\Opera\opera.exe"
with one that includes a space and the parameter --private.
"C:\Users\username\AppData\Local\Programs\Opera\opera.exe --private"
Step 6
Double-click the Opera shortcut created to see if it opens up an Opera browser in Private mode, which it should.
And if all works, you can now drag it down to the Taskbar so it opens up in Private mode every time you launch it.
Mac Users
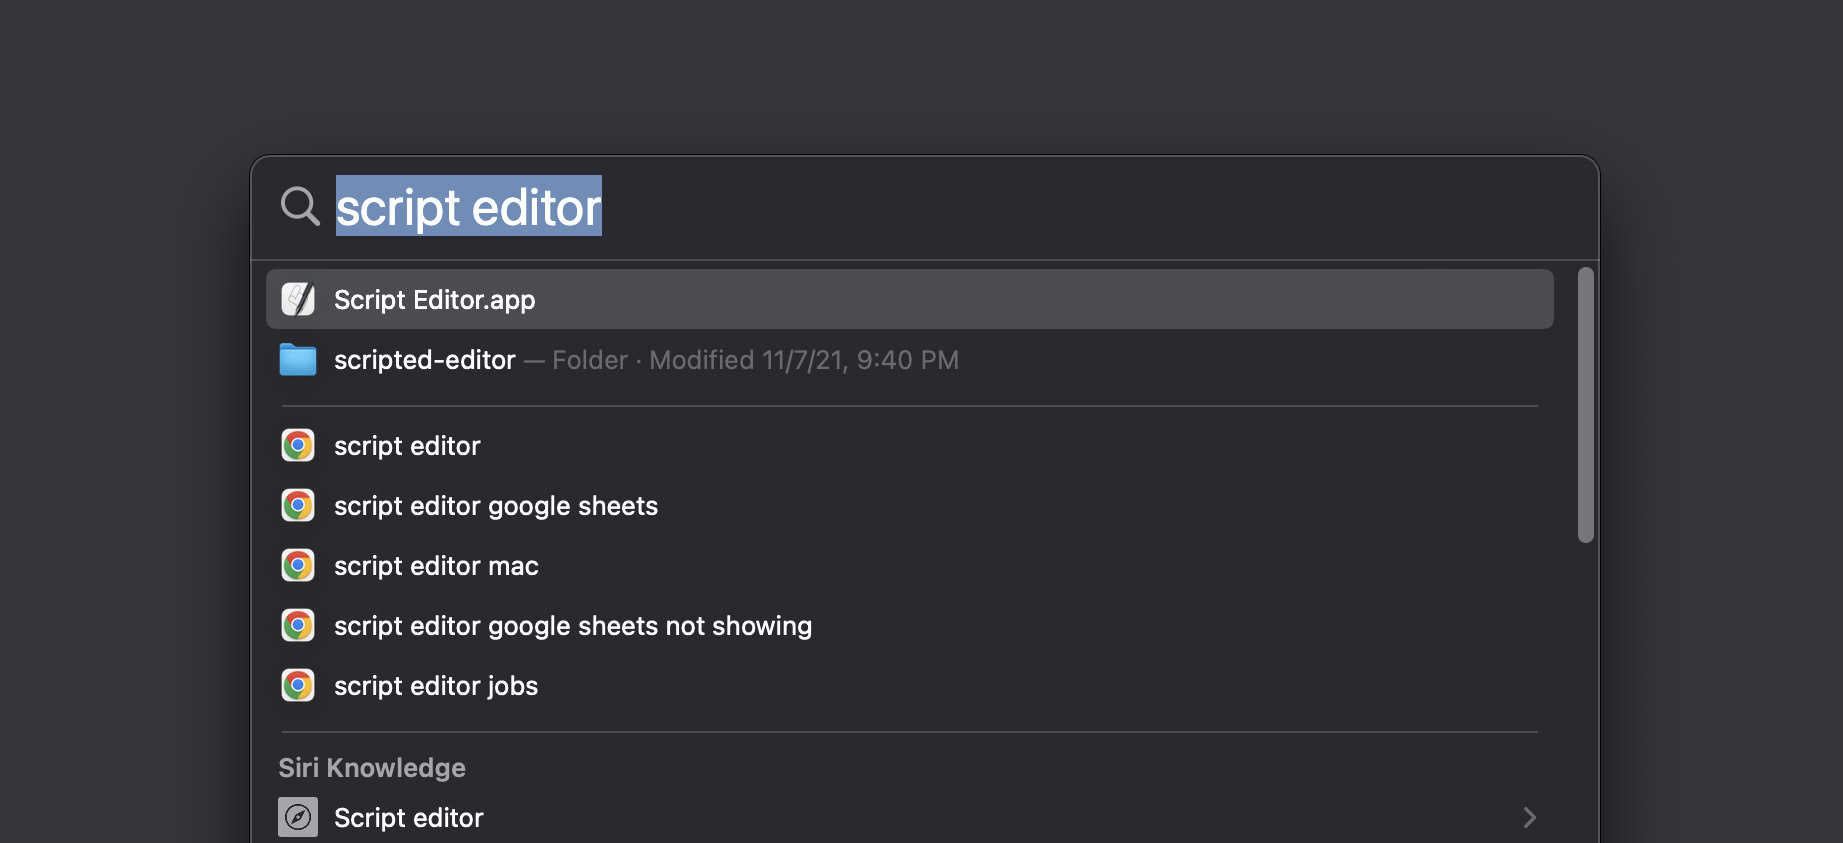
Step 1
Open the Script Editor app. You can search for it via Spotlight or find it inside /System/Applications/Utilities.
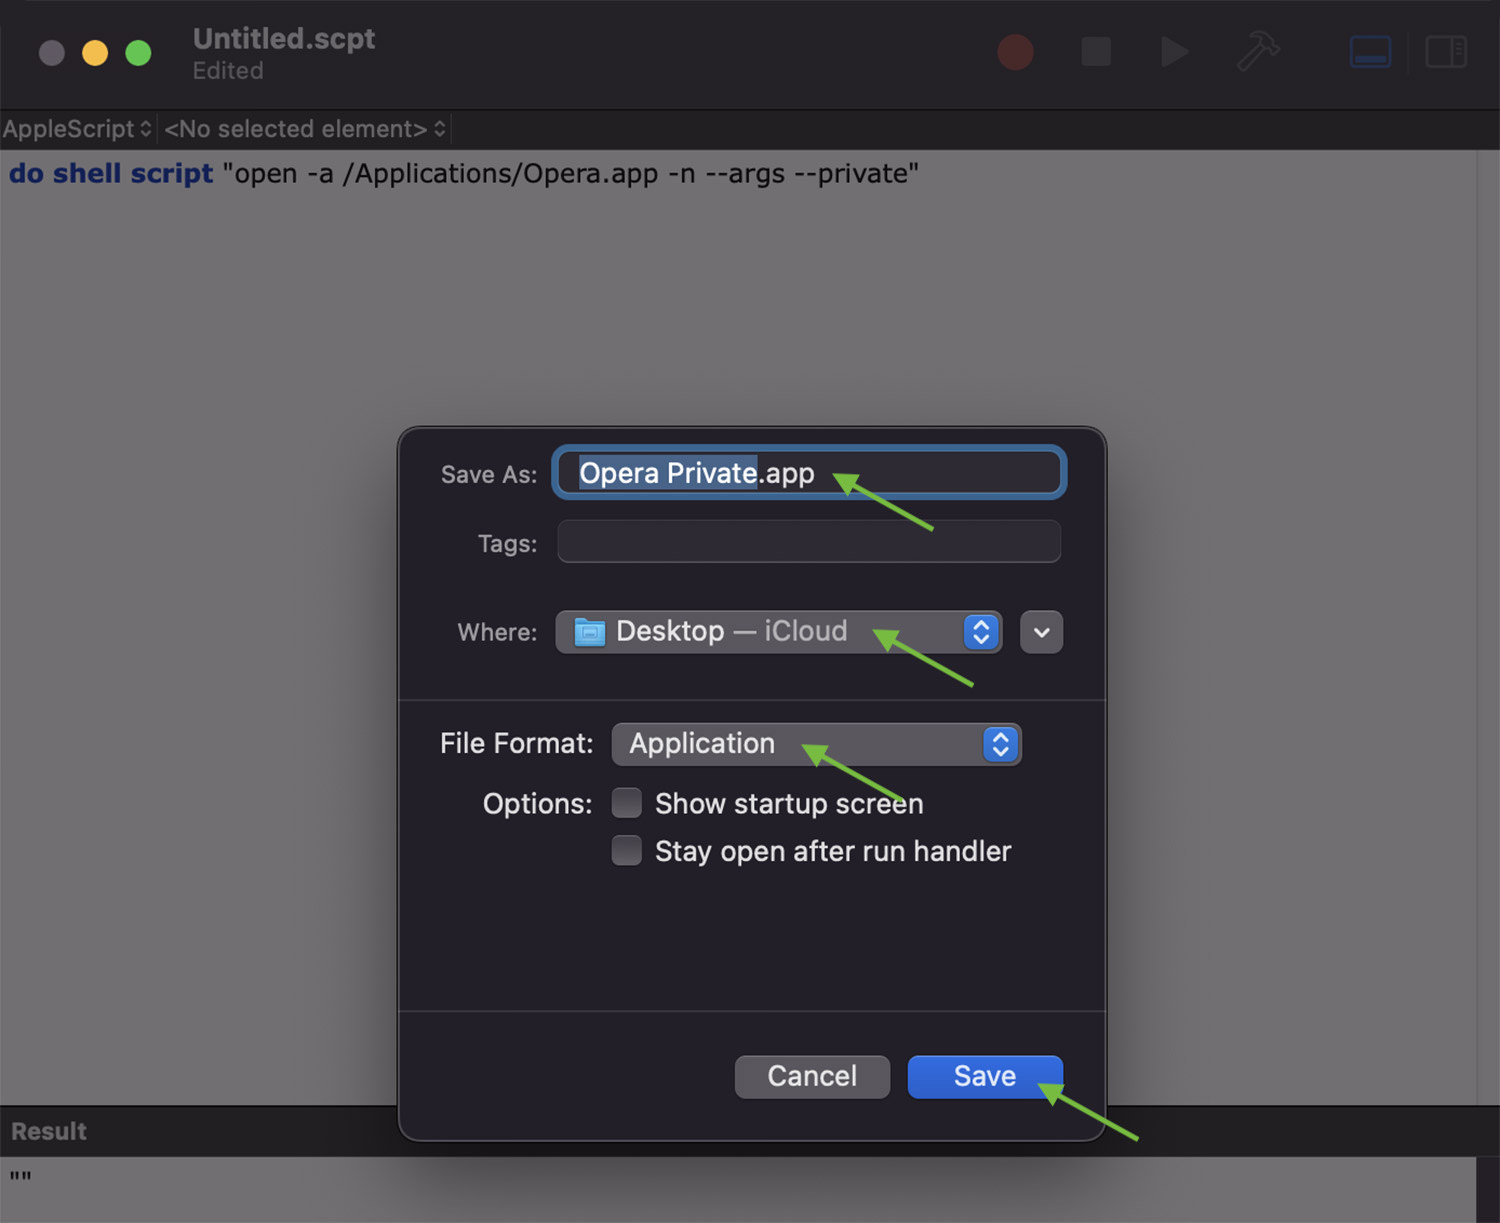
Step 2
In Script Editor, select “New Document” and paste the following code inside.
do shell script "open -a /Applications/Opera.app -n --args --private"
Then go to File > Save (Command + S) to save the file. Select “Desktop” for “Where:”, “Application” for “File Format:”. Hit the "Save" button when done. This will create an executable file that opens Opera in Private mode on your Desktop.
Step 3
Double-click the executable file you just created; it should open up Opera in Private mode by default.
Step 4
Finally, let’s add an icon to the executable file so it looks nicer when added to the Dock.
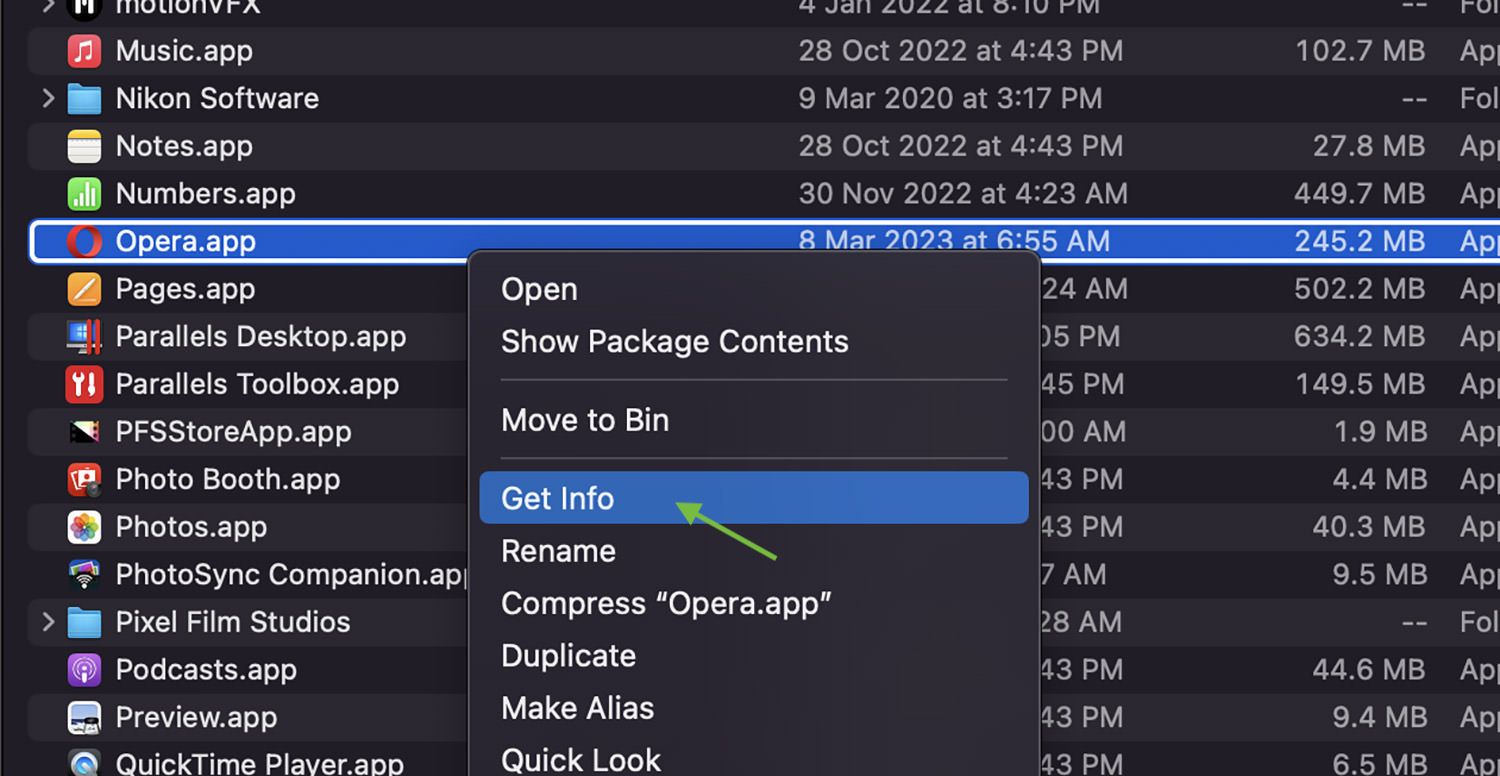
Open Finder, and look for the Opera app installed on your Mac, right-click, and select “Get Info”.
Next, “Get Info” on the executable file you just created, and position the two dialogue boxes side by side, like the screenshot below.
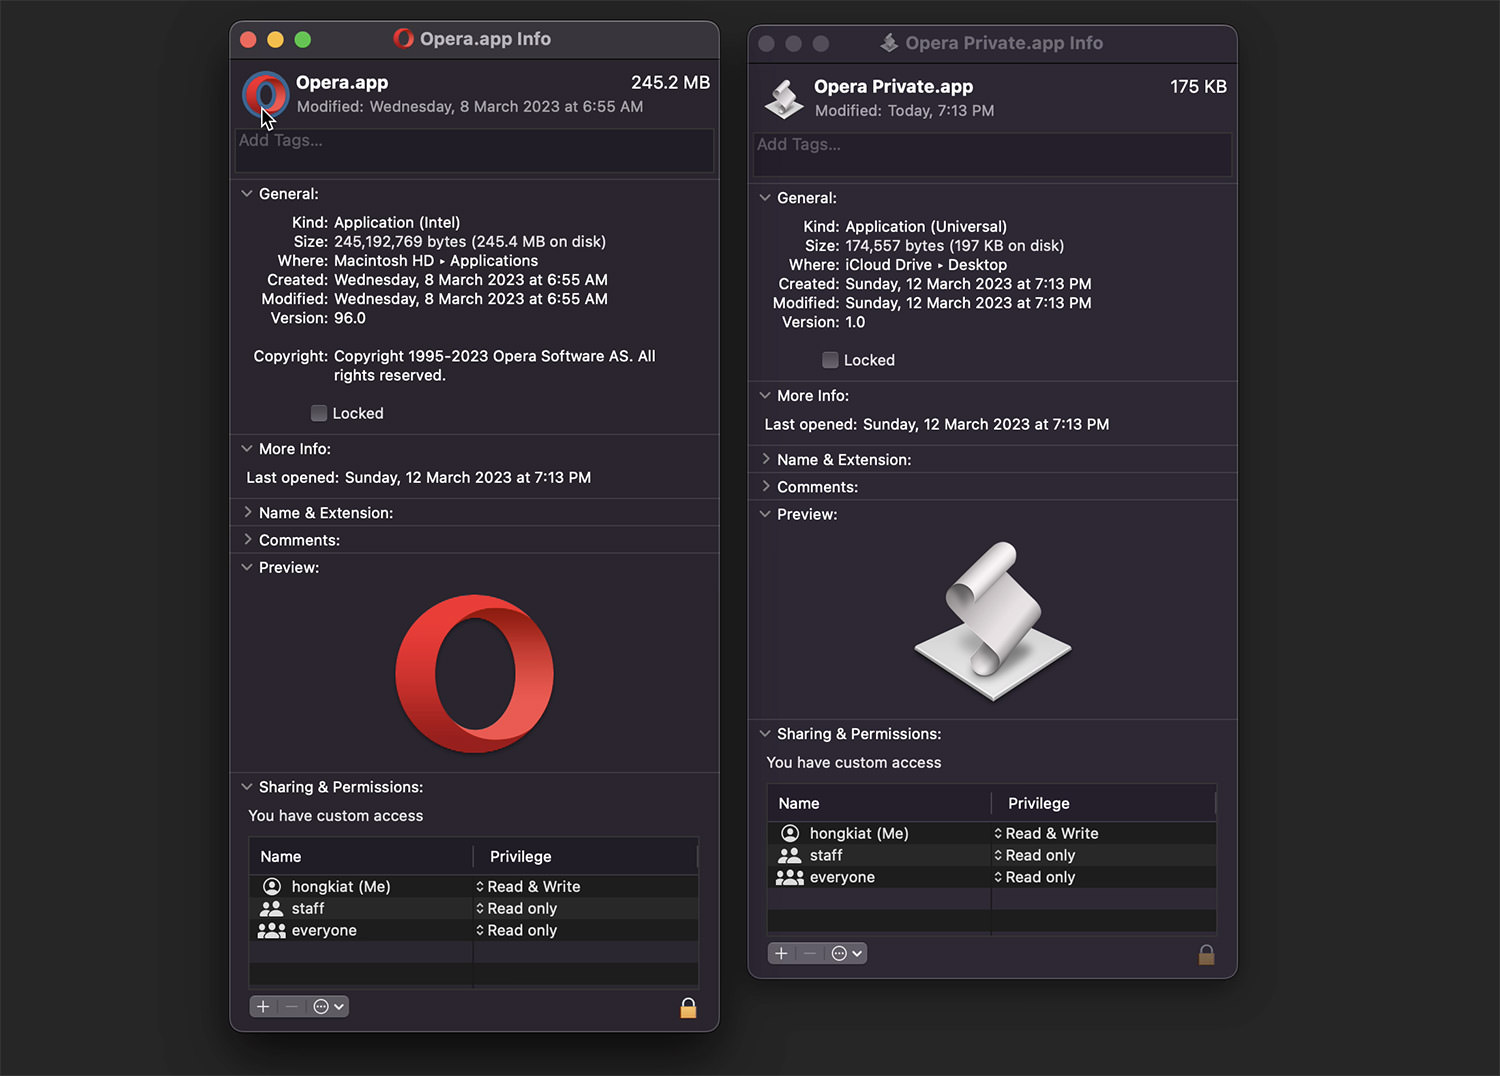
Now, left-click once on the Opera logo, then do a Command + C to copy its logo, then click the executable file’s logo and hit Command + V. This will copy the Opera logo over.
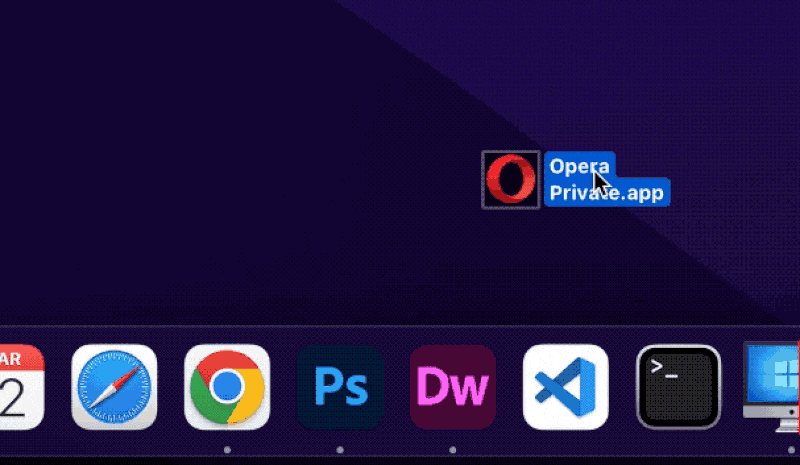
Finally, go ahead and drag it onto your Dock!