How to Make Your Gmail Account Safer
Email is a key part of our online identity. It can give access to many of our other online accounts. So, it’s very important to protect our email from bad people.
Gmail has strong safety features, but many of us don’t know about them all. In this article, I’ll share a list of easy steps to help protect your account from unwanted access and harmful actions.
First, we will deal with strengthening the security of the Google account, and then we will dive into adding extra security measures to the Gmail account.
Read Also: Gmail Advanced Search (Ultimate Guide)
Make Your Google Account Stronger
Let’s start by strengthening your Google account. Every Gmail account is also a Google account. I’ll guide you through the important settings to make sure your account is safe from usual security issues. Plus, I’ll teach you how to adjust some things to enhance its safety.
1. Activate 2-Step Verification
2-Step Verification is an extra safety step that better guards your account. It requires you to provide a second security answer (not just your password). So, it’s always a good idea to turn on and use two-step verification.
Passkey is another effective method to protect your Google account. Learn how to set up Google Passkey for your account.
Here’s how you can set it up:
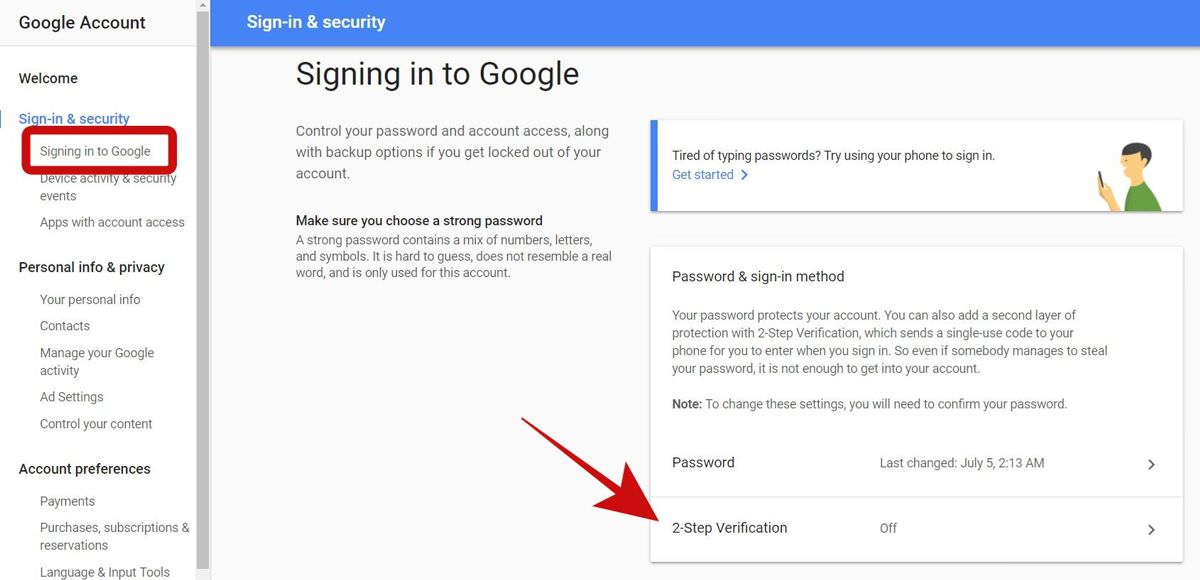
- Open Sign-in & security in your browser and select “2-Step Verification“.
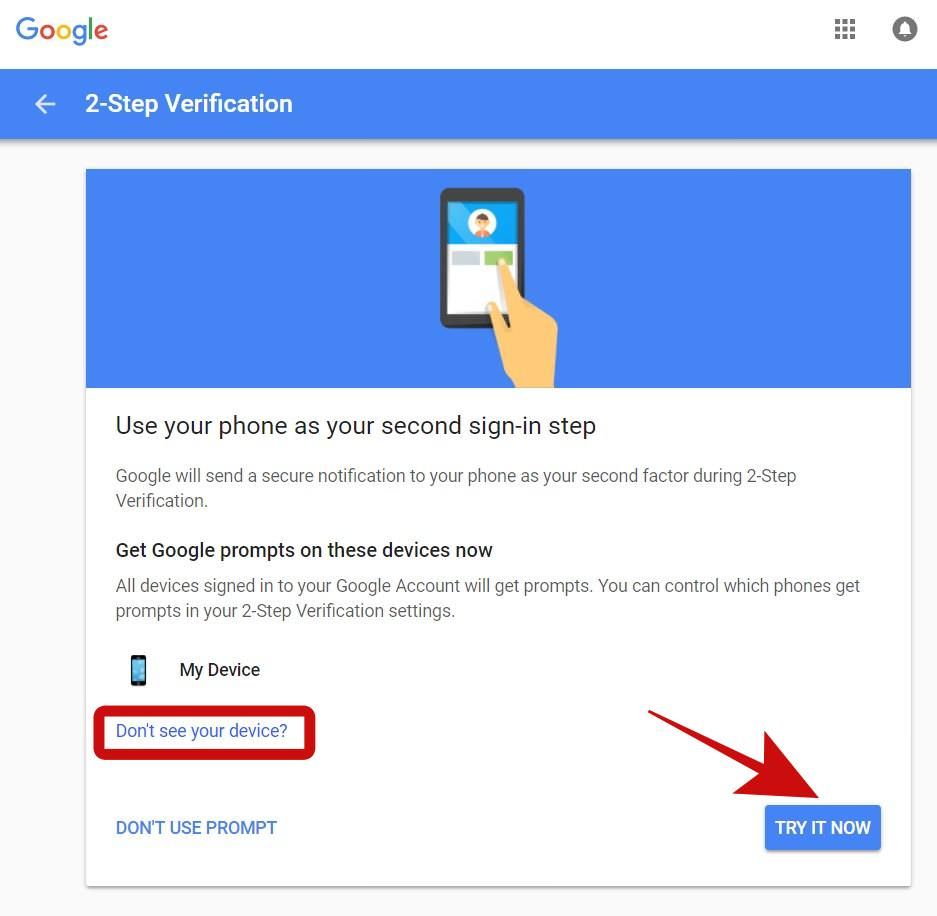
- Next, click “GET STARTED“. Google will suggest using your phone for the second sign-in step, called Google Prompt. If you want to try this, click “TRY IT NOW“. If your phone isn’t listed, select “Don’t see your device?” to add it. But if you prefer using your phone number, click “DON’T USE PROMPT”.
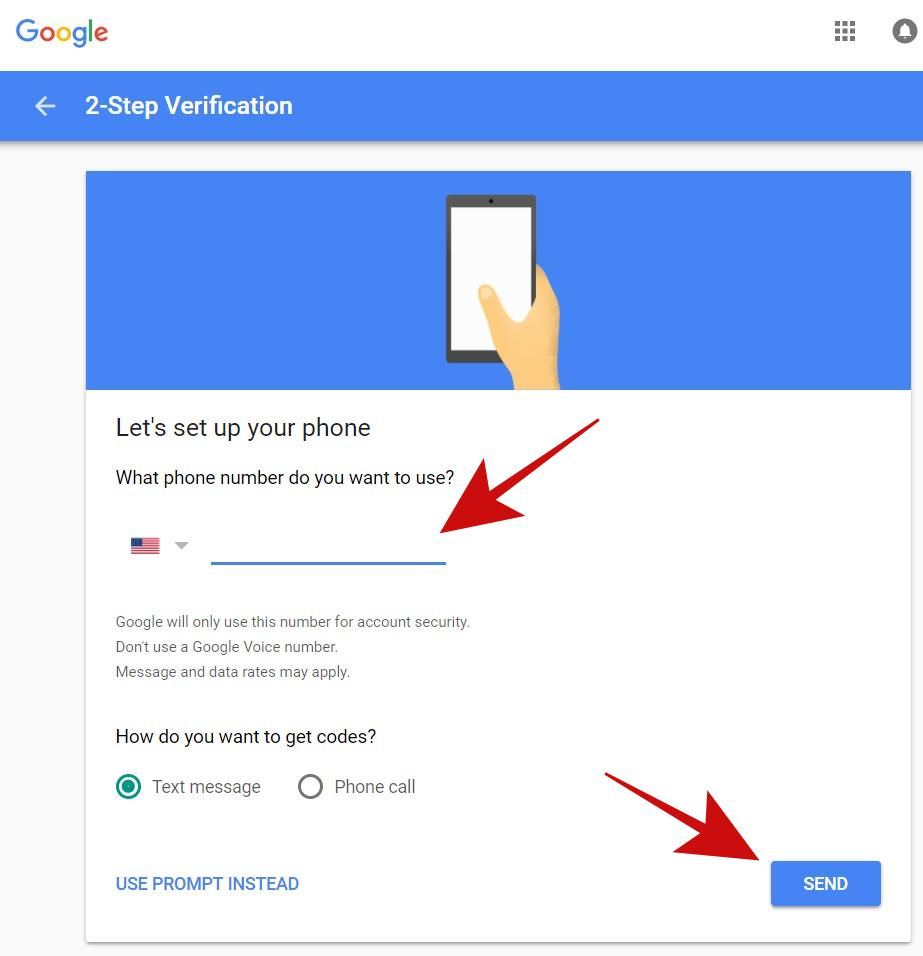
- If you chose “DON’T USE PROMPT” and want to use your phone number for verification, enter your number and hit SEND. Google will send a code to your phone. Input that code when asked, and you’re all set.
2. Add Backup Contact Details
It’s smart to have backup contact details in case you can’t access some of your info. Here’s how you can add them:
- Open Sign-in & security in your browser and sign in if needed.
- Select “Signing in to Google” on the left side, then find the “Account recovery options” section.

Add or Update Backup Email
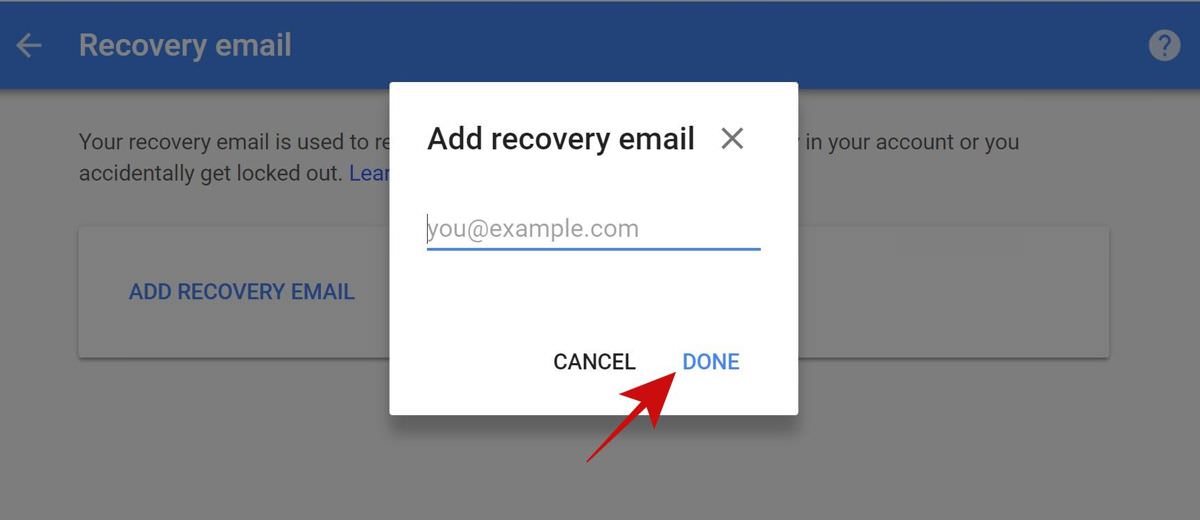
Click “Recovery email”. Choose “ADD RECOVERY EMAIL” and enter the email address you want as a backup. Click DONE. To change it, click the pencil symbol and update the email.
Add or Update Backup Phone Number
Click “Recovery phone”. Choose “ADD RECOVERY PHONE” and enter the phone number you want as a backup. Click NEXT. Google will ask you to confirm, so do that. To change it, click the pencil symbol and update the phone number.

3. Remove Unapproved Apps
When you use your Google account to sign in to an app or website, you give it permission to access your account. This allows it to access your account whenever it wants, but only the information or services you’ve approved.
But you wouldn’t give a stranger the key to your home, right? Similarly, it’s a good idea to check your account often for apps you didn’t approve or no longer use and remove them. Here’s how:
- Open Sign-in & security in your browser and sign in if prompted.
- Select “Apps with account access” on the left and then click “MANAGE APPS“.
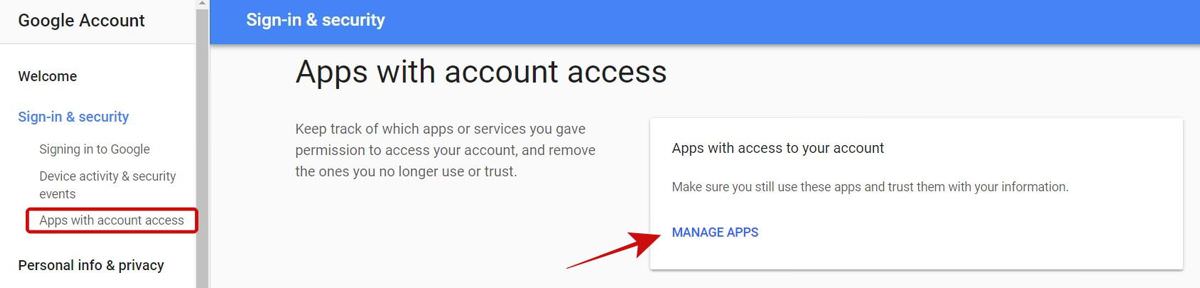
You’ll see a list of apps connected to your account. These are apps that can access your account based on their permissions. To see an app’s details, including what it can access and when you approved it, click on the app. To remove it, click “REMOVE ACCESS“. I suggest removing any apps you don’t recognize, didn’t approve, or no longer use.

4. Turn Off Low-Security Apps
“Allow less secure apps” lets apps with weaker security access your account. It’s best to keep this off, even if you turned it on for a specific reason, like using Microsoft Outlook to check your emails.
It’s safer to turn this setting off and find a different way to do what you need. For example, you can use the new Gmail and its offline feature to check and manage your emails without an internet connection.
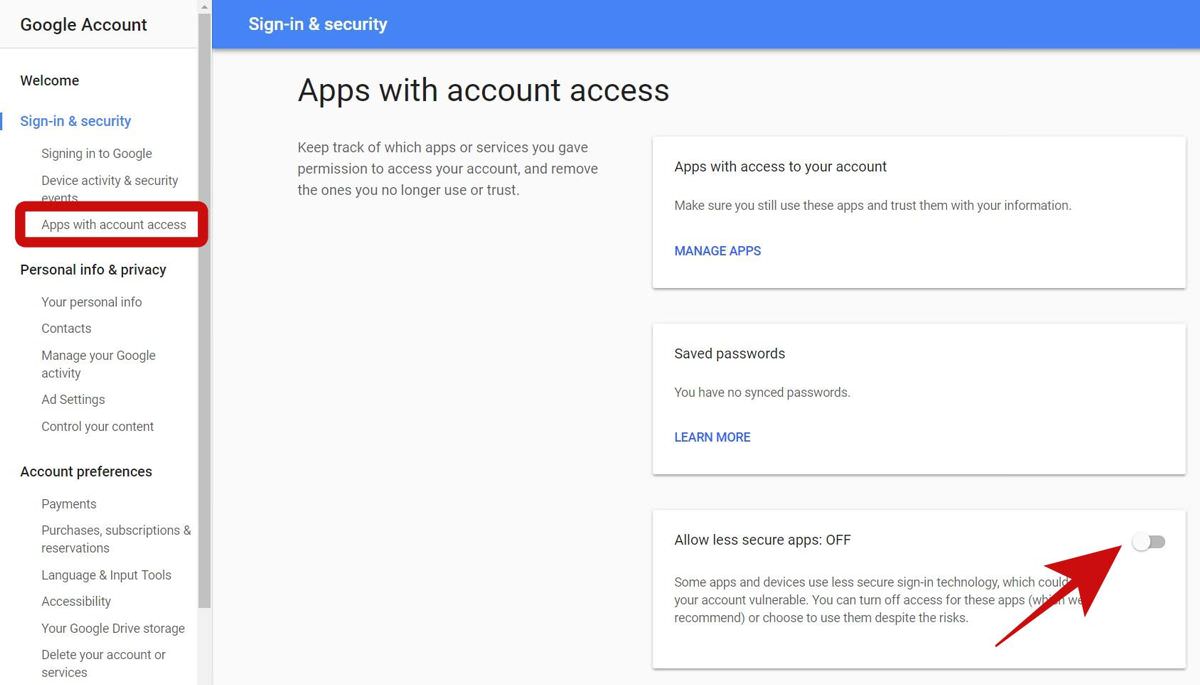
- Go to Sign-in & security in your browser.
- Select “Apps with account access” on the left. Then turn off the setting that says “Allow less secure apps”.
5. Review Important Account Activities
Keeping an eye on activity logs is a good way to spot possible unauthorized access or hacking attempts. Google keeps a log of all your account activities. It’s wise to check this regularly and mark any activity that looks odd, like changes you didn’t make. Here’s how to view this log:
- Go to Sign-in & security in your browser.
- Select “Device activity & security events” on the left side.
- You’ll find two sections: “Recent security events” and “Recently used devices“. Look through these for any unusual activity, like a login from a place you’ve never been. You can also click “REVIEW EVENTS” and “REVIEW DEVICES” to see more details.
Strengthen Your Gmail Account
After securing your Google account and setting up basic protections, it’s time to focus on your Gmail account. Since this post is about keeping your emails safe, it’s very important to know and use the safety features of Gmail.
1. Review Gmail Settings
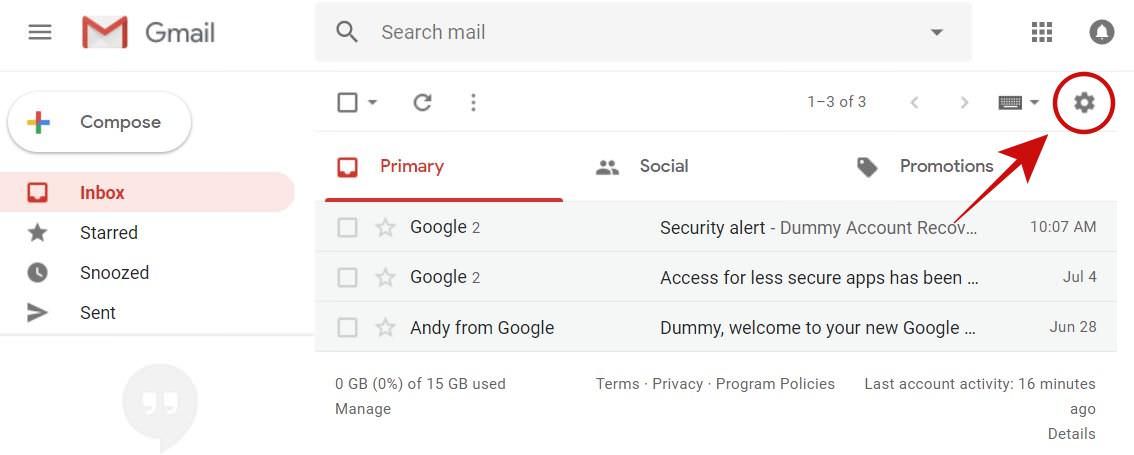
First, let’s examine the Gmail settings to ensure everything is as it should be. Gmail may not have a ton of options, but the ones it has are vital for email safety. To start, click the gear icon in Gmail to open settings. Here’s what to look for:
General Tab
In this section, review the following:
- Signature: Ensure your signature hasn’t been altered and doesn’t have any unfamiliar links.
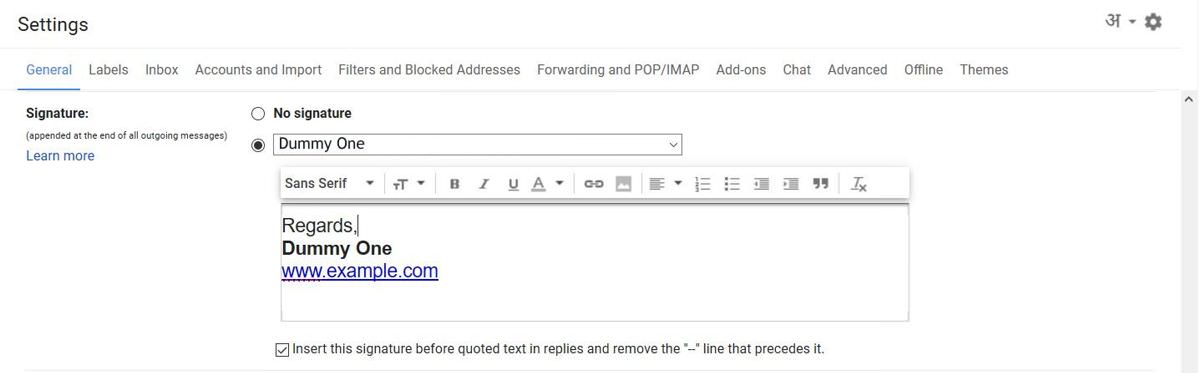
- Vacation Responder: Make sure it’s on or off based on your preference and the message is correct.

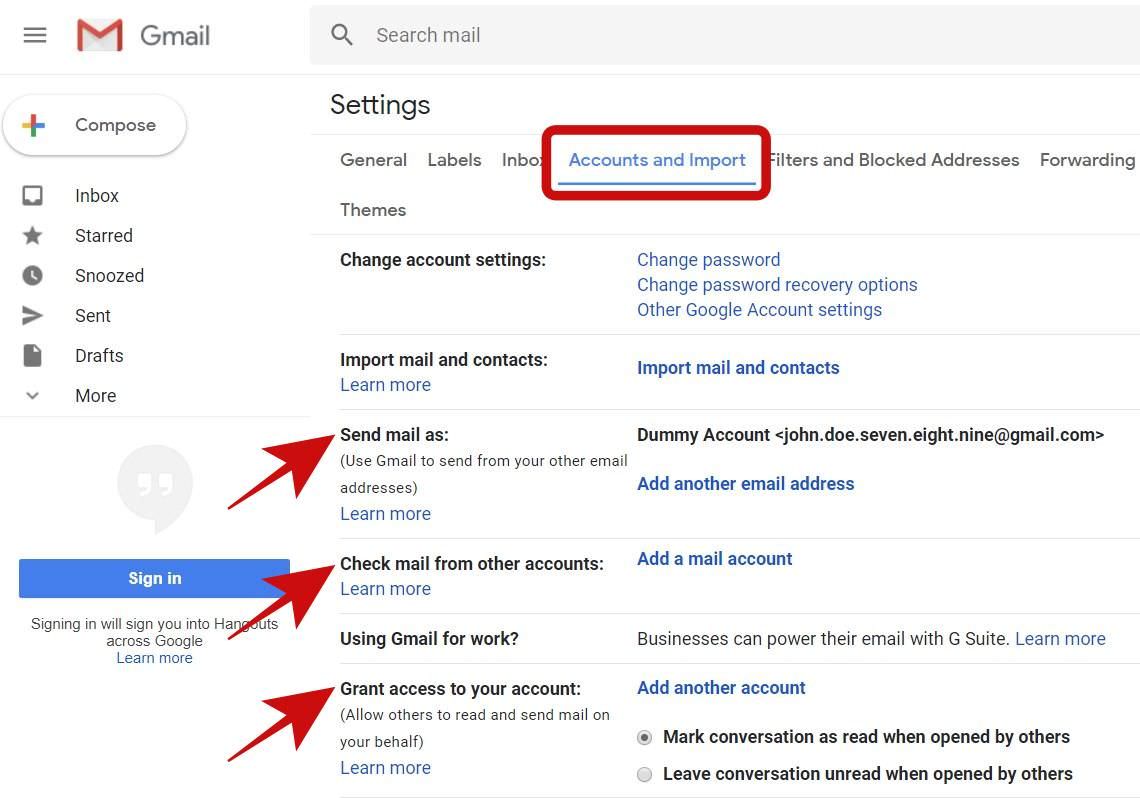
Accounts and Import Tab
Here, ensure the following:
- Send Mail As: All email addresses in this section should be yours.
- Check Mail from Other Accounts: Every email address here should belong to you. Otherwise, you could unintentionally access someone else’s email.
- Grant Access to Your Account: This section shouldn’t have any unfamiliar addresses. If there’s an address you don’t recognize, someone might have access to your account, and you should remove them right away. To do this, click Delete next to their address.
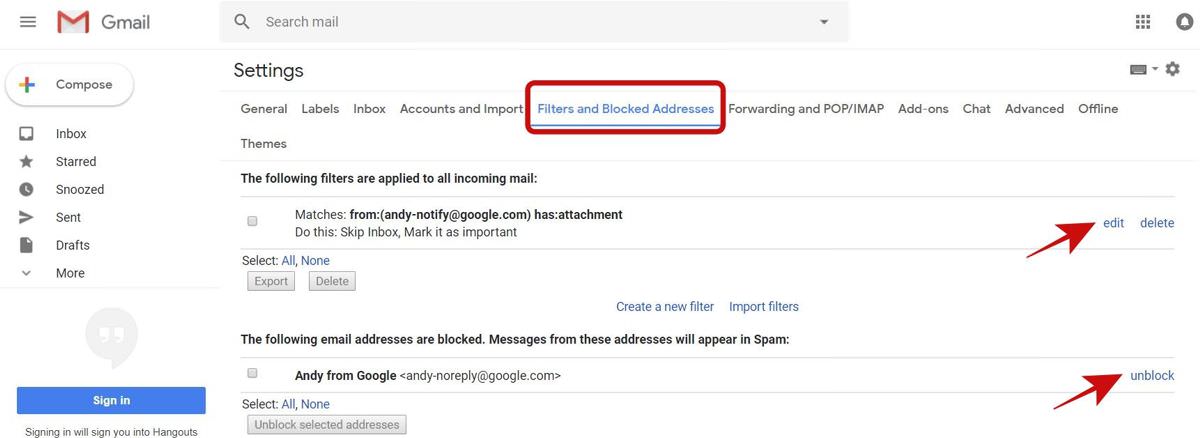
Filters and Blocked Addresses Tab
Within this section, you should review:
- Filtered Emails: Ensure there aren’t any unexpected filters. If there’s a filter that looks suspicious, remove it right away.
- Blocked Emails: This section lists all the email addresses you’ve blocked. You won’t get emails from these addresses, so ensure none of them are important or familiar to you. If you find an address you shouldn’t have blocked, unblock it.
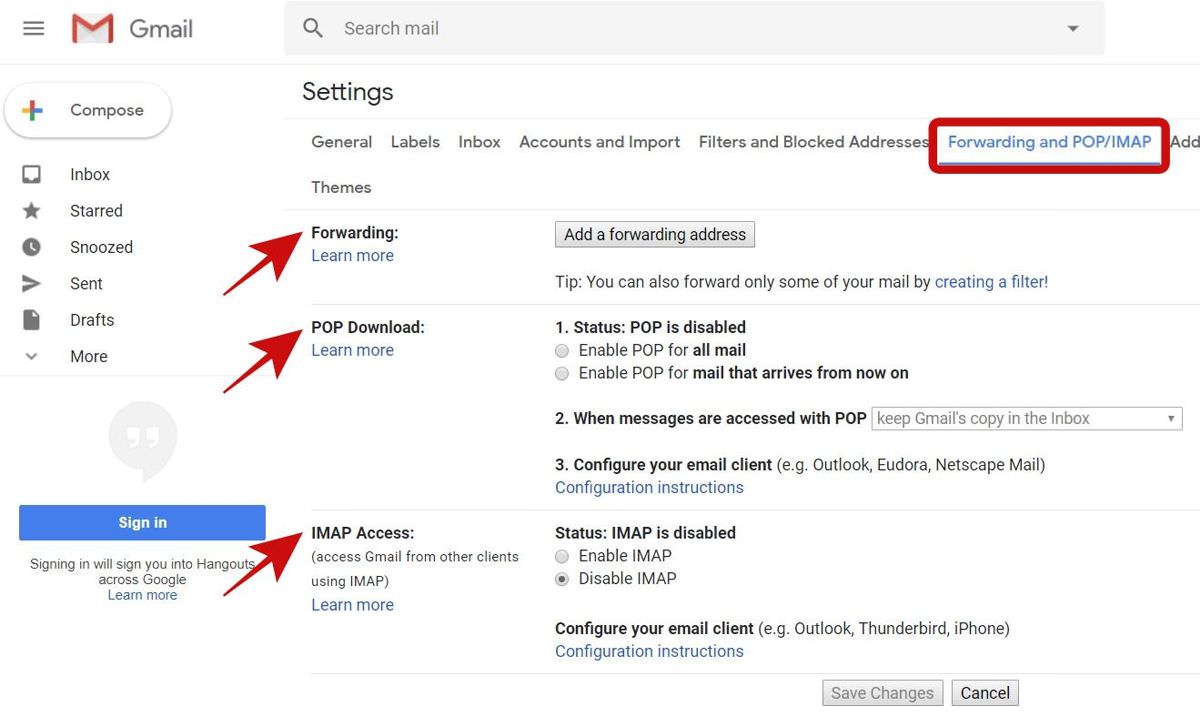
Forwarding and POP/IMAP Tab
Under this section, ensure the following:
- Forwarding: Your emails shouldn’t be sent to someone else without you knowing. If there’s an unfamiliar address here, remove it to prevent unwanted access to your emails.
- POP Download: Make sure POP isn’t turned on if you didn’t enable it.
- IMAP Access: Ensure IMAP is off if you’re not using it.
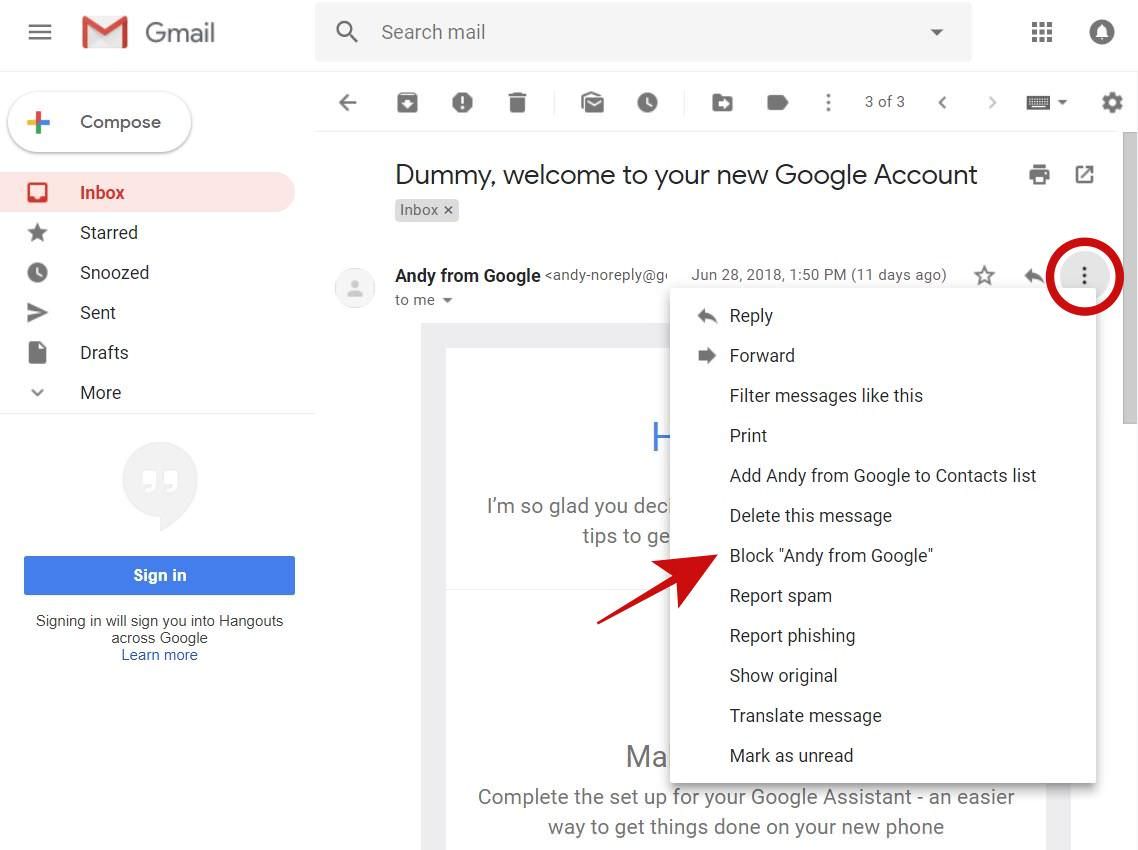
2. Remove Suspicious Emails
Block Unwanted Senders
If you get an email that seems strange or you don’t trust, and you don’t want emails from that sender anymore, you can block them. Gmail will then move their future emails to Spam.
To block an email sender, follow these steps:
- Open the email from the sender you want to block.
- Click the options icon at the top-right of the email, then pick the “Block” option.
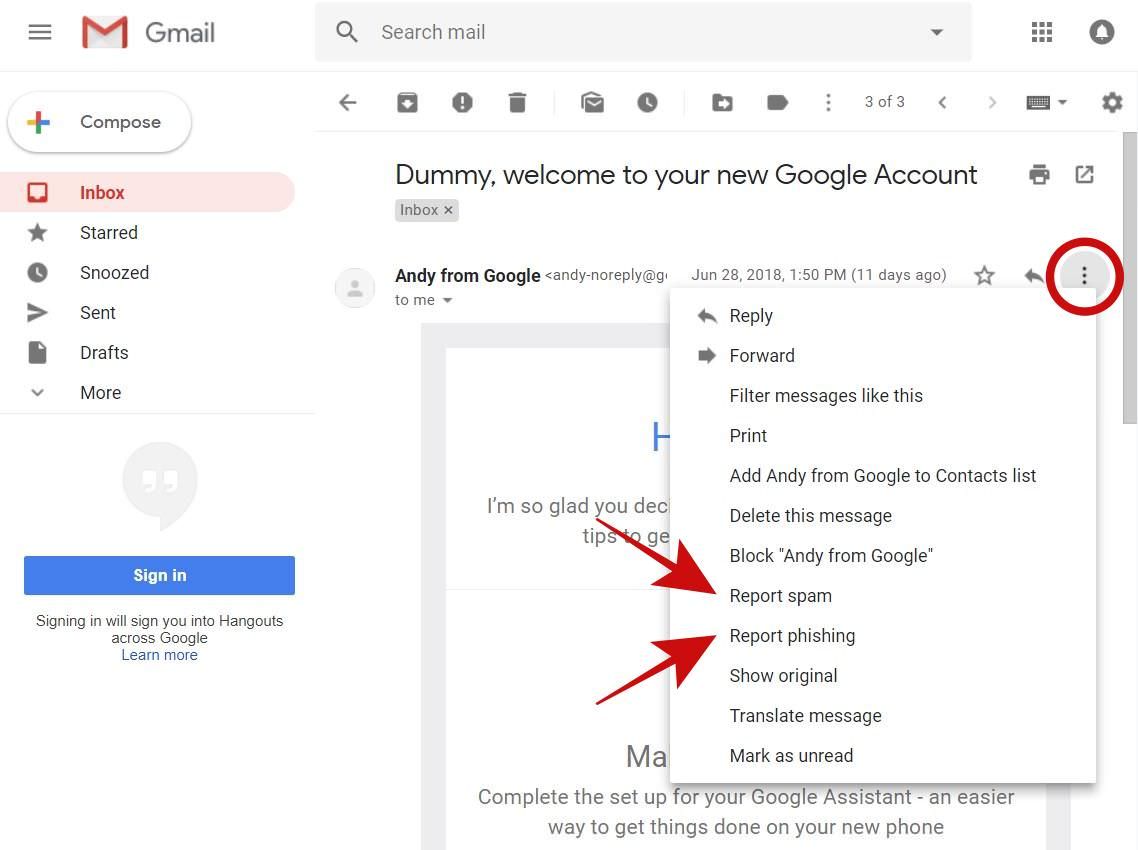
Report Junk or Harmful Emails
It’s not unusual to get junk or harmful emails, especially on work addresses shared with others. Nobody wants to read these unwanted emails. If you get one, you can report it. If Gmail agrees it’s junk or harmful, it’ll mark similar emails as spam in the future.
To report these emails, follow these steps:
- Open the junk or harmful email in Gmail.
- Click the options icon in the top-right corner, then pick either “Report phishing” or “Report spam” depending on what kind of email it is.
I hope this post helps you keep your Gmail account safe. Remember to be careful and follow safety guidelines when you’re online. If someone hacks into your computer or online session, they might get into your emails too.