How to Mine Monero (XMR) On Your PC
Monero (XMR) is an open-source cryptocurrency based on Unlinkability and Untraceability. This means that it will be nearly impossible for one to link two Monero transactions or trace the source of the funds.
Monero’s high anonymity is achieved using the Cryptonode protocol meaning that random transactions on the blockchain are mixed with the correct transactions, thus making it impossible to track your transactions.
In this article, I will show you how to mine Monero, right on your PC.
10 Best Crypto Trading Bots
Crypto trading is one of the riskiest ways for people to earn money, and there is where crypto... Read more
Step 1. Create a Monero Wallet (MyMonero)
In order to be rewarded with the Monero (XMR), you mine in a later stage and you must first have (and use) a Monero-supported wallet.
Examples of Monero-supported wallets include MyMonero, AtomicWallet, Exodus Wallet, etc.
In this guide, we will use the MyMonero wallet as an example. Here’s how to obtain a MyMonero wallet:
- Go to https://mymonero.com/, download the wallet app for your operating system, install it, and then launch the app.
- Click “Create a new wallet“, give it a name, and then click Next.
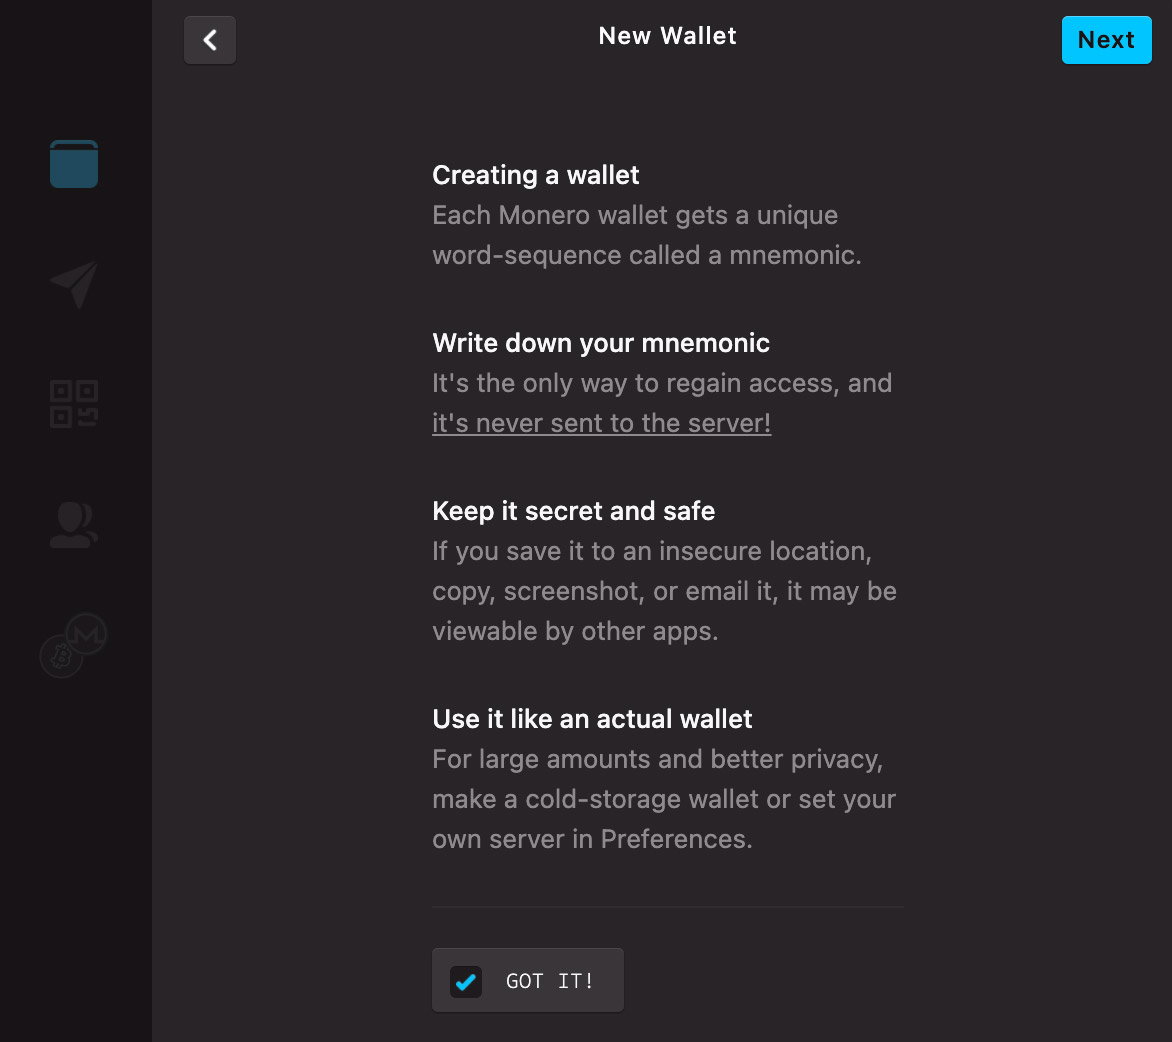
- Read through the steps described in this next page, check the box, and then click Next.
- Copy the given mnemonic phrases down somewhere safe and private. These phrases will be needed to recover your wallet shall you lose access to them one day. Once done, click Next.
- You will be tested if you’ve noted down your mnemonic phrases correctly. Follow the instructions to enter the phrases correctly, then click Confirm. Now set a PIN or password as you’ll need it when you access your wallet at a later stage and then click Next.
- That’s it. If you see a screen like the following, that means your wallet has been successfully created. Now click on your wallet.
- A truncated version of your wallet address will be displayed here. To obtain the full address, click Copy.


Step 2. Get the mining software (XMRig)
Next, we will need mining software – an application that will help you mine Monero. And for that, we will go with XMRig, one of the most popular Monero mining apps available right now.
- Go to https://xmrig.com/, click the green ‘Download’ button to download XMRig.
- Choose the XMRig for your operating system and initiate the download process.
- Once downloaded, unzip and move the folder somewhere easily accessible, like your Desktop.


Step 3. Generate a config file
One final step before you can start mining Monero. You will need to generate a config.json file from https://xmrig.com/, and have it replaced with the default config.json downloaded earlier in step 2.
The process of generating the config.json file starts with adding a Monero mining pool.
You can add a custom pool, or you can select from the existing list of pools. For the sake of simplicity, we will go with the latter. We will talk about creating a custom pool in the next section of this article.
1. Adding mining pool (from drop down menu)
- Open https://xmrig.com/ in a browser.
- Navigate to Wizard > Pools, then click + Add pool.
- Select a pool from the drop-down menu, enter your Wallet address, make sure the Coin is Monero, then click + Add pool.


Note: To help decide which pool to choose, you can go to miningpoolstats.stream/monero to get a good understanding of all Monero mining pools with information like:
- Pool fees.
- The number of users of each pool.
- Hash rates.

2. Finalizing other config.json options
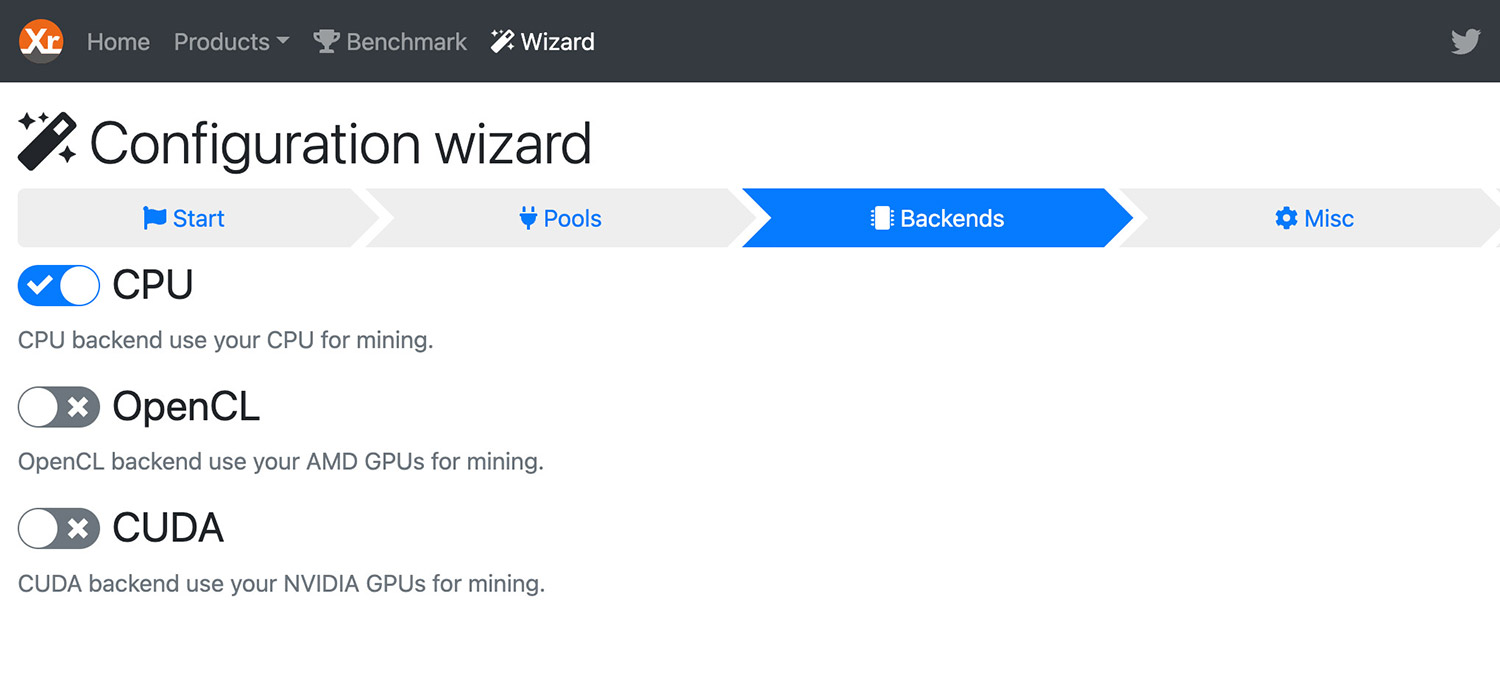
- Click the Backends tab and choose CPU as your mining type.
- Go to the Misc tab, and decide the amount (in percentage) you would like to donate to the development of the app. 0% being not donating at all, 5% is the default.
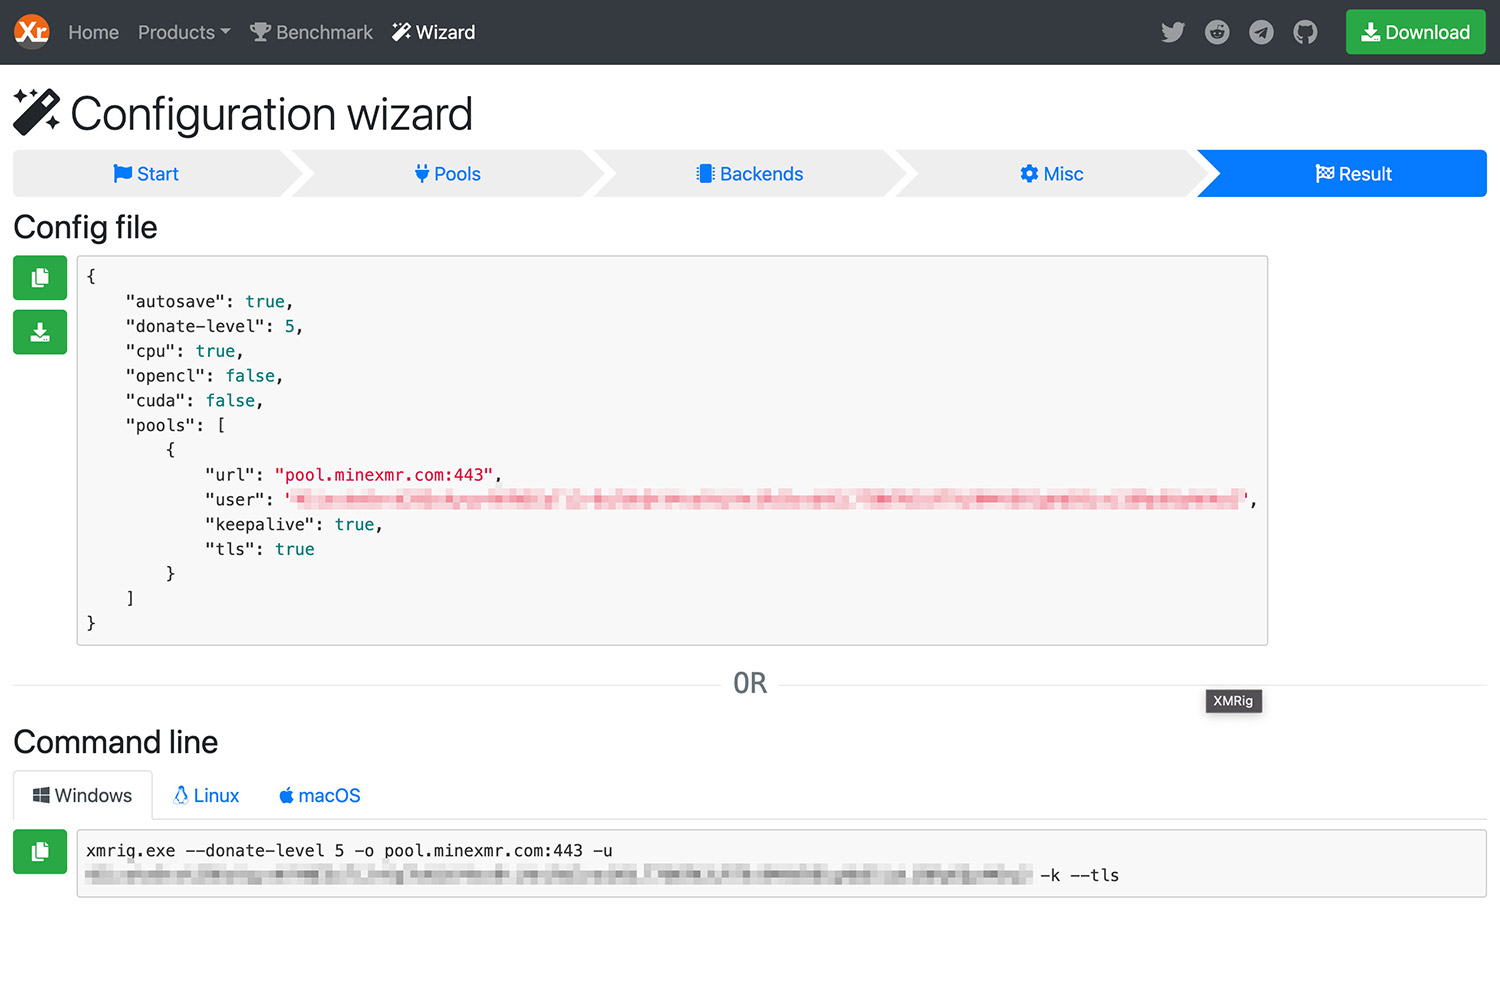
- Lastly, go to the Result tab and click the download button to download your config file.
- Replace the downloaded
config.jsonwith the one in your folder.

That’s all. You are now ready to mine Monero on your computer. Run the program as an administrator and your mining should begin (connecting to the mining pool may take a few seconds).
Here’s how it should look like when the mining is in progress:

Bonus: Adding mining pool (Custom pool)
- Open https://xmrig.com/ in a browser, navigate to Wizard > Pools, click + Add pool, and select Custom pool.
- Refer to https://mymonero.com/ for the Host name.
- Keep “keepalive” and “nicehash” checked.
- Paste your wallet address in User.
- Select Monero for Coin, and rx/0 for Algorithm.
- Click + Add pool and resume steps at 2. Finalizing other config.json options.
Conclusion
Keep in mind that rewards through Monero mining are subject to a minimum balance. Allow your computer to perform the mining job for you now while you wait for your XMR incentives. Once the pool delivers the initial payout, your earnings will appear in your wallet.
Mining Monero is pretty easy to get started with because it does not require expensive mining hardware like bitcoin. Monero has also established itself as the main privacy currency. That implies it has a lot of upward price potential, which might help you make more money mining Monero.