How to Customize Windows 10 “Send to” Context Menu
The “Send to” option in Windows context menu is astonishingly helpful, but it’s also one of the most underrated features. I’ll blame its lame default entries for receiving the cold shoulder.
But, what if you can customize the context menu‘s “Send to” option, it would be able to help you easily send any file to your desired location with just a click, or even open files in a respective program without forcing you to jump between different locations.
So, in this post, I’ll tell you everything you need to manage the “Send to” option. Read on after the jump.
Read Also: Create Custom Right-Click Context Menus with justContext.js
Understanding the “Send to” option
At its very core, “Send to” option is very similar to drag and drop feature. If you drag and drop a file in a folder, it will be moved to it. Similarly, if you drag and drop a file on a specific program then that program will try to open that file (if possible).
When you right-click a file and select a program/location from the “Send to” option, it copies the file to that location or opens it in the selected program. So basically, Send to (as its name also suggests) sends the select file to the selected location or program.
Manage the “Send to” option manually
Getting to the sweeter part, adding and removing items in the “Send to” option is all you need to know to be productive while moving or opening files. Interestingly, “Send to” option is backed up by a simple folder, not surprisingly called SendTo.
Everything that is added in this folder is shown in the “Send to” option, and similarly, everything removed from it is removed from the “Send to” option as well (and you thought I’ll drag you in the registry, right?).
Access the SendTo folder
The SendTo folder is located in the below-mentioned directory:
C:\Users\username\AppData\Roaming\Microsoft\Windows\SendTo
Here username is your actual username in your PC. You can go to this directory manually to access the folder. Alternatively, you can also use a Run command to open this folder. Press Windows + R keys to open the Run dialog and enter this command shell:sendto. When you will press Enter, the SendTo Folder will open up.

Here you can add the shortcut to any program or folder and it will immediately appear in the “Send to” context menu option. Although make sure you copy a shortcut to the original program/folder to keep confusions to a minimum.
Just right-click on the required program/folder and select create shortcut from the context menu. This will create a shortcut that you can move to the SendTo folder.
Use third-party tool to manage “Send to” option
Adding and removing items from the “Send to” option isn’t that hard, but if you want to make it even easier; then a third-party tool may help. For this purpose, Send To Toys is an interesting tool that offers multiple ways to add/remove items from the “Send to” option and also adds some handy entries of its own.
Using Send To Toys
After installation, Send To Toys will automatically add more handy entries in the “Send to” option. The entries include a Quick Launch shortcut, Recycle Bin shortcut, copy to clipboard shortcut, a folder shortcut to send files directly to a default folder, and a few more.

The program’s configuration window lists all the items in your “Send to” option and gives simple Add and Remove button to easily add more items or delete the unrequired ones. You can also configure the Folder option to let you send files to the last accessed folder, user folder, or a predefined folder.
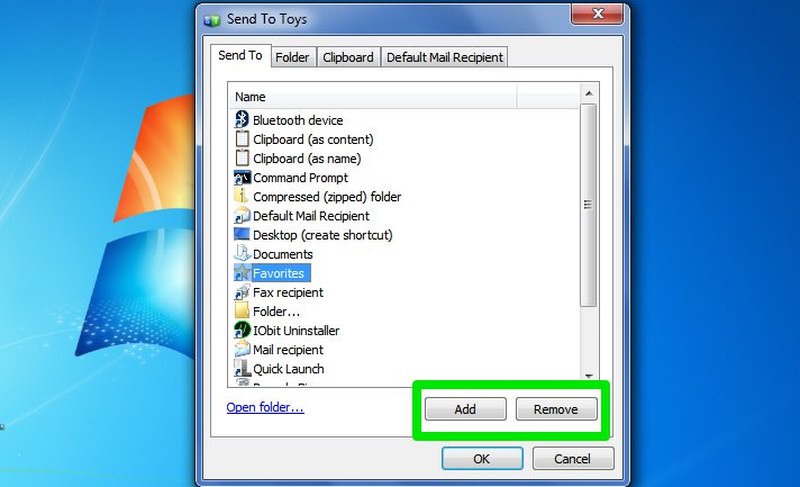
The best feature of this tool is its context menu entries that let you add or remove any item from the “Send to” option by right-clicking on it and selecting the desired option.
For example, if you want to work on a folder and add items to it frequently, then there is no need to go to the SendTo folder. Simply right-click on it and select Add to Send To menu and it will be added. Afterward, when you are done working on it, just right-click on it again and select Remove from Send To menu to easily remove it.

“Send to” option tips and tricks
Now that you know how to manage the “Send to” option, here are a few tips and tricks to help you get started:
Access an extended “Send to” list
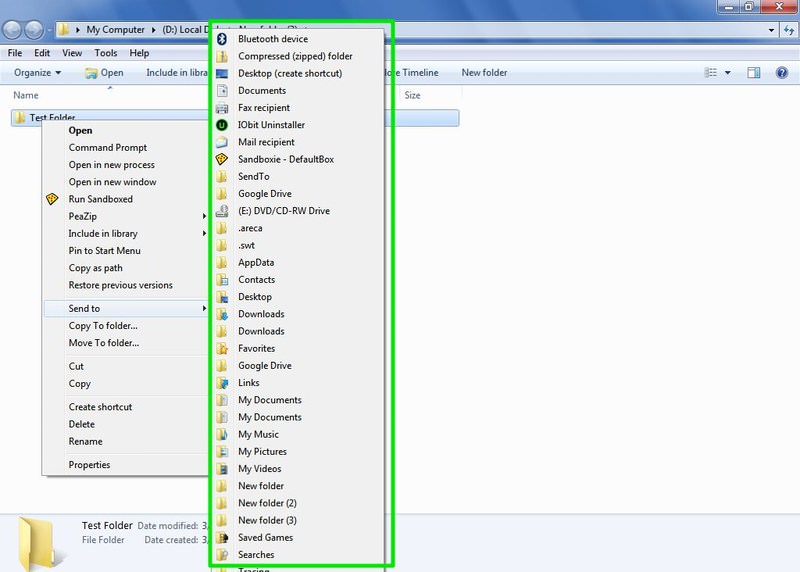
Windows also has an extended “Send to” list that also shows all the folders inside your current User folder. Just press and hold the Shift key and then right-click on the item.
Now move to the Send to option and you will see an extended list of folders. If you work often with folders inside your user account, such as video, documents, and music, etc. then this trick will surely help.
Add cloud storage folder in “Send to” for quick syncing
I commonly use the “Send to” option to easily send any file to my Google Drive folder and sync it with my Google Drive account. If you have a Dropbox folder or a Google Drive folder, then you can add its shortcut in the SendTo folder for quick syncing.
Add an uninstaller shortcut
If you use a third-party uninstaller such as IObit Uninstaller, then you can simply add its shortcut in the “Send to” option to quickly delete any program from anywhere.
Read Also: 8 Tools to Customize Your Windows 10
Ending words
“Send to” option can be really handy when you need to work with multiple folders at the same time, or need to quickly open items with a dedicated program. If you frequently use the “Send to” option, then I will recommend you to download Send To Toys tool to make it easier to add/remove items and get more control.