How to Mine Polygon (MATIC) On Your PC
Polygon is a sidechain for Ethereum, a protocol, and a framework for creating and linking Ethereum-compatible blockchain networks. Its goal is to make it easier for Ethereum-based apps to integrate with other blockchain platforms and allow different blockchains to exchange information and value more readily.
In this article, I’m going guide you through mining Polygon MATIC on your personal computer.
What to Mine Next: A Cost-Effective Guide on Crypto Mining
So, you're interested in earning passive income by mining cryptos? You've come to the right place, so you... Read more
Mining Polygon MATIC via Unmineable platform
Unmineable.com is a cryptocurrency mining platform that makes it easy for anyone to enter into crypto mining without any Application-Specific Integrated Circuit (ASIC) or Graphics Processing Unit (GPU) required. With the Unmineable mining software, you can start mining on your Windows PC or Mac.
As MATIC is not a Proof-of-Work (PoW) token, therefore you can’t mine it. Instead, you can join the Matic network and set up a validator node to collect transaction verification rewards.
How does Unmineable allow non-mineable coins to be mineable
Unmineable has created a simple alternative for miners and regular users to begin earning their preferred cryptocurrency. The fundamental mining mechanism is based on real-world mineable currencies that employ the Proof-of-Work (PoW) algorithm.
In addition, there is a background exchanging procedure that changes the real mineable currency rewards to the coin selected by the user.
On each award, the conversion is done in real-time, and it seems like the user is mining the non-mineable currency. Furthermore, the users don’t have to pay any additional exchange costs.
Any potential external costs are already included in the 1% that the platform charges, and there are also no fees for payouts or withdrawals.
Step 1. Get yourself a Metamask wallet
To get a wallet, take the following steps:
- Download the Metamask Chrome Extension from metamask.io.
- After installing it, you will see the icon in your extensions. Click on the icon and a new page will open.
- Here, click “Get Started” and then click “Create a Wallet”.

- Now, create a password for your account.

- Write down the Secret Recovery Phrase. These phrases will make it easy to back up and recover your account later.

- Enter your recovery phrase in the exact sequence to confirm your Secret Recovery Phrase.

That’s it. You’ve got yourself a wallet.
Step 2. Add polygon network to MetaMask Wallet
After the wallet is created, you will now need to add the Polygon network to MetaMask. Follow the instructions below:
- Go to MetaMask in your browser.
- Click on the current network “Ethereum Mainnet”.
- Choose the option “Add Network” at the bottom of the list.

- Enter the Polygon Mainnet’s settings as following:
Network Name:
Polygon MainnetNew RPC URL:https://rpc-mainnet.maticvigil.com/ChainID:137Symbol:MATICBlock Explorer URL:https://explorer.matic.network
- Once this is done, click the “Save” button.
The Polygon sidechain will now interact MetaMask. You only need to change the network whenever you want to run a dApp on Polygon, and you’ll need to change it again when you want to return to the Ethereum Mainnet.
Step 3. Download latest version of XMRig MSVC
Next, you need to get the most updated version of XMRig MSVC from the official website or this Github source.
Extract the .zip file and locate a file called pool_mine_example.cmd in the XMRig folder and change its contents.
It should look something like this after editing:
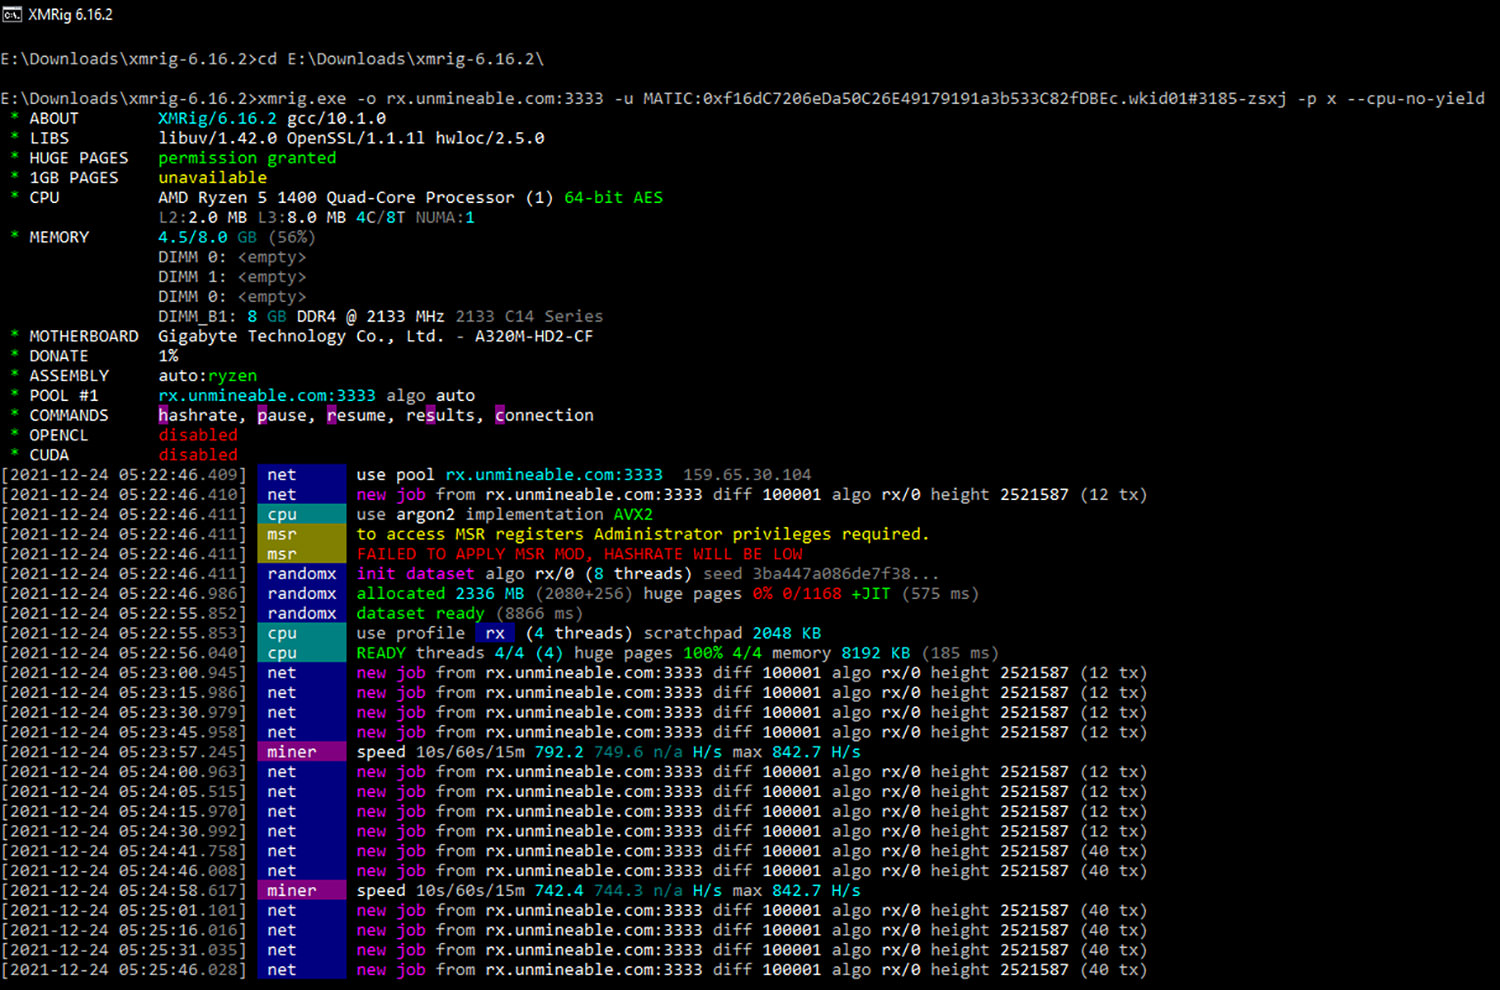
 cd %~dp0
 xmrig.exe -o rx.unmineable.com:3333 -u MATIC:0xf16dC7206eDa50C26E49179191a3b533C82fDBEc.wkid01#3185-zsxj -p x --cpu-no-yield
 pause
The Pool URL may be found after the -o on the second line. Use one of the following URLs, depending on your location. Choose the one that is closest to your current location.
- USA:
rx-us.unmineable.com:3333 - Europe:
rx-eu.unmineable.com:3333 - Asia:
rx-asia.unmineable.com:3333
Add the public address of your wallet after “MATIC” and before the dot on the third line. The address should have the following structure:
MATIC:[Wallet address].[workerID]#[Code to lower mining fee]
Explanation:
The workerID can be any name you want to assign to each computer where the miner is running so that it may be readily identified in the pool metrics afterward.
The code following the # is valuable because mining with it reduces the Mining Fee from 1% to 0.75 percent (which is critical in mining).
With the referral code 8gs8-l24t, you may begin mining right now.
Run the file as an administrator and Matic should start mining.
Step 4: Check your mining stats in Unmineable.
When you set up the address in the pool_mine_example.cmd file, you allow Unmineable know that you want to receive MATIC coins, and you’ve also indicated the address at which you want the mined MATIC coins to be transferred to.
To check your balance:
- Log in to Unmineable.com and select “MATIC” as the currency to mine.

- Go to the “RandomX” tab and insert your address into the box that says “Enter your address to check your stats:”.

- You should be able to check your account balance, or even request a paymen if there’s any.

Conclusion
Since the beginning of the year, the price of Polygon has risen significantly. MATIC appears to be attracting an increasing number of investors. The network’s activity is increasing significantly, as is the number of users and applications, and Polygon is becoming increasingly relevant on social media.
Hoping this guide helped you figure out how to start mining Polygon Matic.