9 Things You Didn’t Know You Can Do With Google Sheets
Google Sheets can do more than just tracking and dealing with data and numbers. There’s a whole world of cool tricks hidden inside Google Sheets that can make your life easier, help you work smarter, and get things done faster. Many of us use it for the basics, but there’s so much more it can do.
In this guide, we’re going to show you nine amazing things you probably didn’t know you could do with Google Sheets.
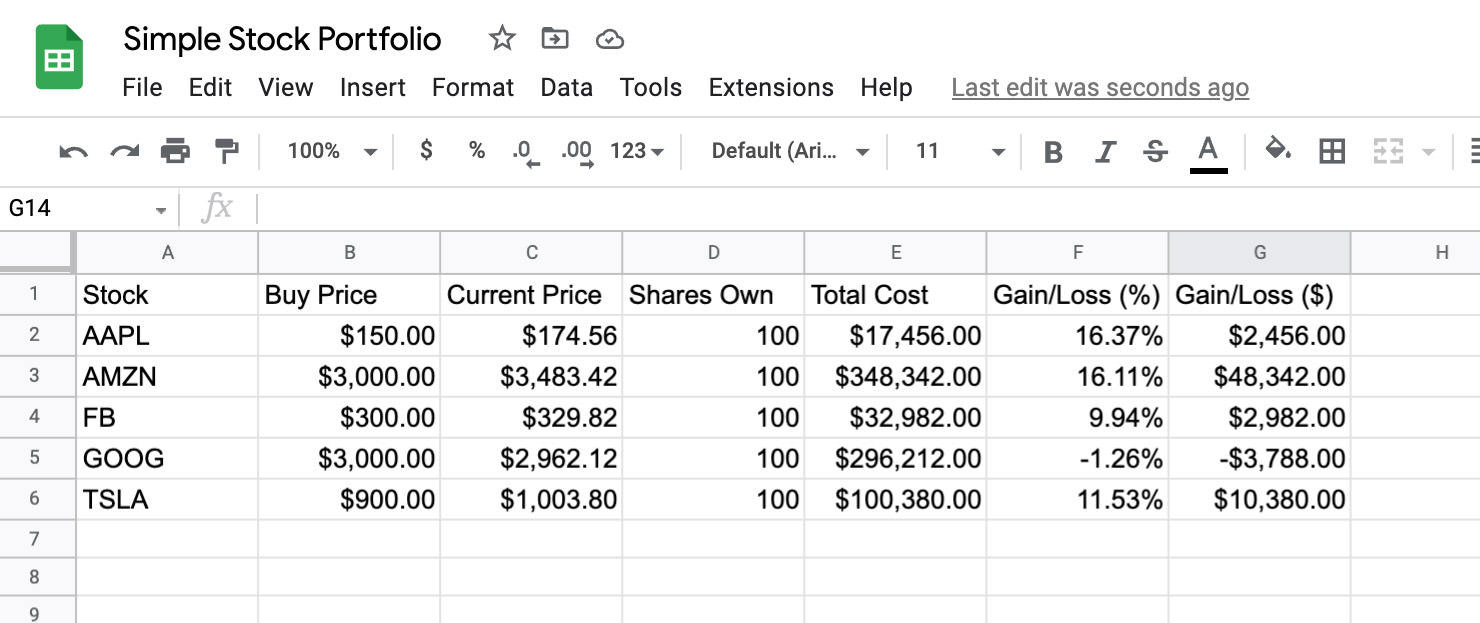
Access Real-time Stock Prices
GOOGLEFINANCE function in Google Sheets grants you access to live financial information.
For example, to keep an eye on Google stock’s current price, simply use the formula:
=GOOGLEFINANCE("GOOGL", "price")
This formula fetches the current price of Google’s stock directly into your spreadsheet. It’s a great way to stay updated with financial markets in real-time without ever leaving Google Sheets.
If you’re interested in exploring the GOOGLEFINANCE function further, consider reading our detailed guide on tracking stock portfolios with Google Sheets. It offers deeper insights on utilizing the GOOGLEFINANCE function for portfolio management.
Additionally, if you’re keen on managing crypto portfolios with Google Sheets, we have free templates available for immediate use.
Generating QR Codes
Did you know that Google Sheets can be used to generate QR codes from URLs? This feature is quite handy, especially because it supports creating multiple QR codes at once. All you need to do is enter the URLs in one row, and Google Sheets will automatically generate QR codes in the next row for you.
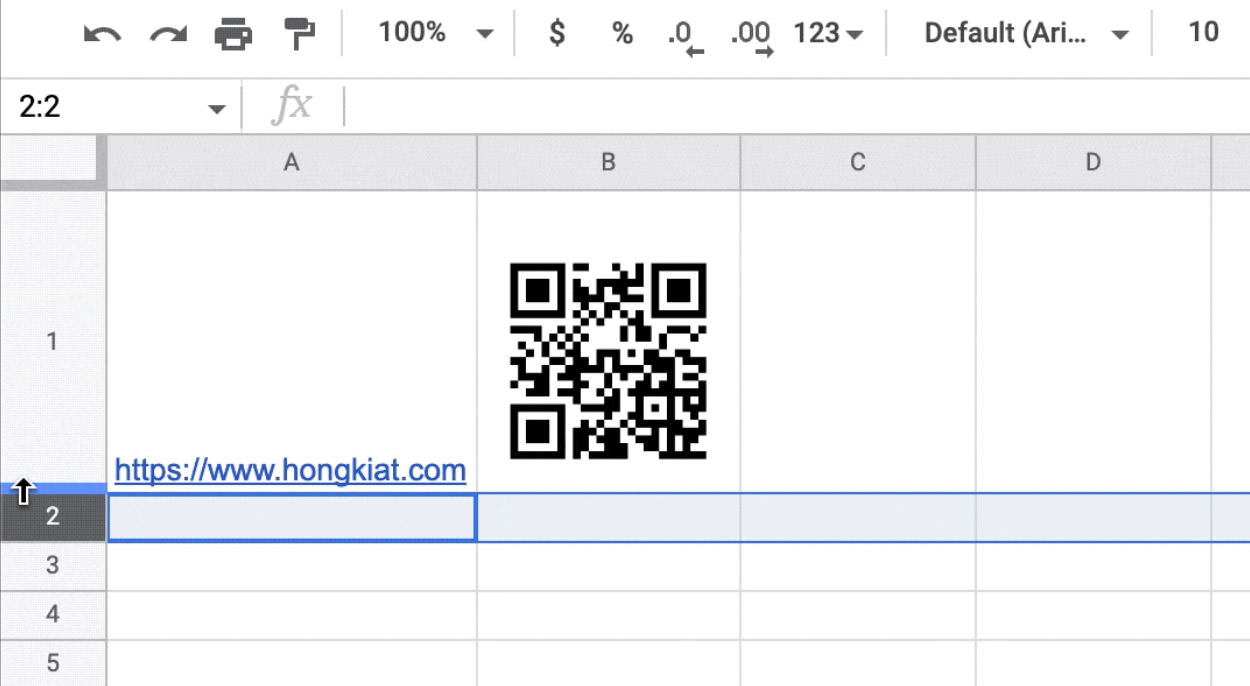
For example, placing a URL in cell A1 will result in the QR code appearing in cell A2.
To make this happen, simply insert the following formula into cell A2:
=image("https://chart.googleapis.com/chart?chs=300x300&cht=qr&chl="&ENCODEURL(A1))
This command transforms the URL from cell A1 into a QR code that is 300×300 pixels in size. It’s an easy and effective method for generating QR codes right from your spreadsheet.
For more details, have a look at our previous post on how to create QR codes with Google Sheets. Additionally, you can create barcodes with Google Sheets as well.
Create Custom Functions
Google Apps Script offers a powerful way to enhance Google Sheets by enabling you to craft custom functions tailored to your needs.
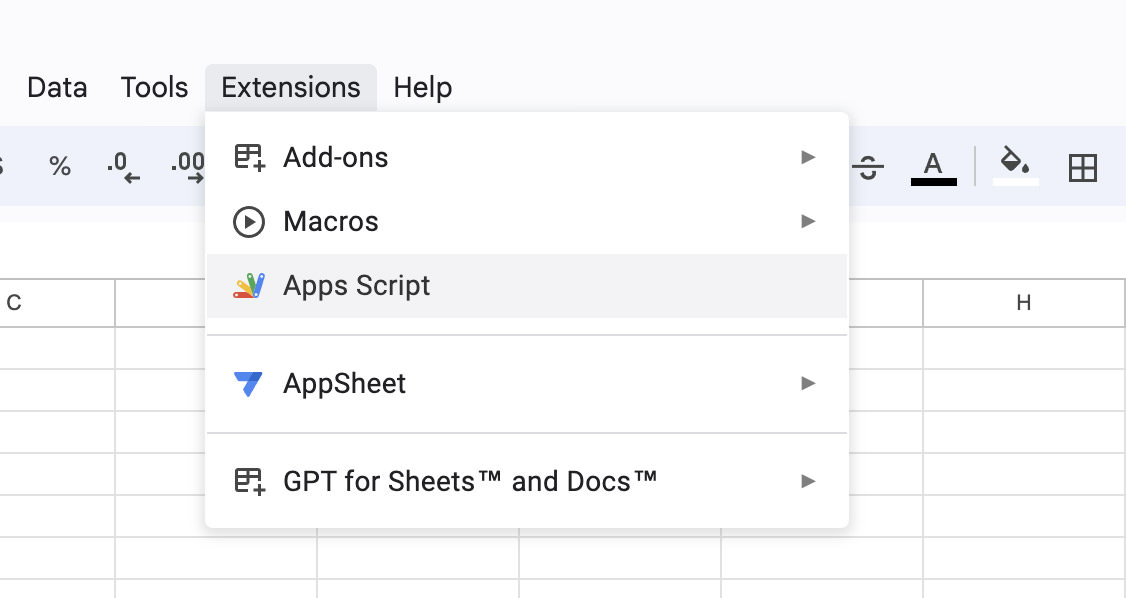
To create a custom function, go to "Extensions" on the Google Sheets menu bar and select "Apps Script" from the list. This will launch the Google Apps Script editor in a new browser tab.
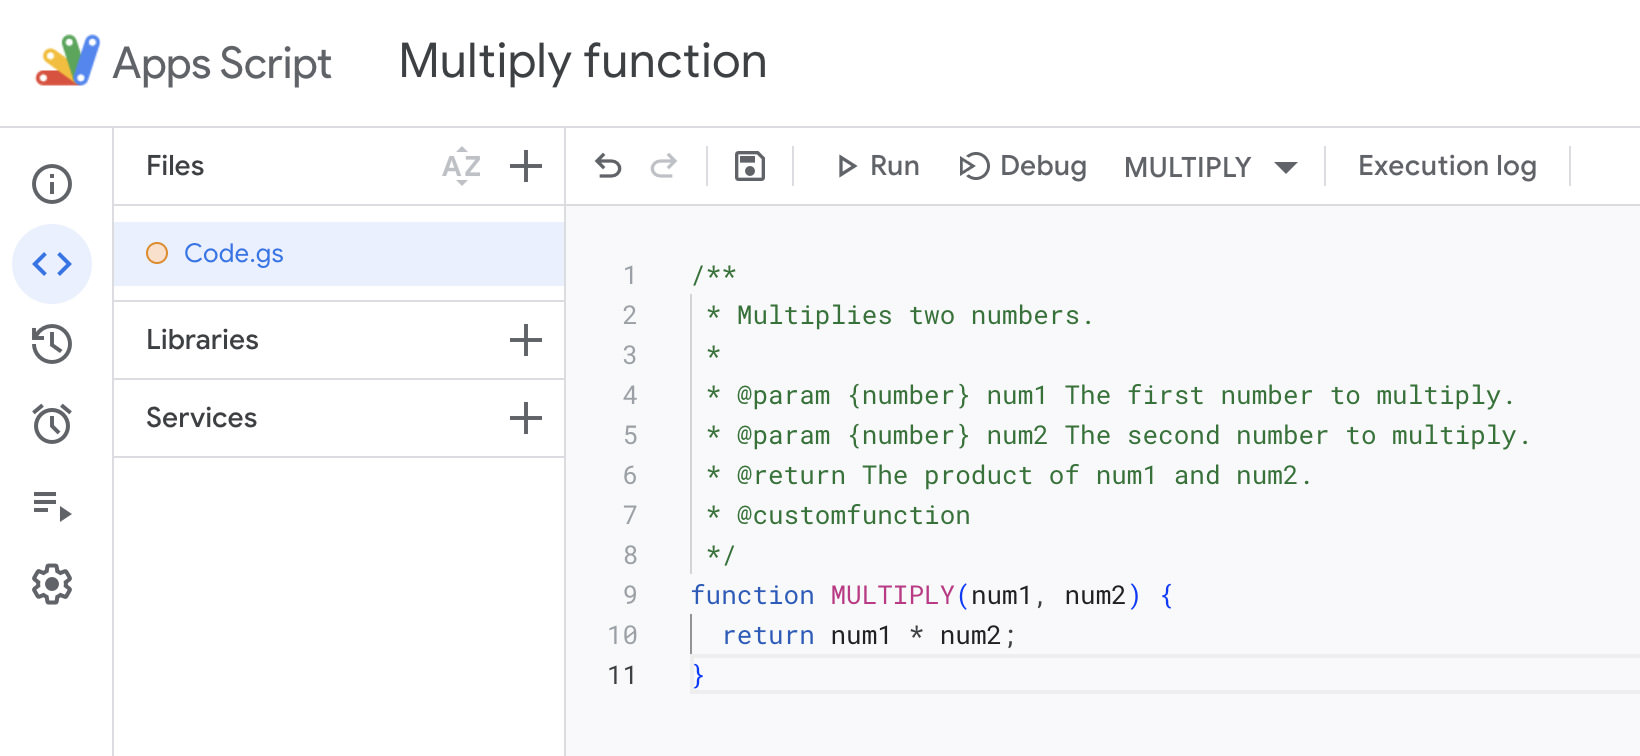
Within the editor, you’ll be greeted by a coding environment where you can script in JavaScript. This is where you can create your custom function.
Let’s illustrate this by coding a straightforward function to multiply two numbers:
/**
 * Multiplies two numbers.
 *
 * @param {number} num1 The first number to multiply.
 * @param {number} num2 The second number to multiply.
 * @return The product of num1 and num2.
 * @customfunction
 */
function MULTIPLY(num1, num2) {
  return num1 * num2;
}
This code snippet introduces a function named MULTIPLY that accepts two arguments (num1 and num2) and outputs their multiplication result.
Once your function is ready, hit the save icon (resembling a floppy disk) or navigate to "File" > "Save" to store your script. You’ll be prompted to name your project; opt for a name that reflects the purpose of your script.
Returning to your Google Sheets, your custom function now integrates seamlessly with the existing functions. In a cell, type =MULTIPLY( to see your function suggested in the autocomplete menu.
Enter your desired parameters in the formula, like so:
=MULTIPLY(10, 20)
This example demonstrates using the MULTIPLY function to calculate the product of 10 and 20, resulting in 200 displayed in the cell.
Web Scraping with IMPORTXML
Google Sheets can also use it to gather data from the web through the IMPORTXML function. Let’s say you want to fetch the latest headline from a news website, you might use:
=IMPORTXML("https://www.examplenews.com", "//h1[@class='top-news-headline']")
This command retrieves the text from the leading news headline, provided it is enclosed in an <h1> tag and assigned the class top-news-headline, and places it directly into your Google Sheet.
This technique is a straightforward yet effective method for consolidating information from various websites into a single location.
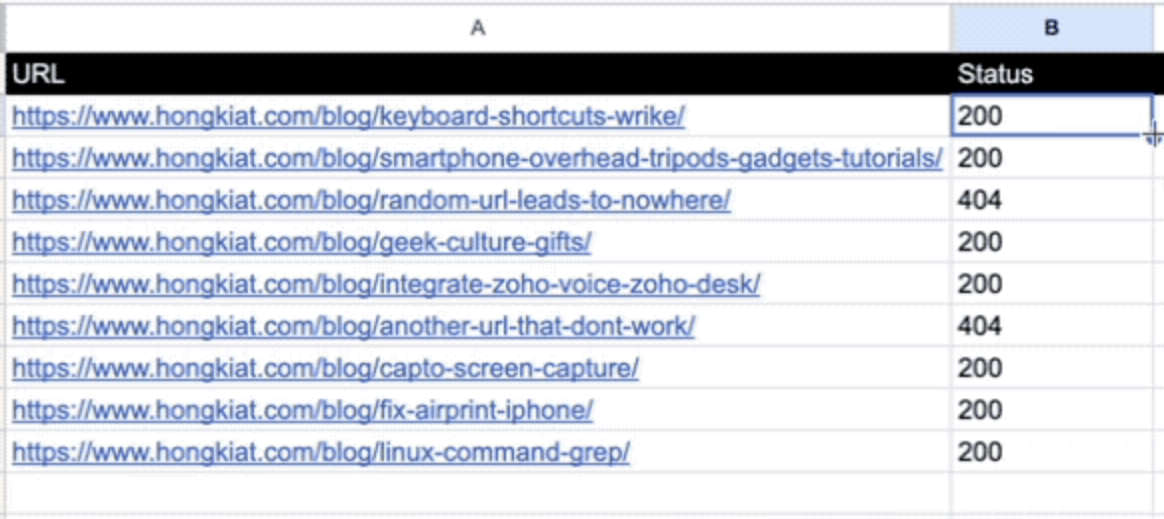
Checking for Broken Links
If you’re dealing with a large number of links and need to determine whether they’re broken, Google Sheets can be too, be an invaluable tool for this task. By inputting all the links into a Google Sheet, you can use Google Apps Script to automatically check each link’s HTTP status.
This process will populate adjacent cells with the HTTP status codes of each link, efficiently indicating their operational status.
To understand how to set this up, check out our guide on how to check for broken links using Google Sheets.
Workflow Automation with Macros
Macros in Google Sheets are a powerful feature for automating repetitive tasks, saving you time and ensuring consistency in your work.
A macro records a series of actions in a spreadsheet and then plays them back in the same order. This is particularly useful for tasks that need to be repeated regularly, such as formatting data, applying filters, or performing calculations.
Imagine, at the end of every month, you generate a report in Google Sheets that requires a series of formatting steps: setting specific column widths, applying a header style, and sorting data by a particular column. Instead of manually performing these steps each time, you can automate the process with a macro.
Here’s an example on how to record, using and edit your Macro.
Step 1. Record the Macro
- Open your Google Sheets document.
- Go to Extensions > Macros > Record Macro.
- Perform the actions you want to automate. For example:
- Set column widths by selecting the columns and adjusting their width.
- Apply header styles by selecting the header row and choosing a text style, size, and background color.
- Sort the data by selecting the range and then using the Data > Sort range option, choosing the column by which you want to sort.
Step 2. Using the Macro
The next time you generate a monthly report, you can apply all the formatting steps you recorded by running the macro. You can do this by going to Extensions > Macros and selecting the macro you created, or by using the shortcut you assigned.
Step 3. Editing the Macro
If you need to adjust the actions performed by your macro, you can edit the script directly. Go to Extensions > Apps Script, find the function corresponding to your macro, and make the necessary changes in the script editor.
This macro functionality turns repetitive, manual tasks into one-click operations, significantly improving efficiency and accuracy in your work with Google Sheets.
Enhanced Conditional Formatting
Beyond basic color coding, Google Sheets enables the application of intricate conditional formatting rules.
For instance, you could set up rules to color sales data green when it surpasses a specific target and red when it does not meet the threshold.
Moreover, you have the flexibility to employ custom formulas for conditional formatting, such as =AND(A2>100, A2<200), to spotlight cells within a specified range that contain values between 100 and 200.
Email Automation
Google Sheets, also with the help of Google Apps Script, offers the capability to automate email sending based on specified conditions or triggers. This functionality proves invaluable for sending out routine reports, reminders, or notifications.
Here’s how to set up an email automation function:
Step 1. Open Google Apps Script
- Access your Google Sheet.
- Select Extensions from the menu.
- Choose Apps Script.
This action will launch the Google Apps Script editor, a space where you can craft and save scripts linked to your Google Sheet.
Step 2. Write the Email Function
In the Apps Script editor, beginning with an empty script, either paste the provided example function or compose your own. For your reference, here’s a sample function:
function sendWeeklyReport() {
  var emailAddress = "team@example.com"; // Adjust this to the recipient's email address
  var subject = "Weekly Sales Report"; // Modify this for your email's subject
  var message = "Please find the weekly report attached."; // Tailor this to your email's body content
  MailApp.sendEmail(emailAddress, subject, message);
}
After inserting or crafting your function, press the disk icon or navigate to File > Save to preserve your script. Assign a name to your project for straightforward identification.
Step 3. Triggering the Function
To define the execution schedule for this function, establish a trigger:
- In the Apps Script editor, click the clock icon on the left panel or opt for Edit > Current project‘s triggers.
- Hit + Add Trigger at the bottom right.
- From the drop-down menu, select the function to execute
(sendWeeklyReport). - Opt for the trigger type (e.g., Time-driven) to determine the execution frequency. For weekly dispatches, you might select the Week timer and specify the day and time.
- Click Save.
Note: Granting Permissions
The initial setup of a trigger or the first execution of a script that interfaces with Gmail will prompt Google to request permission review. Follow these steps:
- Hit the Review Permissions button.
- Select your Google account.
- Read the permission request and grant approval by clicking Allow, thereby authorizing your script to send emails on your behalf.
Additional Notes
- Verify that your Google Sheets document encompasses all necessary data that your script might reference for the email’s contents.
- The script can be adjusted to incorporate dynamic data from your Sheets into the email’s body or subject.
- Before automating the script, conduct a test run to confirm its functionality.
API Integration for Live Data
Last but nott least, Google Sheets can also integrate with external APIs to pull in real-time data, enhancing your spreadsheets with fresh information directly from the web. An easy-to-understand example is adding real-time currency exchange rates without the necessity for an API key.
Example
Imagine you wish to monitor the exchange rate between the US dollar (USD) and the Euro (EUR). The IMPORTDATA function can be utilized to fetch data from a public API that supplies this information without an API key requirement.
=IMPORTDATA("https://api.exchangerate-api.com/v4/latest/USD")
This formula imports the most recent currency exchange rates for the US dollar from the ExchangeRate-API, a platform that provides complimentary access to currency conversion rates.
Following the import, you can pinpoint the specific cell that lists the EUR rate and employ it in your financial models or analyses.
How to Use the Imported Data
- Identify the Cell with the Desired Data: After importing the JSON data into your spreadsheet, you will encounter a variety of currency codes alongside their exchange rates. Find the cell containing the EUR rate in relation to USD.
- Reference the Data in Your Calculations: This cell can be referenced in your financial calculations. For instance, if you have a sum in USD in cell A1 and wish to convert it to EUR, you could use a formula like
=A1 * [Cell containing EUR rate]. - Automate Updates: To keep the data up-to-date, you can configure the spreadsheet to refresh automatically at specific intervals, such as every hour or daily. This option is accessible under File > Spreadsheet Settings > Calculation.
Conclusion
Google Sheets is much more than a simple spreadsheet application; it’s a powerful tool for data analysis, automation, and collaboration. By leveraging the advanced features and integrating with external data sources, users can transform their spreadsheets into dynamic, interactive dashboards and reports.
Whether you’re managing personal finances, overseeing a project, or analyzing complex datasets, these tips can help you unlock the full potential of Google Sheets. Dive in and explore what Google Sheets can do for you.