How to Sign Digital Documents With Preview App (OS X)
For freelancers who work remotely, having to sign a document in person can be a problem. Instead of turning up at the office or meeting with the client, usually, the document is sent to us, we print it out, sign it then rescan it with that scanner we have lying around. Don’t have a scanner? Well, you can use the native Preview app instead.
Preview is an OS X built-in app with a handy feature that lets you attach your signature to a PDF document. The feature has been there since OS X Lion and has been improving through each OS X release. Here’s how you can capture your signature digitally with the Preview app.
Note: For OS X Yosemite users, you can skip ahead to find out how to attach your signature by signing directly on the trackpad.
1. Capturing Your Signature
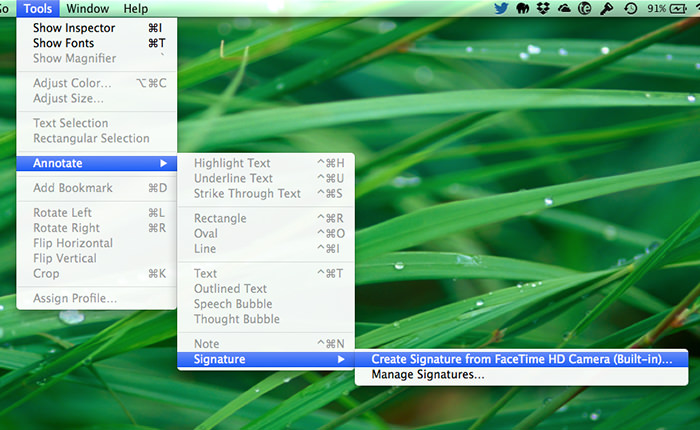
To begin with, you need a piece of clear white paper and a marker. Sign the paper with your best John Hancock. Then, open the Preview app and navigate to Tools > Annotate > Signature > Create Signature from FaceTime HD (Built-in).
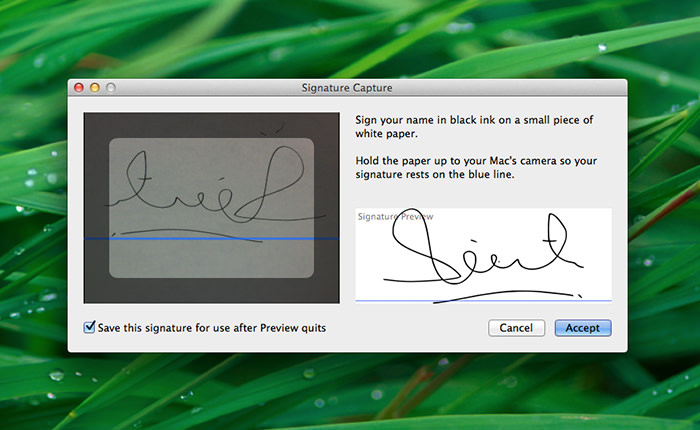
The Signature Capture dialog window will pop up, and your Mac’s built-in camera should automatically be turned on.
Hold the signed paper in front of the camera. Make sure that the paper receives enough lighting for a nice capture. Keep the signature just above the blue line (see below).
Wait a few seconds for the Preview app to trace the signature and capture it. Check out the preview and click Accept if you want to save this signature. Don’t like what you accepted? Just follow the steps again for a retake.
Done? Let’s check out how you can use this to sign a document.
2. Attaching Your Signature
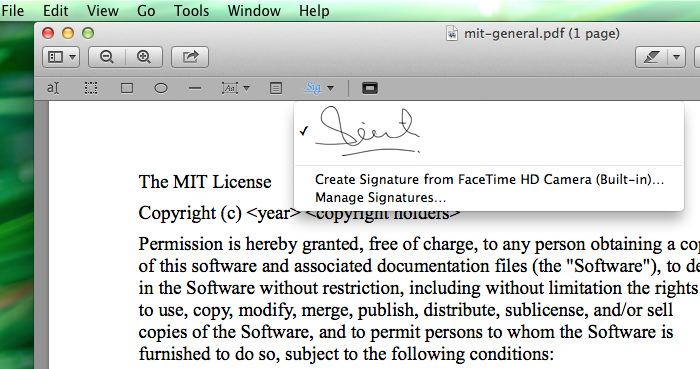
Open that important PDF document that requires your signature in the Preview app. Next, click the Pen icon to open your Editing Toolbar. This toolbar contains tools for adding annotation, shapes, and also your Signature.
Click the “Sig” icon and select the signature to input.
Go back to the document and click anywhere. You can move, adjust and resize the Signature to fit into the signature space properly.
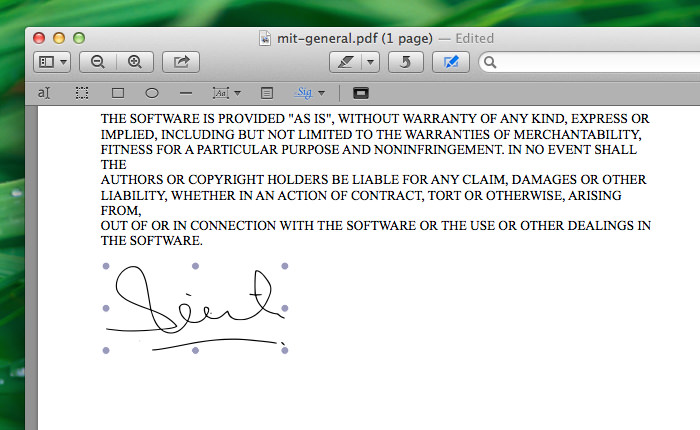
And there you have it. Your signature has now been added to the document. You can now email it or send it back to the receiver for their action.
An Alternative: Signing with the Trackpad (Yosemite)
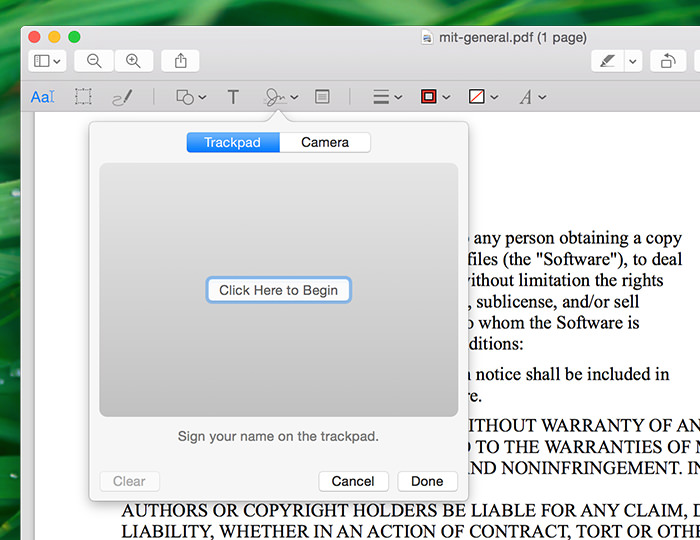
If you are already using OS X Yosemite, you can skip the picture taking and just use your trackpad to create your signature. Signing on the trackpad is not as comfortable as signing on paper though – plus, it had to be said that signing will be easier with a stylus than with a finger.
With the PDF document open, pop open the Editing toolbar and look for this scribble icon. Click on it then choose Trackpad. Click the space to begin signing. Click Done.
Last Note
Keep in mind that doing it this way won’t cryptographically sign the document. Basically this method ensures the authenticity of your signature on the document through encryption and some complex mathematical equations or algorithm.
If security is of utmost concern, you might want to try alternative services like DocuSign, HelloSign, or SignNow instead.