Design Unique Fonts and Characters with Windows Private Editor
Did you know that Windows has a built-in font and character creator? Known by the name of Private Character Editor, it is a lesser known Windows built-in tool that allows you to create and edit your own characters to use them on your PC.
Of course, it’s not as advanced as some of the today’s online and offline font maker tools, but I would say it’s one of the easiest character makers that would get the job done. Best of all, it’s completely free and doesn’t need to be downloaded.
Today, I will show you how to use Windows Private Character Editor to create your own fonts and characters to freely use them on your PC.
Note: It should be kept in mind that the custom characters that you will create can only be used on your PC. You can’t send them to another PC via email or in a document as the receiver won’t have them saved on their PC.
However, you can still print and share the documents if you need to share them with someone (screenshot may work as well).
Read Also: 15 Best Font Pairing Tools for Designers
Access Private Character Editor
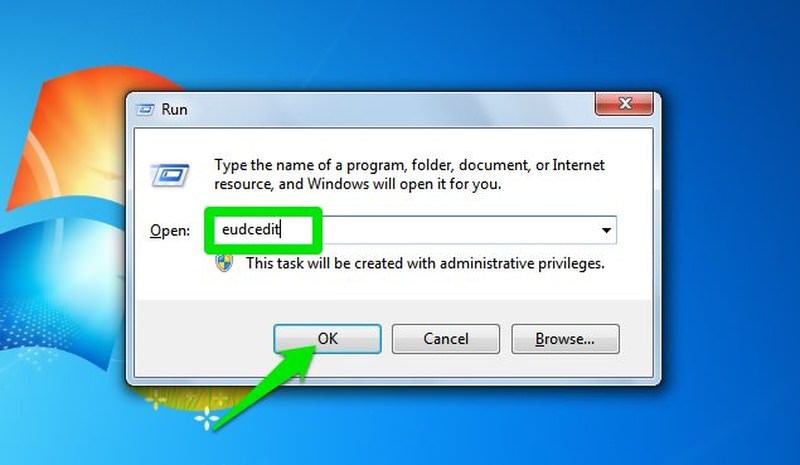
Private Character Editor is a rather hidden tool saved in "C:\Windows\System 32\eudcedit.exe" and you will have to find it among hundreds of other files. So, the easiest way to open Private Character Editor that works in all versions of Windows is through the Run dialog.
Press Windows + R keys to open up Run dialog and enter eudcedit in it. When you will press enter, Private Character Editor will open up.
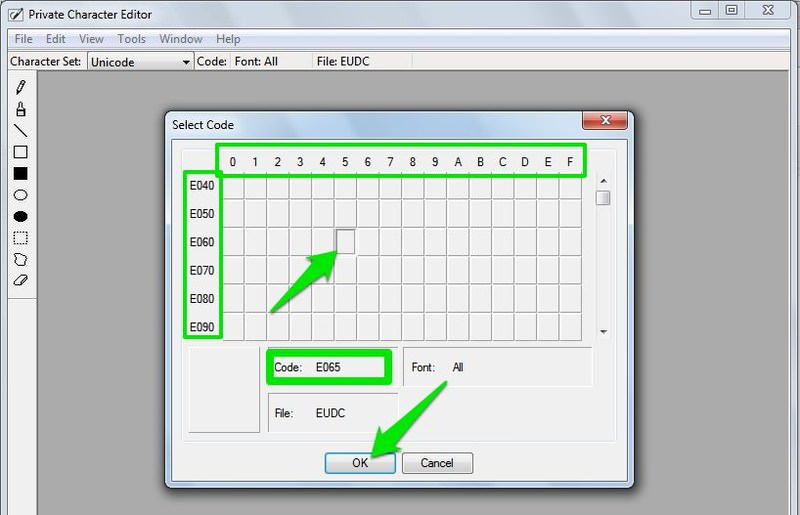
Select code
As soon as PCE opens up, you will be asked to select a code. This is basically a registration process of your new character. You need to assign a code to the character to be able to use it and search for it when needed.
There are total 6400 codes available for you to choose from. Just click on any block and you will see it’s code at the bottom in the Code field. The codes are automatically created, based on the values in the left column and the top row. Once you have selected your desired code block, click on OK to get started.
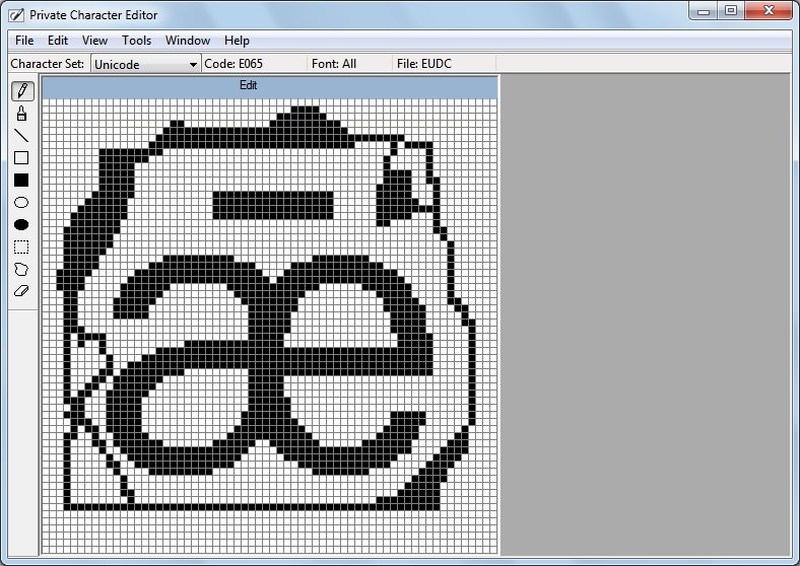
Create your own character
Now you should see a grid style drawing board with 64×64 blocks to fill in and create your character. There are also basic tools to help you with creating your character. The tools include pen, brush, straight line, hollow rectangle, filled rectangle, hollow ellipse, filled ellipse, rectangular selection, freeform selection, and eraser.
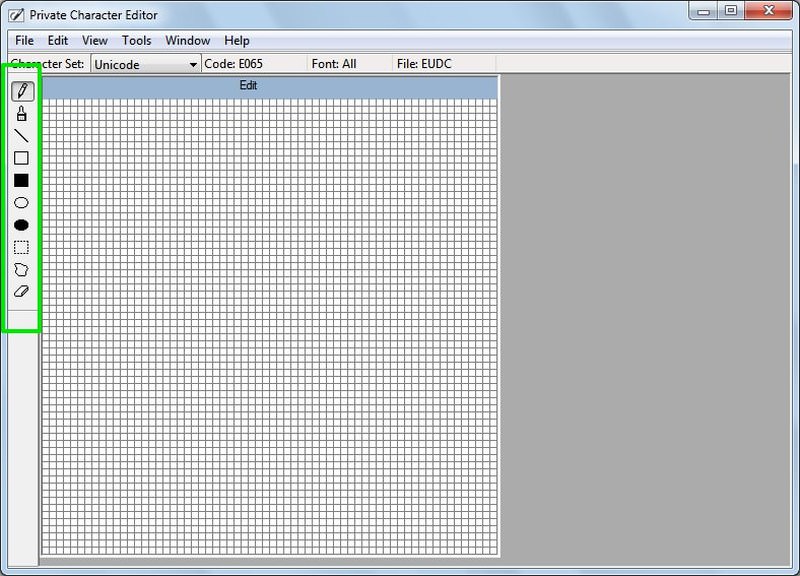
You can only create the character with black color, and whichever tool you use for drawing they will simply fill a block with black color. You can select your desired tool and use the left mouse click to start drawing. The cool thing about grid style layout is that you can easily un-fill filled blocks just by right-clicking on them.
This allows you to easily rectify errors and create the perfect character. I was able to create multiple types of drawings without much problem and with great perfection.

Edit an existing character
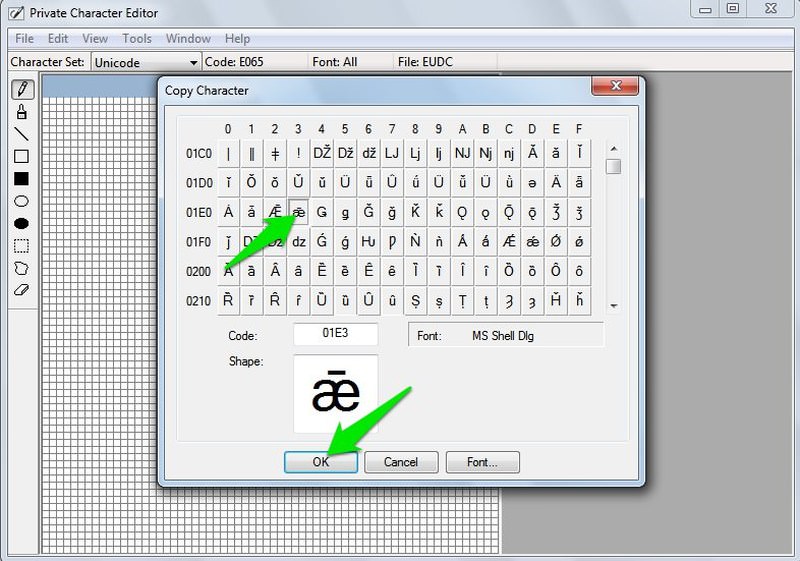
Creating a character from scratch isn’t necessary, you can also edit any of the available characters and make it yours. You just need to find a character that resembles your vision and quickly edit it to create your own character. To do so, click on Edit button in the above menu and then select Copy Character… from it.

A new window will open up where all the characters that are currently installed on your PC will show up. Just browse through them and click on the one that you would like to edit. After selecting, click on OK below to insert the character in the editor.
The character will be inserted and you can edit it to your heart’s content. Do note that you are not editing the original character, the edited character will be saved separately as your custom character.
Save the character
Once you have created your character, you can save it alongside other characters to insert in any of the documents. To save your character, click on the File menu and select Font Links from it.

A prompt will show up asking you to save the character you just created. Click on Yes here to save the character.
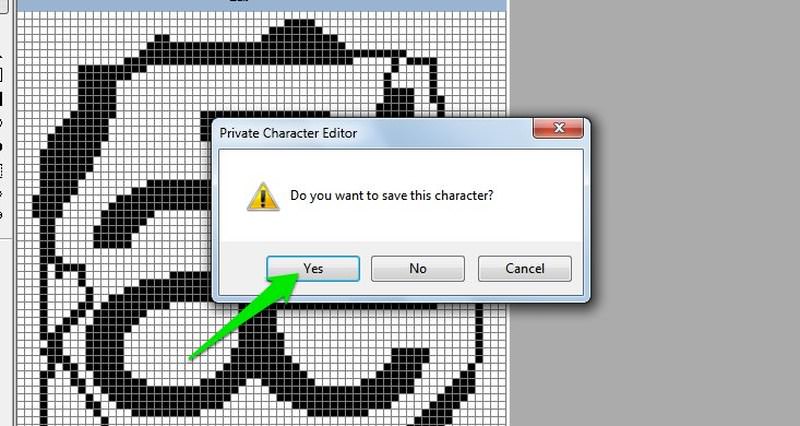
Another dialog will open up asking you whether you want to make the character available for all the fonts or just specific fonts. You should select "Link with All Fonts" here if you don’t have any special needs and click on OK to link it.

Use the created character
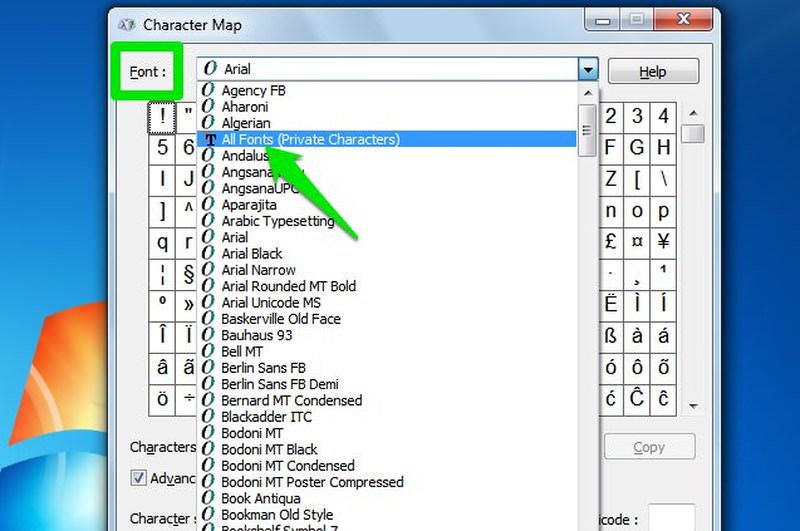
The easiest way to use the character is through the Windows Character Map and copy the character to clipboard from there. To open the Character Map, press Windows + R keys and type charmap in the Run dialog. In the Character Map, click on the drop-down menu next to the Font option and select "All Fonts (Private Characters)" from it.
You will see all your created characters now. Click on any of the characters to see a preview of it. You can double-click on a character to select it in the "Character to copy" field below. Afterward, click on the Copy button next to it to copy the character to your clipboard.
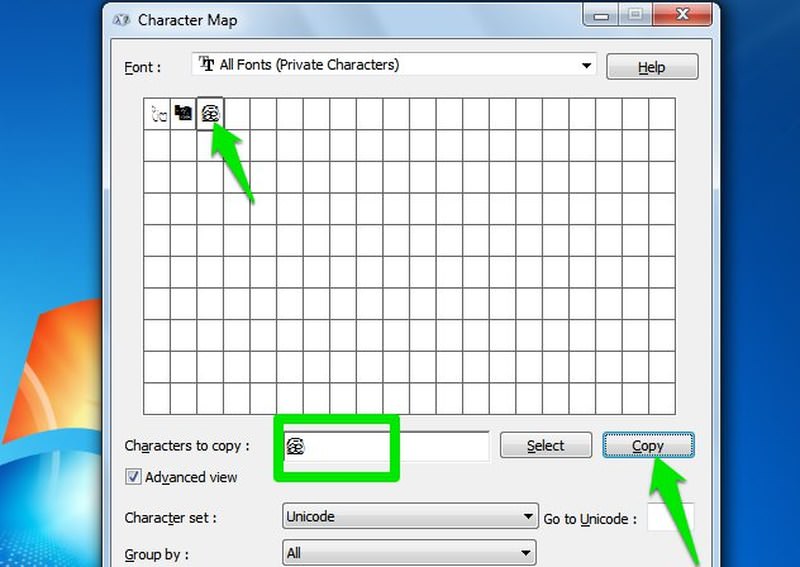
You can now paste this character anywhere in your PC by pressing Ctrl + V. The allowed fields include (but not limited to), folder names, file names, explorer search bar, and any type of documents.
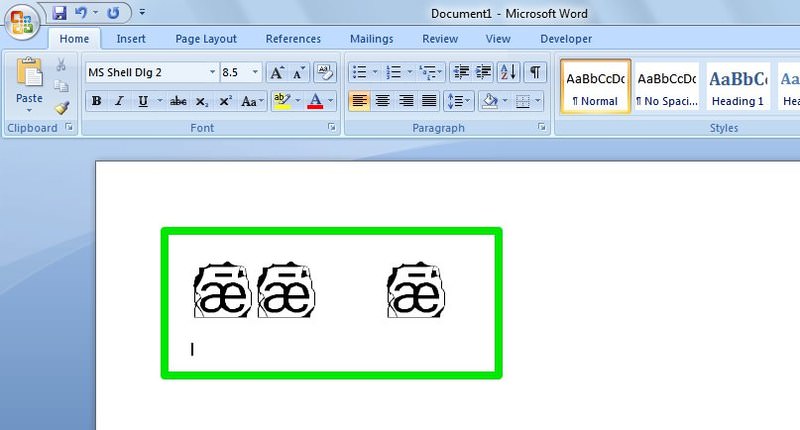
In case you want to add the character in a Microsoft Word file, simply enter the code of the character that you selected at the beginning and press Alt + X keys (the code is not case sensitive).
Bottom line
Private Character Editor might be a very limited tool for creating custom characters and fonts, but it is definitely one of the easiest tools to use. You can create thousands of custom characters if you want and use them without any limitations.
Do share with us in the comments if you use Windows Private Character Editor for any purpose.