Create a Stunning Stainless Steel Background in Photoshop
Inspired by their designs, I’m trying to bring these styles back into my personal design and thus created something somewhat solid, and looks a bit like a piece of stainless steel metal.
Full details ahead.
Stainless Steel Background
Step 1
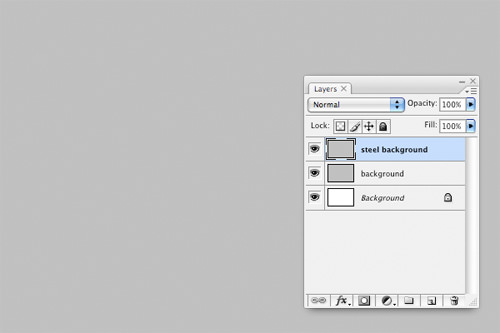
Create a blank new document at the size of 600×400. Create a new layer, name it ‘background’ and fill it with gray color [#c0c0c0]. Duplicate ‘background’ layer, name the new layer ‘steel background‘ and place it on top of ‘background‘.
Step 2
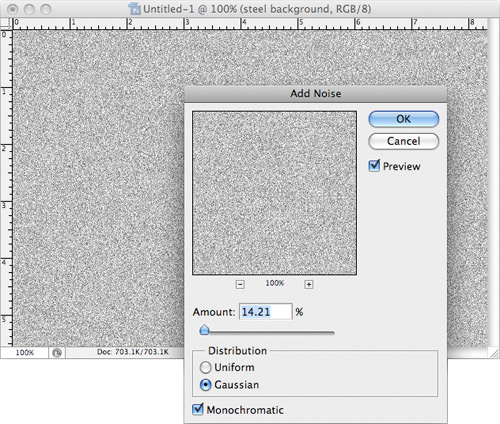
With ‘steel background’ layer selected, apply Filter > Add Noise and enter the following settings:
- Amount: 14.21
- Distribution: Gaussian
- Monochromatic checked
Step 3
With ‘steel background‘ layer still selected, go Filter > Blur > Motion Blur and enter the following settings:
- Angel: 0
- Distance: 34 pixels

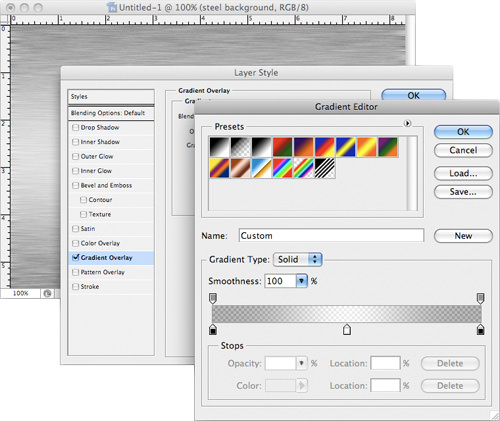
Right click ‘steel background‘, select Blending Options and enter the following settings for Gradient Overlay – Gradient Editor:
Color Stop 1
- Color: #000000
- Opacity: 50%
- Location: 0%
Color Stop 2
- Color: #ffffff
- Location: 50%
Color Stop 3
- Color: #000000
- Opacity: 50%
- Location: 0%
Metal Text
Step 4
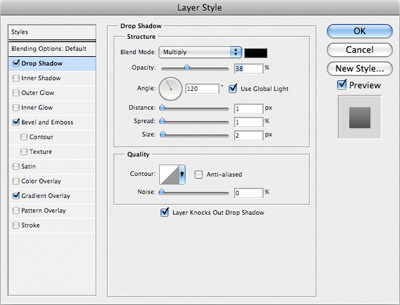
Your stainless steel background is basically done, we’ll continue from there to insert a metal text that should look matching. Use the Text Tool, write something in the middle, preferably with think fat font (I’m using Myriad Pro Bold here). Right click (or double click) the text layer to launch the Blending Options dialog.
- Drop Shadow
- Opacity: 38%
- Distance: 1px
- Spread: 1%
- Size: 2px
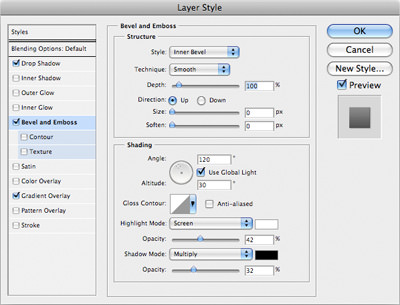
- Depth: 100%
- Size: 0px
- Soften: 0px
- Highlight Opacity: 42%
- Shadow Opacity: 32%
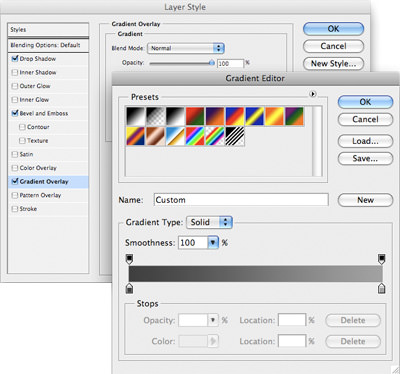
Color Stop 1
- Color: #3f3f3f
- Location: 0%
Color Stop 2
- Color: #a1a1a1
- Location: 100%
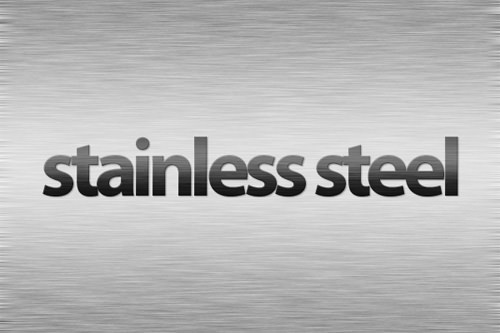
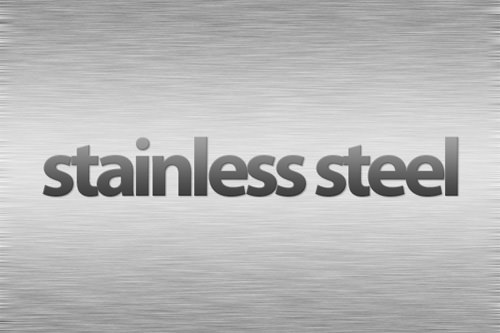
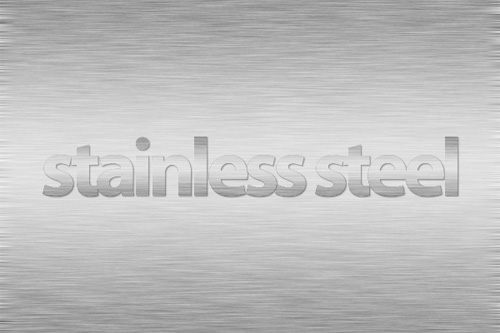
Your text should look something similar to the below.
Step 5
Here’s something you need to follow tightly. Hold Control key (Mac: Command key) and left click on the text layer to highlight it’s outline. Make sure the outline is still there, select ‘steel background‘ layer, and hit Control + J (Mac: Command + J)
By doing this, you are duplicating the steel background in the shape of your text. Rename the layer to ‘text background‘ and move it to the top.
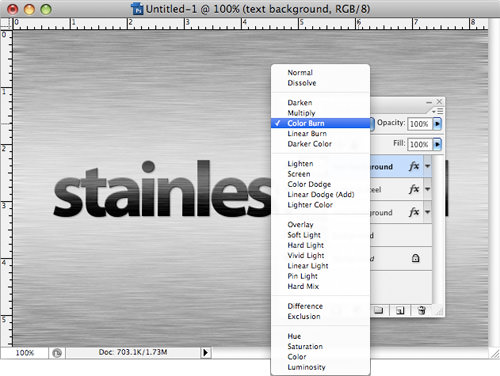
Step 6
Change ‘text background‘ to Color Burn, bring it’s Opacity down to 67%.
Your final output should look something similar to the image below.