Photoshop Tutorial: Create Photo Curves
We publish photos on a blog, websites so often that sometimes they just don’t look special anymore. Here is a simple Photoshop tutorial on how to add curves to photos, making them more interesting on views.
Plan how big your image will initially be, and create a new canvas with white background. Create a new layer, draw a rectangular at any color. This rectangular represents the size of your photo. 
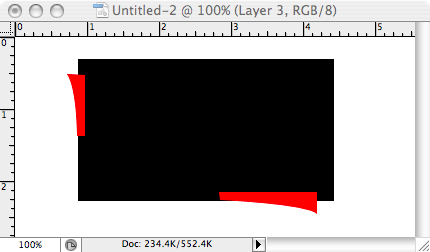
Create a new layer on top, use Pen tool and draw something like this. I’ll use red color for now to differenciate these 2 elements. 
Move the rectangular layer up, right click on Blending Options. Enter the following:
- Drop Shadow
- Inner Shadow
- Gradiant Overlay
- Location:0% Color:#dadbdf
- Location:100% Color:#f1f1f1
- Stroke


Select the layer with the red element, right click and select Blending Options. Choose Color Overlay and select black color. Now that it turned black and behind your rectangular, go to Filter -> Blur -> Gaussian Blur and enter radius 5.9. You should now have something that looks like this image. 
Change the shadow layer’s Opacity to 19%, it should look sweet. Now let’s insert an photo inside, before that, drag and select the inner rectangular. 
Find an image, copy it and paste it inside the selection using SHIFT + CTRL + V (win) SHIFT + Command + V (mac)
Your final output will look something like this.