How to Change a Car’s Color in Photoshop
Changing a car’s paint color in Photoshop is still a useful beginner exercise because it teaches selective color adjustment without forcing you into a full repaint from scratch.
This quick tutorial shows how to use Photoshop’s Replace Color tool to swap the color of a car in a photo, then refine the selection until the result looks clean enough.

The blue Subaru WRX above will be our example. If you want to test a different color on the same vehicle, Photoshop makes it fairly painless.
To begin, go to Image > Adjustments > Replace Color.
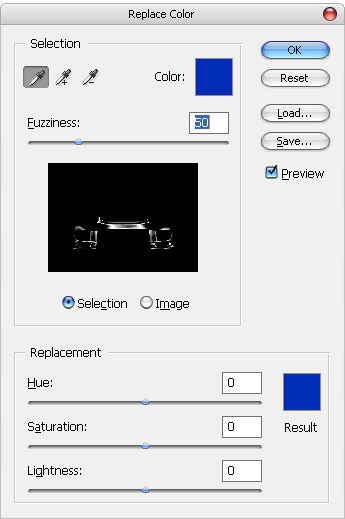
By default, the Replace Color dialog shows a monochrome preview of the selected area. White represents the active selection, while black shows what is not being affected. Click on the body of the car and Photoshop will begin selecting that color range.
Then adjust the Hue slider to test a different body color.

At this stage, do not worry if the result looks ugly. The point is to make the color shift obvious so you can see what Photoshop is catching and what it is missing.

To add more of the car body into the selection, hold Shift and click the unchanged areas, or drag across the remaining color range. To remove an accidental selection, hold Alt while clicking.

Keep refining the selection until the full body color is included. You can also raise the Fuzziness value to widen the selection range, but go carefully, since that can start pulling in unwanted surrounding areas.
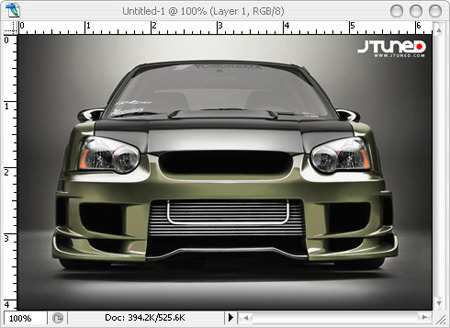
Once the car body is fully selected, drag the Hue slider until you land on a color you actually want. You can continue adjusting Fuzziness if the selection needs a little more tightening.
For a simple effect, that is enough to turn the original blue Subaru into something completely different.