How to Create a Glossy Christmas Bauble in Illustrator
Hi buddies! Christmas time is coming and we all know that is a great time for designers to work hard and make some extra money. As an overload of work is a frequent issue, there is a need to accelerate the creation process. We’re here to help.
Today we bring to you a fast and easy tutorial to make a nice-looking Christmas Baubles also known as Christmas ball ornaments to some of you.
At the end of the tutorial you will be know how to create the nice, glossy effect you see on 3D illustrations of metal balls. For this tutorial, we will be using Adobe Illustrator.
Let’s get started.
80 Best Photo Effects Photoshop Tutorials
Discover 41 of the most stunning Photoshop photo effects with step-by-step tutorials. Elevate your photo editing skills today! Read more
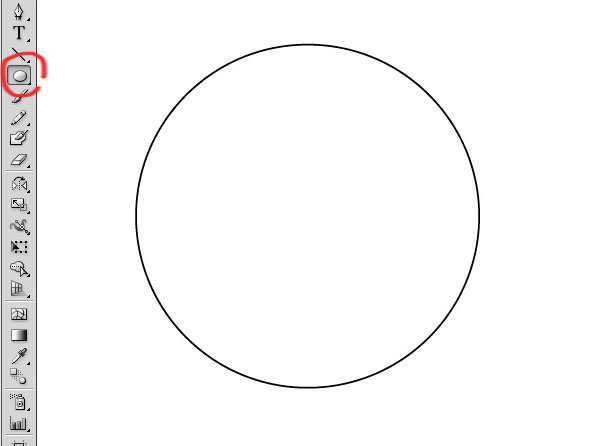
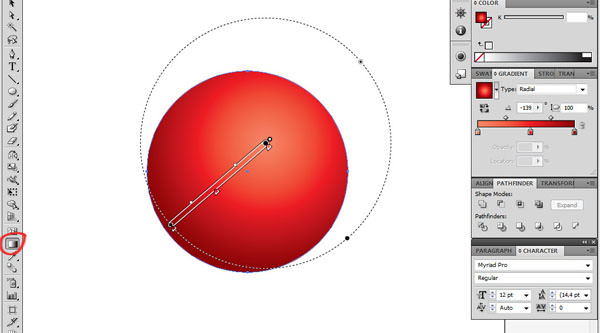
Step 1 – Shape And Gradient
With the Elipse tool, make a circle. Use shift to keep it round.
Use the gradient tool to fill the circle. Make a radial gradient in the shape as is shown in the image.
In this case, we made a red gradient so you might use the classic red (100 magenta and 100 yellow in CMYK). In the image you can see that the center of the gradient is not in the center of the ball but a little to the top right. The darker red goes left and downwards to simulate a shadow.
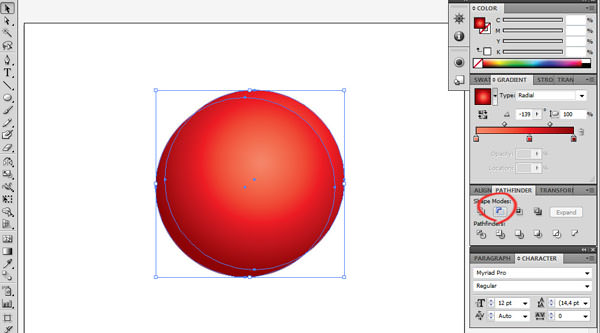
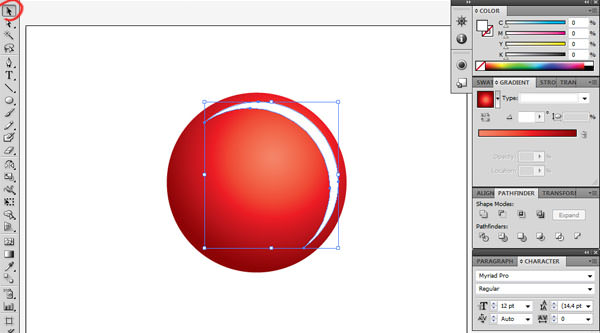
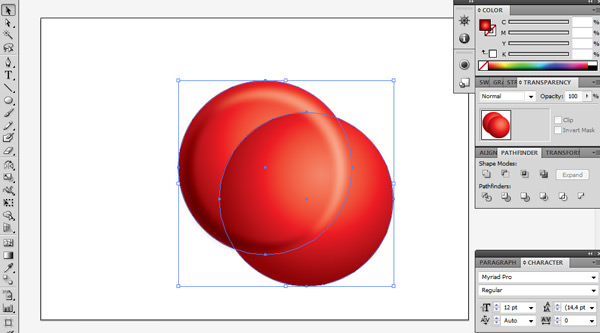
Step 2 – Adding The Glow And Shadow
Copy the circle (Ctrl / Command +C) and paste it back (Ctrl / Command + B) twice, so now we have 3 circles overlapped.
Select the one which is above and bring it down and to the left as it’s shown in the image.
Now with the shift button pressed, we select both circles and we go to the pathfinder tool and select minus front.
Fill the resultant shape with white.
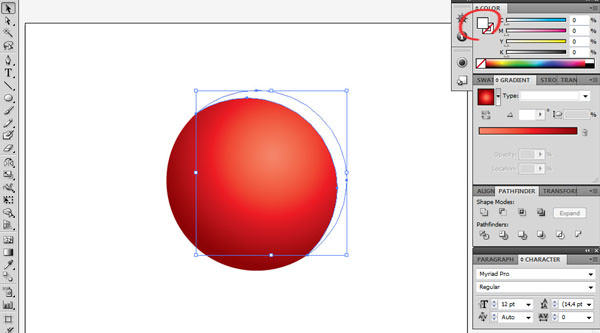
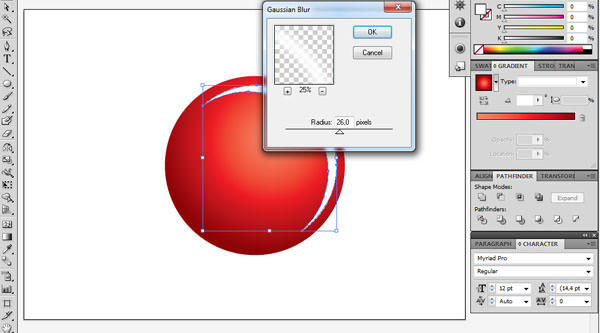
You’ll get an inverted moon, which we will use to add a reflected glow effect on the bauble. Resize and move the shape until it looks like the image below.
Then go to Effect > Blur > Gaussian Blur, and find the right Blur Radius that you are happy with.
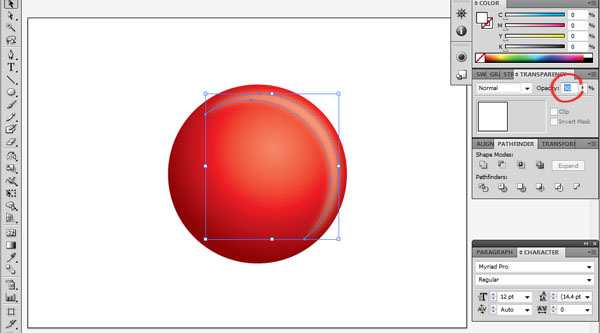
After that add transparency to the shape, 50% should do the trick.
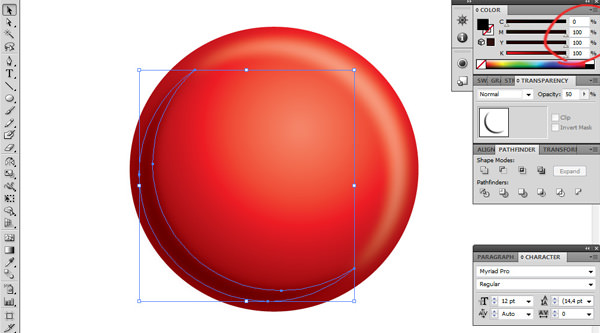
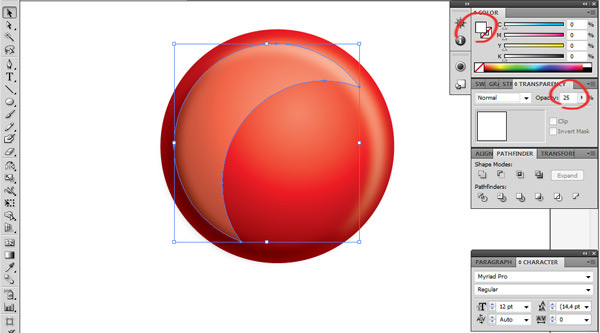
Now make a copy of the crescent (Ctrl / Command + C, Ctrl / Command + V) and use the reflect tool to reflect it horizontally and vertically (so that it is opposite the first crescent).
Then change the color to C=0, M=100, Y=100, K=100. As we are in a red background we won’t use only black.
Use Ctrl+2 to block both crescent shape, so we can select the bottom circle without trouble. Copy and paste back (Ctrl+C & Ctrl+B) once again and move it as it’s shown in the pic.
Again we will use the Pathfinder > Minus Front. Then fill it with white and 25% transparency. After that resize it smaller. This will give the bauble a nice glossy effect.
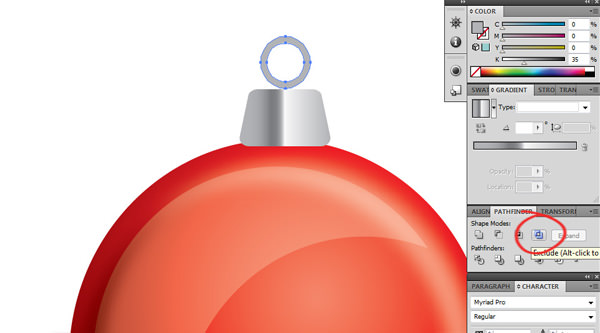
Step 3 – The Metal Top
Let’s create the top hanger. Use the rounded rectangle tool and fill it with a linear gradient of 3 greys and 1 white. Manage the gradient to achieve a metal style look.
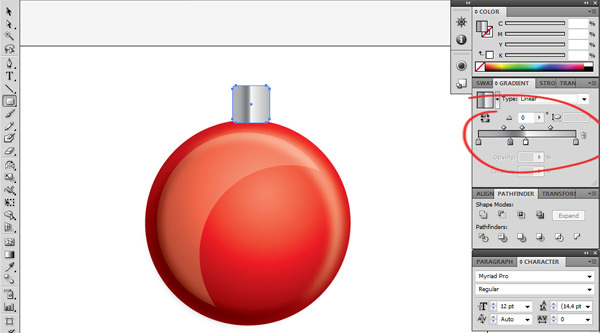
After that we will inclinate that shape.
Use the Free Transform tool (E), click the corner, hold it while pressing Ctrl / Command + Shift + Alt and give it the desired shape (you can also reduce the height).
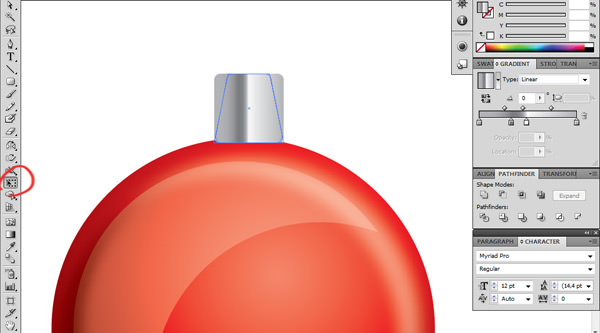
Then make a circle above, copy and paste back (Ctrl / Command + C & Ctrl / Command + B) we resize the one on the top.
Then with both selected go to pathfinder and select Exclude. This way we will crop the circle and have a "wheel" as shown in the pic.
Step 4 – The Decoration
To give the bauble the final touch, you could add stars, snowflakes, lines, circles, etc. In this case we made 3 lines but at this link you will be able to download the final artwork and other examples.
To add the three lines, use the rectangle tool and draw three rectangles, make a group (Ctrl / Command + G) with them and we make a gradient in light brown so it looks golden.
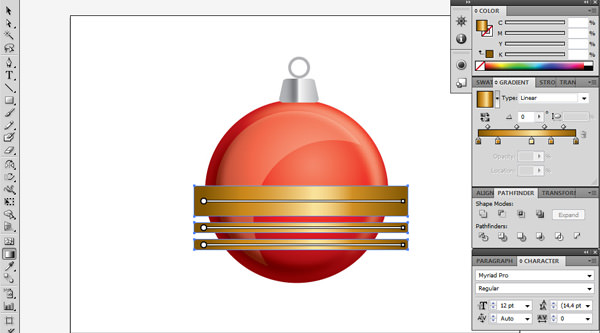
Then Copy and Paste Back the big circle again and bring it to the front. Select rectangles and the copied circle and we will make a clipping mask (Ctrl / Command + 7). This will crop the lines so they fit the circle.
Now select the circle and the rectangles and bring them back (right click > arrange bring to back).
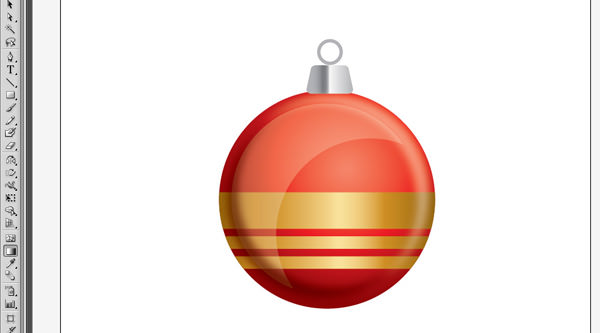
And, that’s it. We really hope you have enjoyed this tutorial and we look forward to seeing your christmas baubles. Thanks for your time. Comments are welcomed.
Click here to download this free vector and 5 other more Christmas bauble.