10 Useful Dreamweaver Tips & Tricks For Beginners
A Dreamweaver user will definitely reckon what a powerhouse it is. Packed with tonnes of features, options and debatably one among the most well known IDE (Integrated Development Environment) in today’s market. It may not meet the criteria that some developers demanded however, Dreamweaver undeniably provides a decent range of development, collaborating and coding tools. These options and tools are hidden under layers of regrettable less intuitive menus, which is why we are providing tutorials in today’s post.
We will show you some of the most powerful functions of Dreamweaver to assist your access them quickly, along with many other helpful tricks that will lubricate you development time and improve your code quality significantly. Full list after jump.
1. Dynamic View with “Live View”
We already know that DW offers a static view of our open files, but what about "dynamic views" of an application such as WordPress?
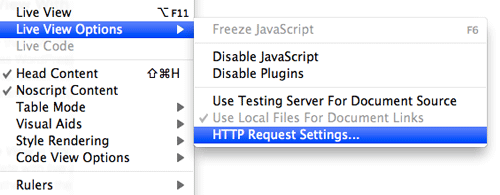
First, we need to tell DW what settings to use to present our"dynamic views" correctly. To do this, select HTTP Request Settings from the View > Live View Options menu, then enter the GET or POST parameters you need to view your application correctly.
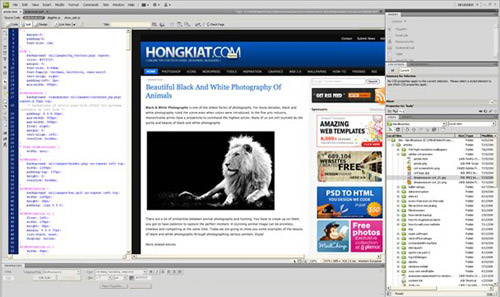
Then by switching to Live View in DW, it replaces the old Design View pane with a live, pixel-perfect WebKit rendering of your page; complete with live Javascript, DOM manipulations, database queries, server-side code, and rendered CSS, rather than the placeholder icons you see in Design View.
2. "Code Navigator" is DW’s Firebug
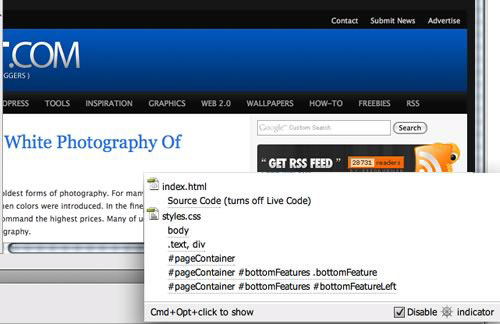
Taking it a step further is all about the Code Navigator and when in the Live View window, ALT-clicking (Command-Option-clicking for Mac) anywhere in the window, instantly presents the code that rendered that item. Similar to what you might currently see in Firefox/Firebug.
3. Freezing JavaScript
Due to the dynamic nature of Ajax, many times we need to interact with a page where certain items are not rendered or available on first page load. These are items that are injected into the page some time after page load. Here’s an example:
You might want to change the styling of a tool tip that is implemented entirely in JavaScript. Before today, you’d have to methodically search your way through your scripts to find what was being created and where.
Instead, try this:
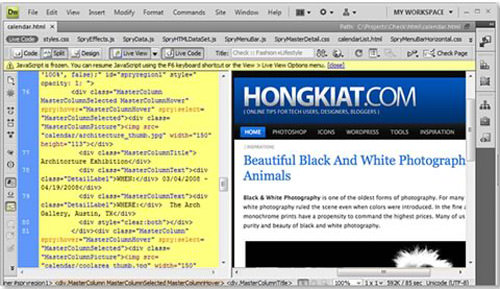
Render your page in Live View, then hit F6 to Freeze JavaScript at any time, allowing you to target and dissect the code relating to any dynamic item in the page.

4. Live View’s Next Best Friend – "Live Code"
When using Live View, you can also turn on Live Code. Live Code will update your code as you hover, click and interact with elements and items in the Live View window!
5. Automatic JavaScript Completion
Dreamweaver comes with an intelligent and complete HTML and CSS code completion, but what about Javascripts? If you code jQuery or Prototype in Dreamweaver, then you should know there are API extensions that provide Javascript code completion. It reduces the typing needed and can come in pretty handy for fast coders.

6. Beautify Codes On The Fly
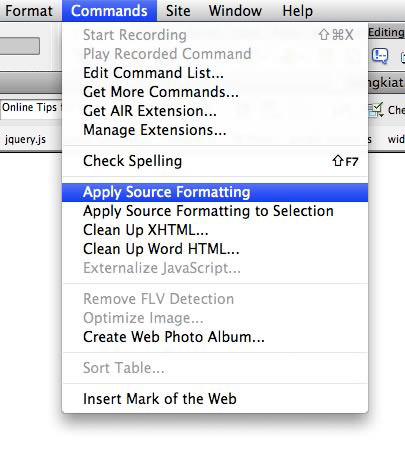
Does your code page look like unorganized, messy lines of code? Use the Apply Source Formatting feature and reformat it exactly to your preferences. To quickly clean them up, click the Format Source Code icon at the bottom of the Coding toolbar (Edit > Toolbars > Coding) and select Code Format Settings to set your preferred formatting.
You can also access the formatting option from Commands > Apply Source Formatting or only apply it to a select block of code by selecting the Apply Source Formatting to Selection option.
7. Get widgety
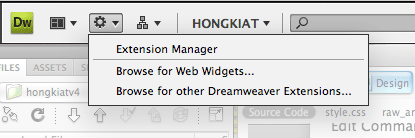
Just click the Extend Dreamweaver icon (it looks like a gear) in your Application Bar and select Browse for Web Widgets. This will take you to the Adobe Exchange where you can find additional widgets from vendors such as Yahoo!, JQuery, and many others.
8. Subversion & Dreamweaver
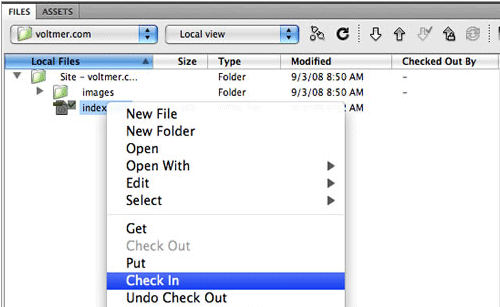
And yes, Dreamweaver does support Subversion (SVN). For developers who uses SVN to maintain revision control of their project, this could be a good news. Dreamweaver developer Andrew Voltmer discuss how you can use Subversions with Dreamweaver.
9. No More Redundant Styles
Many people use Dreamweaver as a way to update content visually, like a word processor. Before Dreamweaver CS4, this could result in redundant CSS rules like .class1, .class2, and so on. In Dreamweaver CS4, just switch your Property Inspector to HTML mode (click the HTML icon on the left of the Inspector) and you’ll say goodbye to all that redundant CSS, inserting only appropriate HTML markup.
10. Form Validation made easy
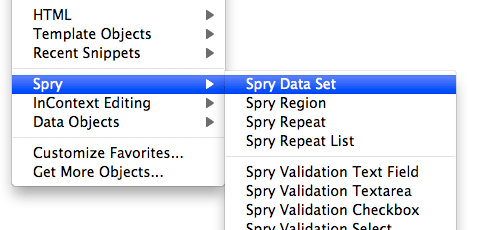
Want to validate your form fields, but worried that you’ll have to rebuild from scratch? No worries. Simply select an existing form element, such as a text field, and apply a Spry Validation widget from the Insert > Spry menu. Then control validation requirements such as minimum or maximum characters directly from the Property inspector.
Bonus: 3 more
11. Access Related Files Easily
When you open an HTML or PHP file, you will now see a row of dependent file names, such as CSS, Javascript and even included files for PHP, at the top of the document window. You can easily switch to these files, make changes and save them, all without even opening them up. When you click any file in the Related Files bar you will see its source in Code view and the parent page in Design view. Or use Code Navigator to quickly access CSS source code that affects your current selection.

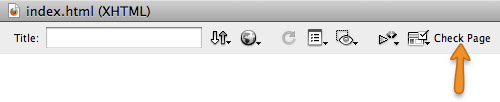
12. Check browsers compatibility
Open the document you want to check for compatibility; from the same menu bar where Code / Split / Design views are accessed, look to the far right for ‘Check Page‘ button.
Clicking it will expand a drop down menu, select ‘Check Browser Compatibility‘. The Browser Compatibility results window will show at the bottom of the window with any issues that you need to address.
Note: This will NOT check new versions of IE on Mac! To select which browsers to use for testing, select Check Page > Settings from the menu.
13. Preview PHP Pages
Dreamweaver allows you to run and preview PHP codes within the software. Here’s how to get it setup.

Getting started
- First, select Site -> New Site from the top navigation.
- You’ll see both the Basic and Advanced Site Definition option tabs. Let’s proceed by selecting the Advanced Site Definition tab.
- Enter a folder name for the site in the appropriate box (for this example we’ll use "myphp" as the folder name).
- Create another folder named "images" by entering its name in the ‘Default Images Folder’ field.
- Under the Local Info, input the following values in the fields:
- Site Name: the name of the site. To be used in Dreamweaver only
- Local root folder: This is the name of the site you will be working in. Be sure to name sites in a way to minimize conflicts, or confusing names.
- Default Images folder: This is optional, but it’s advised to create it now as most sites will use images to some extent. This is where DW will ‘look’ to insert images in your documents during the coding phase.
- Links Relative to: This defines how document linking in Dreamweaver will be handled. You can select either Document or Root. The differences between the two are:
- Document Relative – Will insert a path relative to the file you are working and the item being linked to.
- Root Relative – Uses / which causes the document/file to be linked in relation to the ROOT folder.
- Another alternative is to add some configuration to the server configuration files. Being a more advanced task, we’ll just stick to using Document-relative for now.
- HTTP address: enter the site root folder for your project
- Case-sensitive links: Dreamweaver will check if any file in the project can have Case-sensitive issue when uploading to the server. Notifications will be shown when you use: Site -> Check Links Sitewide. You can leave it checked if you want. I personally don’t leave it checked as I always name files in lowercase. Uppercase letter is not recommended.
- Cache: Check Enable cache.
- In the Remote Info page, either setup your FTP or other access to a remote server or leave the Access to None.
- In the Testing Server page select the option that relates to the file type/system you will be testing.
- Version Control will not be used for this example so you may leave it blank unless familiar with it.
- Cloaking allows you to place .psd, .fla, and other source files within your sites folder and DW will disregard them when uploading/updating your site.
- Design Notes are ideal for a web design team as it retains note on changes made to the files. It’s checked by default and fine for us to use this way.
- Leave File View Column, Contribute, and Templates as default.
- The Spry page simply points to the Spry assets folder which is automatically included with Dreamweaver. There’s no need to change this. Once every setting is finished, click OK.
Preview PHP in Dreamweaver
Now open a PHP file and make the needed changes to it. To view this file in Dreamweaver simply press F12 and the results will show in your default browser. You can change which browser is used in Edit -> Preferences -> Preview in Browser. This allows a faster edit-to-preview time, eliminates the need to type long URLs into your browser bar or to use another server software to render the PHP files, all of which save time!
That’s all. Happy Dreamweaver’ing :-)