10 Vital Tips & Tricks to Using Movavi Video Editor
Movavi has been in the market from quite some time. Thousands of users from around the world are using it for their personal and professional projects. But even as a regular user, there are some features of the editor that some users don’t know about.
This post highlights some of the interesting features, tips and useful tricks that you can do in the Movavi video editor.
From creating time-lapse videos and YouTube intros to background sound removal and video stabilization, you’ll be amazed at how much these features can add up to your productivity.
So, let’s take a look at the tips.
1. Removing the trial watermark
When you are editing a video in the trial mode, the video exported will always have Movavi watermark. Hence there’s no way to get rid of the watermark as long as you’re using the trial version.
However, once you purchase the program and activate it, not only that you’ll be able to export all the forthcoming videos without any watermark, but there’s a way to remove the trial watermark from the ones exported during the trial version.
Please remember that for this tip to work you’ll need to have the project file of your video in .MEPX, .MEPB, .MEPS, or .MEP version as the watermark cannot be removed from the video exported. To do this:
- Go to File > Recent Project and select any of the project files that you previously worked on. You can also look up the project files in your computer’s hard drive.
- Open the file in the editor and save it again. And this time, it will be saved without the watermark.
2. Add your own watermark/ logo to video
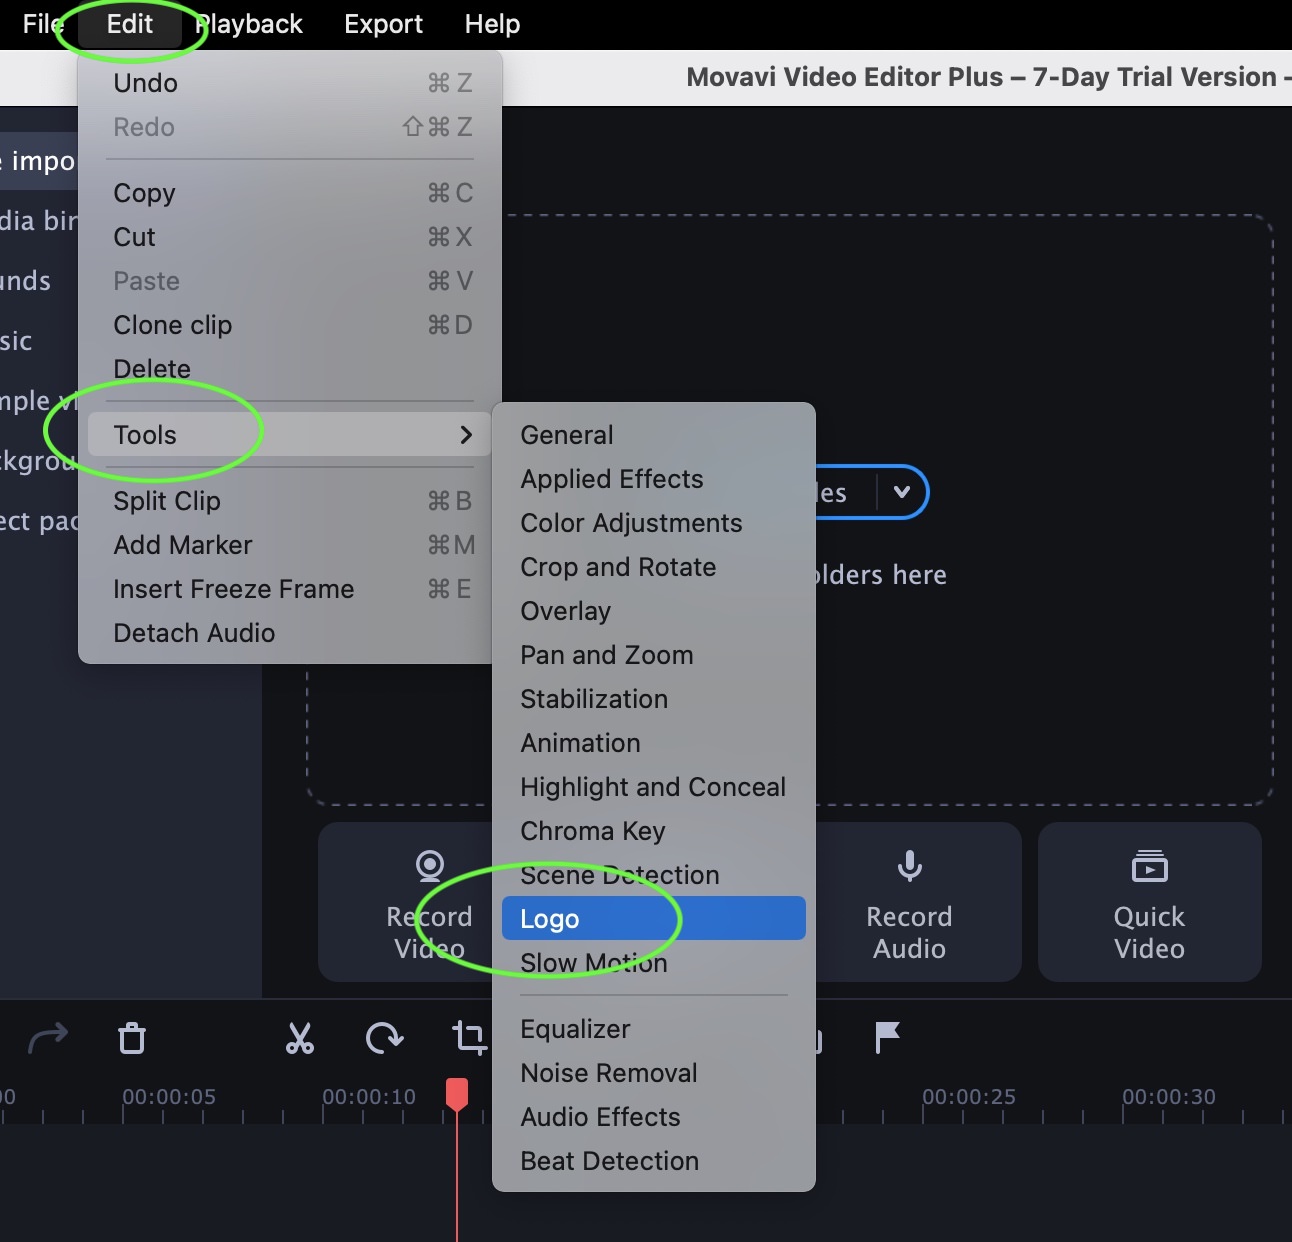
Movavi Video Editor Plus allows you to add your own branding to the edited video either in the form of a logo or as a watermark to keep off any copyright infringement. So, to do that:
- Go to Edit > Tools > Logo.
- In the window that opens up, click Add Logo to upload any image that you want to use as your branding and it will appear on the video being edited.
- You can move and place it anywhere on the video and also set its duration in the timeline (whether you want it to appear throughout the video or on a few frames)

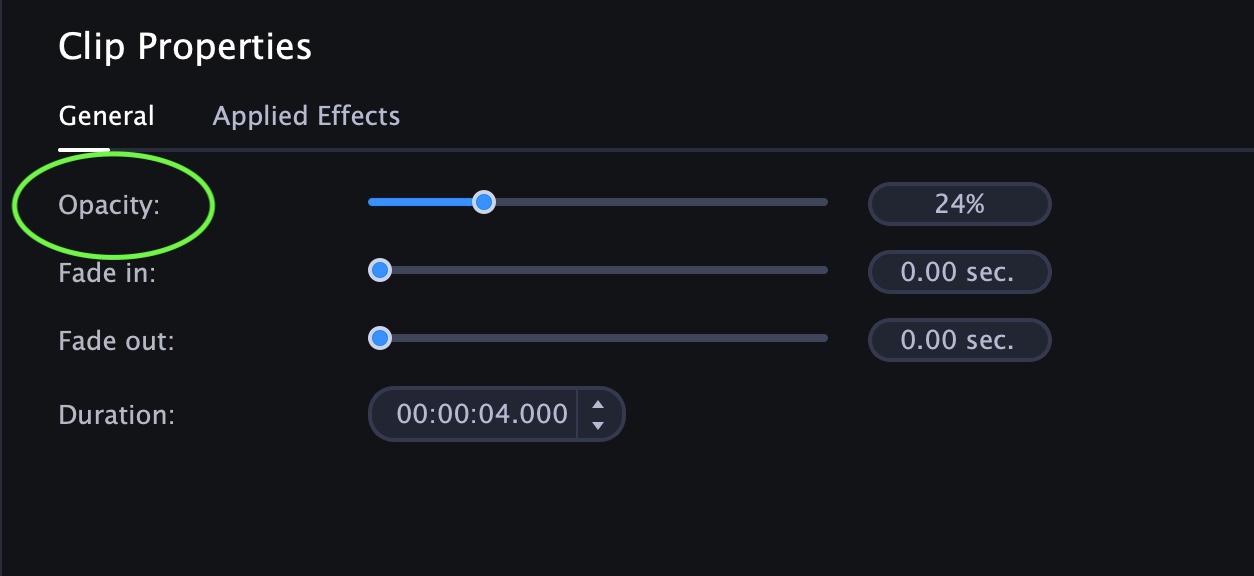
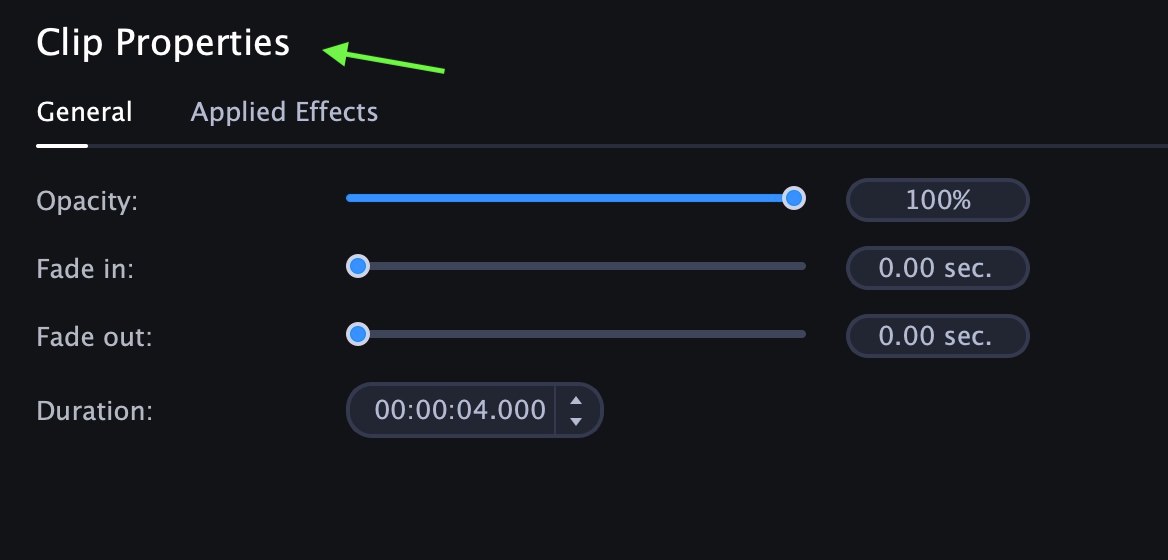
Note: To add the watermark, follow all the aforementioned steps, however, as watermark is opaque, you can click on the image in the timeline and in the Clip Properties that appear, lower the Opacity of the image till you reach the desired result.
3. Create a time-lapse video
Time-lapse videos are creative and an interesting way to demonstrate a lengthy process. You can create cool time-lapse videos with Movavi Video Editor Plus without getting into too many technicalities.
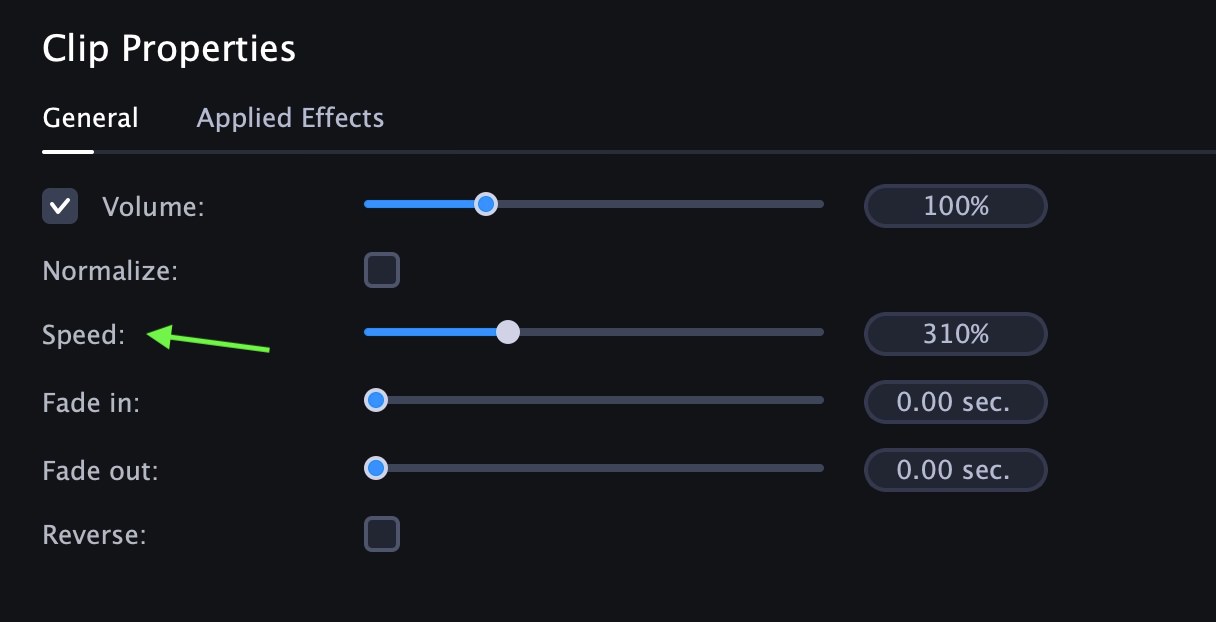
To create a time-lapse effect for your video, you can simply speed up the video.
Here’s how to do it:
- Open the clip that you want to convert to a time-lapse video by clicking the Add Files button or through simple drag and drop.
- Click on the video clip and drag it onto the timeline.
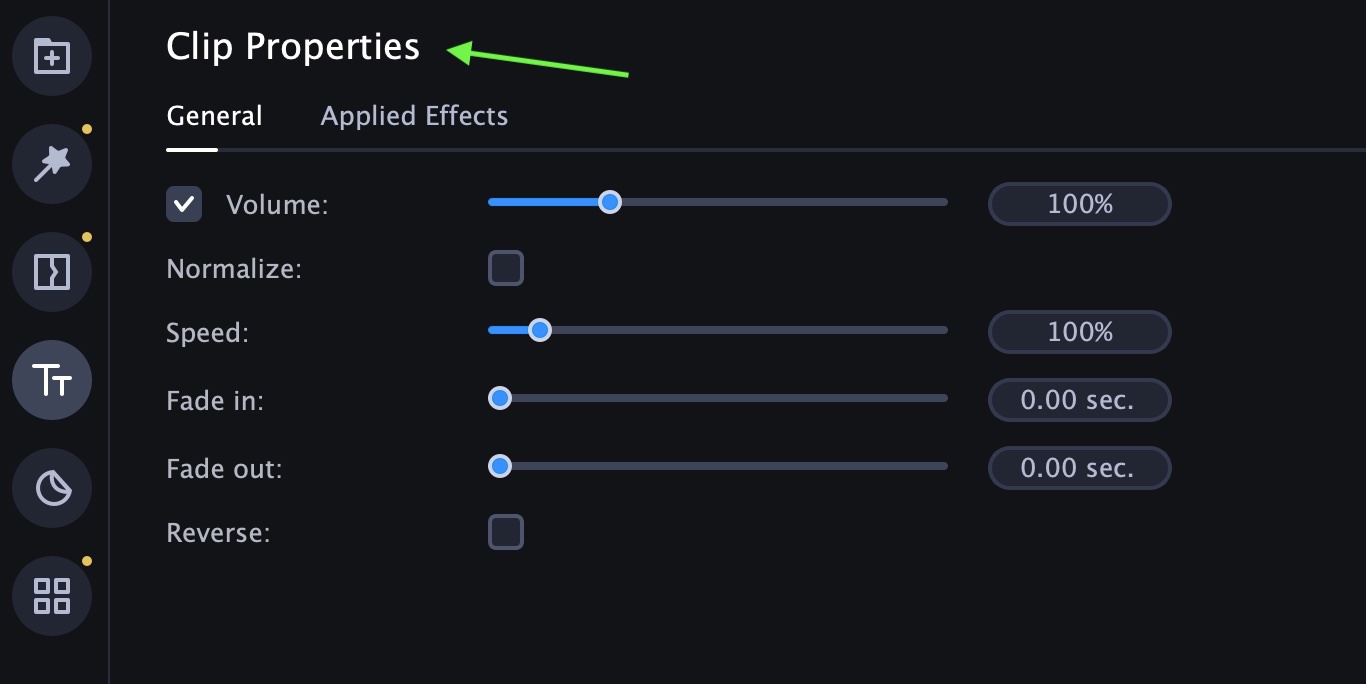
- Now double-click the clip on the timeline and the window above will show you Clip Properties.
- Drag the Speed slider from 100% (by default) to the point where you achieve the desired speed of the clip. You can keep testing the speed in the preview window.
- Spice up your time-lapse video by adding some music. Just import a nice music track to the software, drag it on the timeline and fix its length, start and end point according to your clip.
- Once you get the desired result, click on the Export button the left. In the resulting window add the particulars like name of the video, format, quality, and where to save.

4. Create a time-lapse with photos
Do you know that you can convert a series of consecutive photos into a time-lapse video as well? There is a cool and super easy way to do it through Movavi Video Editor.
Here’s how:
- Open the series of photos by clicking on the Add Files button and then drag them to the timeline.
- Select all the images on the timeline and Clip Properties will appear.
- In Clip Properties go to Duration and manually change the duration of your frames to 00:00:00.100. This will change the frame rate to 1 frame per second.
- Preview the result in the preview window and click Export to save your final time-lapse by entering the particulars.


5. Get highest quality of the exported video
There happens at times that the your edited video comes out with a lower quality than the original footage.
The reason for this might be that the original footage has higher resolution than the Full HD (1920×1080) set by the software by default.
To solve this issue you need to change the default resolution of the project and make it the same as that of the original footage.
Here’s how you can do it:
- First check the resolution of the original footage by right clicking on it in the timeline and in the resulting menu clicking on File Information.
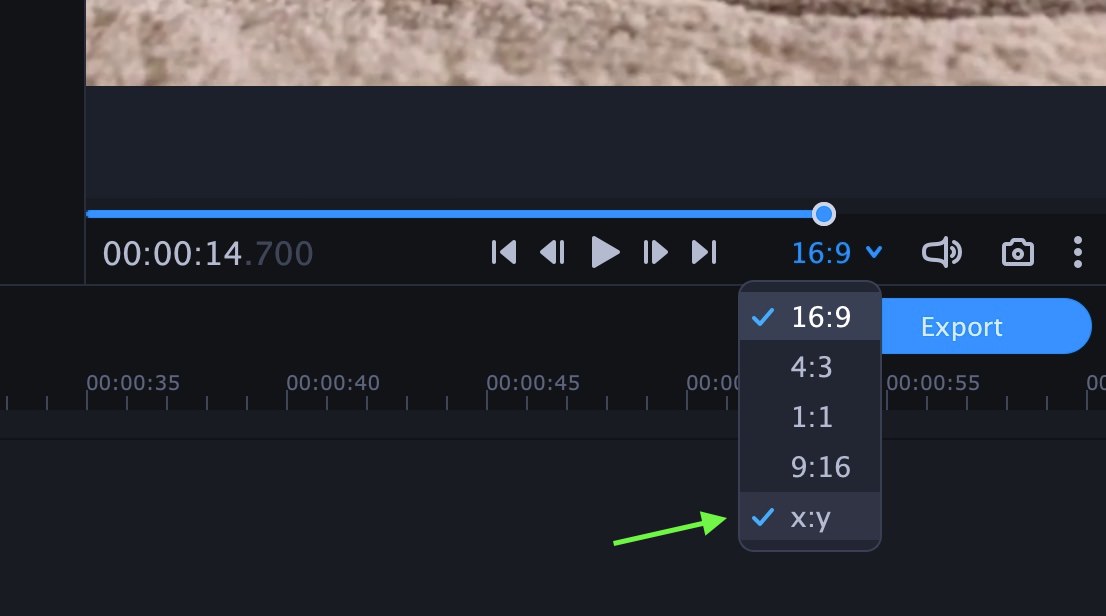
- Once you know the original resolution, go to the preview window and click on [16:9] to open the drop-down menu.
- Click on [x:y] to enter custom resolution for your project.
- Now when you export your final video make sure the resolution is same as the one you entered for the project.


6. Get rid of the black bars on the output video
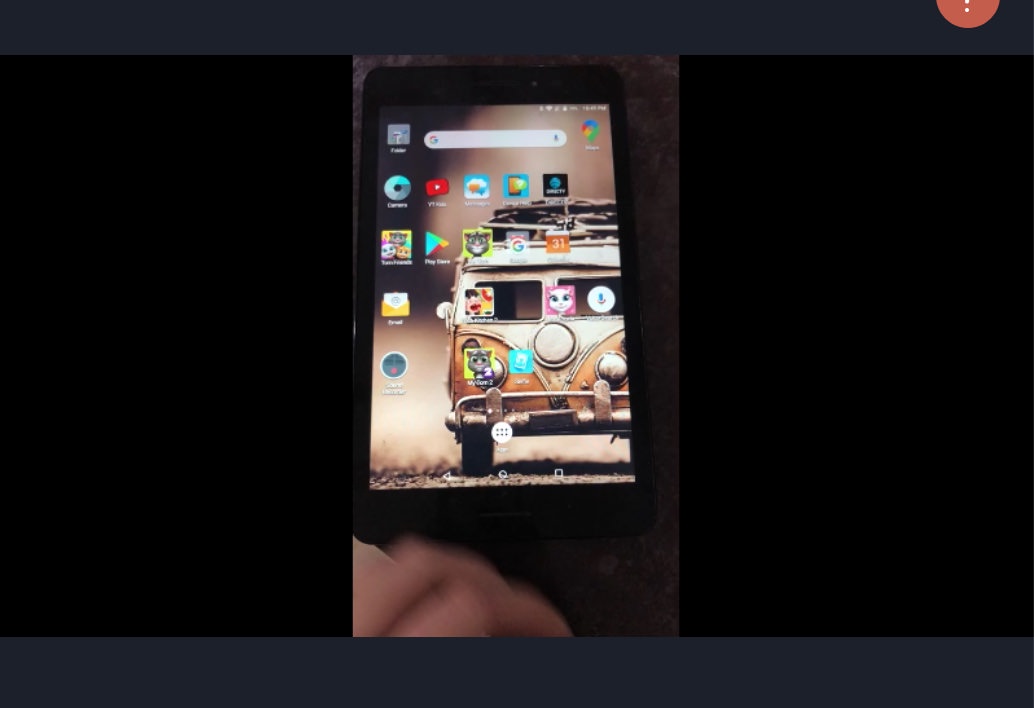
At times, when you export a video, it turns out to be having black bars or black rectangles on both sides.
This happens when you use videos or different aspect ratio or if the project is set up incorrectly.
However, you can any of the following ways to get rid of these black bars.
I – Using filter to fill in the black space
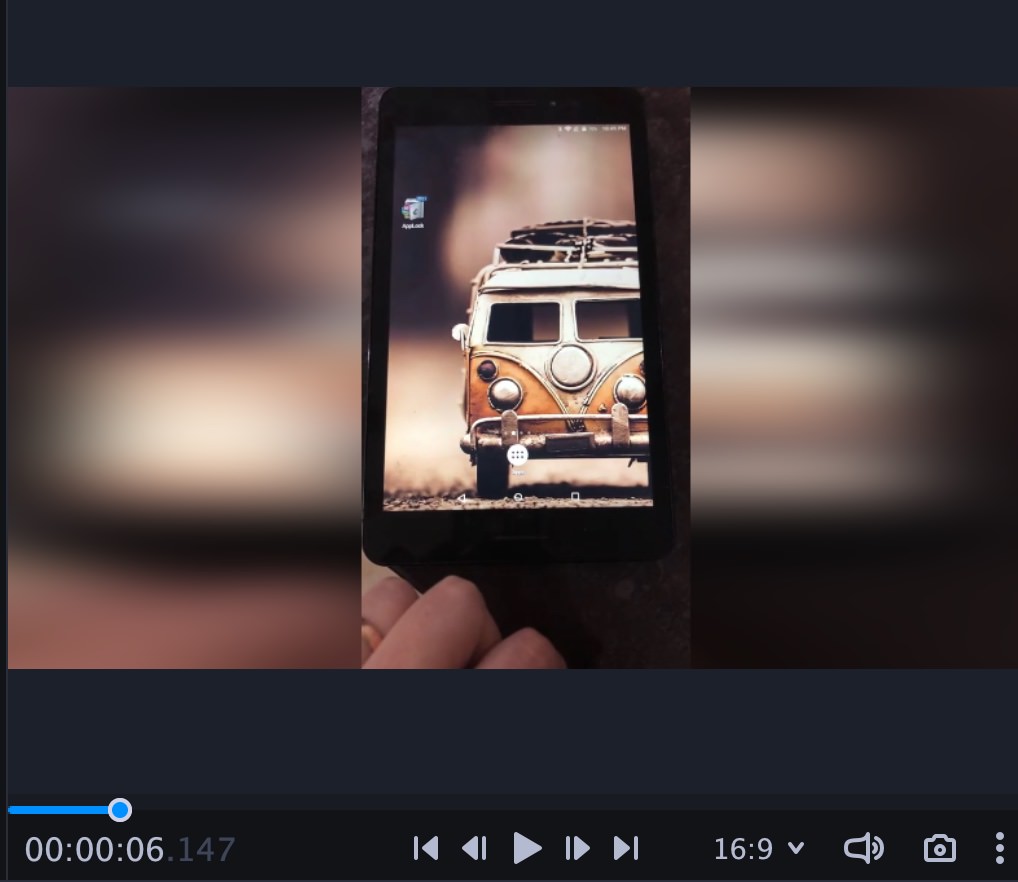
Movavi Video Editor allows you to add special filter that uses your own video to create a blurred background to cover up empty space. Here’s how you can apply it:
- On timeline click on the clip with black bars on the sides.
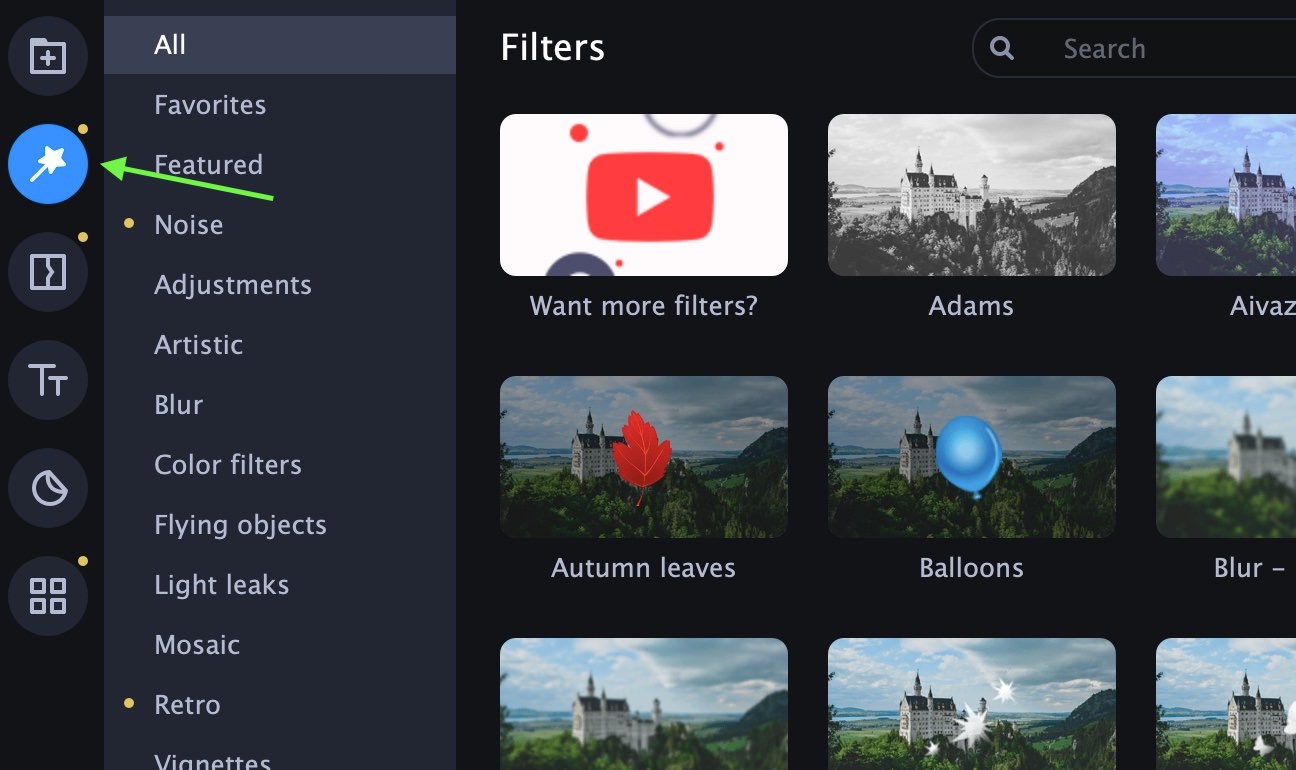
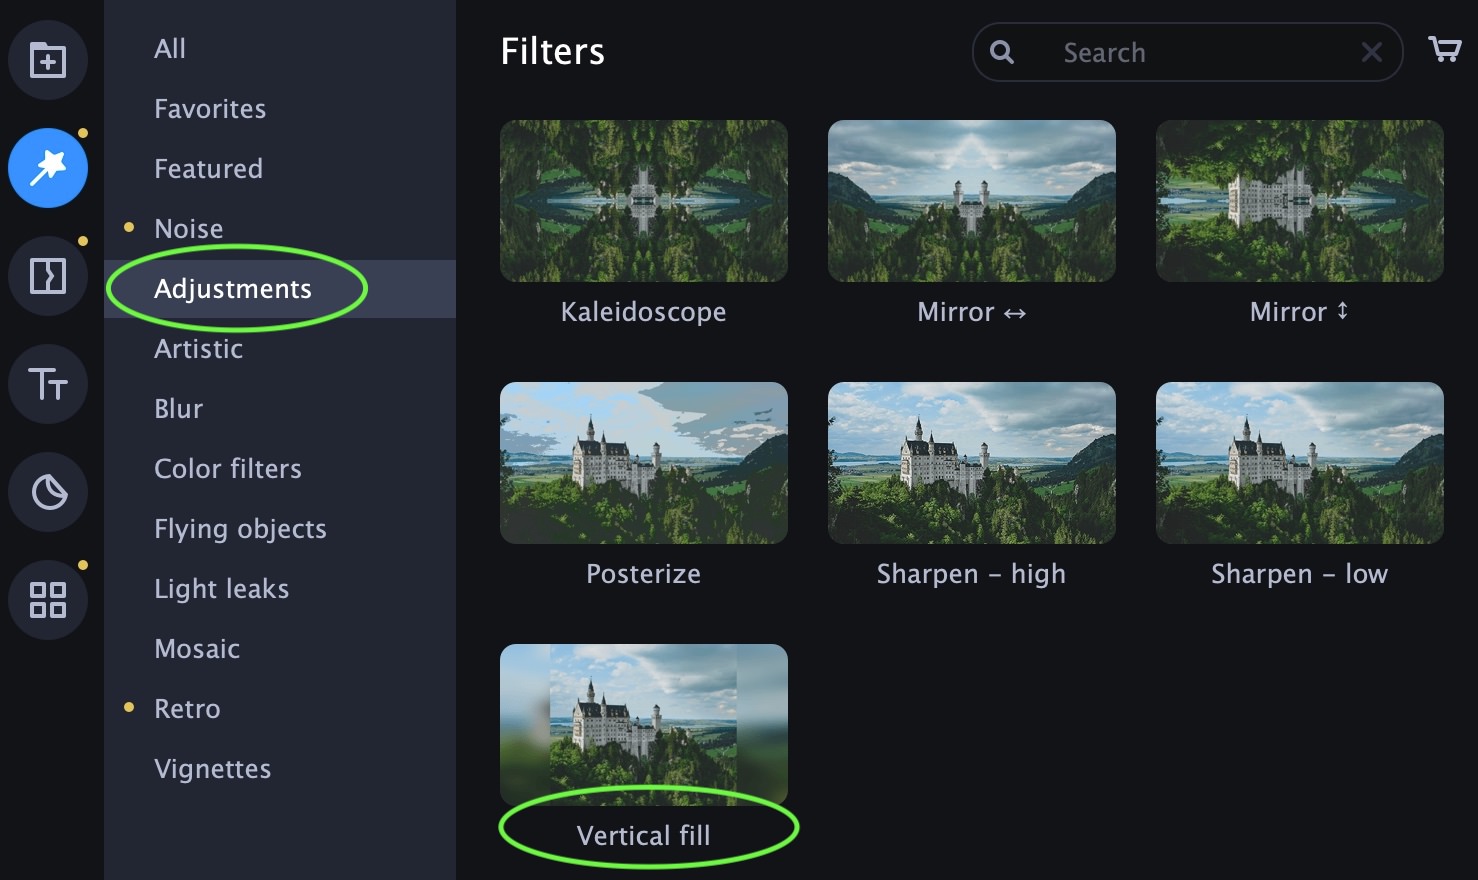
- Click on the Filters button (magic wand icon) on the left side panel to open the Filters tab.
- Go to the Adjustment group and scroll down to the Vertical fill filter.
- Drag the filter down to the clip on the timeline. This will add a blurred background to your video covering up the empty black area.
II – Manually crop out the empty area
If you don’t want to add the filter background to the empty black spaces, then simply crop it out.
Here’s how to do it:
- Click on the clip with black bars on the timeline.
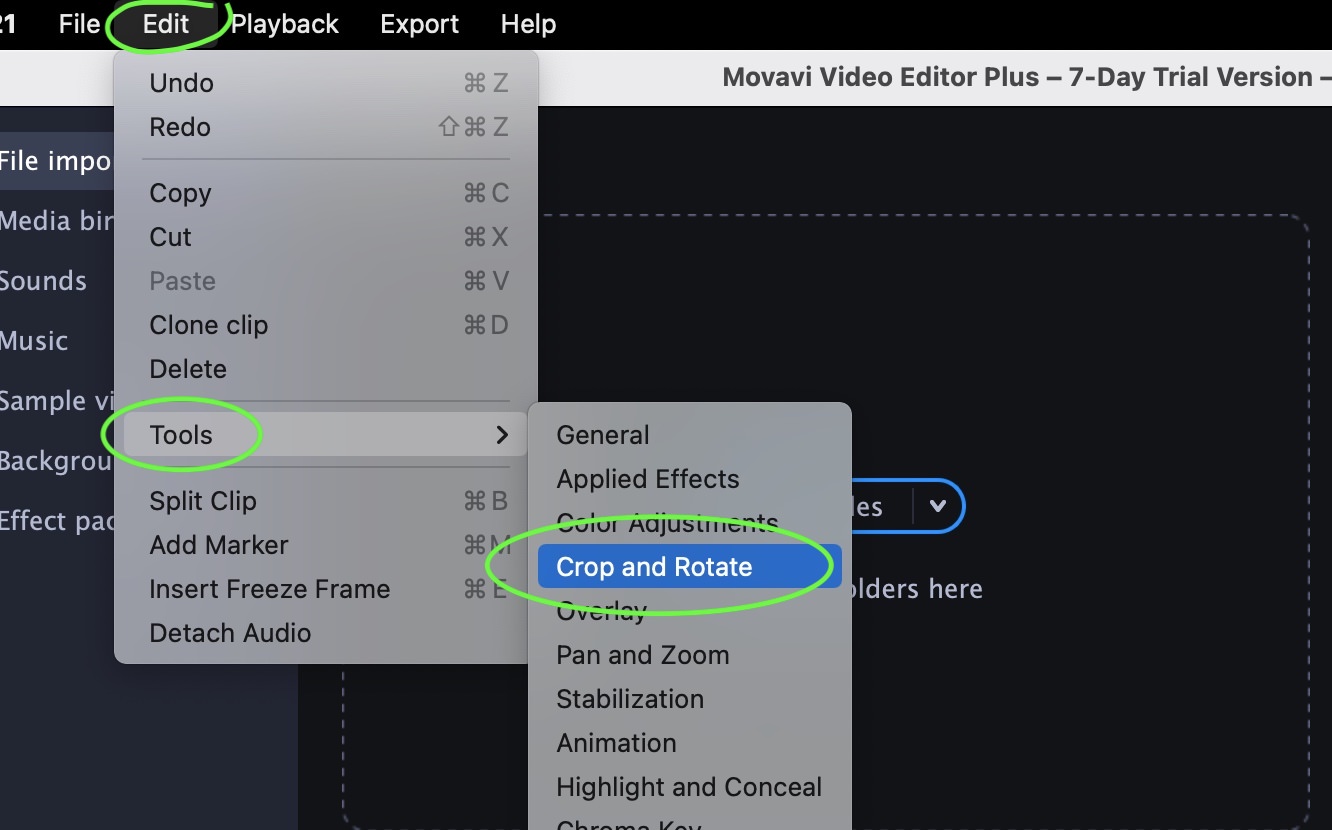
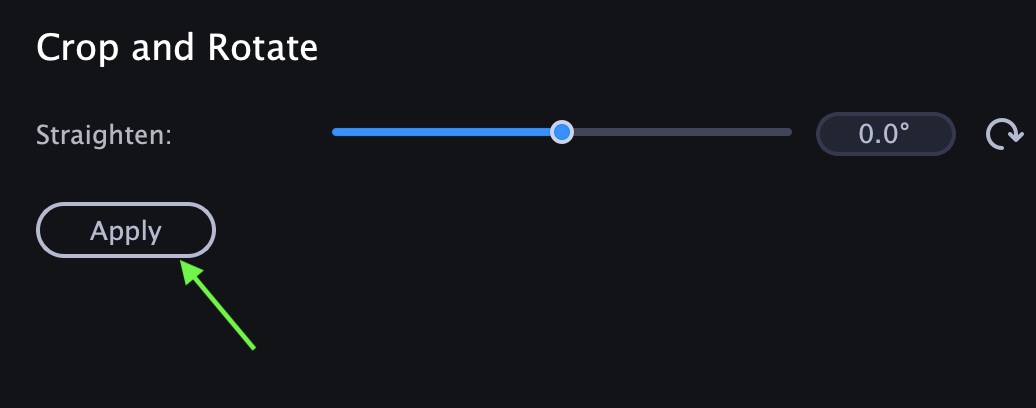
- Go to Edit > Tools > Crop and Rotate.
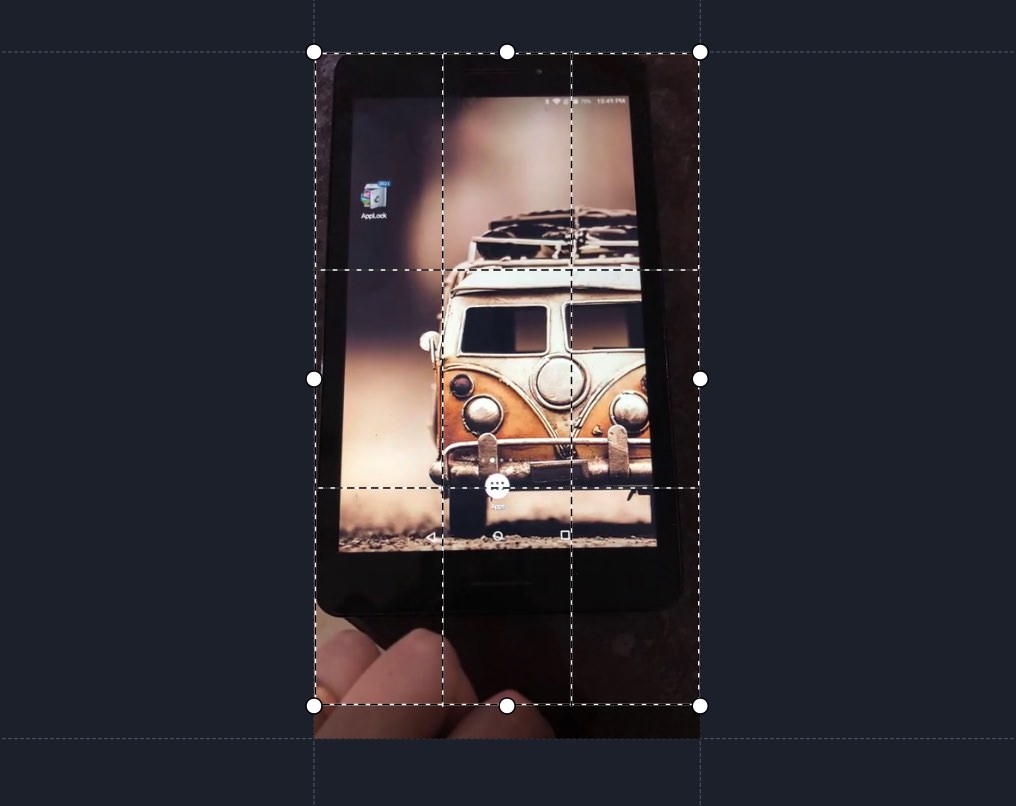
- This will add a box frame to your clip. Move the frame and resize it to adjust it according to the area you want to keep.
- Once done, click Apply and the empty black space will be removed in the final version.
7. Enhance the quality of a video
You can use Movavi Video Editor to improve or enhance the quality of a video for instance a CCTV footage, an old video or videos captured in low light etc. To improve your videos, follow the steps below.
- Import the video to be improved in the video editor by clicking on the Add Files button and then drag the clip to the timeline.
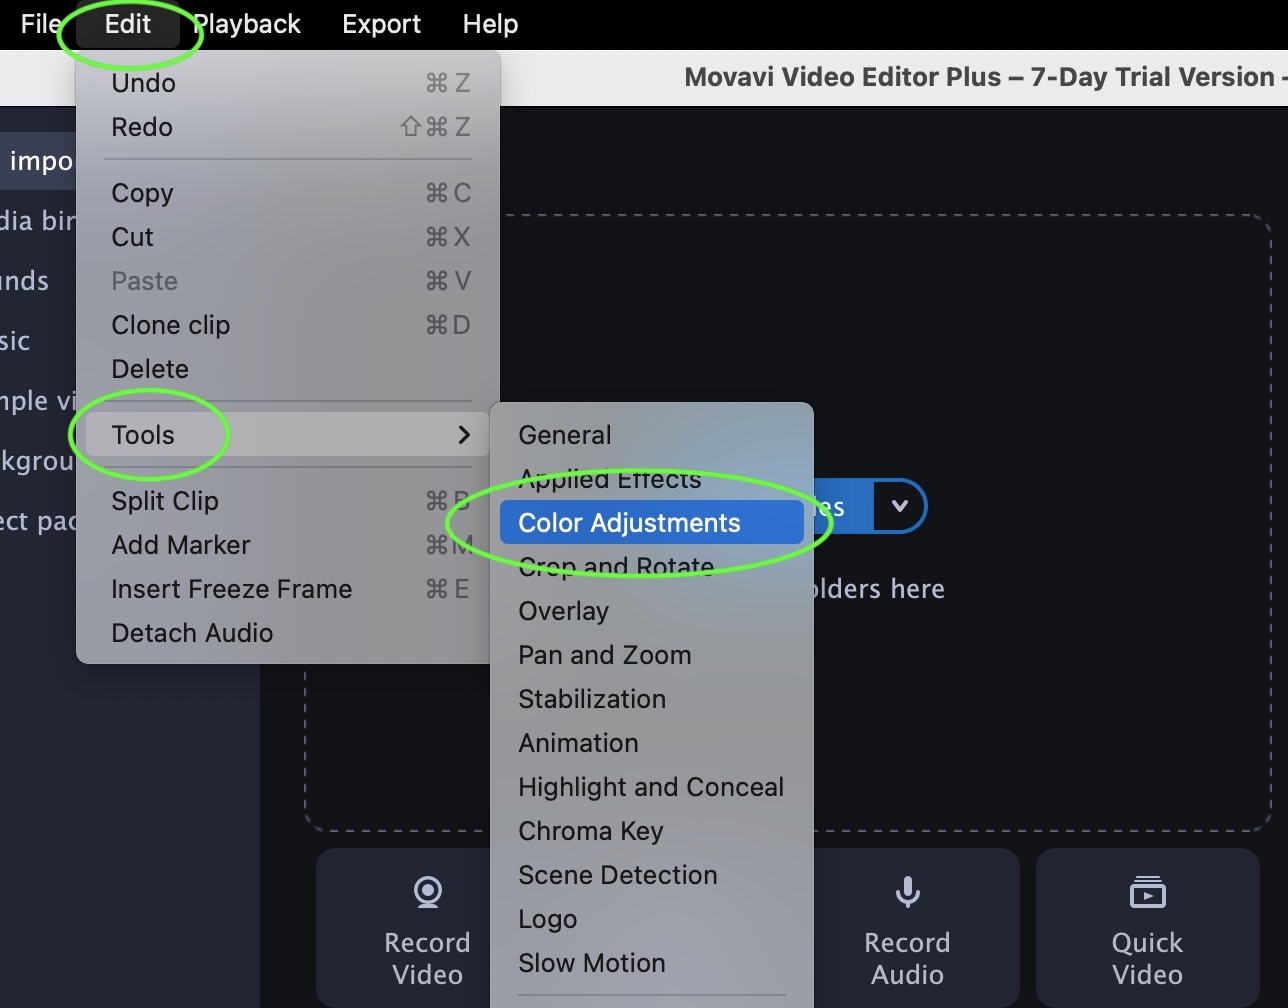
- Go to Edit > Tools > Color Adjustments. This will open up a window with different adjustment filters that you can apply to your footage.
- If you’re looking to change certain color settings of the clip manually, then click on Advanced tab to tinker with aspects like Brightness, Contrast, Saturation, etc.

8. Create a dynamic intro for YouTube
It is really important to have an engaging and dynamic intro for your videos on YouTube to give a quick introduction of your channel to the viewer. As a regular video content creator, it is useful to create an intro template that can go with every new video that you make.
To create an into template in Movavi, take the following steps:
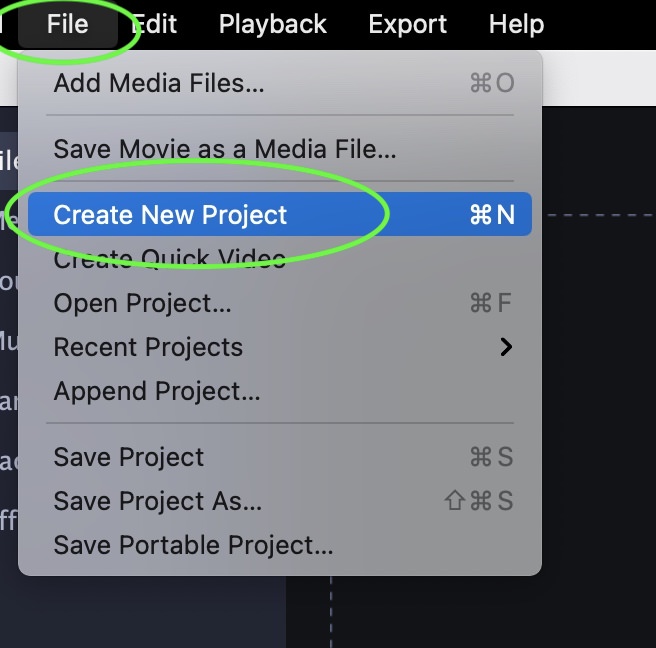
- Go to File > Create New Project.
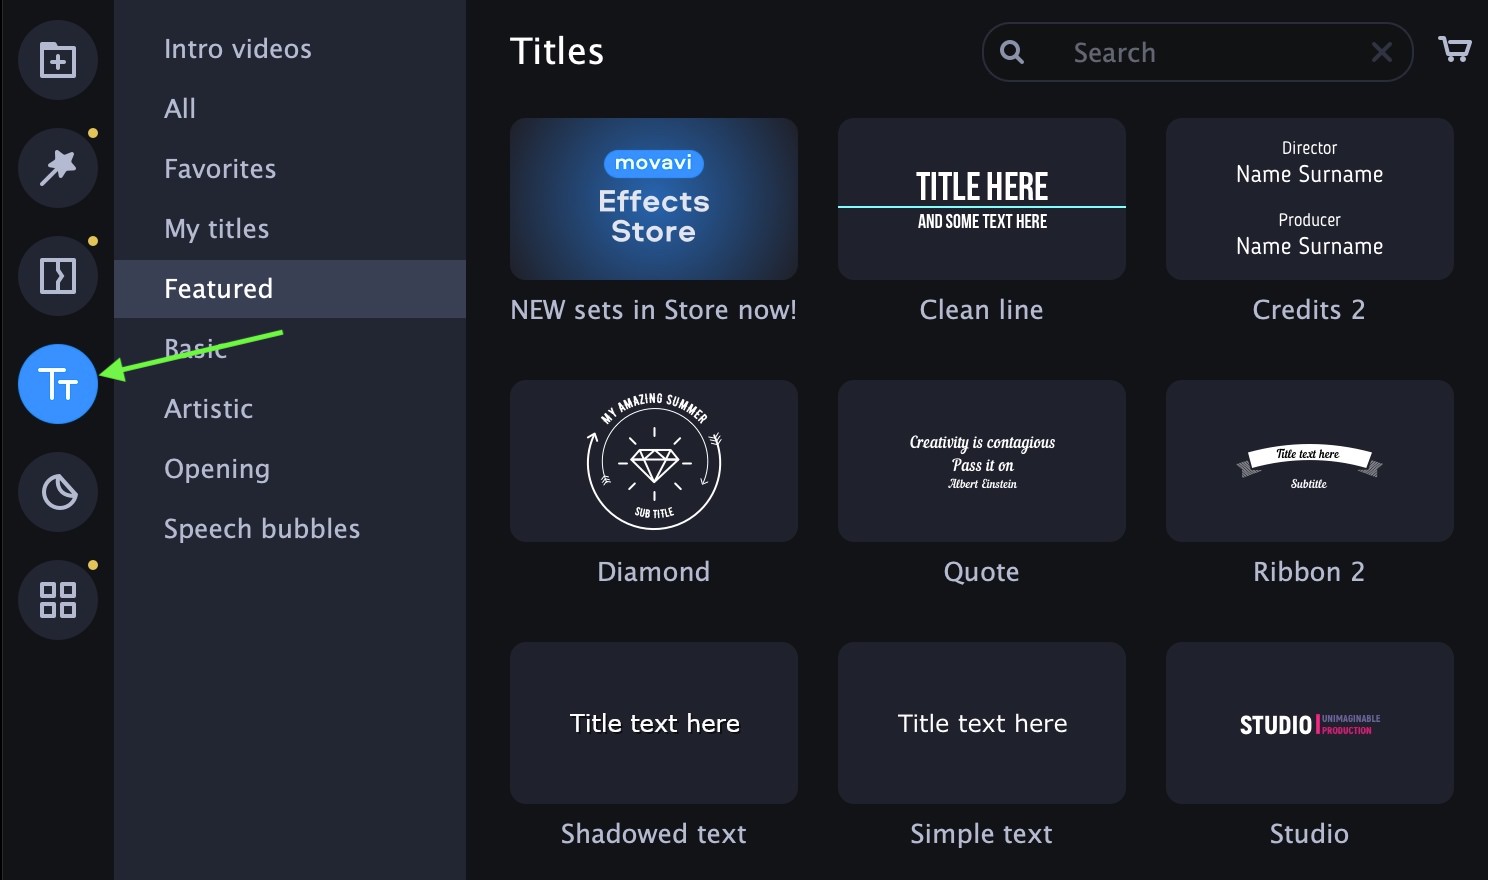
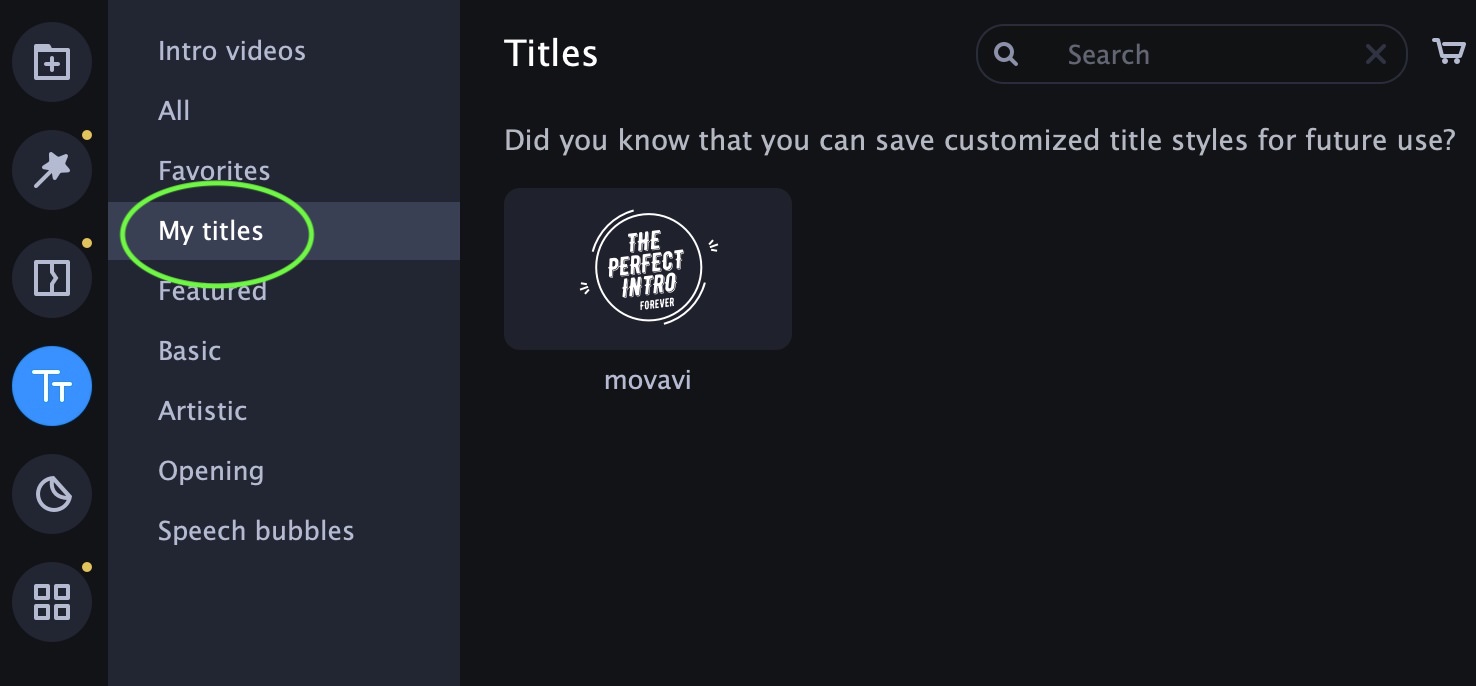
- Click on the Titles button on the left and it will open up an array of Intro videos. Drag any of these pre-made intro videos on the timeline for further customization.
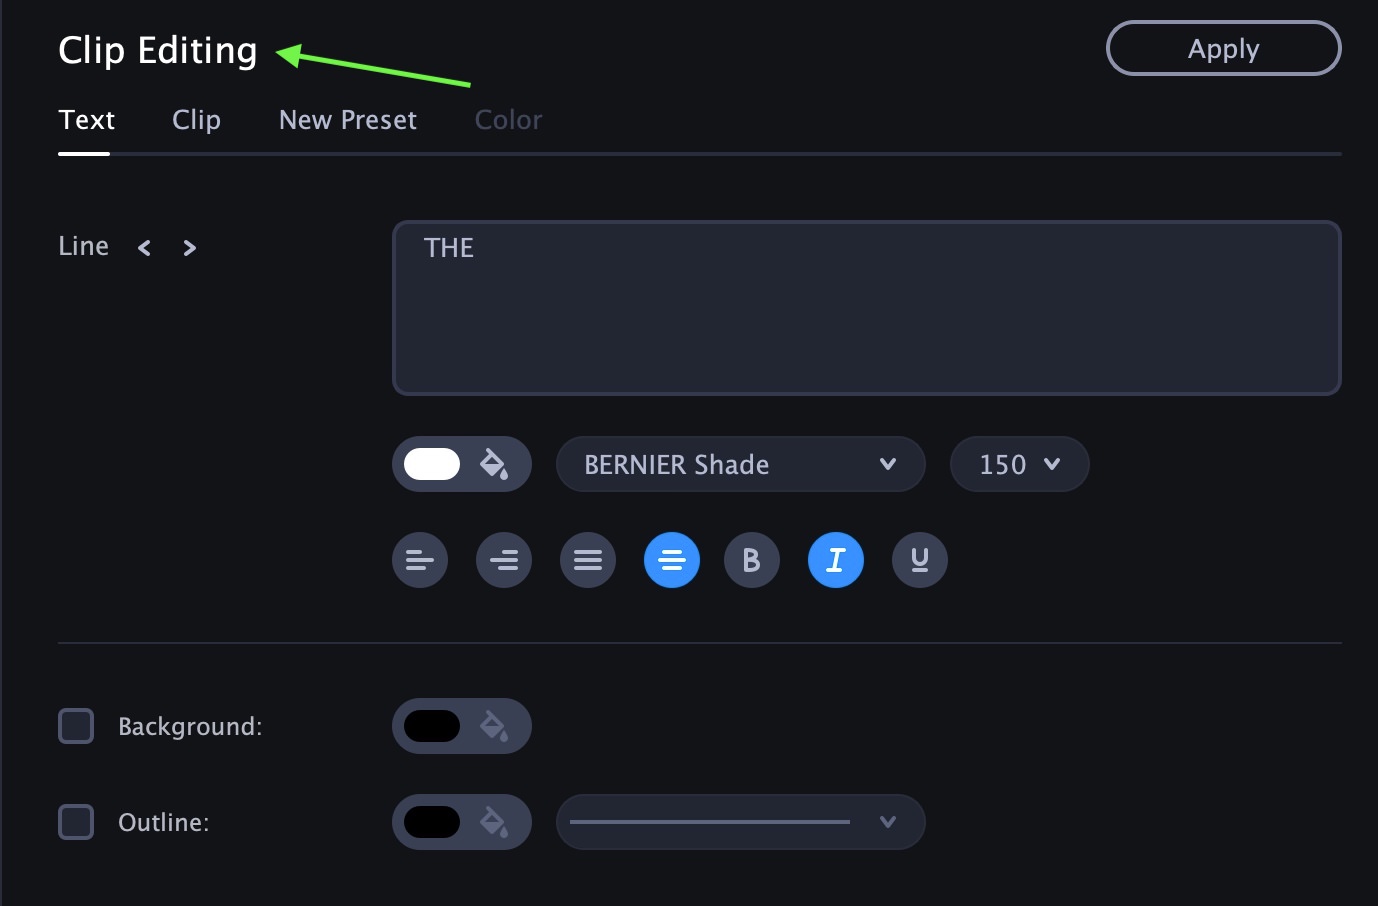
- Drag your preferred title to the timeline double-click on it and a Clip Editing window will open up.
- Here you can change the graphical elements of the intro (text, font, color) as well as its speed and duration.
- You can add a customized background to your title, add music, and effects etc.
- Once done, you can save it as a new preset and access it any time in My titles.
9. Record a video with your webcam
For online tutors and content creators, Movavi Editor offers a useful feature to capture video through your webcam. To do that:
- Open the video editor and click on the Import tab.
- Here you’ll see the Record Video button.
- Once you click on this button, a new record video window will open up. It’ll ask you access permission for your computer’s camera and microphone and once you allow you can click on Start Capture button to initiate the recording.
- Once you’re done with the recording, click Stop Capture button fill in the particulars in the Capture Settings and save.
- If you want to edit the recorded video, click Back to editing button and it will open up in the editor window automatically.
10. Save videos for 4K TV
Ultra HD or 4K video have a resolution four times higher than the Full HD videos and therefore, 4K TVs give you a very sharp picture and a great viewing experience. So if you want to convert a 4K video for viewing on a specific 4K TV, then you can easily do that in Movavi video editor.
- Open any 4K video in the editor.
- If you want to edit it, go ahead and do the needful and then click Export.
- In the Save Video to the Computer, click on the Save for TVs (TV icon) button.
- Here you’ll see a list of major TV manufacturers along with the resolution.
- Select the one for your particular TV set or the Other 4K TVs option if your TV is not there.
- Click Start and your 4K video will start exporting.


(Bonus) 11. Stabilize shaky videos
Not everyone is a professional cinematographer. Especially when you capture a video with hand-held device, the result turns out to be shaky.
You can somewhat eliminate the shakiness of your video with the stabilization feature in Movavi video editor. Here’s how to do it:
- Add the video to the editor through Add Files and drag it to the timeline.
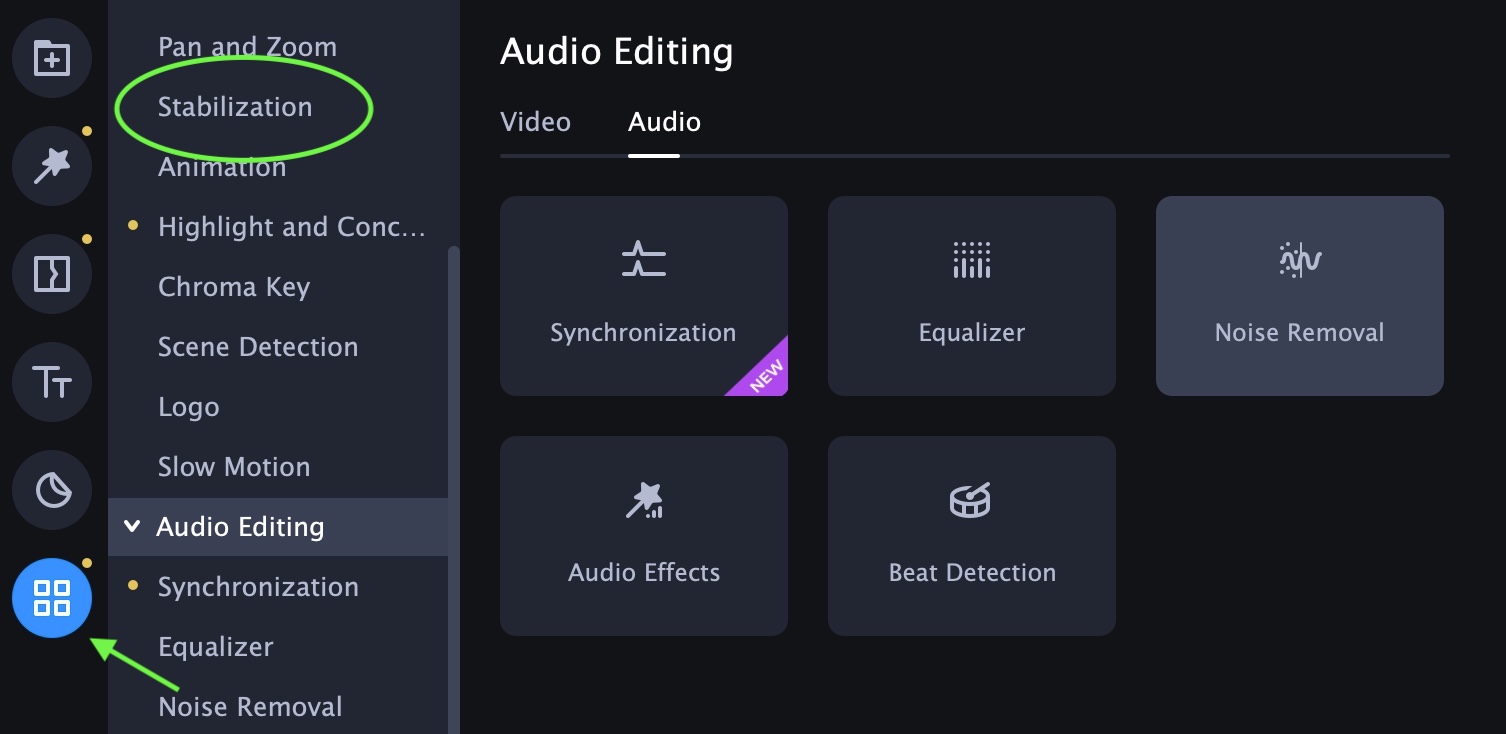
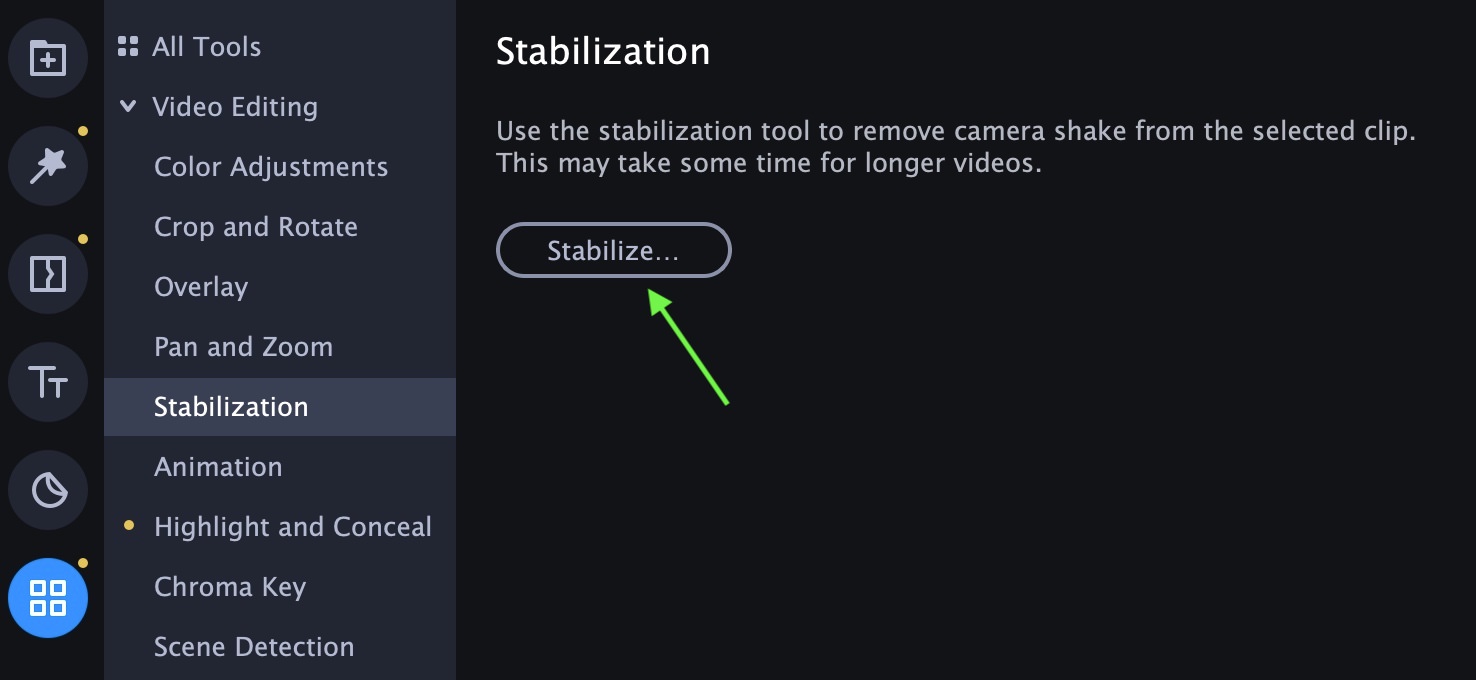
- Click on More Tools button (four square icon) on the left and select Stabilization.
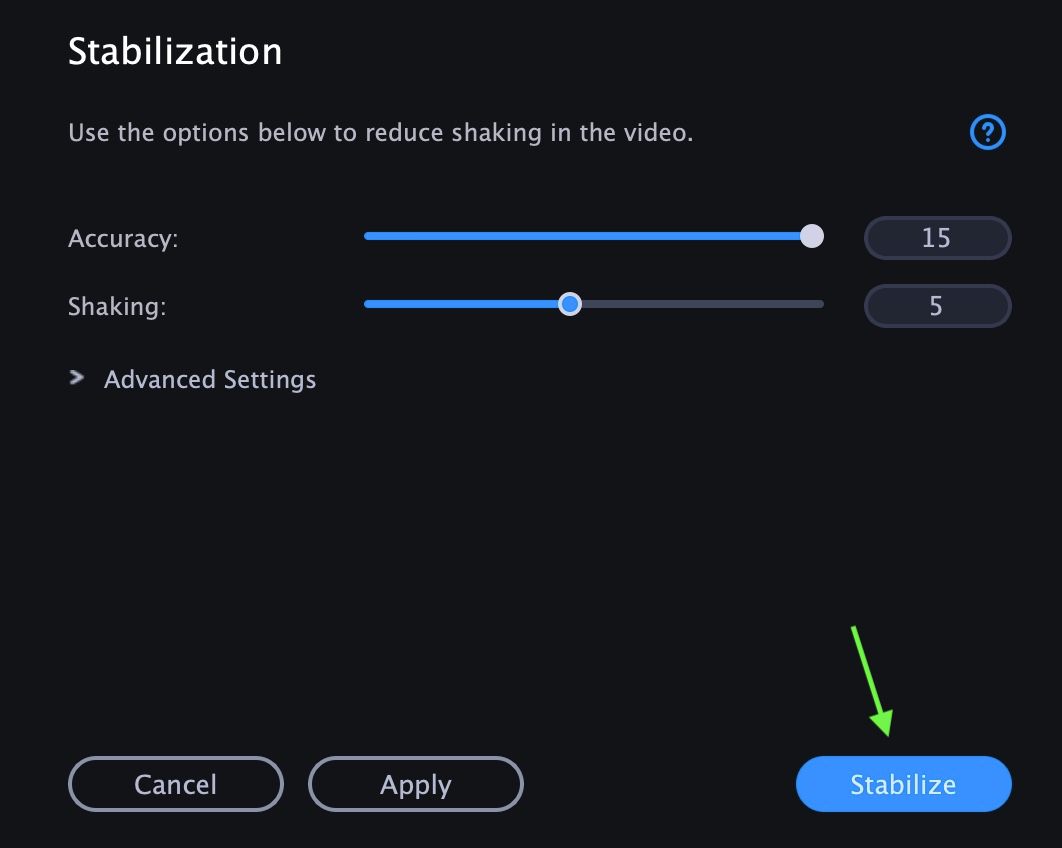
- Here click Stabilize and a window will open up with automatic stabilization settings for your video.
- You can either accept the automatic settings as proposed by the software or make changes to the settings manually.
- Once you’re satisfied with the results, click Stabilize button at the bottom of this window to complete the process.
(Bonus) 12. Troubleshoot video export issue
It might happen that you try to export a video after editing on the Movavi editor and it either shows an error message or the progress bar simply freezes. This is caused by a problem in your graphics card. To solve this issue:
- Go to the video editor Settings > Preferences > Acceleration.
- Here uncheck all accelerations and click OK.
- Now restart the program, open the project and you will now be able to successfully export your video.
(Bonus) 13. Remove background noise
If you have captured a video in a noisy environment or if the background noise is affecting the quality of your video then you have an option to minimize it in the Movavi editor. For this:
- Select the audio clip in the timeline and go to More Tools button on the left. It will open up the Audio Editing window.
- Click on Noise Removal and try different slider values till you achieve desired results.
