How to Install and Run Android on PC
If you love Android on mobile devices, you’re going to adore Android on a PC. Maybe you look forward to multitasking on Android, i.e., running multiple apps simultaneously. Or maybe you wish to run an Android app or game on your desktop or laptop, which isn’t natively available for your Windows PC.
Whatever be your reason, Android for PC is a handy concept, which brings your favorite mobile apps to the big screen.
Unlike Android TV, you get to use apps side-by-side as on any modern multi-tasking platform. For instance, you can polish your next presentation while watching the news on YouTube.
10 Apps to Connect Computer to Android Devices
When you're a vivid smartphone user, you may need to connect your device to your PC or Mac.... Read more
Of course, you can run apps on an Android Emulator; however, emulators can be buggy and slow, and they hardly support all apps and games in the Play Store. Or, you can install Android on your PC and enjoy apps and games with superb performance. That said, let’s get started on installing Android on PC.
How to Run Android Apps on Ubuntu
Android has (almost) become the de-facto of mobile computing. That's why its apps are sought-after even on other... Read more
Introducing Bliss OS
In this guide, I’m going to use Bliss OS for installing Android on PC. Bliss OS is an Android-for-PC OS from the team that brought you Bliss ROMs (one of the popular custom Android ROMs).
It’s built on the top of Android-x86 — the first and original open-source project experimenting with Android for PCs.
Bliss OS comes with numerous features. First and foremost, it supports Google Play Store, so you get to enjoy most of the apps and games for Android. Then, it offers customization features as Bliss ROMs, allowing you to make it your own. Also, it adds various compatibility, performance, and security features.
Prerequisites
You must fulfill the following requirements before installing Bliss OS.
- Download Rufus for Windows from its website.
- Download Bliss OS from here (do pick a stable build).
- Get a flash drive having a minimum of 4GB of storage.
Prepare the Flash Disk
Before installing Bliss OS (or any OS), you must have a bootable installation disk, which you can use to install the OS.
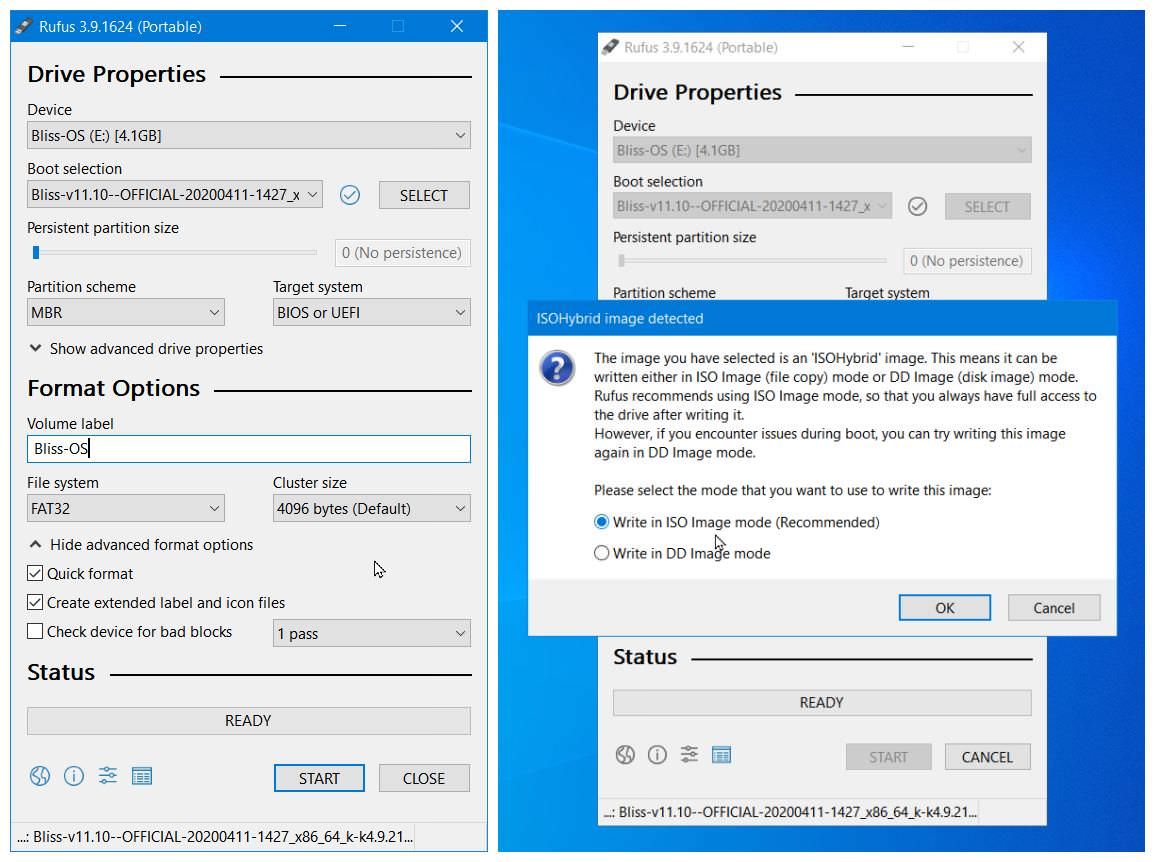
In this case, you need to create a bootable flash drive using Rufus. When you’re ready, just follow the steps below:
- Open Rufus > click the SELECT button.
- Choose the downloaded Bliss OS ISO and click Open.
- If you have multiple flash drives, choose one under Device.
- Without changing any other option, click the START button.
- If you see a Download required window, click the Yes button.
Install Bliss OS on PC
Part 1 – Boot via the disk
First of all, you must boot with the bootable disk you created in the last section. You must know to boot from a portable drive (google it for your system).
- Restart your PC to boot from your flash disk. You may need to open the boot menu by clicking Esc/F10/F12 key for choosing the disk.
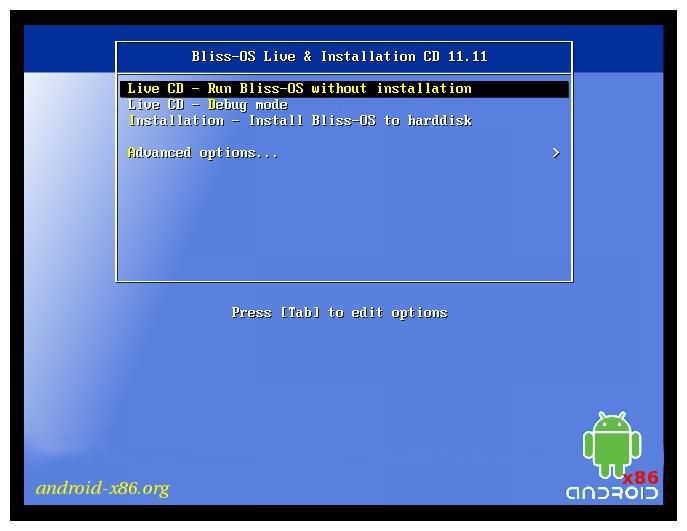
- When you see the live menu, choose the first option: Live CD.
- Bliss OS will boot and show you the lock screen if your system supports Android on PC. If you only see text even after an hour, your system doesn’t support Bliss OS, and we can’t do anything about it, unfortunately.
- If your system boots into Bliss OS and shows the lock screen, congrats! Your PC supports Android on PC, and you can continue the guide.
However, the testing party isn’t over yet. After you boot into Bliss OS, you must test the essential hardware such as Keyboard and Mouse (or Touchpad), Wi-Fi, Bluetooth, Battery, etc.
For instance, Wi-Fi and Bluetooth weren’t functioning on my system although all the other hardware was working superb for me.
When you’re sure everything works well with Bliss OS and you want to install it permanently on your system, then continue following the below steps:
- Restart your PC to boot from your flash disk. You may need to open the boot menu by clicking Esc/F10/F12 key for choosing the disk.
- When you see the live menu, choose the third option: Installation.
Part 2 – Create a partition
This is an optional part, which is only required if you want to create a new partition using the free space on your system’s disk for installing Bliss OS.
- At the next screen, click C, then click Enter to create or modify partitions. I used a virtual machine, so I used the whole hard disk. You may use just some part of your hard disk (create a new partition in such a case).
- Click N, then click Enter for answering Do you want to use GPT?
- Choose Free Space using up/down keys, then use left/right keys to select New at the bottom. And finally click Enter to create a partition.
- Click Enter to select Primary, then click Enter to select the Size. You can edit the size if you don’t want to create a partition of all free space.
- Click Enter again while Bootable is highlighted to make it bootable.
- Use left/right keys to highlight Write, then click Enter. You may get a confirmation message: type “yes” (without quotes) and hit Enter key.
- Use left/right keys to highlight Quit, then click Enter to continue.


Part 3 – Now install Bliss OS
Either you’ve a ready-to-use partition for installing Android on PC or you’d have created it in the last section. Either way, you can now install Bliss OS.
- Choose the partition where you need to install Bliss OS, click Enter.
- Use up/down keys to choose Ext4, click Enter to format the partition. If you get a confirmation dialog, click Y, then press Enter to format it.
- Use left/right keys to choose Yes, then click Enter to install GRUB.
- Click Enter while No is highlighted to install /system as read-only.
- Congrats! Bliss OS is installed. Click Enter to enjoy Android on PC.


Part 4 – Start using Bliss OS
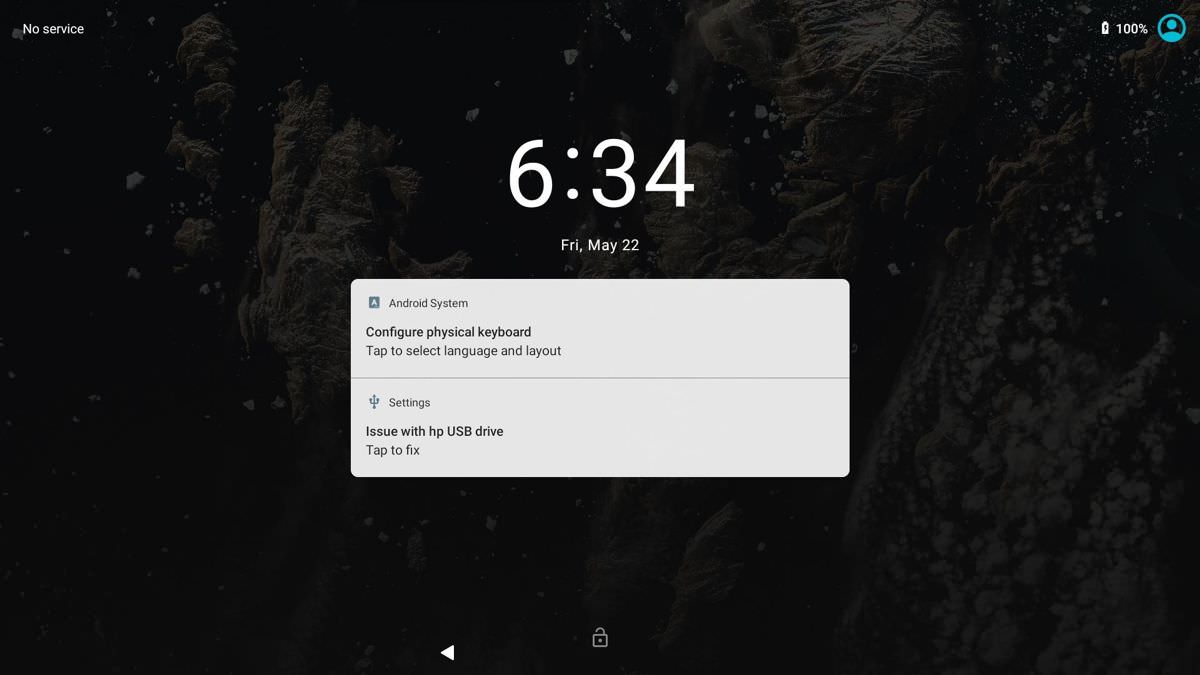
When Bliss OS is launched for the first time, it shows you a beautiful lock screen — just like Android. You can swipe up using the mouse/touchpad to unlock the screen. Then, it will ask you to Select a Home app.
I’ll suggest picking Desktop Mode since it provides a home screen with a taskbar at the bottom.
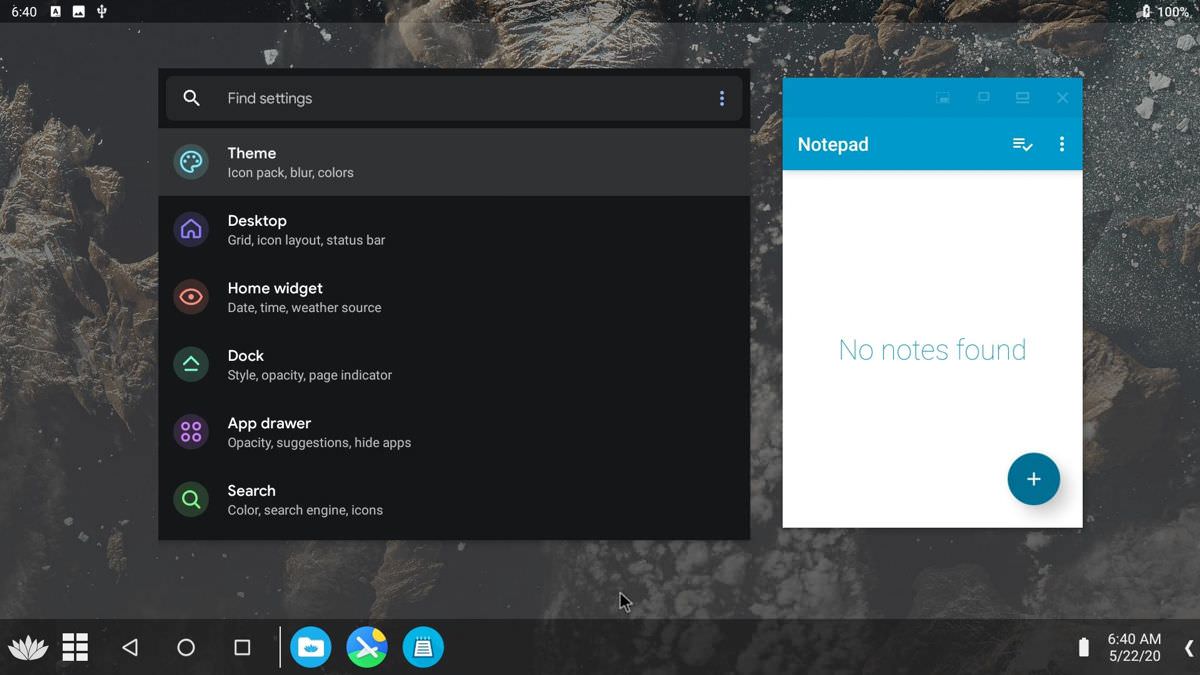
Finally, you’ll see the home screen with a taskbar, unlike Android, if you select Desktop Mode. Upon clicking Bliss icon in the bottom-right, you’ll see the app menu along with a search bar, somewhat like Windows’s Start menu.
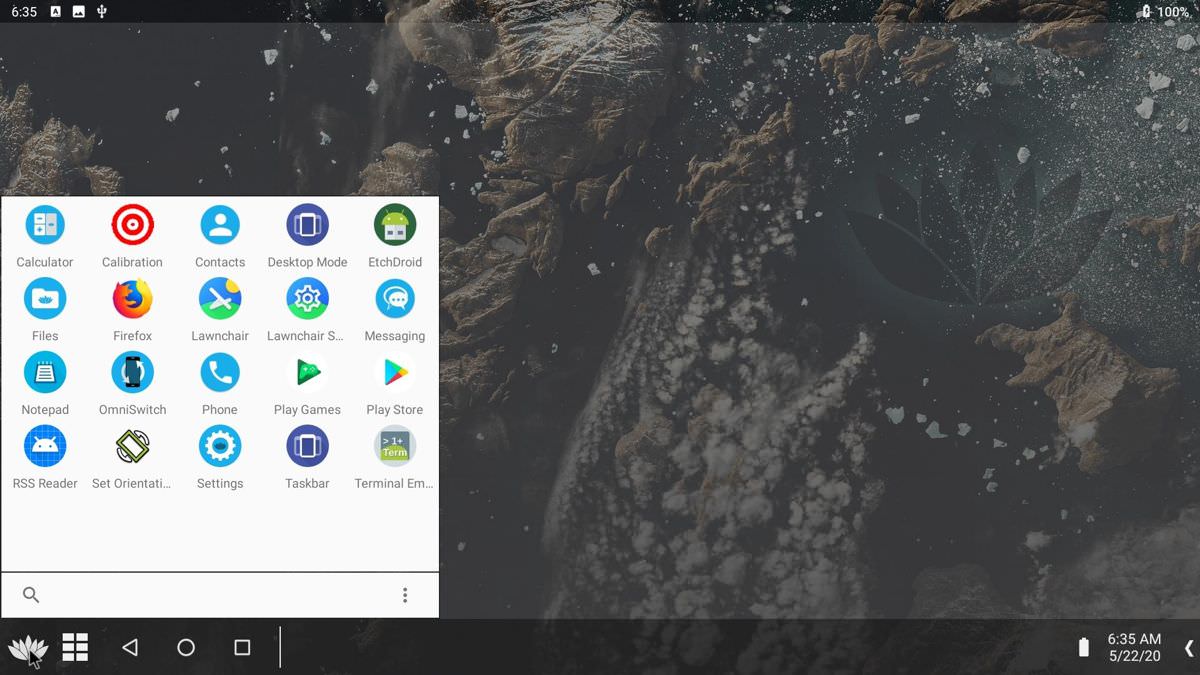
Bliss OS is superb, thanks to features like Android 10’s Desktop Mode. The best catch is its support for multitasking — running apps side-by-side. For instance, you can open Settings along with Notes (as shown in the screenshot). Or you can finalize your presentation or take notes while watching the latest news.
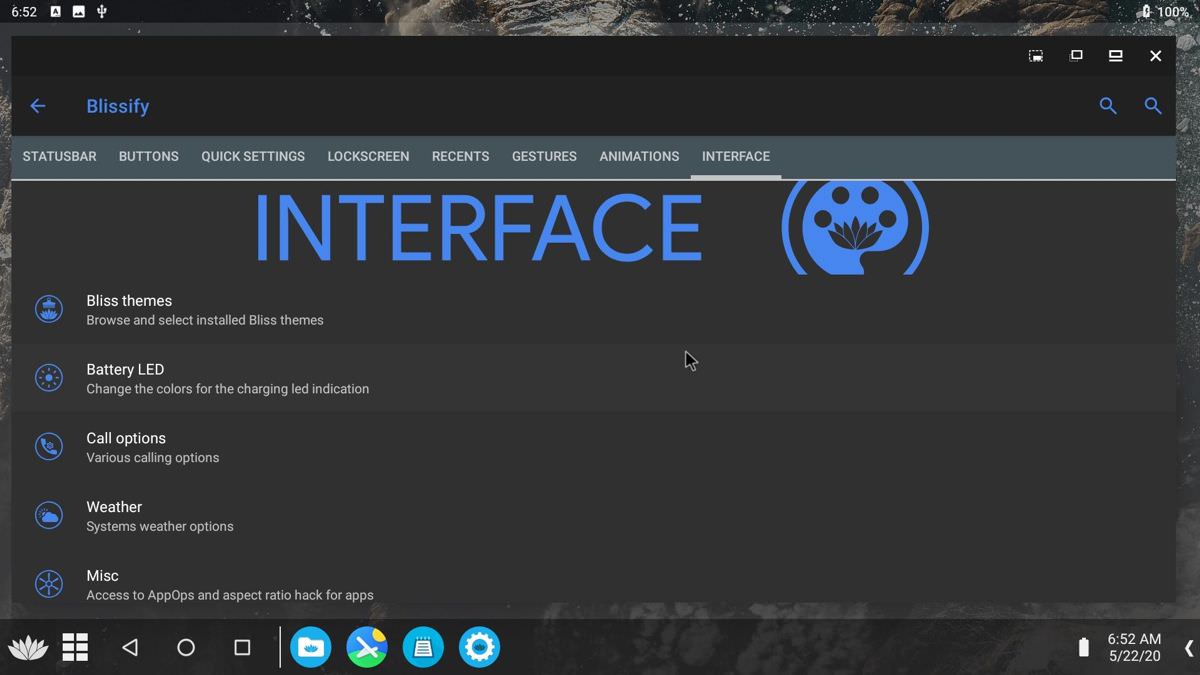
Also, it packs a whole lot of customization features, which are borrowed from Bliss ROMs. You can find such options under Settings > Blissify, where you will see the customization options categorized under tabs.
You can change the look & feel of the lock and recents screen and status bar or the whole interface.
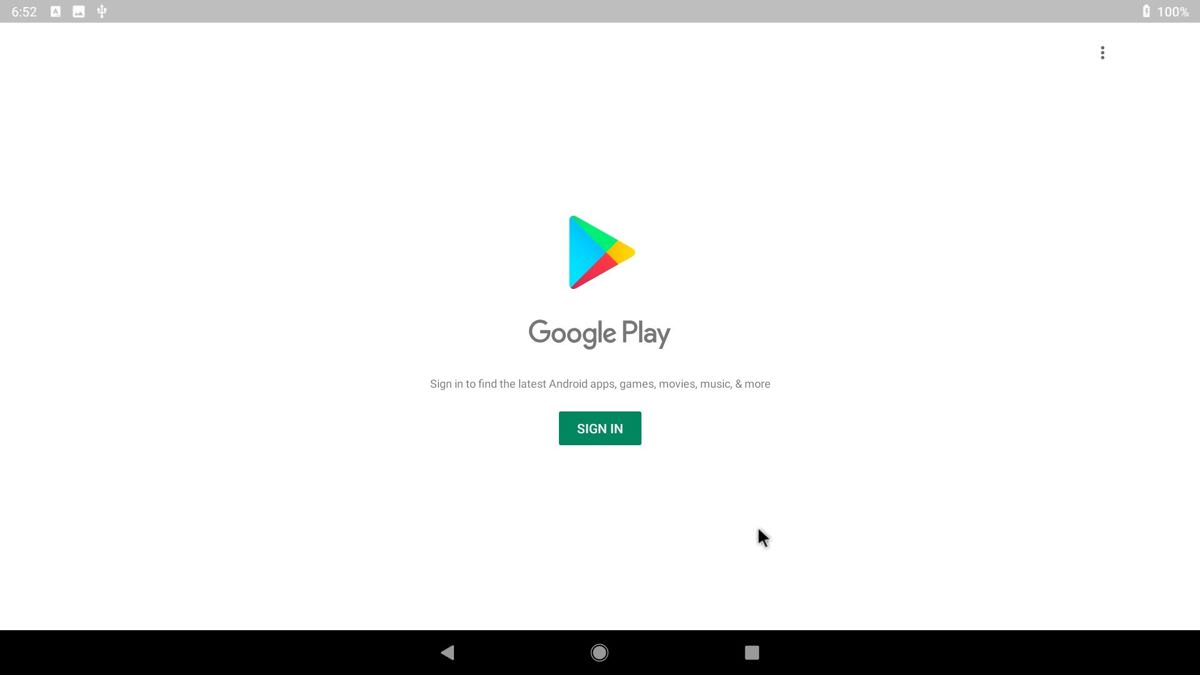
Finally, Bliss OS also supports the Google Play Store — the biggest and safest app store for Android. Moreover, it comes installed with the Play Store. So, you can just launch the app, sign in to your Google Account, and start downloading your favorite apps and games.
That’s the most exciting part of Bliss OS, agree?