Navigating the New Windows 8 User Interface
Note: This post was first published on the Apr 20, 2012.
Microsoft has unveiled the new Windows 8 operating system, featuring a redesigned interface tailored for touch rather than traditional clicks. This significant shift introduces a quicker system and a fresh, tile-based Metro Start screen. If you’ve been accustomed to a desktop filled with folders, the new design might seem daunting. We’re here to guide you through customizing this innovative interface to suit your personal preferences.
This guide will first cover the notable changes in Windows 8. We’ll then walk you through basic customizations to make the Metro Start screen feel like home.
Exploring the New Features of Windows 8
In Windows 8, you’ll find that many apps require you to be logged in with your Windows Live ID, and Internet Explorer now operates in two distinct modes. Let’s begin by examining the revamped ‘Settings’ page, which showcases a fresh interface design.
1. Navigating the Metro Start Page
From any page or app, simply hover your mouse over the right side of the screen to access your Charms menu. This elusive toolbar provides shortcuts to essential features like the ‘Start’ page, ‘Devices’, ‘Settings’, ‘Share’, and ‘Search’. Alternatively, pressing the Windows key + C will also reveal the Charms menu.
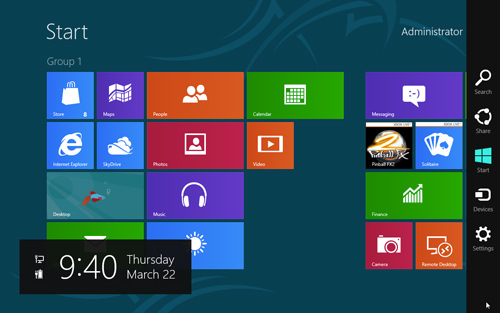
Hovering over the left side of your screen will display a preview bar showing your currently running apps and the Start page.
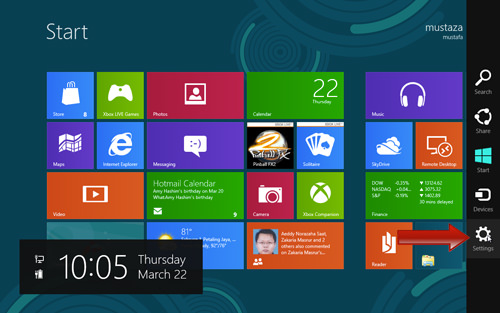
2. Logging in with Your Windows Live ID
Most apps on Windows 8 require a Windows Live ID for access. If you’re not logged in with your Live ID, attempting to open an app may result in an error message.

To link your Live ID, navigate to the Charms menu by hovering over the right side of your screen and clicking on ‘Settings’.
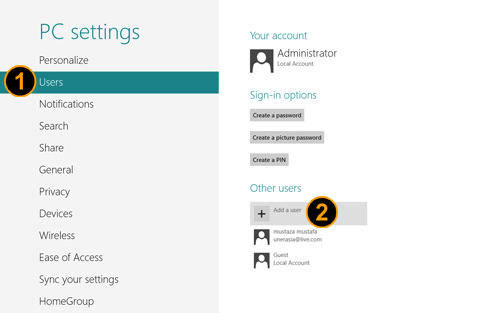
Click the ‘More PC Settings’ button located at the bottom of the Charms menu.
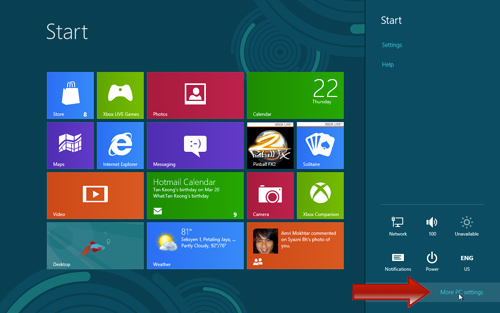
In the ‘Users’ section of the settings, click on ‘Add a user’.
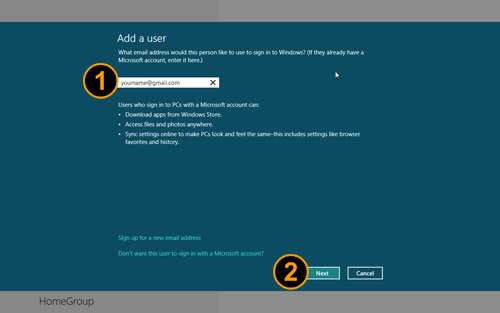
Enter your Live ID and follow the prompts to add it to your system.
Once you’ve added your Live ID, log out and then log back in with your new user ID to fully integrate the changes.

By using a Live ID, you’ll gain full access to all Windows 8 apps, SkyDrive, and the ability to download more applications from the Windows App Store.
Personalizing Your Metro Start Screen
The Metro Start page is now the central hub of Windows 8, offering numerous customization options to tailor its appearance to your liking.
1. Personalize Your Metro Start Screen
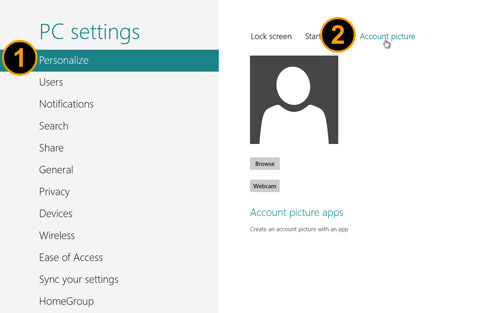
To alter the look of your Metro Start page, navigate to the Charms menu on the right and select ‘Settings’, then ‘Personalize’.
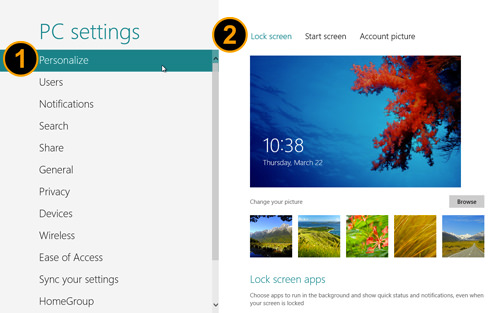
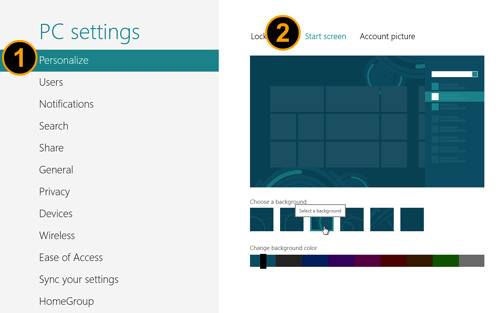
Here, you can modify your Lock screen or switch tabs to customize your Start screen’s appearance.
Additionally, update your account picture by going to ‘Account picture’ and uploading a new image or avatar.
2. Organizing Tiles by Groups
You can organize all tiles on your Start screen by categories such as ‘Social’, ‘Utilities’, ‘Internet’, and ‘Games’. To reposition a tile, click and drag it to a new location or to join another group.
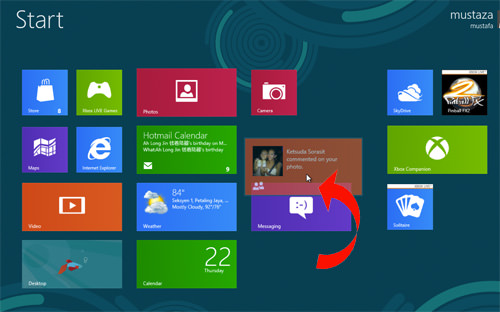
To create a new group, drag a tile to an empty area; a new group will form automatically.
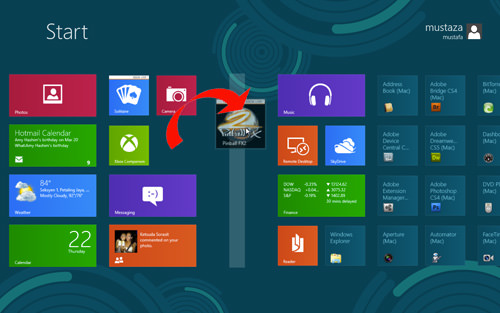
You can also adjust the size of each tile to display as either a rectangle or square. Right-click on a tile and select ‘Larger’ to change its shape.

3. Naming Tile Groups
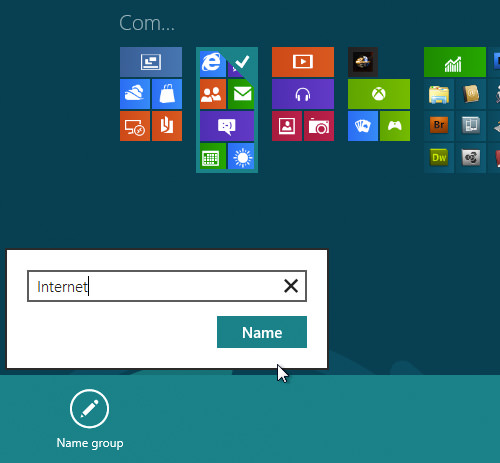
For easier navigation, you can rename any group of tiles. Hover over the bottom right corner of the screen and click the magnifying glass icon to minimize the Metro Start page view.

Right-click on the tile group you wish to name, and an option will appear at the bottom of the screen. Click on ‘Name group’ and type your preferred name.
4. Adding and Removing Apps from the Metro Start Screen
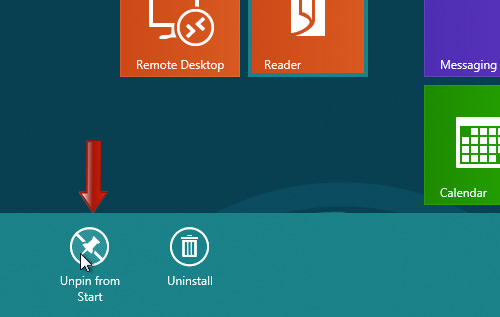
To remove a tile from your Start screen, right-click on it and select ‘Unpin from Start’.
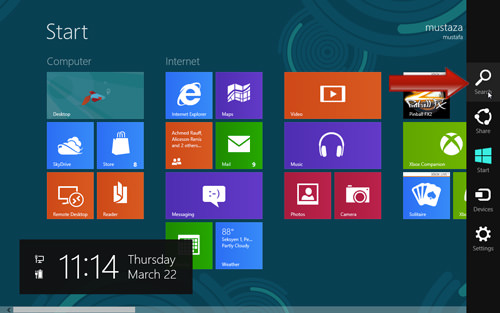
To add a new app shortcut to the Start screen, hover your mouse over the Charm menu and click on ‘Search’.
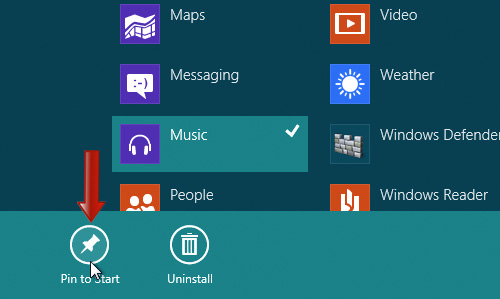
In the app listing page, right-click on an app to view options and select ‘Pin to Start’ to add it as a tile on your Start screen.
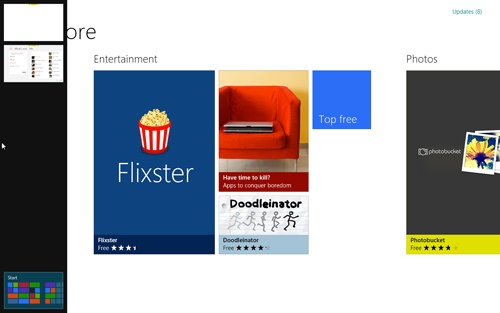
Exploring the Windows (App) Store
Windows 8 makes it more enjoyable and straightforward to enhance your computing experience. Simply click on the ‘Store’ tile from the Start page to begin exploring and acquiring new apps, whether free or paid.

Within the Store, you can scroll through various apps, easily finding something that catches your eye. Whether you wish to purchase an app or download one for free, the process is user-friendly and quick.

Conclusion
With just a few simple modifications, you can tailor your Metro Start screen to suit your preferences. While the customization options may currently seem limited, as the product evolves, expect to discover even more ways to personalize your Windows 8 experience effectively.