How to Free Up Hard Disk Space Without Deleting Anything
I once wanted to install a 9GB game on my 20GB system drive with just 1GB free space (was the requirement of the game). With little to no room for deleting any data, I had to look for ways to free up space on my C drive that doesn’t involve deleting important data. With a few hours of tinkering, I managed to free up 13GB of space without deleting even a single important file.
System drive (C drive usually) has many system files/folders such as temporary files, app data, libraries, etc. that can increase in size as you use your PC; eventually taking up all the space. You can move such files and folders to another drive to make space in your system drive.
So, in this post, I’ll show you how to move large system files/folders to another drive and make them usable from there, and get rid of unnecessary data or features to free up space.
Read Also: How to Delete Your Digital Footprint Completely
1. Decrease or delete hiberfil.sys file size
If you open hidden files on the C drive, you would see a huge file named hiberfil.sys. This file is used by the hibernate feature of Windows to move all the processes from RAM to this file when you put your PC on hibernate mode. The file size is equal to 75% of your total RAM installed.
Therefore, if you have 16GB of RAM, then hiberfil.sys size would be 12GB. Thankfully you can either decrease or delete hiberfil.sys file to free up space on the system drive, here’s how to do it:
Decrease hiberfil.sys
If you don’t always have loads of processes open before using hibernate mode, then you can decrease hiberfil.sys size to free up space. The 75% threshold is only there to ensure you are able to use hibernate feature even when almost all of the RAM is filled with active processes. However, most people can survive on 50% hiberfil.sys size as well.
To decrease hiberfil size, you first need to open an elevated command prompt window.
- In Windows 7 and below, open start menu and go to All Program.
- Here right-click on Command Prompt shortcut and select Run as administrator from the context menu.
- Windows 8 and 10 users can press Windows + X keys and select Command Prompt (Admin) from the list.
In the command prompt, enter the below command and hit enter: powercfg -h -size 50
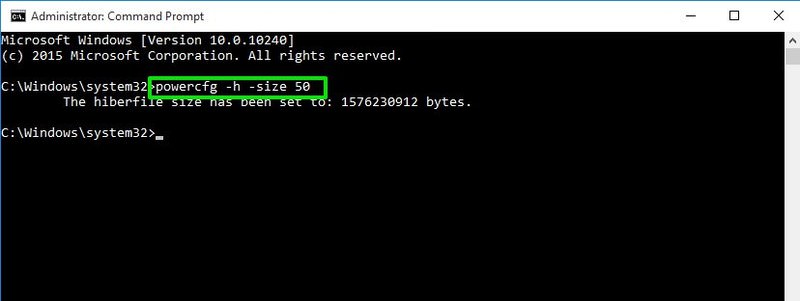
This will decrease the hiberfil.sys size to 50% of your RAM. You can replace 50 with any number you like, but it must be below 75 and above 50 (you can’t choose below 50).
Delete hiberfil.sys File
If you don’t use the hibernate feature of Windows, then you can simply turn it off and claim all the space hiberfil.sys file was taking. To do so, open elevated command prompt window again and enter the below-mentioned command: powercfg -h off
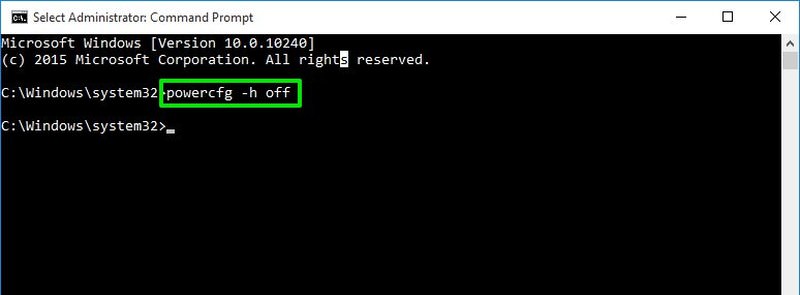
This will turn off the hibernate feature. You can easily turn it back on if needed by using the command powercfg -h on
2. Move Pagefile.sys file to another drive
Pagefile is the virtual memory that Windows uses to allocate some of the processes in the RAM. Pagefile is crucial for the proper working of your system as it keeps the RAM free by saving passive program processes on the hard disk.
However, it’s size is almost as big as your actual RAM and sometimes even double the size of physical RAM. So if you have 8G or 16GB of RAM, then the pagefile.sys file will also be near that size.
On top of that, pagefile.sys also resides on the system drive by default, i.e. in the C drive. Thankfully you can easily move pagefile.sys to another drive with more space to free up space on the system drive. Here is how to do it:
- Press Windows + R keys and type
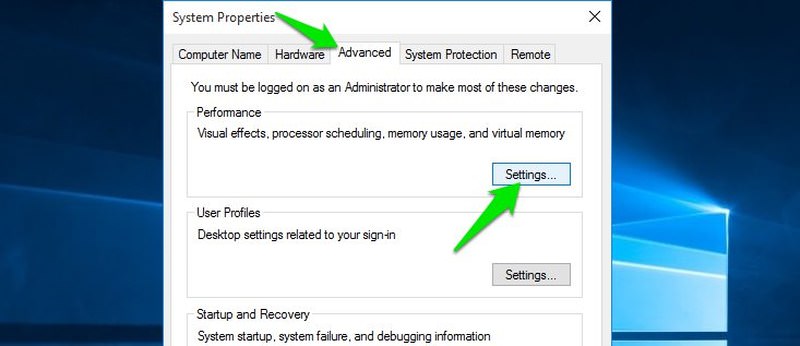
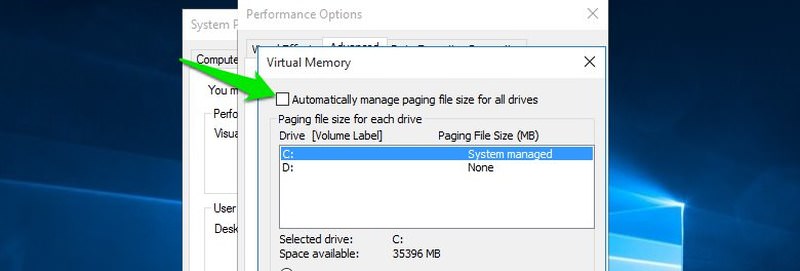
sysdm.cplin the RUN dialog to open System Properties. - Here move to the Advanced tab and click on Settings under Performance.
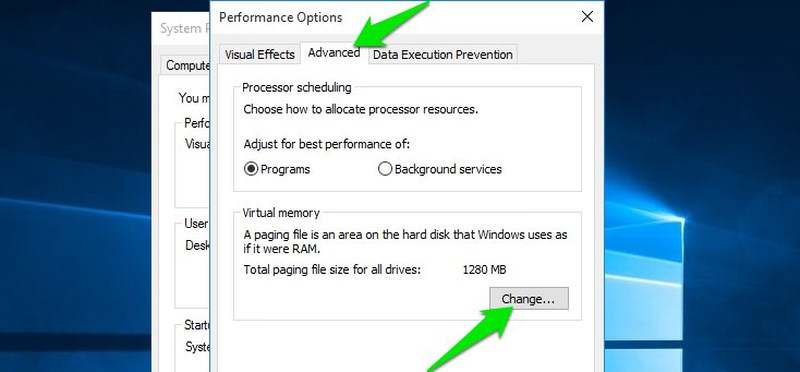
- Move to Advanced tab here as well and click on Change.
- Uncheck the option "Automatically manage paging file size for all drives" option and you’ll be able to edit the options below it.
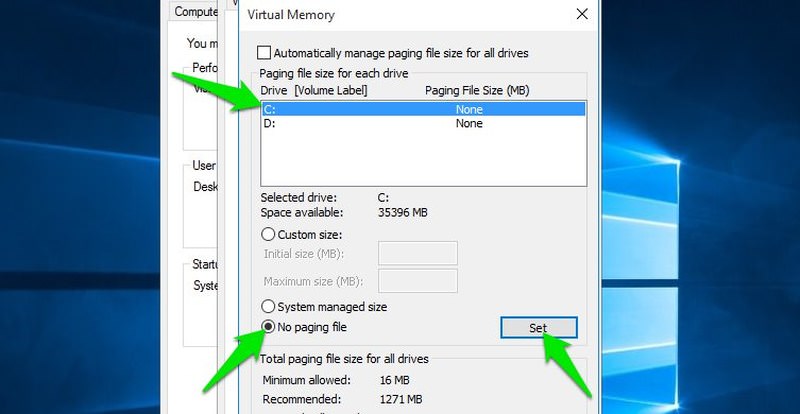
- Select C drive here and then select No paging file below.
- Now click on Set next to it to turn off pagefile.sys on the C drive.
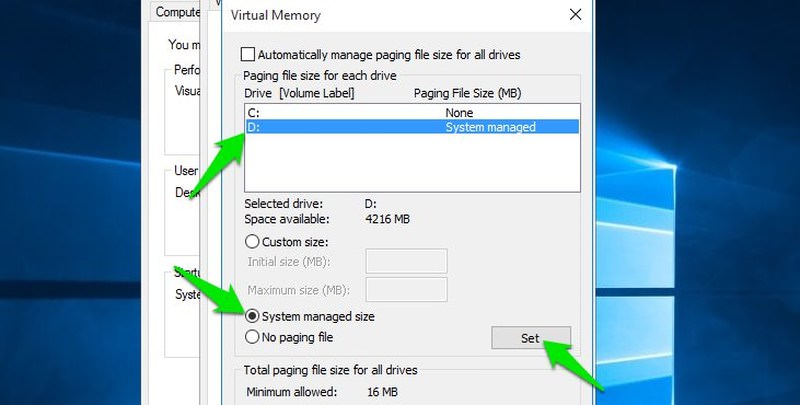
- After that click on the drive where you want to move the pagefile.sys and select System managed size under it.
- Simply click on Set again and pagefile.sys will be moved to the chosen. You will have to restart the PC to let this change take effect.
Note: If you didn’t gain any space after restarting the PC, then go to C drive and unhide hidden files. You should see the pagefile.sys here, just delete it like you normally delete a file and it will be removed.
3. Compress all the data
Many people don’t know that Windows has a built-in compression tool that can compress content inside your NTFS formatted drives. You can either compress specific folders or even the whole drive to save space. Best of all, you can still use the compressed data like you normally do without any errors or special configurations.
The trade-off here is that every time you will access a file or program, it needs to be decompressed before opening; which can be both good or a bad thing depending on your PC specs.
When you will launch a compressed program/file, your CPU will quickly decompress it and load it into RAM (should take less than 1-3 seconds). If you have a powerful CPU, then this process will be faster as well. At the same time, the compressed program/file will load faster in the RAM as it has a smaller size now.
Therefore, if you have a strong CPU but slower storage device (preferably hard drive), then the compression may speed up opening time. However, if it’s the other way around, then it may take an extra second or two to open a file.
Like I said before, you can either compress specific folders or the whole drive, but I will not recommend you to compress the whole system drive. As C drive also contains system files (Windows), it may inversely affect the performance of Windows. So it’s better to only compress specific data inside it. Of course, you can compress other drives that don’t have an operating system inside.
To compress a folder/drive, right-click on it and select Properties. Under the General tab, click on the Advanced button and then check the checkbox next to Compress contents to save disk space.
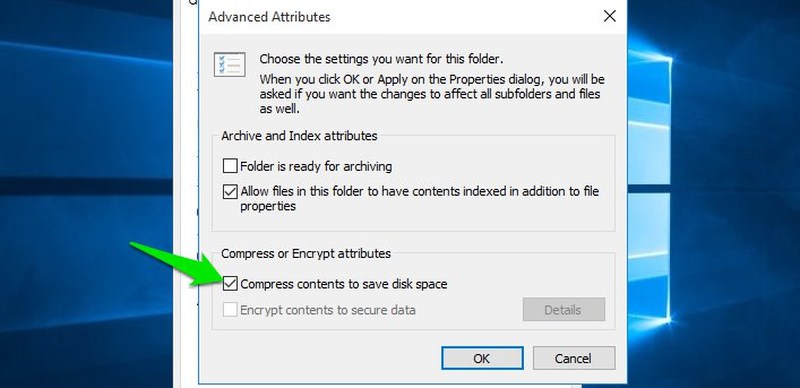
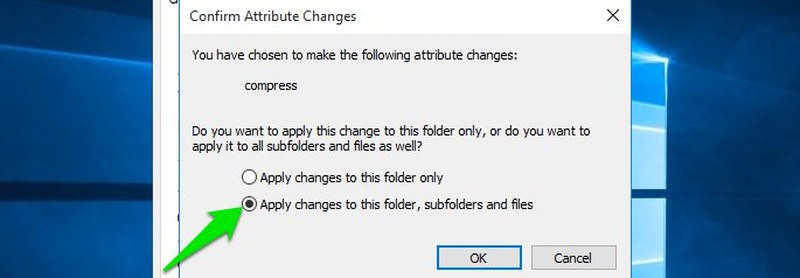
- Now click on OK and Apply the settings. You will be asked whether all the contents of the folder should be changed or only the selected folder.
- Here select Apply changes to this folder, subfolders, and files.
Depending on the size of data, it may take few minutes to compress all the data (may take hours for full drive compression).
The folder color will turn blue indicating it is compressed. If you see any performance decrease that you are not comfortable with, then go through the same process again and uncheck the option Compress contents to save disk space to decompress the folder.
In my case, I decreased the size of my Program Files folder from 1GB to 744MB without any noticeable loss in performance. That’s almost 250MB of free space. However, your mileage may vary as it still depends on the content type and whether it is already compressed or not.

4. Decrease Recycle Bin size
Deleting unrequired content inside the recycle bin is important to ensure you gain space for the deleted items. However, you can also decrease the size of the recycle bin storage for system drive to ensure you don’t have too much data hanging around in the recycle bin.
Here is how to do it:
- Right-click on recycle bin and select Properties.
- Select C drive here and enter the amount of allocated storage under the Custom size option.
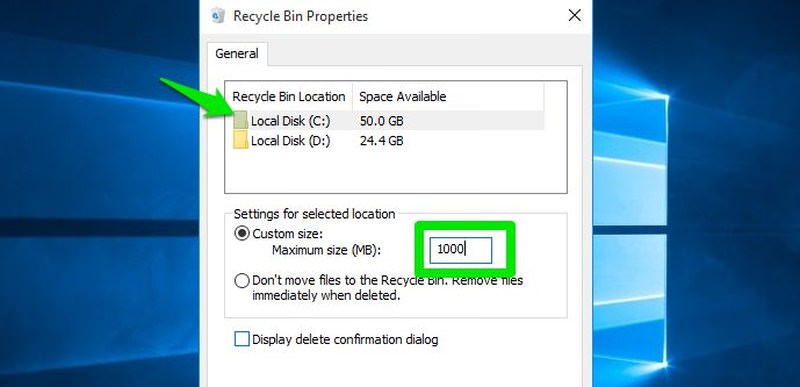
Usually, 1-2GB space is enough to keep recycle bin working while using less space.
5. Move User Libraries
Your user account libraries are stored on the C drive by default. Folders such as My Documents, My Pictures, My Videos, Contacts, Desktop, etc. all are on the C drive. Of course, these folders usually contain a lot of data that you may not mind moving to another drive.
However, directly moving these folders to another drive will have a negative effect on programs using them, such a desktop. Thankfully, there is a way to move these folders to another drive while letting Windows and other program manage them from the new location.
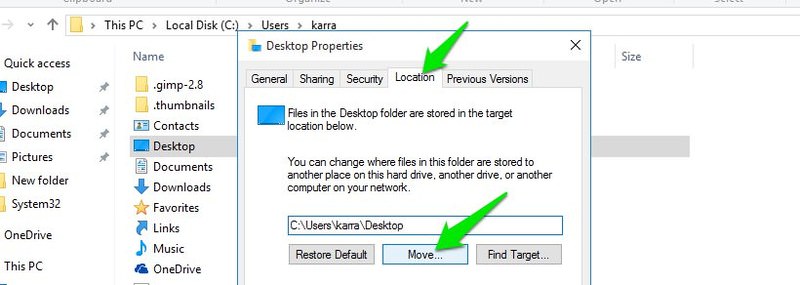
- Right-click on the folder and select Properties from the menu.
- Here move to Location tab and click on Move.
- Just select a new location on another drive where you want to move this folder and it will be moved.
Repeat the above process for all the libraries to move them as well. I will recommend you to create a folder with the name of your user name and move all these folders there. This way it will be easier to manage them.
Note: The App data folder inside your username can’t be moved like this. However, you should not move this folder anyway as it may break some apps.
6. Move TEMP and TMP folders
TEMP and TMP are the two folders in system drive where all the temporary data of Windows and programs is stored. The data inside these folders is usually temporary and can be deleted to regain space without major drawbacks.
However, I don’t find this as a reliable solution as sooner or later these folders are going to fill up again with data. And you also need to have enough free space available all the time that the programs could create temporary data again.
A permanent solution to this problem would be to move these two folders to another drive with more storage. However, you cannot move them the usual way as programs and Windows need to know where the folders are.
Here is how to move them:
- First, go to the drive where you want to move these folders and create two new folders. Name one as TEMP and other as TMP.
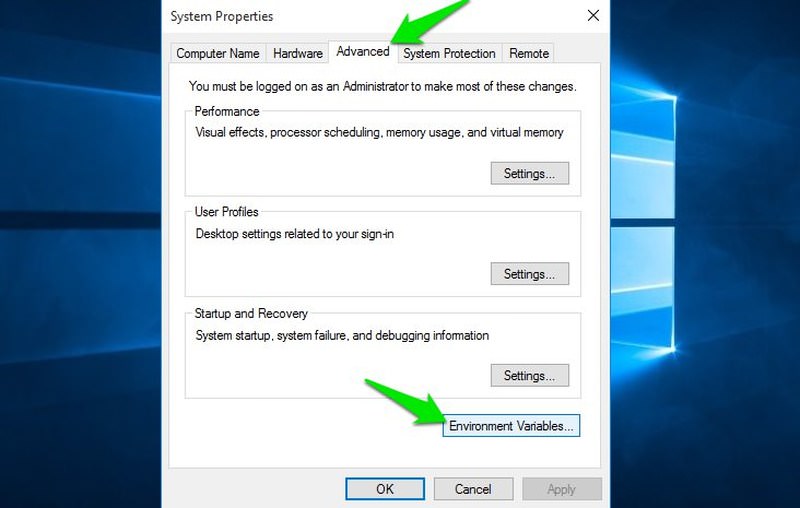
- After that press Window + R and type
sysdm.cplin the Run dialog. - In the system properties, move to Advanced tab and click on the Environment Variables button below.
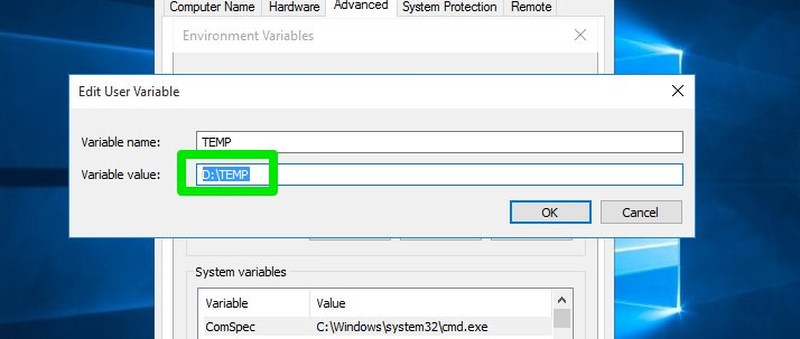
- You will find both TEMP and TMP variables in the User variables section.
- Click on TEMP and then click on Edit option below it.
- Here you need to enter the new location in the Variable value field.
- Go to the TEMP folder you created earlier in the new location and copy its location from the above address bar.
- Paste the location here and click on OK.
- Do the same for TMP variable, but copy/paste the location of new TMP folder you created instead.

Your system will now read and write temporary files to the newly created folder instead of the folder in the system drive. However, you should delete all the previous data in the TEMP and TMP folder on the system drive to free up space.
7. Delete duplicate files
Duplicate files are unnecessary files that could build up over time due to bad copy/pasting, backups and multiple installations of programs. These files are usually useless and can be safely deleted. Here is how to delete them:
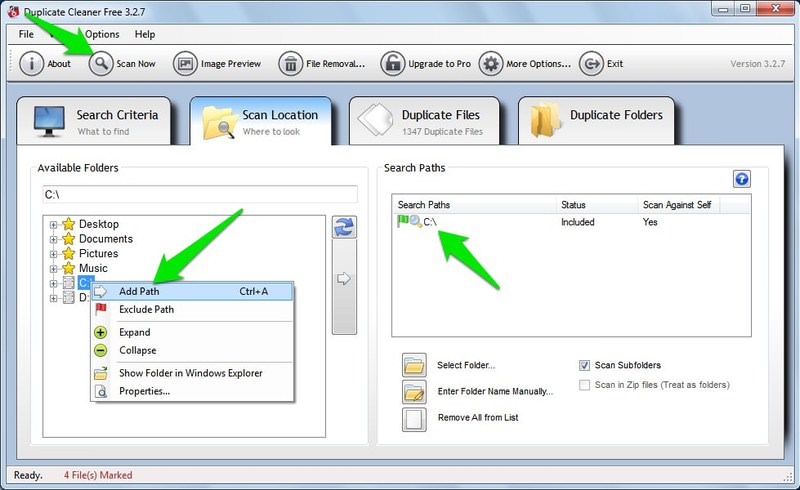
For this purpose, Duplicate Cleaner’s free version is a good tool to both find and delete duplicate files. Download and install the tool and launch it.
- Move to the Select Location tab and right-click on C drive.
- Now click on Add Path and then click on Scan Now button at the top to start the scan.
Once the scan finishes, the tool will show you all the duplicate files and the total space they are taking. Here do not select all the files and delete them as some of the files may be similar but are different files. Go through all the files and make sure they are actual duplicates.
After that click on File Removal button above to delete all the selected files.

8. Delete unnecessary files
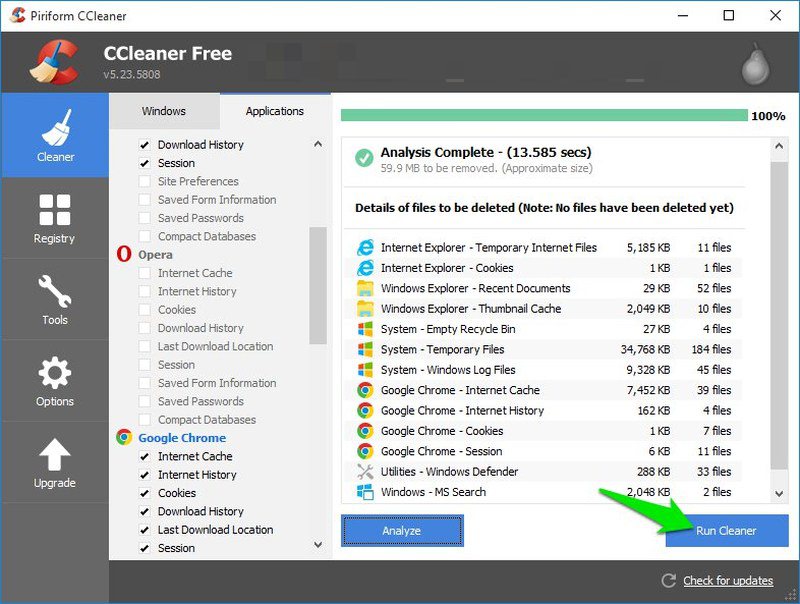
I am not going to ask you to delete programs and files that are not useful to you anymore or you use less frequently, but deleting data that isn’t necessary is a good way to free up some space. You can use a good PC cleaning tool to quickly delete unrequired data and free up space. For this purpose, CCleaner is a reliable tool that can help free up GBs of space.
Just install CCleaner and run a quick scan by clicking on Analyze button. It will show you all the unnecessary data that can be deleted. Check this data to ensure nothing important is there, and then click on Run Cleaner button to delete the data.
Read Also: 5 CCleaner Tips and How to Use It Efficiently
Note: CCleaner also deletes data of your browser. If you don’t want to delete internet history, cookies, cache and other handy data, then uncheck these options before scanning.
Final thoughts
Moving pagefile.sys and compressing most of the data inside C drive helped me free up the most space in system drive. However, other methods mentioned here will also help free up space and keep it free in the future as well. Do let us know in the comments if you know any other methods to free up space in C drive.