How to Back Up All Your iMessage History
We all have cherished chats and memories in our iMessage. But what happens if they suddenly disappear? While iCloud can save our chats, it’s not the best for digging up old messages or photos. If you’ve ever spent ages trying to find an old conversation or image, you’re not alone. Thankfully, there are better ways to save and manage our iMessages.
In this post, we’ll introduce you to two methods: one using a third-party app and the other using the Mac’s Terminal. The latter method is a bit technical, so it’ll require some know-how, but don’t worry, we’ll guide you through it!
Method 1: iMazing
iMazing is a third-party app, and among the methods we’ll present, it offers the simplest way to back up your iMessage chat history. This app allows you to save your iPhone messages to your computer or even transfer them to a new phone. But it’s not limited to just texts; you can also archive pictures, videos, and other items from your chats.
What’s impressive is that you can view all your messages – be they regular texts, MMS, or iMessages – directly on your computer, whether it’s a PC or a Mac. You’ll be able to see details such as whether the message was sent, delivered, or read. If you’re transitioning to a new phone, iMazing can assist in transferring all your messages, including those from apps like WhatsApp.
While the app is compatible with both Windows and Mac, fully utilizing its features comes at a price. Regarding the cost, there are three options: $33.99 for one device, $59.99 for three devices, or $64.99 for an unlimited number of devices. If you’re seeking an efficient way to manage your messages, iMazing might be worth considering.
Method 2: iMessager Exporter

The second method is free, but it requires some basic technical skills on your Mac. This process involves using the Terminal to install a tool named iMessage Exporter. Created by ReagentX, this tool allows you to archive various iMessage data, including audio messages, Apple Pay records, edited messages, replies, reactions, and more. While the tool is user-friendly, the initial setup can be a bit challenging.
Here’s a brief guide on how to use “iMessage Exporter” to archive your iMessage conversations. For a more comprehensive tutorial, refer to our previous post about exporting iMessage history on your Mac.
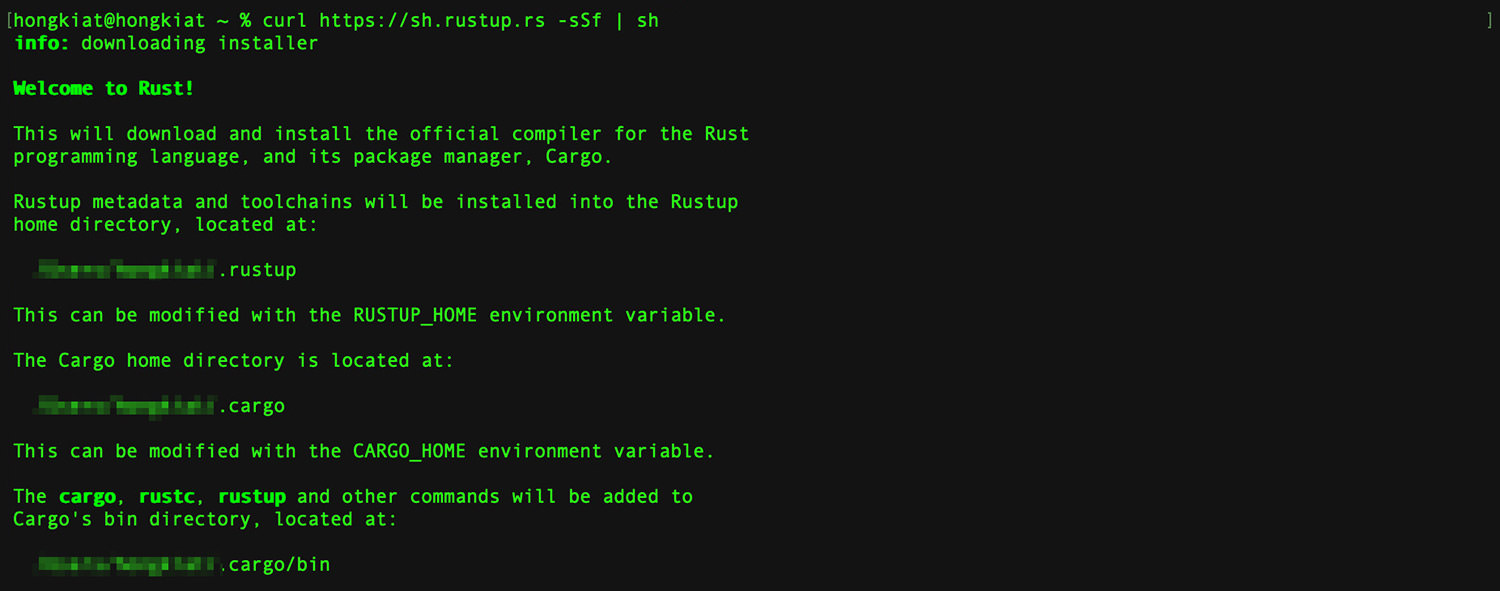
- Open the Terminal on your Mac. To download Rust, enter the following command:
curl https://sh.rustup.rs -sSf | sh - After Rust has been downloaded, press ‘1‘ to proceed with the installation.
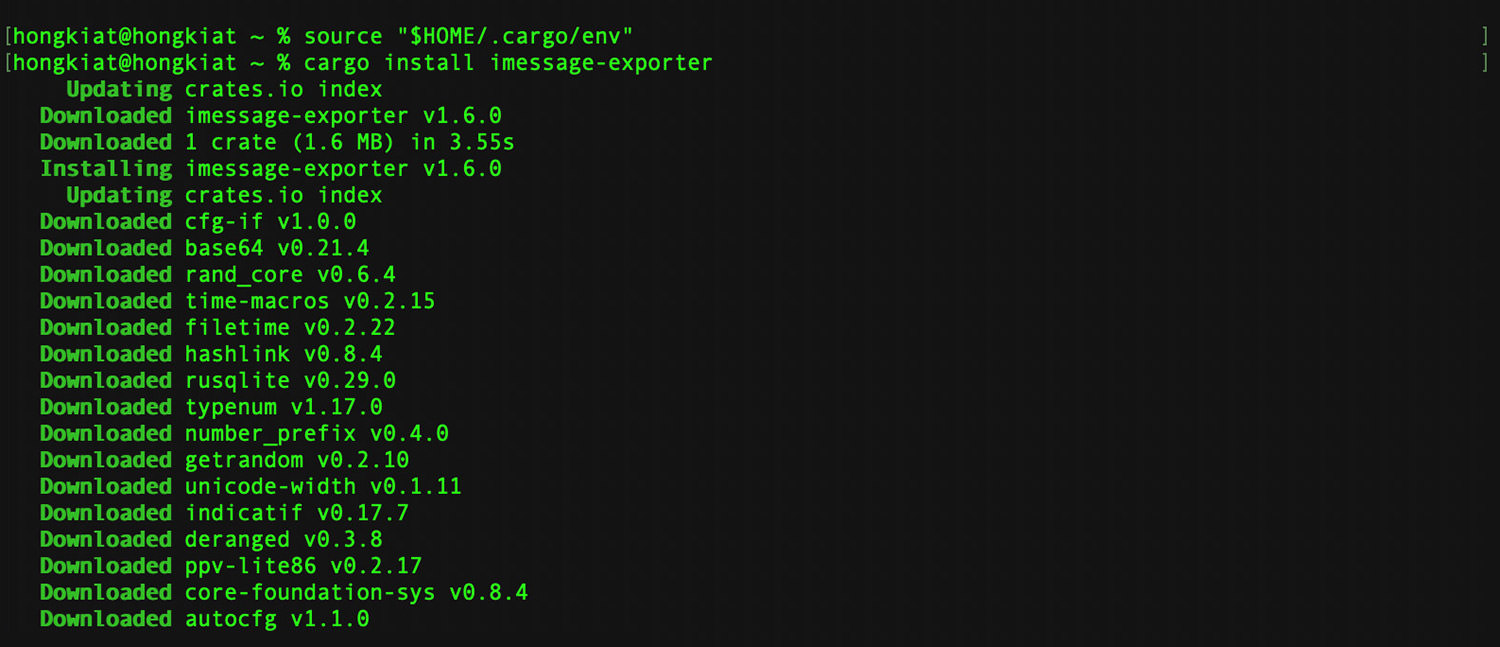
- Once the installation is finished, type the command
source "$HOME/.cargo/env"and press Enter. This will configure your current shell. - To install iMessage Exporter, enter the command:
cargo install imessage-exporter - For security access, navigate to System Preferences > Privacy & Security > Full Disk Access. Find ‘Terminal‘ in the list and enable it to grant full disk reading permissions.
- Return to the Terminal and enter the command
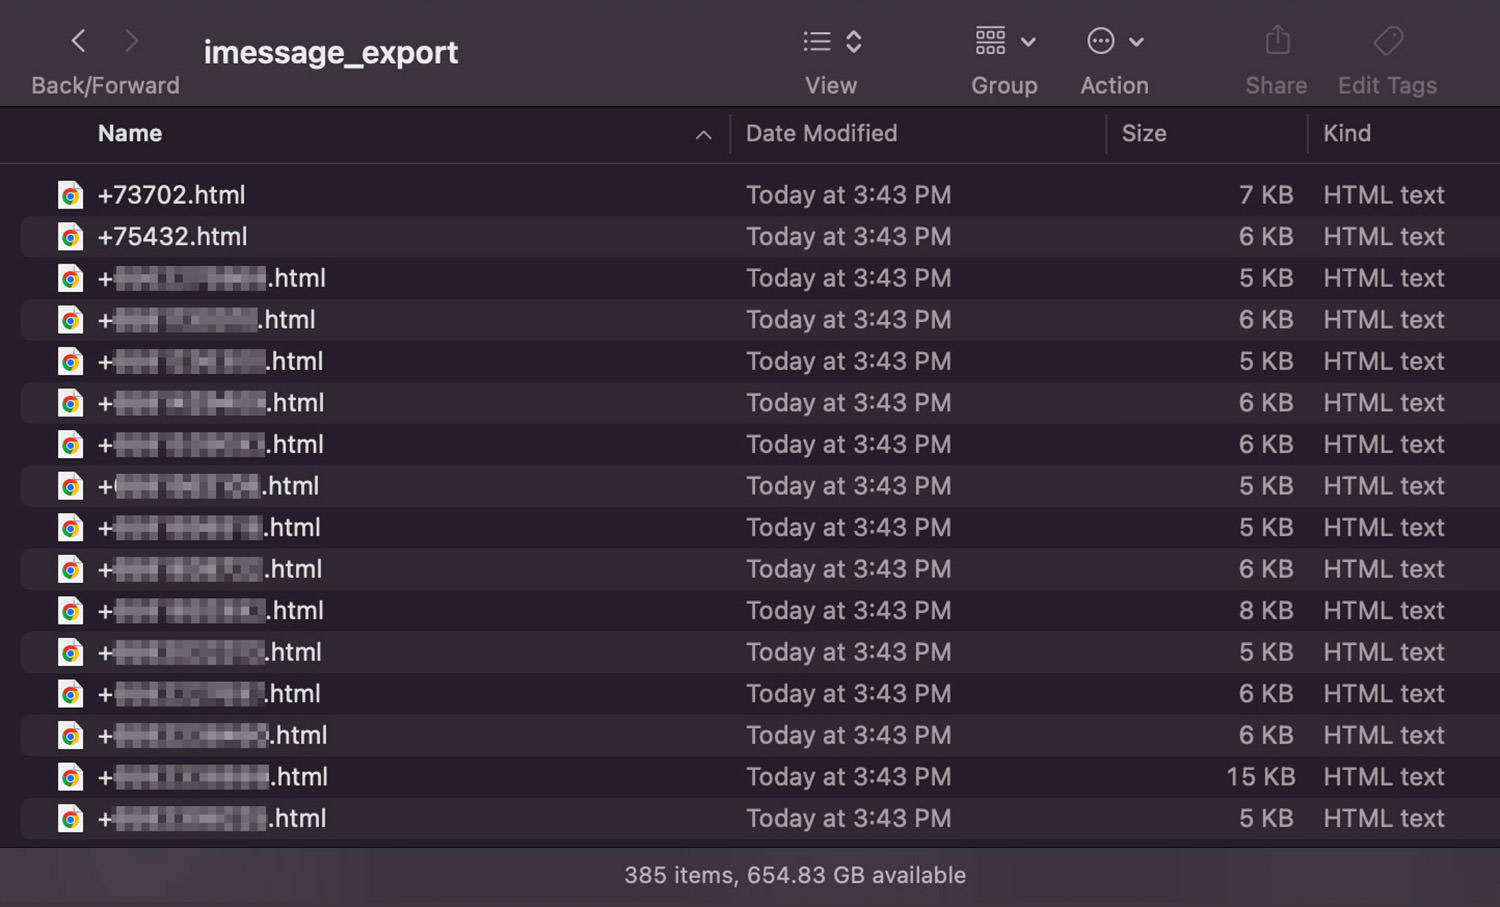
imessage-exporter -f htmlto start exporting your iMessage chats as HTML files. - After the export is complete, open Finder. Use the shortcut Command + Shift + G and enter the path
~/imessage_export. This will take you to the folder containing your exported iMessage chat histories.