How to Export iMessage Chat Histories to Your Mac
Our iMessage chats often hold valuable memories and important conversations. Ensuring they’re safely backed up is crucial, especially if we ever need to revisit them. While there are various methods to export iMessage history, in this post, we’ll zero in on a specific tool: the iMessage Exporter. This free Mac tool is a gem for Mac users, offering a straightforward way to safeguard your iMessage chats.
However, a heads-up: using iMessage Exporter does require a touch of technical know-how with Mac. But don’t worry, we’re here to guide you through the process, ensuring you can easily archive your cherished chat histories.
Read Also: How to Optimize iMessage For More Storage Space
What is iMessage Exporter
If you’re a Mac user with some technical expertise, there’s a tool you might find intriguing. Named iMessage Exporter, it was developed by ReagentX. This tool allows you to save various iMessage contents, from audio messages and Apple Pay records to edited texts, replies, and reactions.
While the tool is user-friendly and straightforward, setting it up using the Terminal does involve a few steps.

Installing and Using iMessage Exporter
Here’s a step-by-step guide on how to isntall and getting iMessage Exporter up and running:
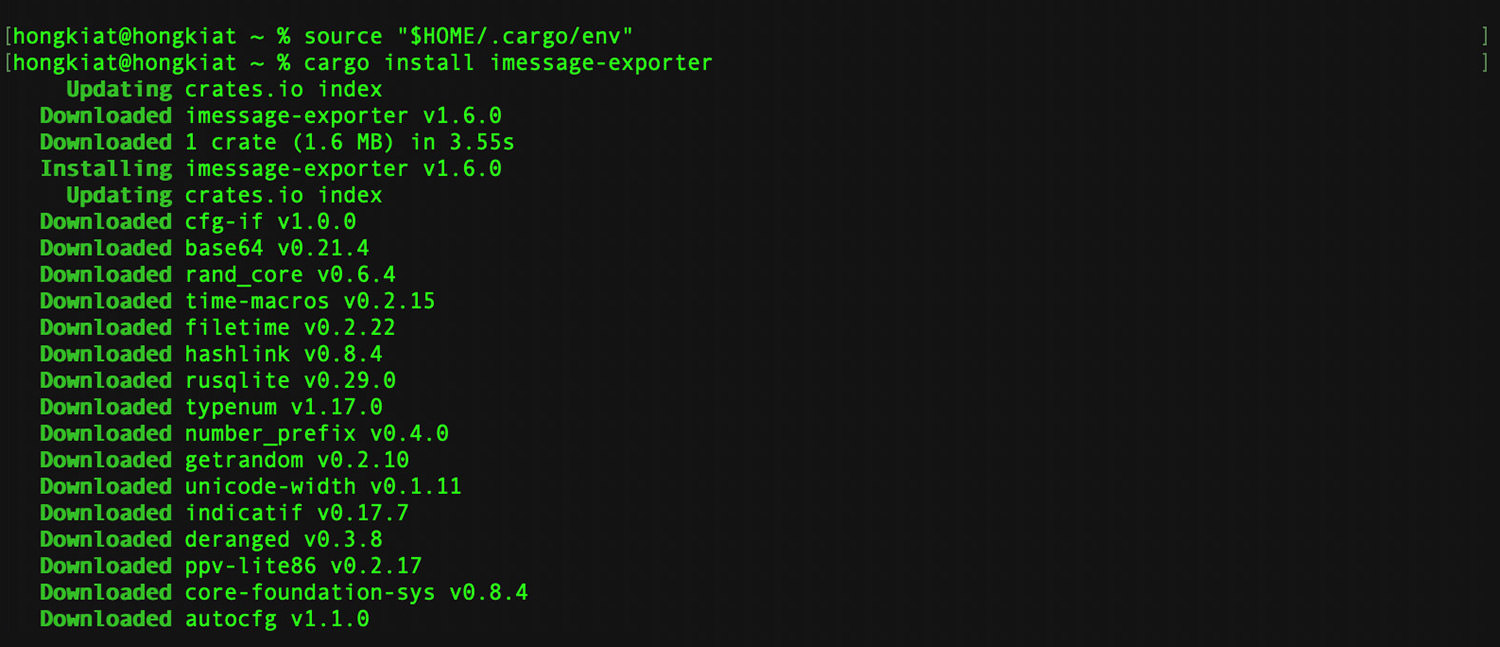
Open Terminal and type in the command below; this will download Rust to your computer.
curl https://sh.rustup.rs -sSf | sh

Once the download is done, you’ll be prompted with 3 options: to proceed with installation, customize installation, or cancel installation. Press ‘1‘ and hit Enter to continue.

Here’s what you will see when Rust is installed:

You will now need to configure your current shell. Use the next command to do that:
source "$HOME/.cargo/env"

You’re now ready to install iMessage Exporter. To install, paste and run this:
cargo install imessage-exporter
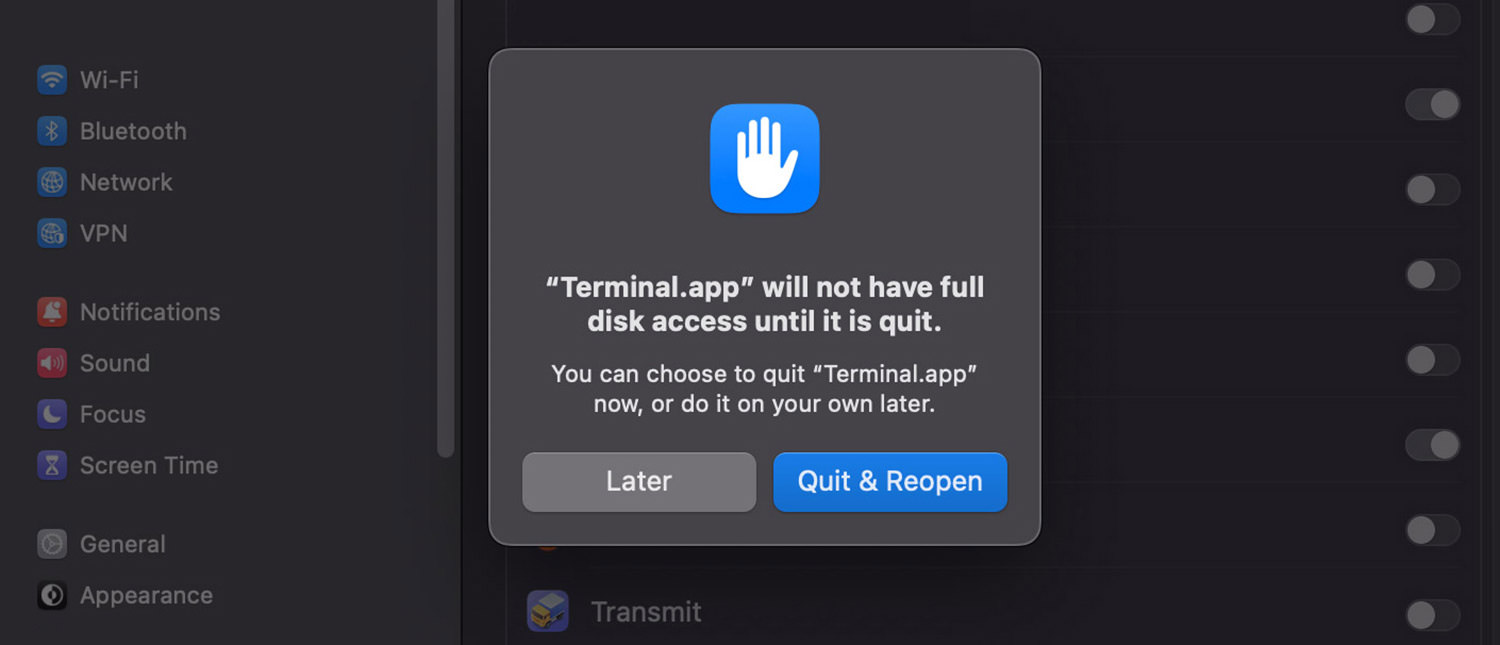
Once iMessage Exporter is installed, you will need to give it permission to run. Go to your Mac’s settings, then navigate to Privacy & Security > Full Disk Access. Find Terminal and turn it on.
To run iMessage Exporter, go back to Terminal and run this command:
imessage-exporter -f html
This will start exporting all your iMessage chats into HTML files.

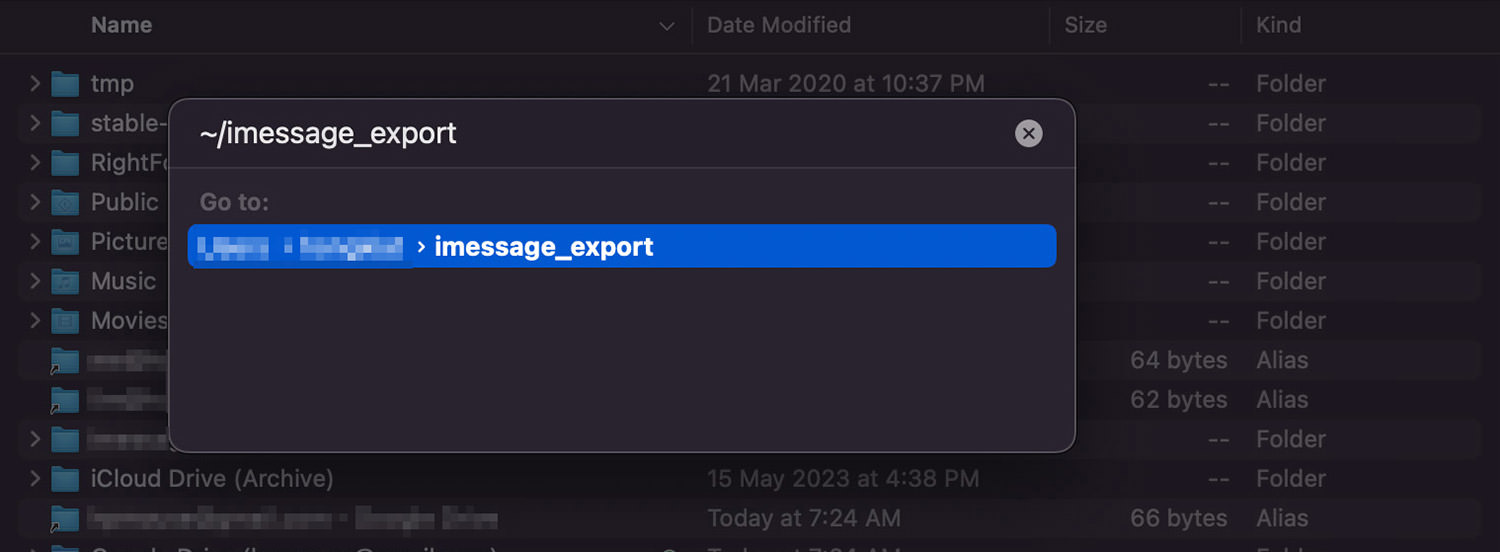
Locating Chat History Files
To locate all the exported files, do the following:
Open a Finder window.
Hit Command + Shift + G and then insert this path: ~/imessage_export and then hit Enter.
This folder will show you a list of exported iMessage chat history, sorted by contacts, in HTML files.
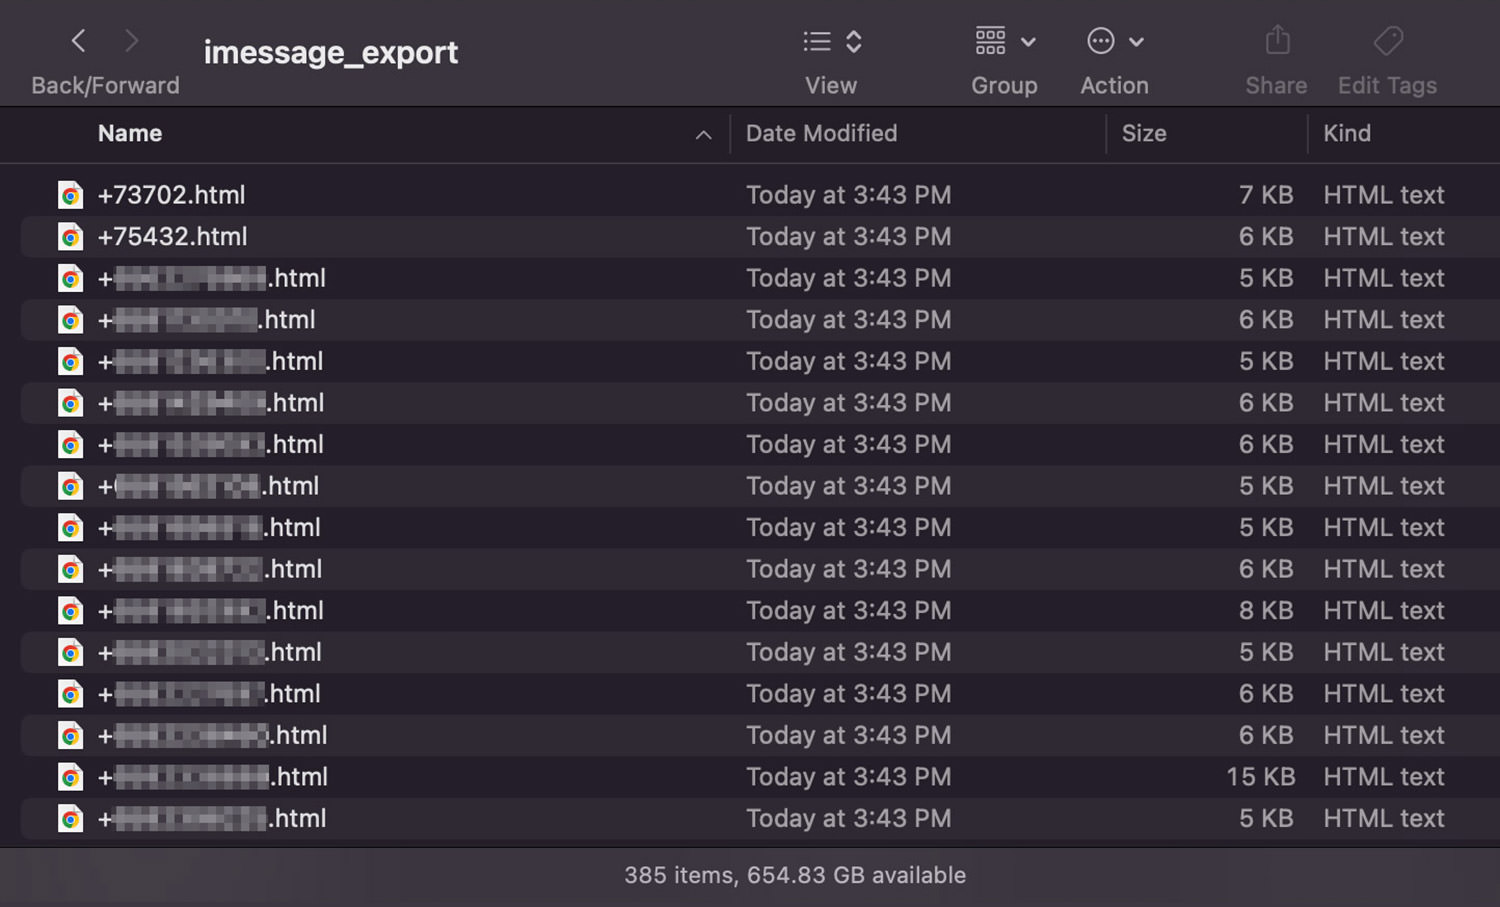
You can go through them one by one, or you can back them up to external drives.
How to Uninstall iMessage Exporter
Last but not least, if you are done with exporting the iMessage chat histories and would like to uninstall iMessage Exporter, here’s how to do it:
- Open Terminal.
- Run the following command:
cargo uninstall imessage-exporter
- That’s it!