Mastering Double-Sided Print and Cut with Cricut
I’ve dedicated a significant amount of time to trying to achiev of double-sided printing and cutting using a Cricut. Despite the abundance of online guides, consistently aligning designs perfectly on both sides during cutting remained a challenge. Therefore, I embarked on my own journey of trial and error and eventually discovered a successful method.
Why choose double-sided printing, you might wonder?
While Cricut’s print and cut feature is generally reliable, the real test comes with projects like double-sided business cards, or thank you cards, where precision in both design alignment and cutting is crucial.
In this guide, I’ll lead you through the steps to create a double-sided thank you card with designs on both sides. We’ll start by creating the design, then move on to importing it into Cricut Design Space, and finally, print and cut it with as close to perfect alignment as possible.
Setting Up Your Design
Start by launching Cricut Design Space. Select "Shapes" and insert a rectangle onto your canvas. Resize it to serve as a reference for your design’s maximum cutting size.
This step is crucial for later precision.
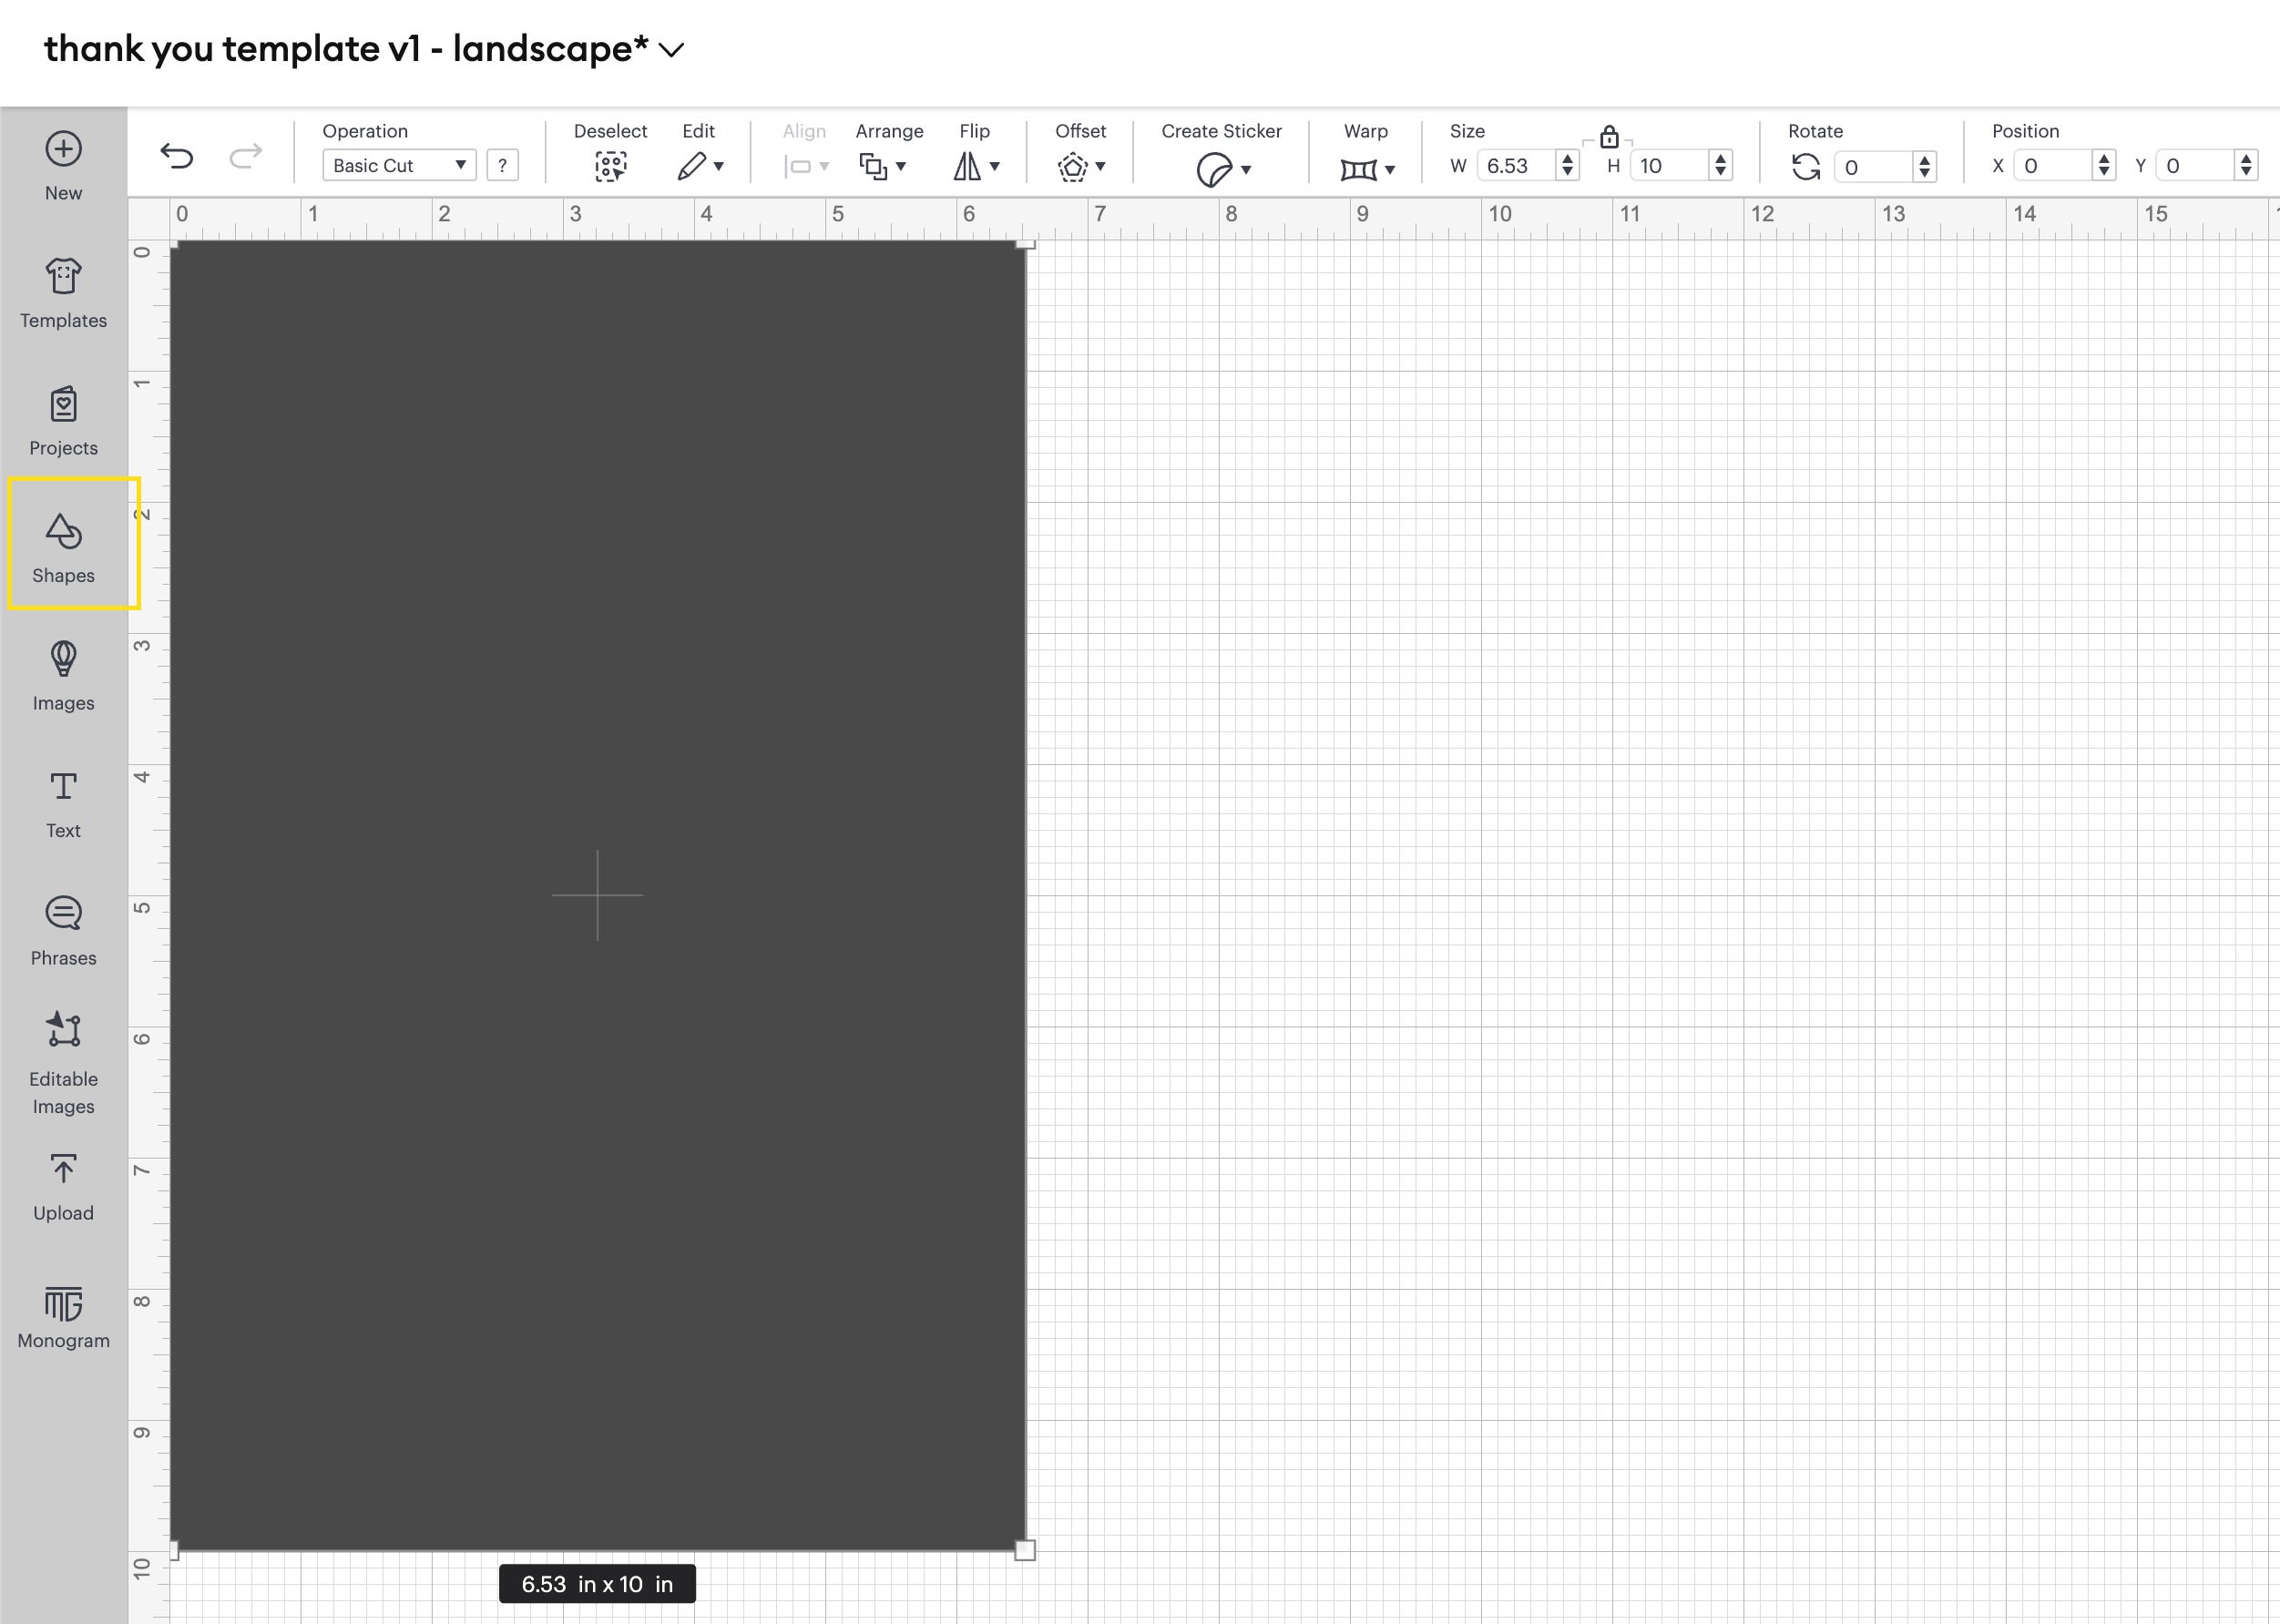
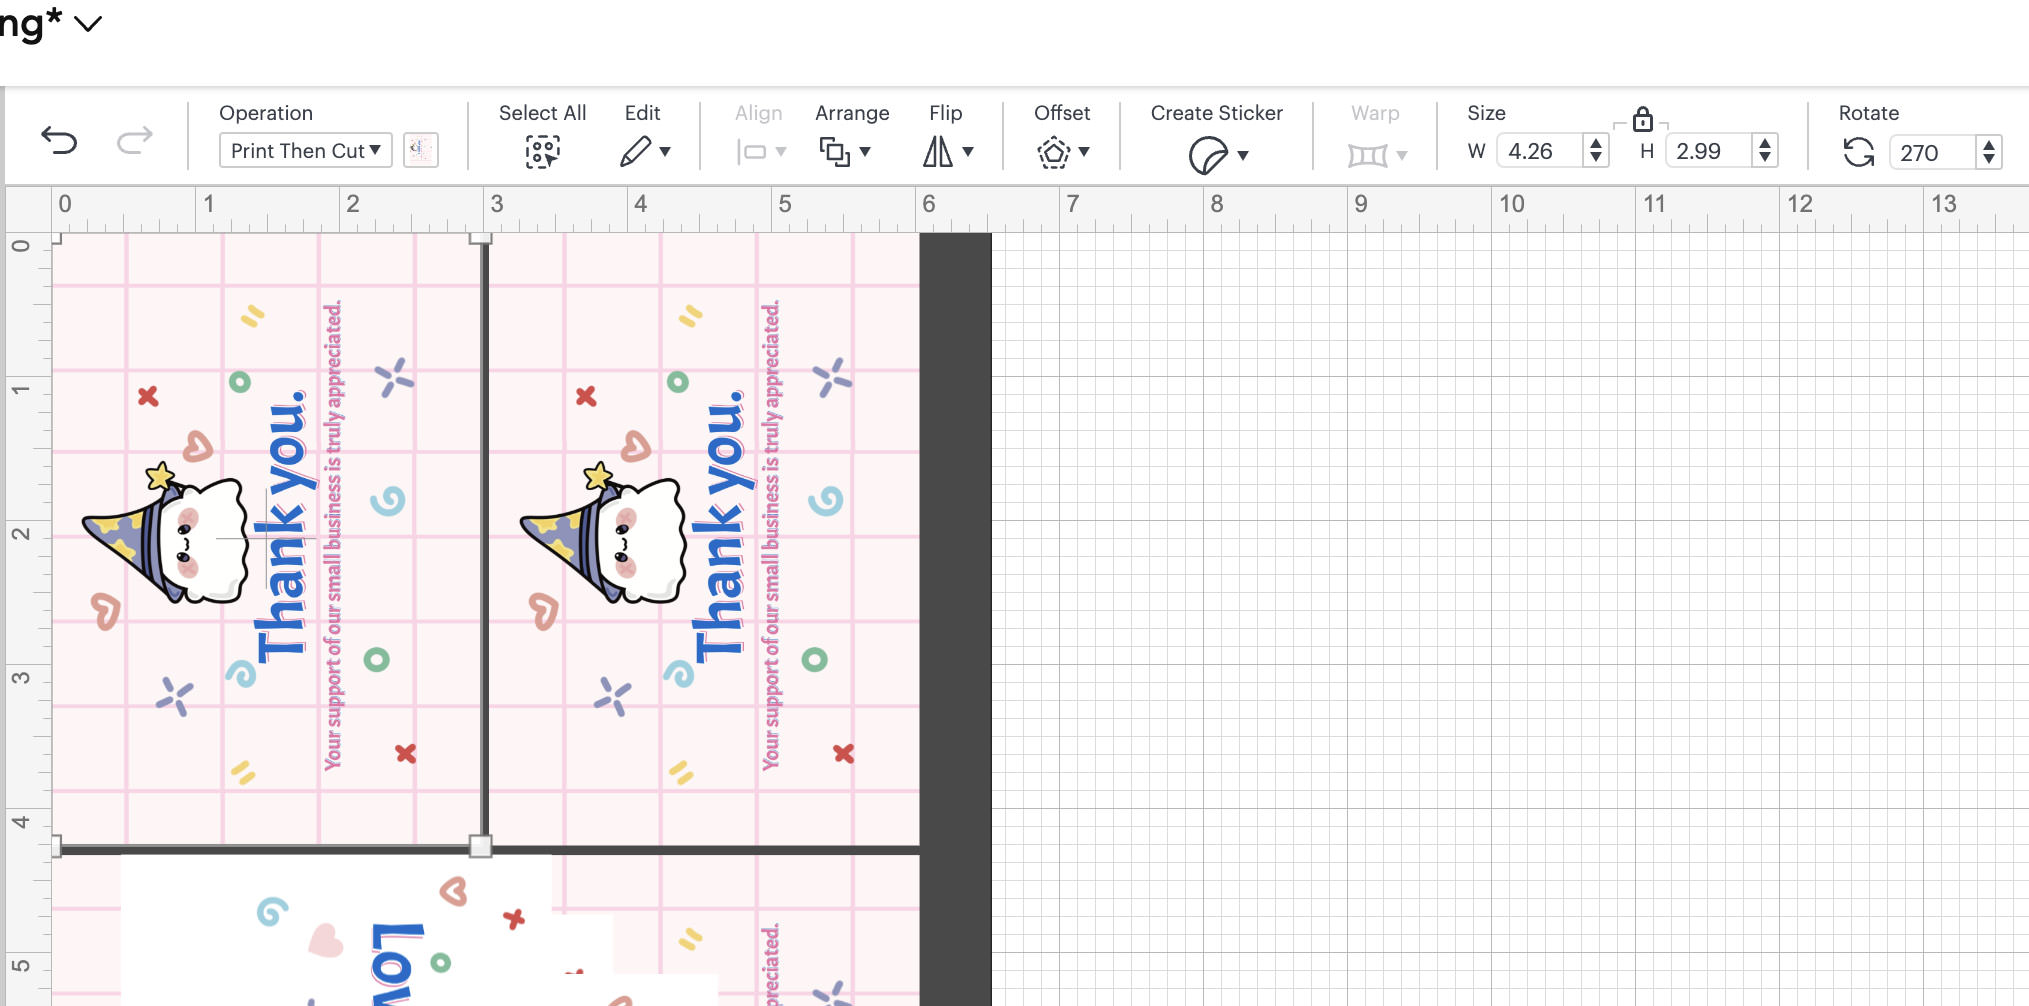
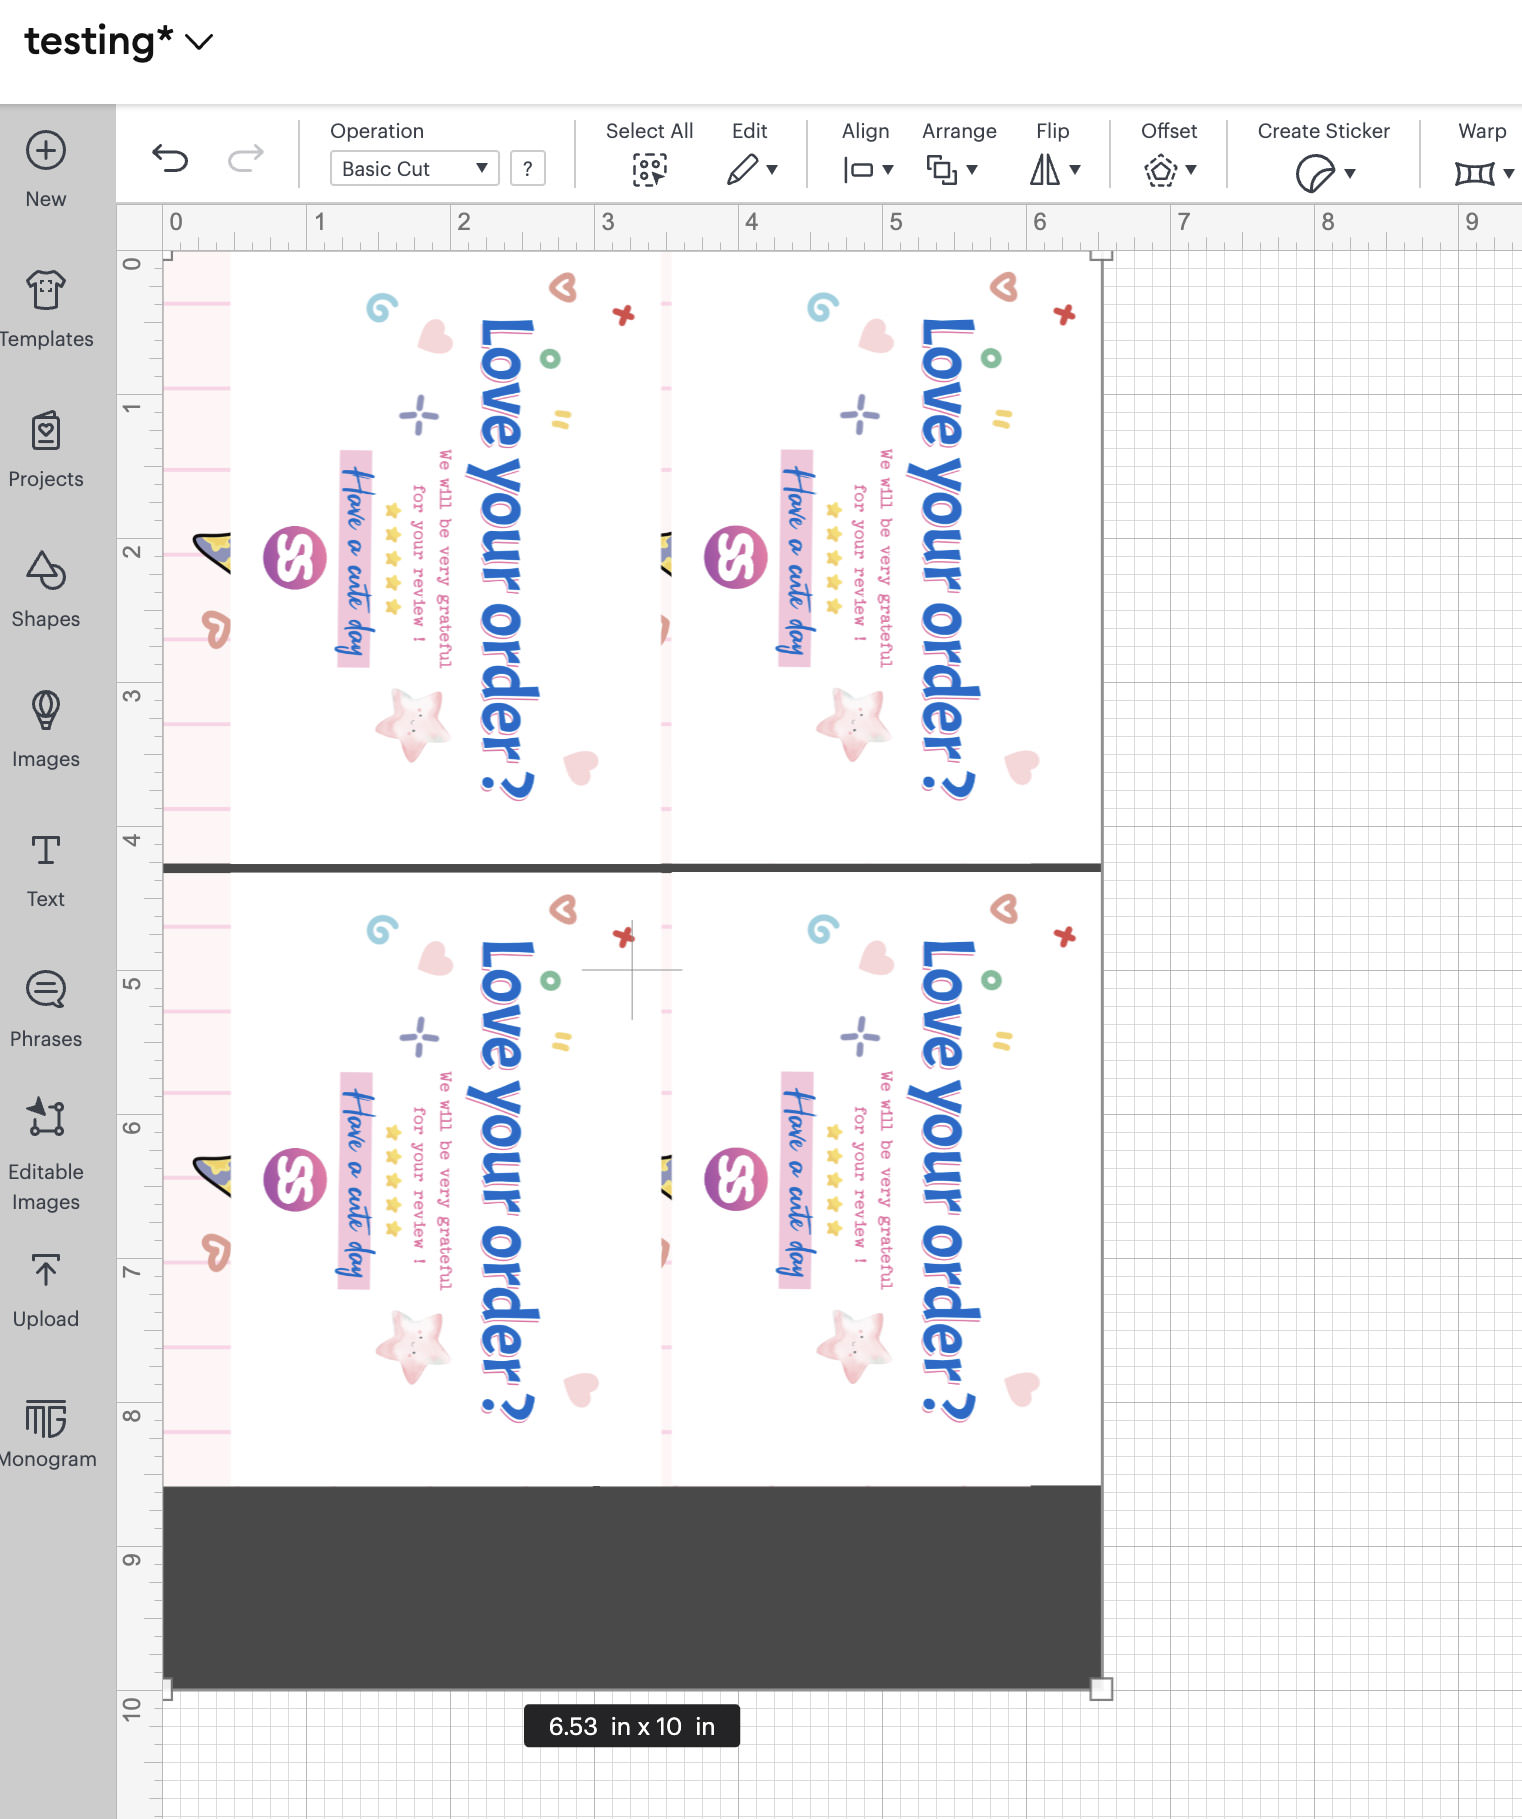
I use the Cricut Maker 3, so I set my rectangle’s size to 6.53 inches in width and 10 inches in height, which is very close to the maximum cutting size.

After creating both the front and back designs of the thank you card in Photoshop, I first imported the front design into the canvas. Then, I duplicated it three times, resulting in a total of four designs, as shown in the screenshot below.
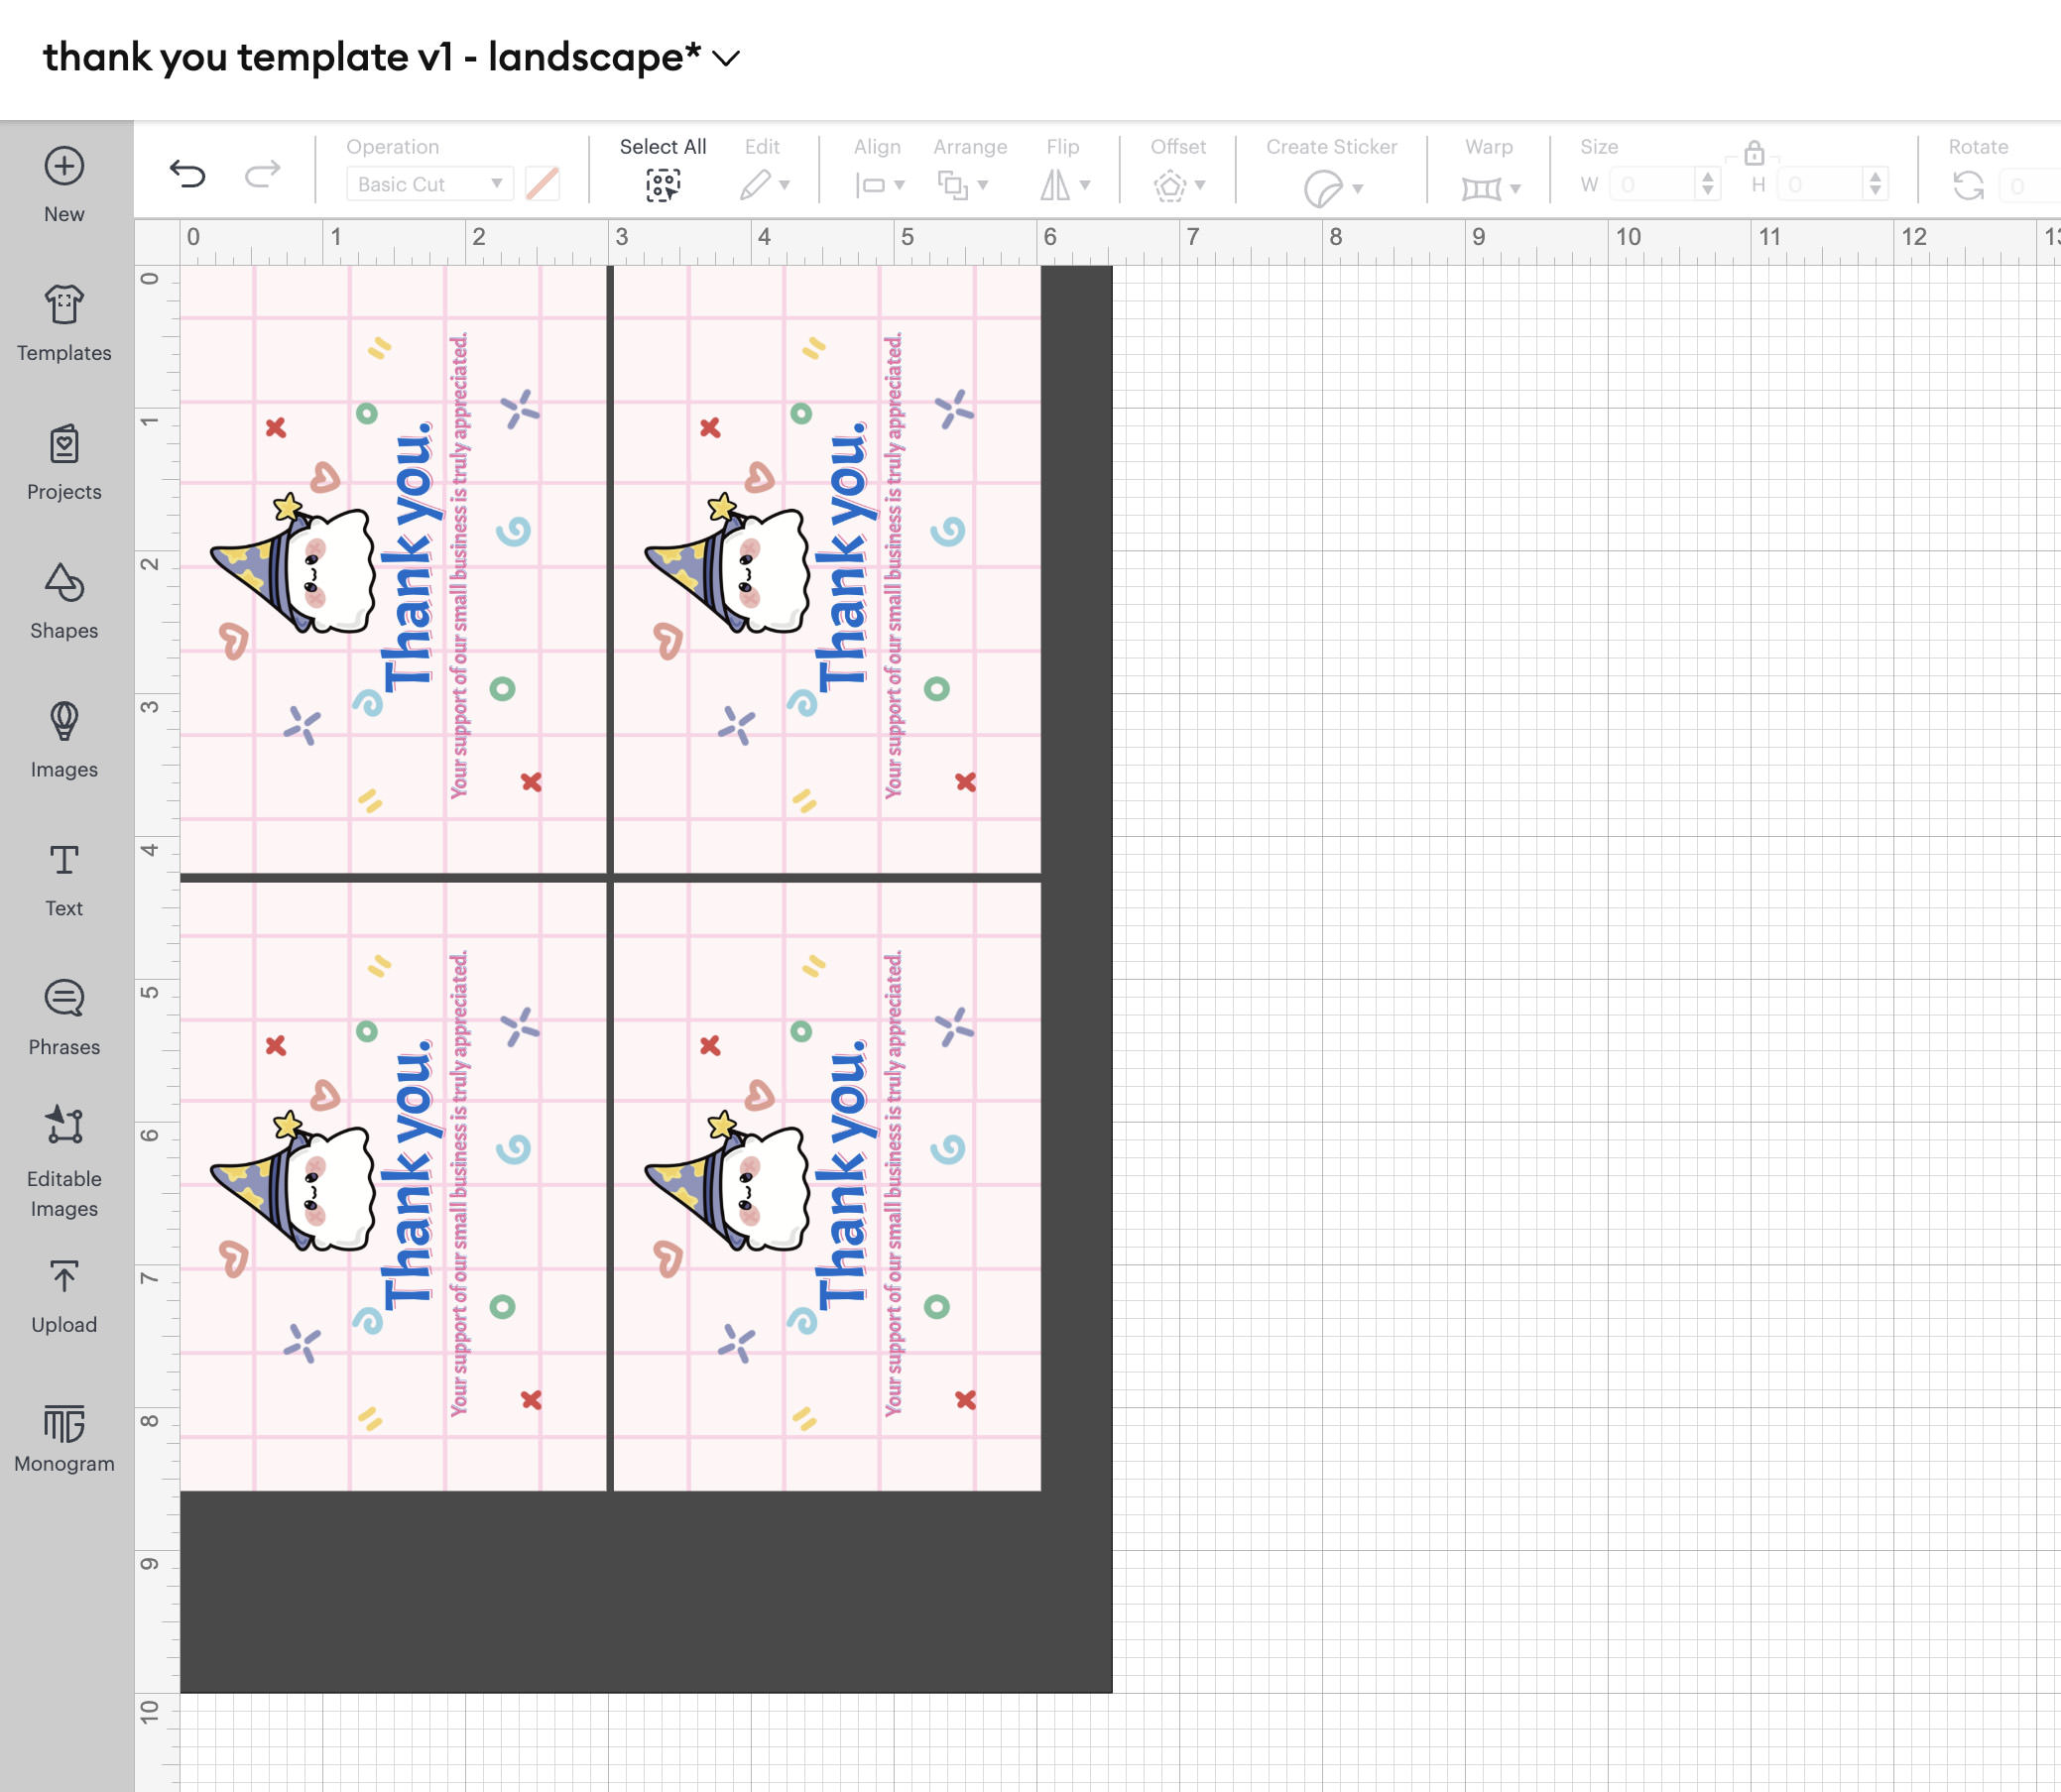
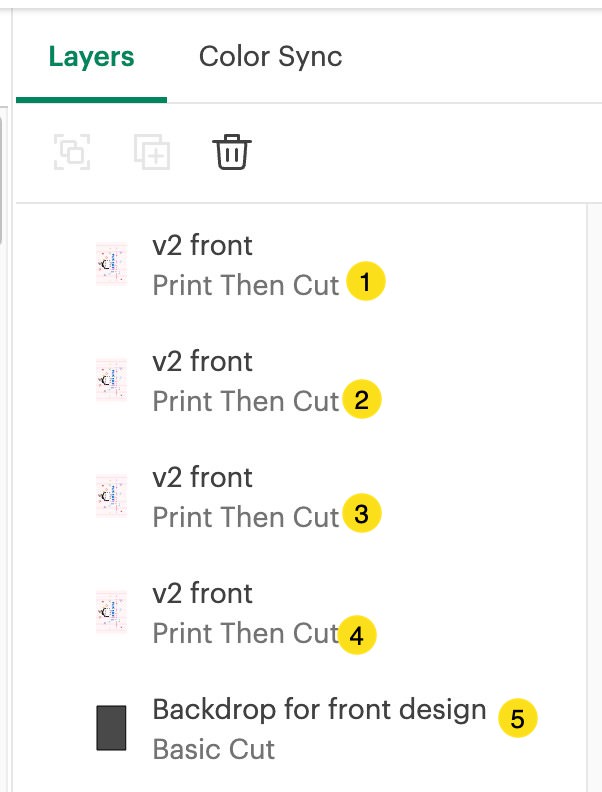
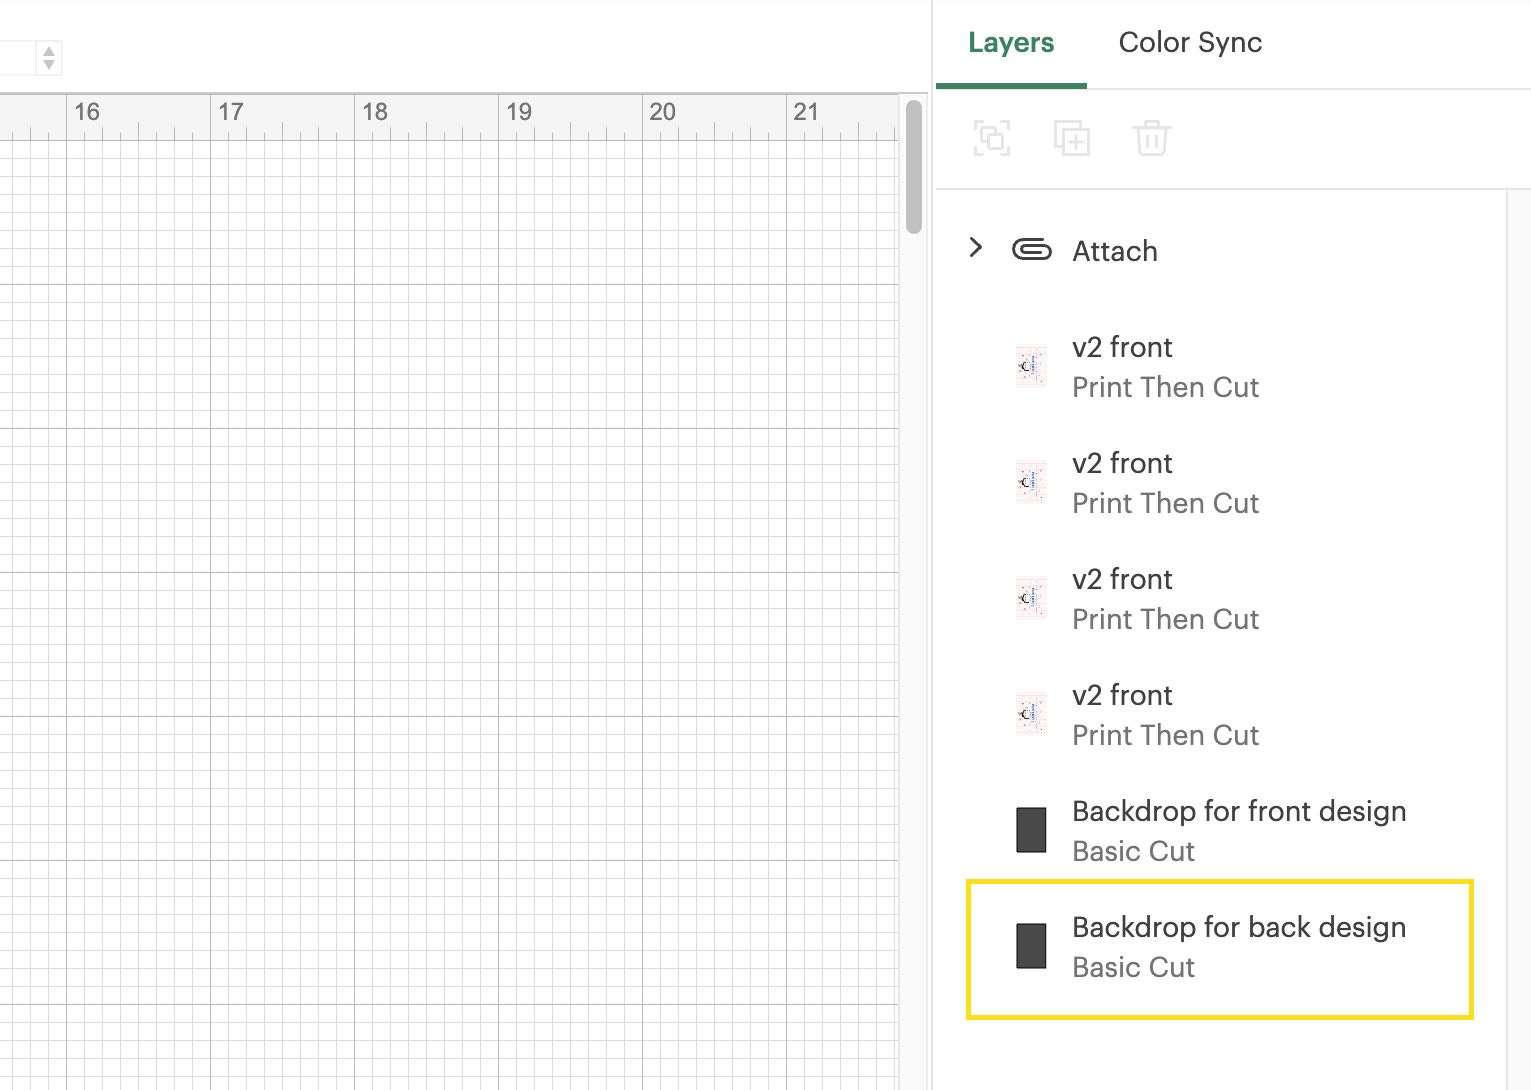
The Layers panel shows five items: four front designs and one backdrop for the front design.
Next, I’ll import the thank-you card’s back design and duplicate it three times, making a total of four, just like the front’s design earlier.
Then, each of them is positioned precisely over its corresponding front design. Instead of manually aligning them, use the X and Y coordinates from the front design for exact placement.
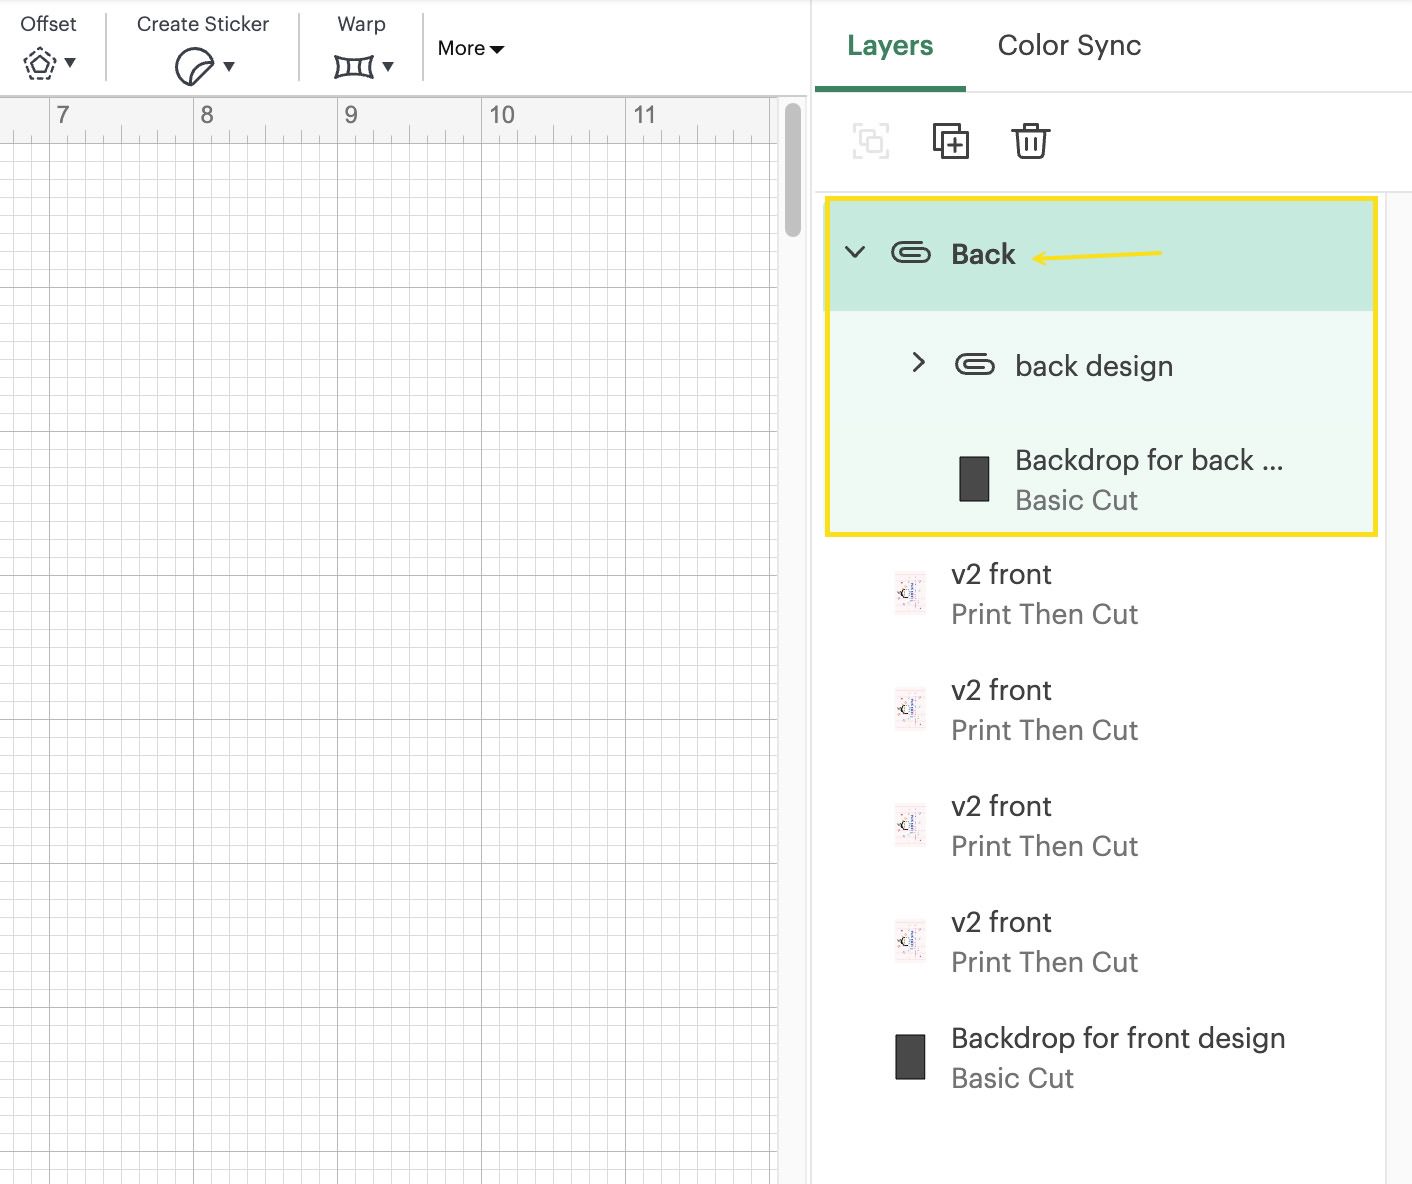
Duplicate another backdrop for the back designs. Label them distinctly to avoid confusion later.
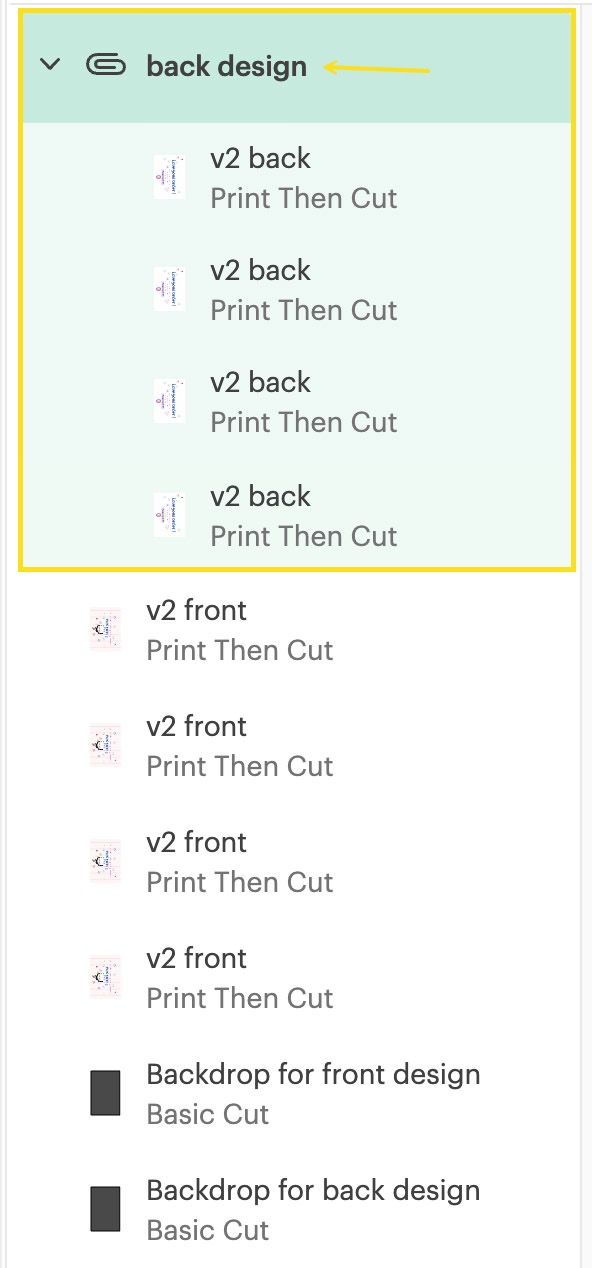
In the Layers panel, attach all four back designs and name the group “back design.”
Select the “back design” group and its backdrop, then align them to the right.
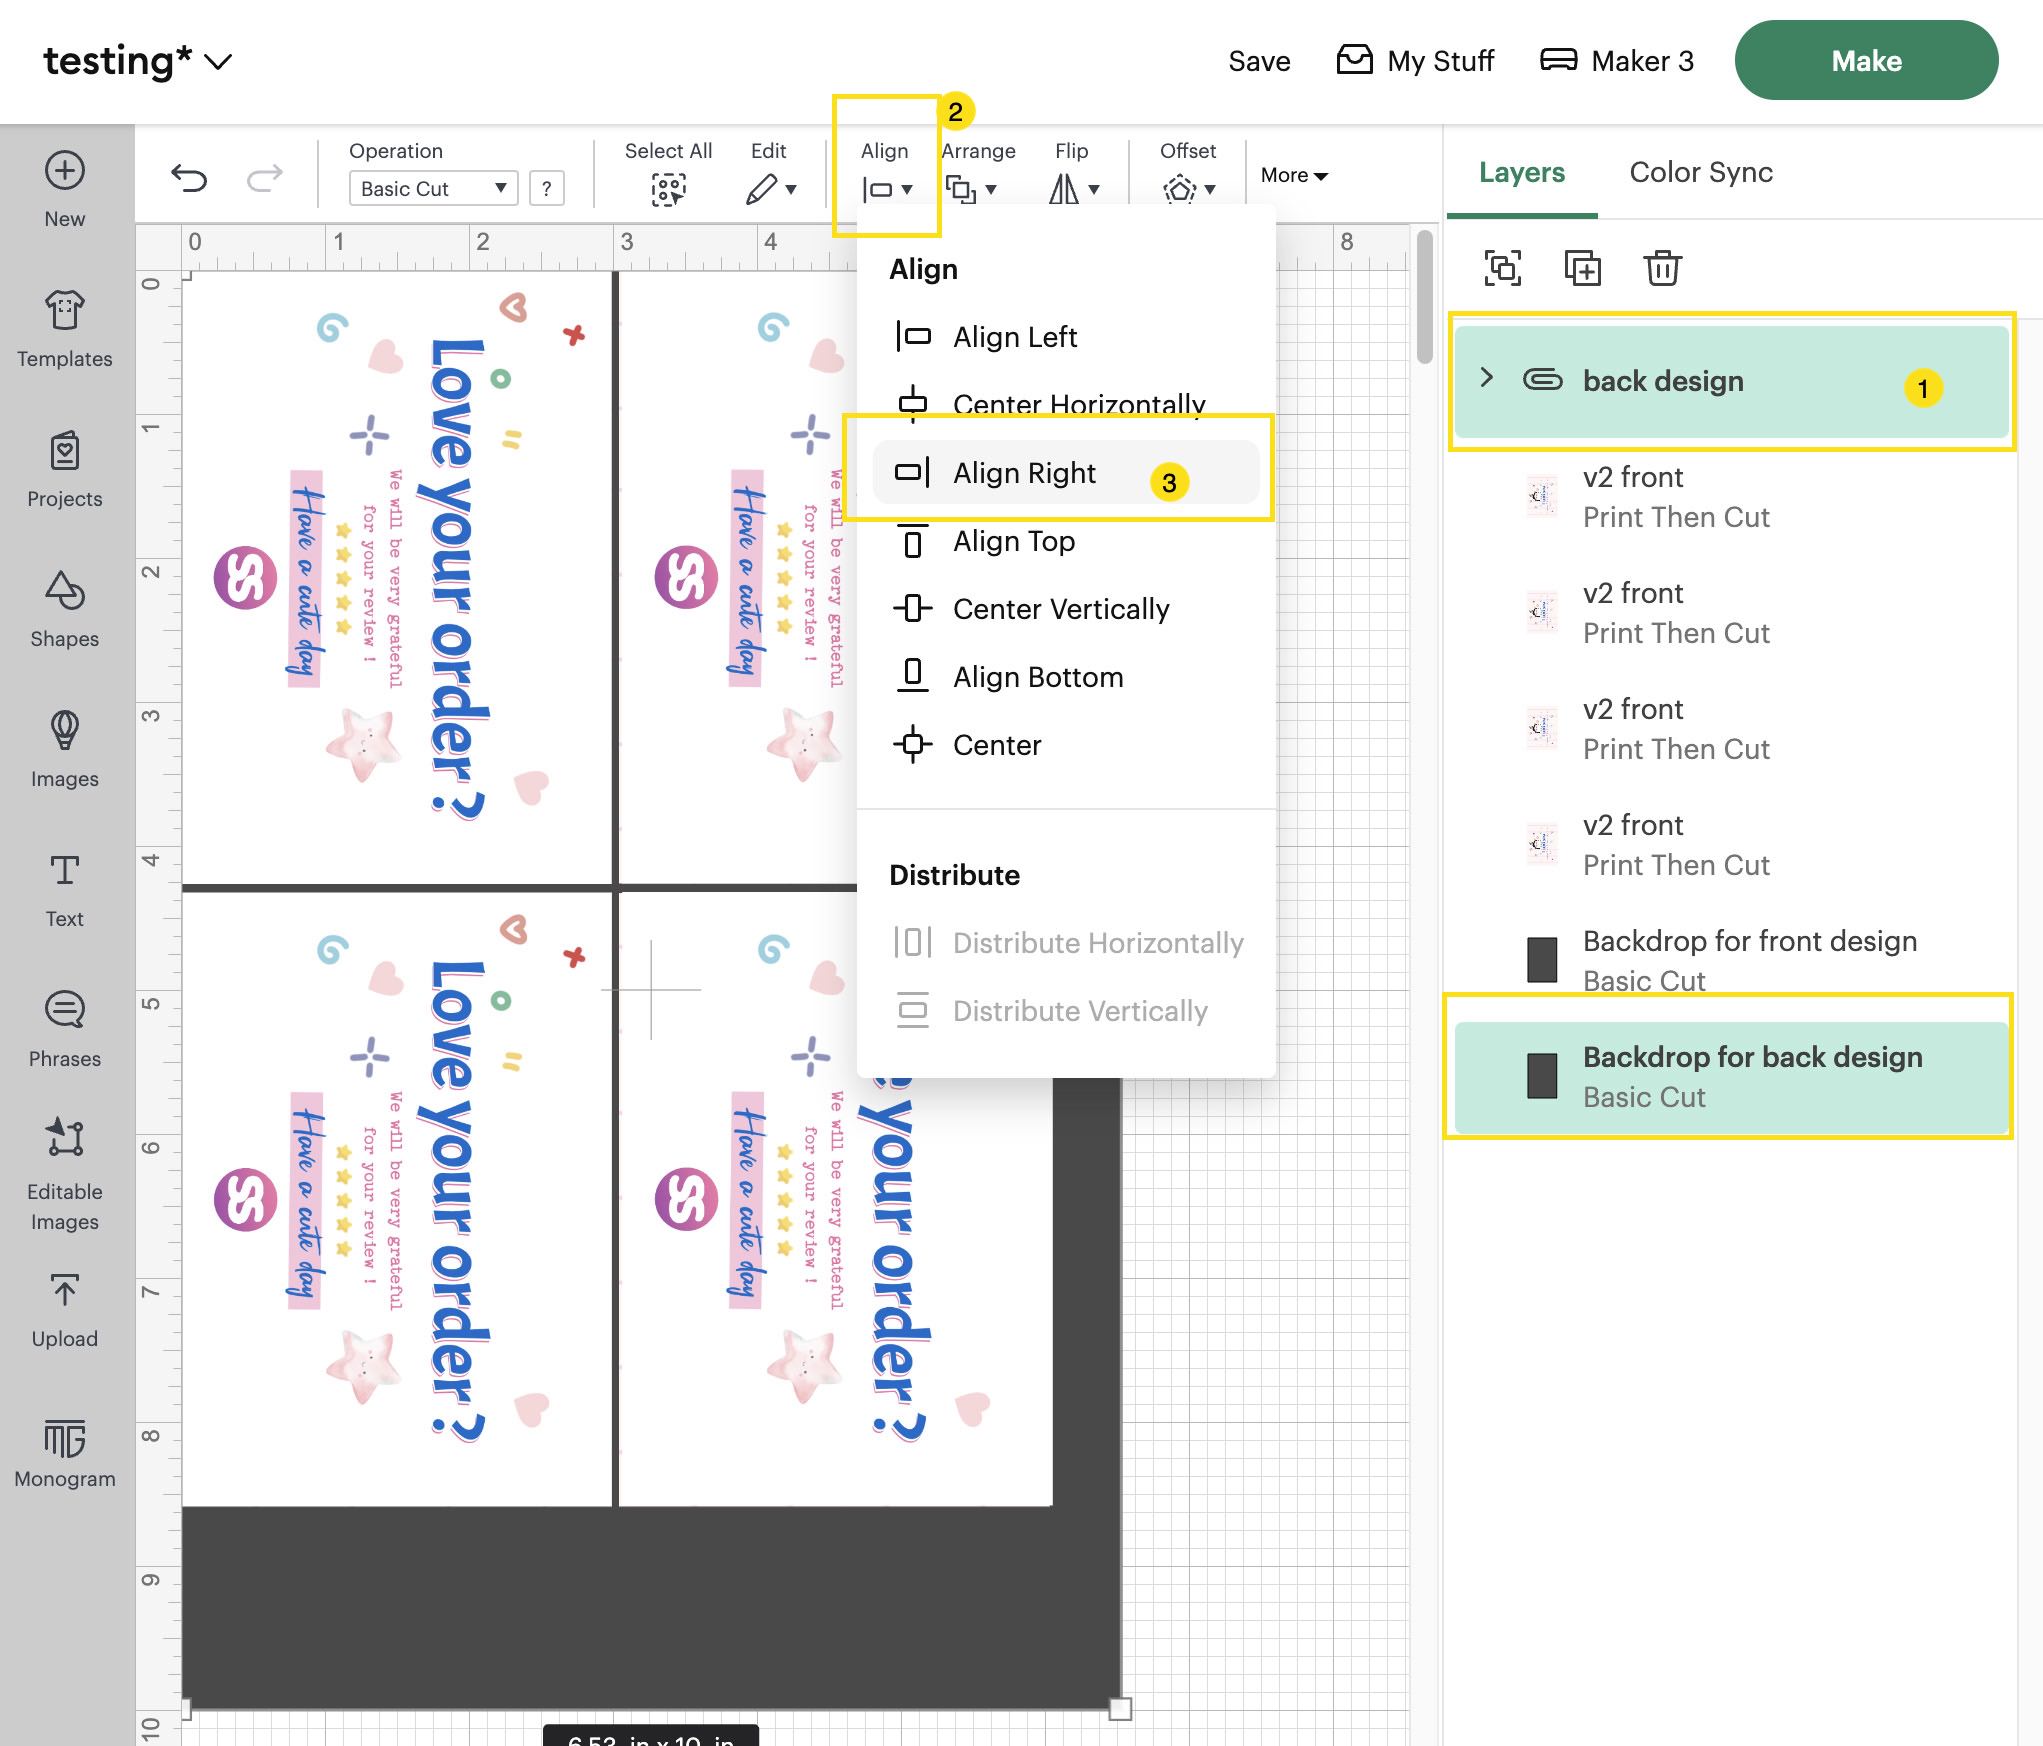
This will move them horizontally while maintaining their vertical position, as shown in the screenshot below.
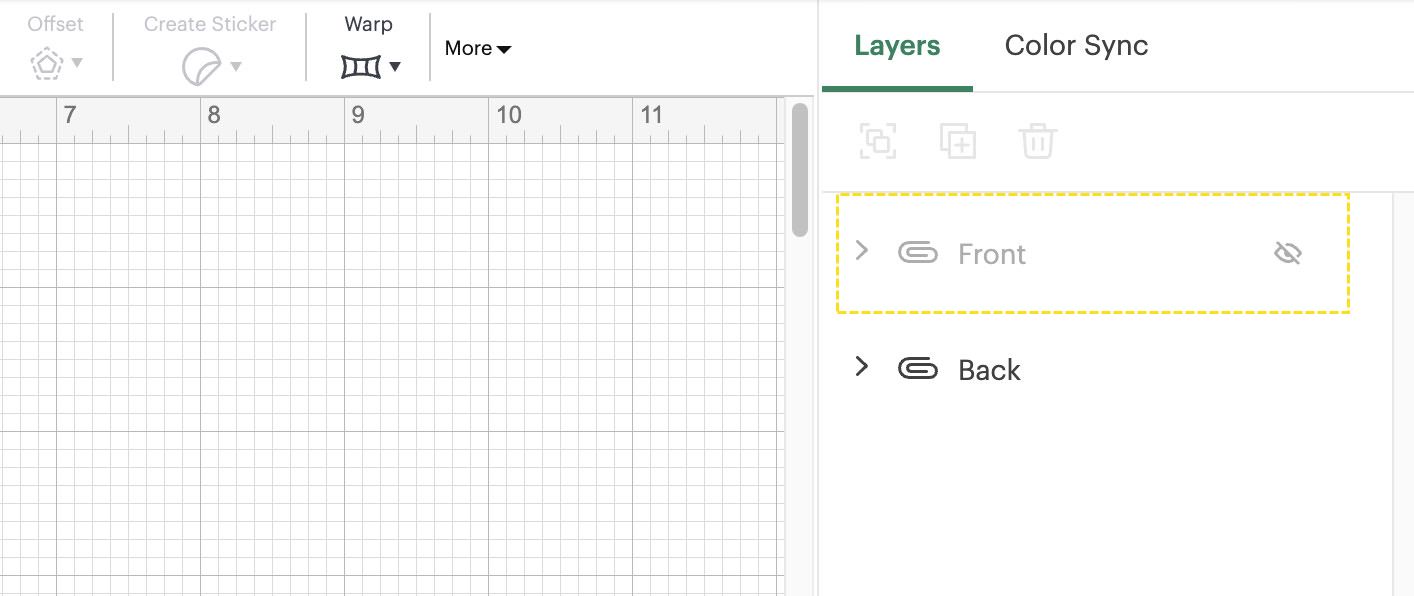
Attach the “back design” group and its backdrop together, naming it “Back.”
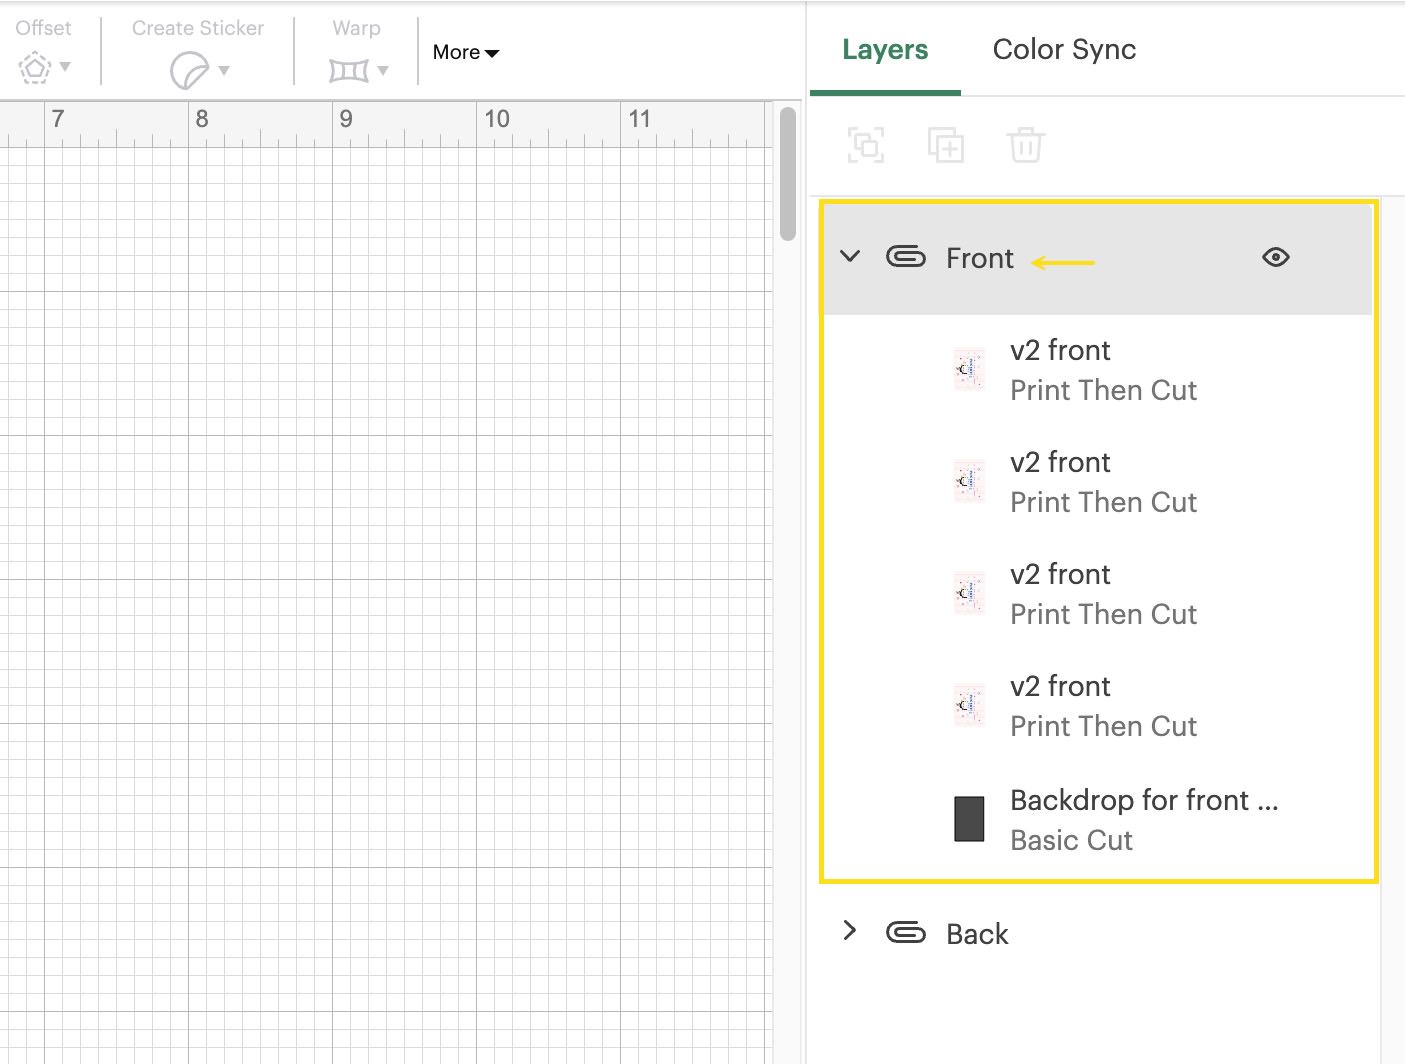
Repeat a similar process for the front designs, naming the group “Front.”
The Print and Cut Process
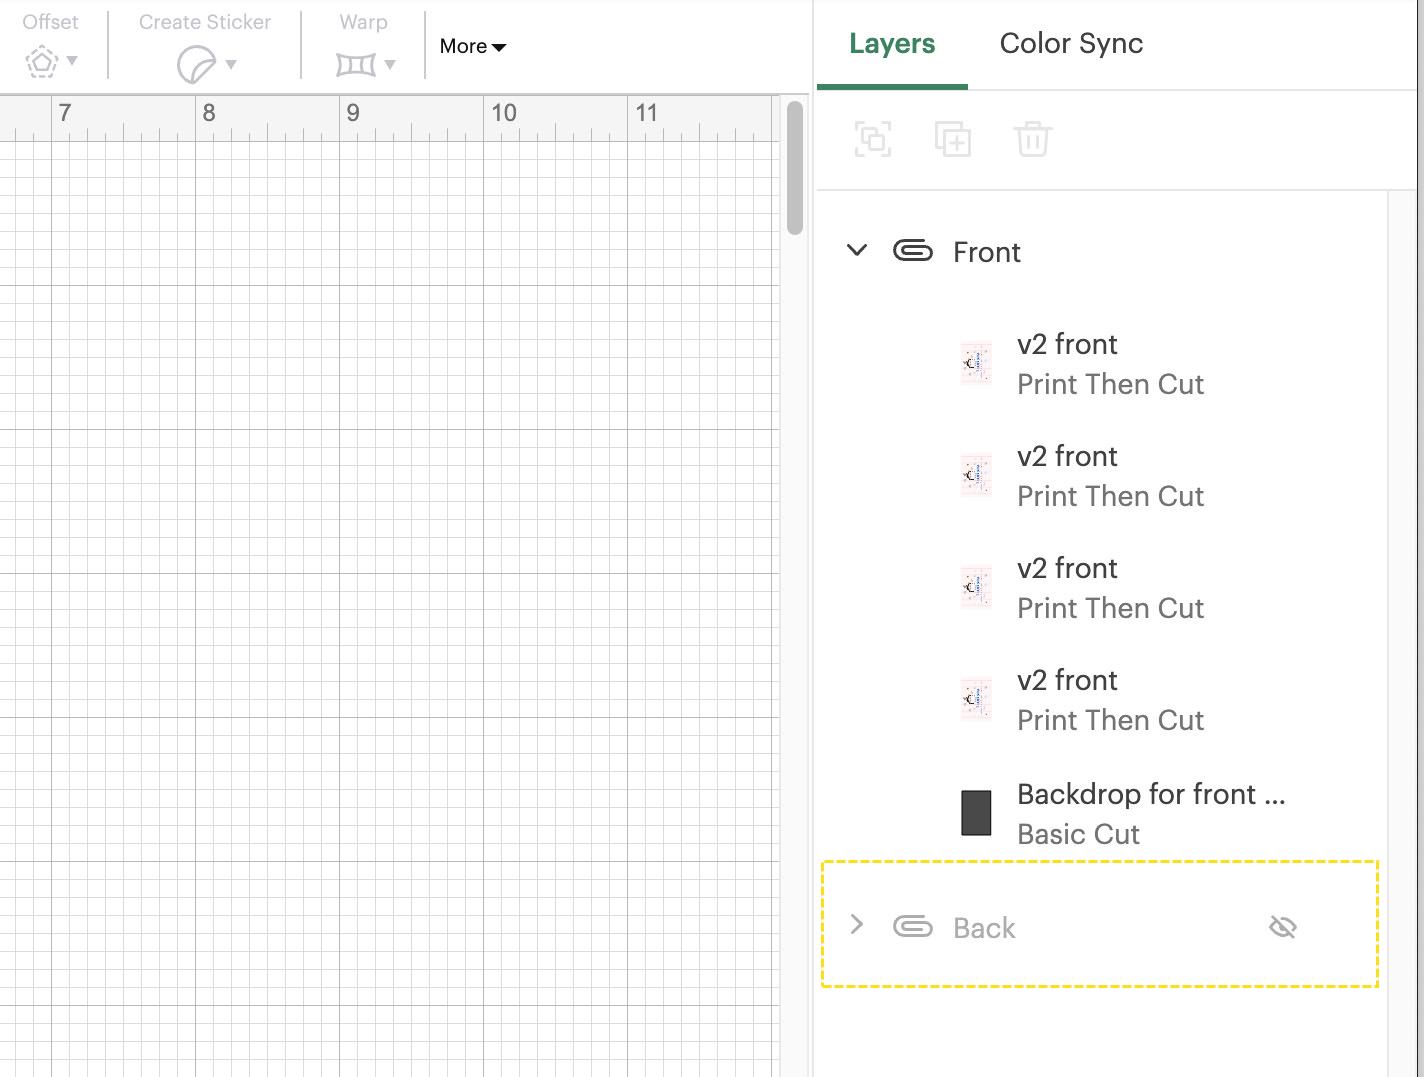
With the setup complete, it’s time to print the thank-you card. First, hide the “Back” group , click “Make” and proceed to print the front design.
Ensure to turn off “Add Bleed” and turn on “Use System Dialogue” in the printer setup.
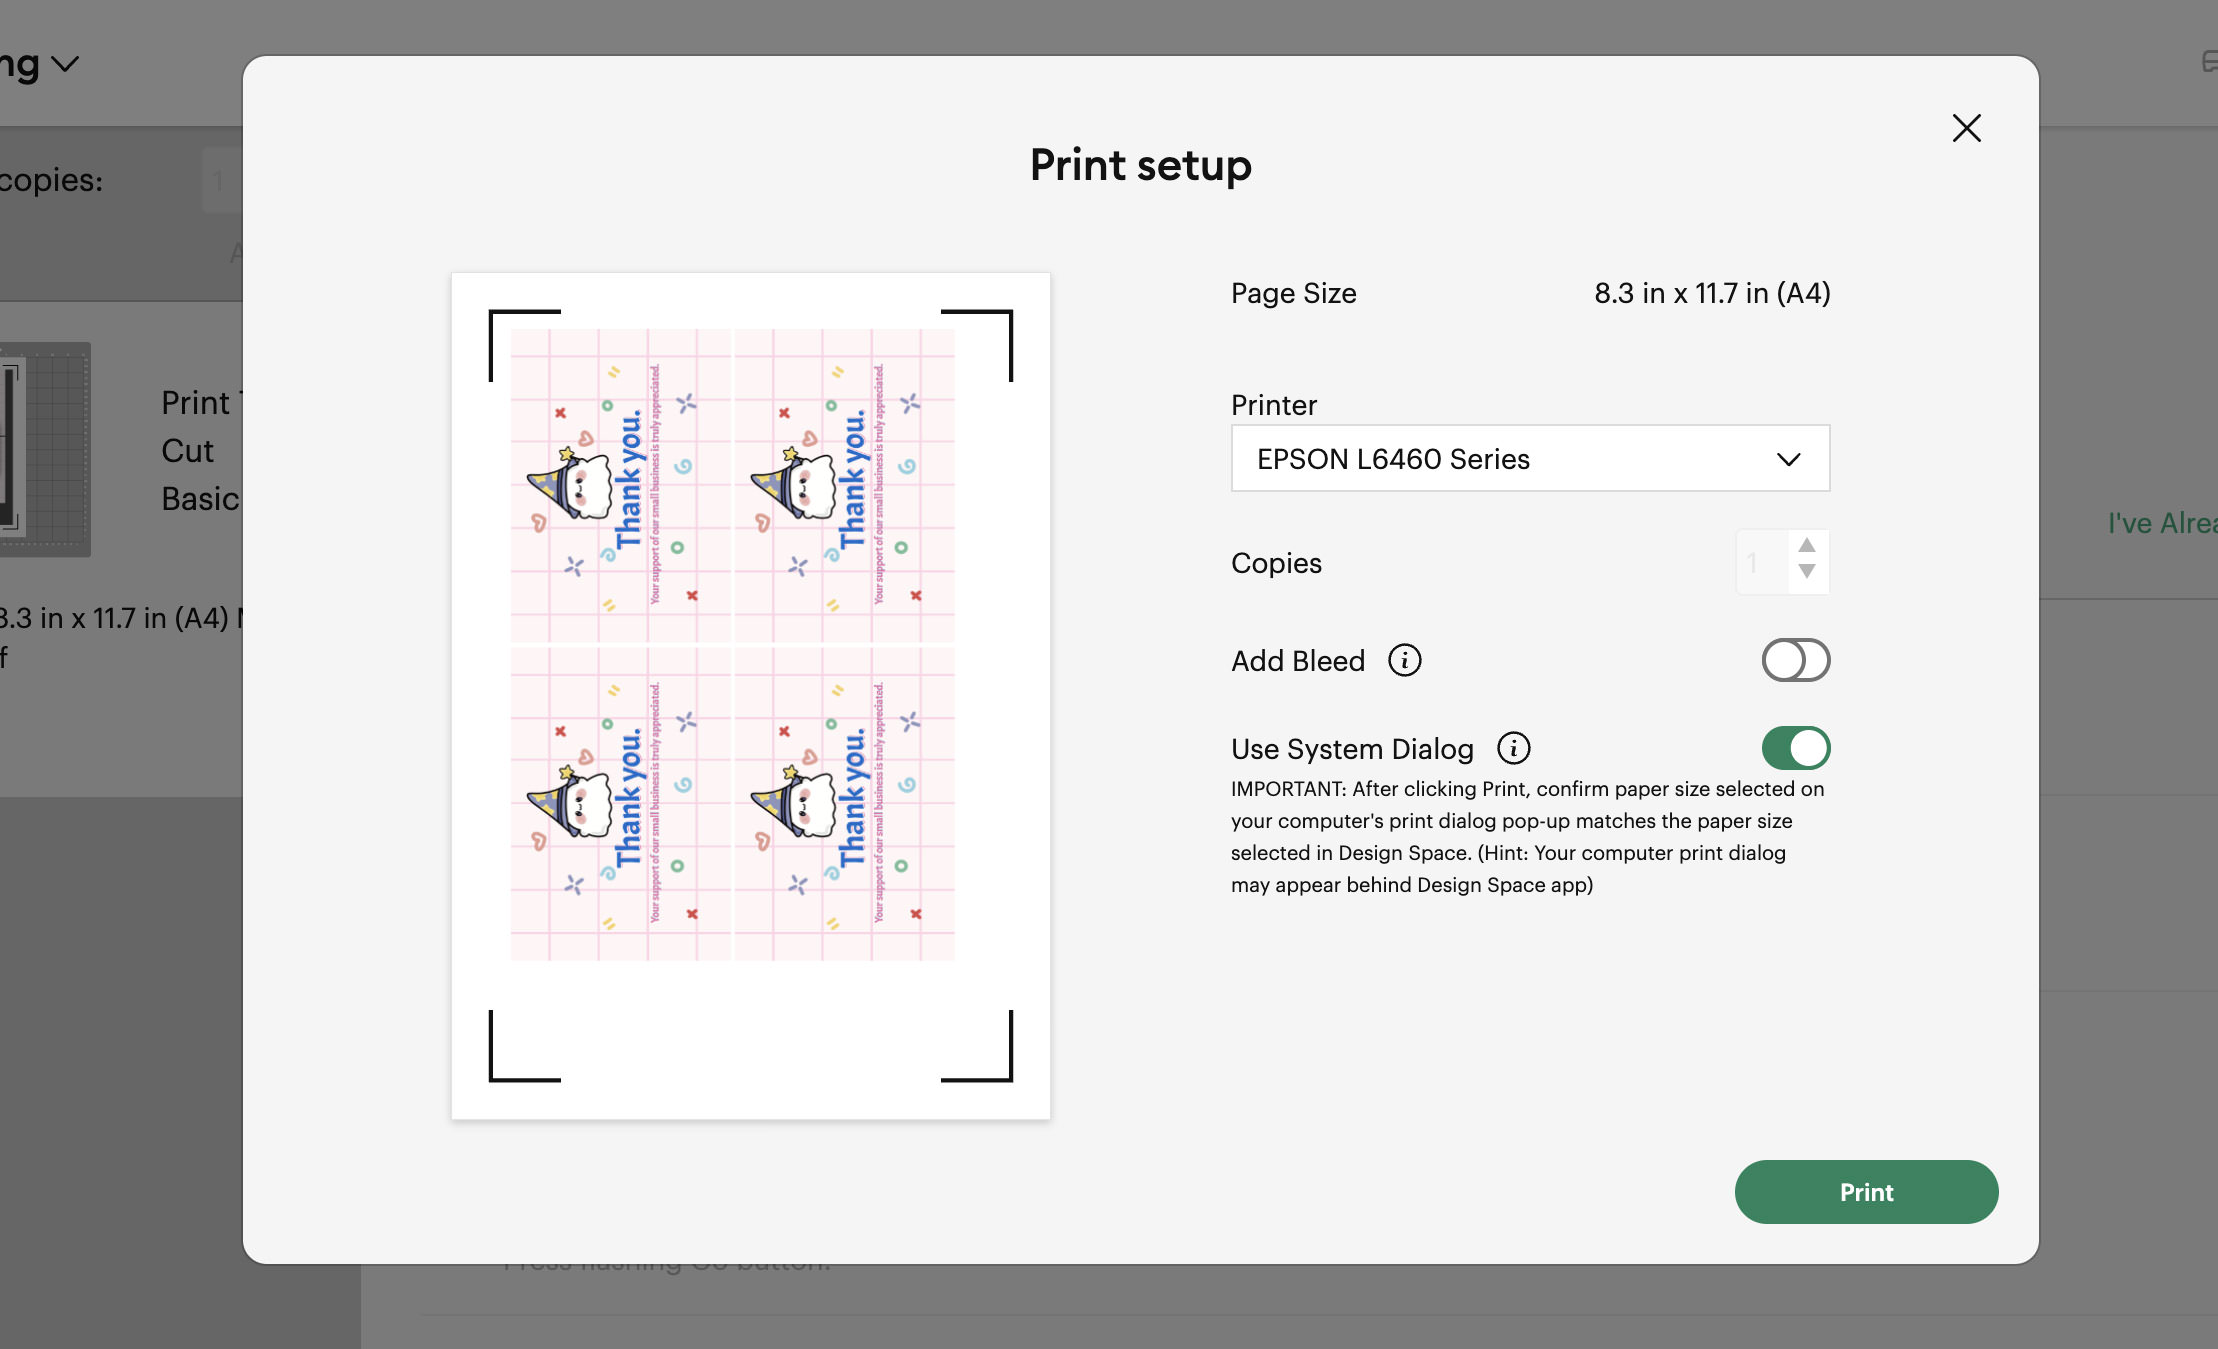
After printing the front, cancel the cutting process to return to the canvas. Flip the printed sheet and reinsert it into the printer for the back design.

Back in Cricut Design Space, hide the “Front” layer, make the “Back” layer visible, and print the back design.
Once printed, place it on your Cricut cutting mat with the back design facing up. Then proceed to set the base material and let Cricut do the cutting. You should end up with perfectly aligned front and back designs after cutting.
I hope this guide enhances your crafting experience. Happy crafting!