Block Annoying Ads on Android: Apps, Games, and Browsers
Ads are a necessary evil. Many websites and applications offer free services, content, and software because advertisers fund them. This financial support obliges service providers to display ads, which in turn keeps their operations running and their content free for users like you.
Read Also: 30 Essential Apps For Your Android Phone
However, ads can sometimes disrupt your experience, making it less enjoyable. This guide explores various methods to prevent ads from appearing on your Android device, whether you’re using apps, games, or just browsing the internet. You can block ads in different scenarios, focusing specifically on either apps and games or exclusively on browsers.
These techniques are applicable to both rooted and non-rooted devices, with specific instructions provided for each scenario. Before starting, ensure you have a File Manager installed, such as Astro File Manager. Most file managers will suffice.
Disclaimer: Please proceed with caution when attempting to block ads. We cannot be held liable for any consequences that may affect your device as a result of applying these methods.
Adblock Plus (ABP): Block Ads on Android
This method leverages ad-blocker apps to eliminate all ads on your device, including those displayed in various apps and games. Among the plethora of ad-blockers available for Android, the most prominent are Adblock Plus (ABP) and AdAway. We will focus on Adblock Plus, but feel free to choose AdAway if it suits your needs better.
How to Use Adblock Plus
Opting for Adblock Plus means supporting an open source project that offers the flexibility to allow non-intrusive ads. This feature is compatible with both rooted and non-rooted devices. Note that installing an ad-blocker requires enabling your device to accept apps from unknown sources, as these are not available on the Google Play Store due to Google’s policies against ad-blockers.
Here’s how to prepare your device for sideloading:
- Navigate to Settings > Applications (or Security on Android 4.0 and above).
- Find and enable the Unknown sources option.
- Confirm your choice by tapping the checkbox, then confirm again on the popup.
Your device is now ready to install ad-blockers.
Installing and Setting Up Adblock Plus
- Begin by opening a browser on your device and downloading Adblock Plus for Android. This will download the APK file: adblockplusandroid-version.apk.
- Locate the downloaded file, tap on it, and select Install. If you’re using a file manager, choose Open App Manager, then Install.
- For rooted devices: After installation, open Adblock Plus. It will ask for superuser permissions, which you should grant to activate ad-blocking.
- For non-rooted devices: You’ll need to set up a manual proxy. Follow the setup instructions for devices up to Android 3.1 and those 4.0 and newer.
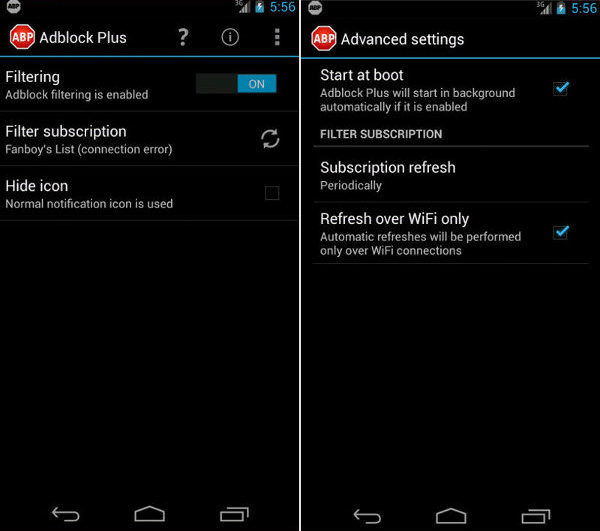
With Adblock Plus configured, you can now enjoy an ad-free experience. Customize your settings in Adblock Plus to manage ads filter lists and allow non-intrusive ads if you prefer.
Adblock Plus – Browser Extension
Adblock Plus is also available as a browser extension specifically for Firefox. This method effectively blocks ads displayed on web pages within the browser while leaving ads in apps and games unaffected. It is compatible with both rooted and non-rooted devices.
How to Set Up the Adblock Plus Extension
- If Firefox is not yet installed on your Android device, download it here. Open Firefox, then add the Adblock Plus add-on from here.
- After installing, restart Firefox to enjoy browsing without ads. To adjust your ad-blocking preferences, navigate to Menu > Adblock Plus and explore the configurable options.
Block Ads Using ‘hosts’ File
This method involves using the ‘hosts’ file to block ads across your entire device, including in apps and games. Note that this technique only works for rooted devices.
Understanding the ‘hosts’ File
The ‘hosts’ file is a plain-text file used by the operating system to map hostnames (like example.com) to their corresponding IP addresses. When you access a website by its hostname, the OS first checks the ‘hosts’ file for the IP address. If the hostname is listed, it uses the mapped IP; otherwise, it queries a DNS (Domain Name Service) server.
Setting Up the ‘hosts’ File to Block Ads
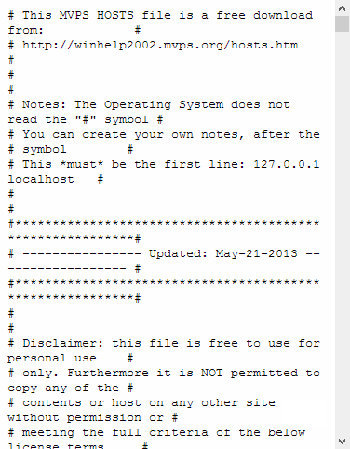
- On your computer, visit one of the following pages to download a pre-configured ‘hosts’ file: MVPS, pgl.yoyo.org, or hostsfile.mine.nu. Save the page as ‘hosts’ on your computer.
- Transfer the ‘hosts’ file from your computer to your Android device via Bluetooth or a USB connection. Remember the file path.
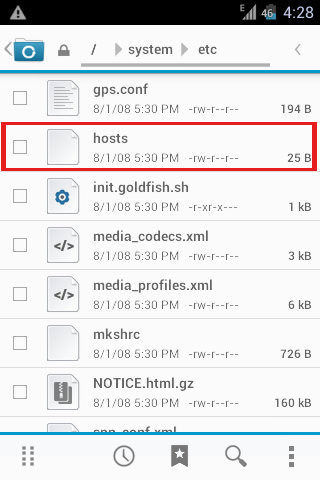
- On your Android, use a file manager to navigate to /etc or /system/etc. You may need to grant superuser permissions to access these directories.
- If a ‘hosts’ file already exists, rename it (e.g., to .txt or .bak) and replace it with the downloaded file. Reboot your device to activate the ad-free environment.
Conclusion
While ads can be irritating, they serve as a gateway to discovering new apps, products, and websites. Allowing non-intrusive ads can introduce you to potentially great new apps and experiences. Additionally, many apps offer the option to purchase an ad-free version, enabling you to support your favorite developers while enjoying an uninterrupted experience.