Drawing a Balinese Barong Mask – Photoshop tutorial
Have you heard of or seen a Balinese Barong Mask? The Barong mask is worn by dancers who portray the good spirit (Barong) in its eternal battle against the evil spirit, Rangda. The story is told in a traditional Balinese dance that is popular with tourists and locals in Bali. In today’s tutorial, we are going to recreate a Balinese Barong Mask.
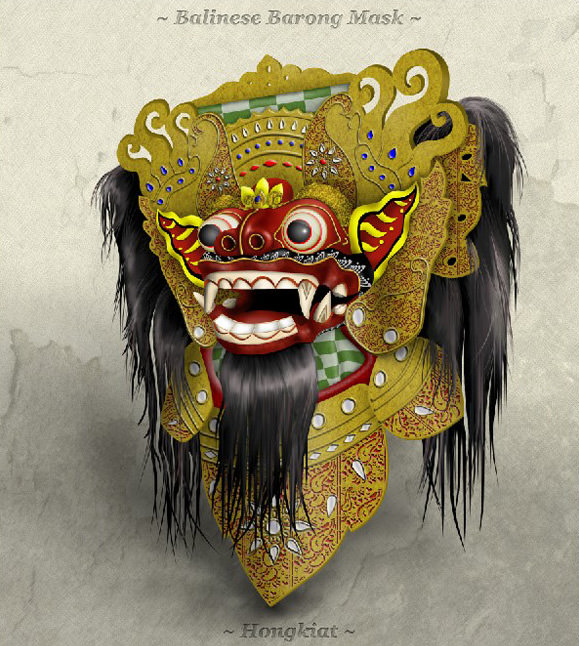
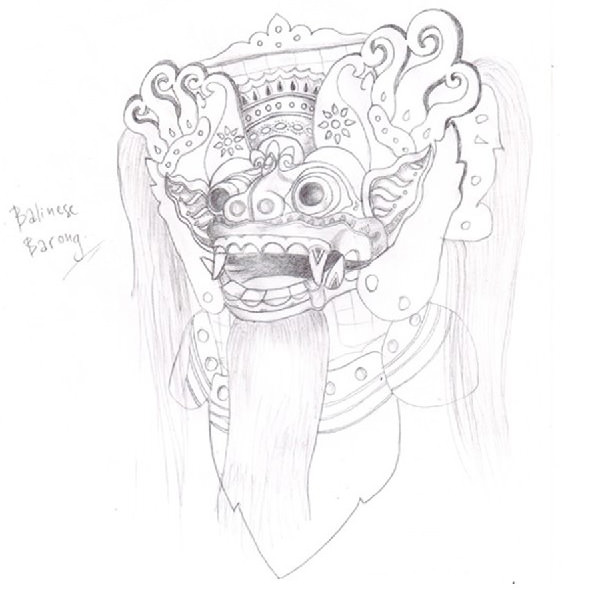
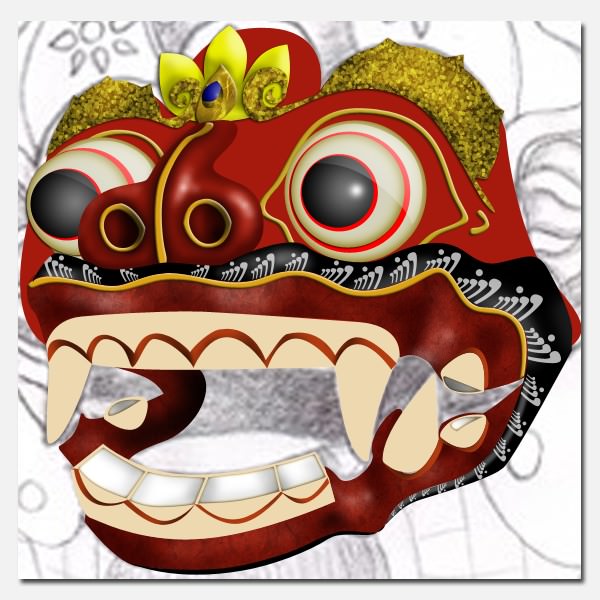
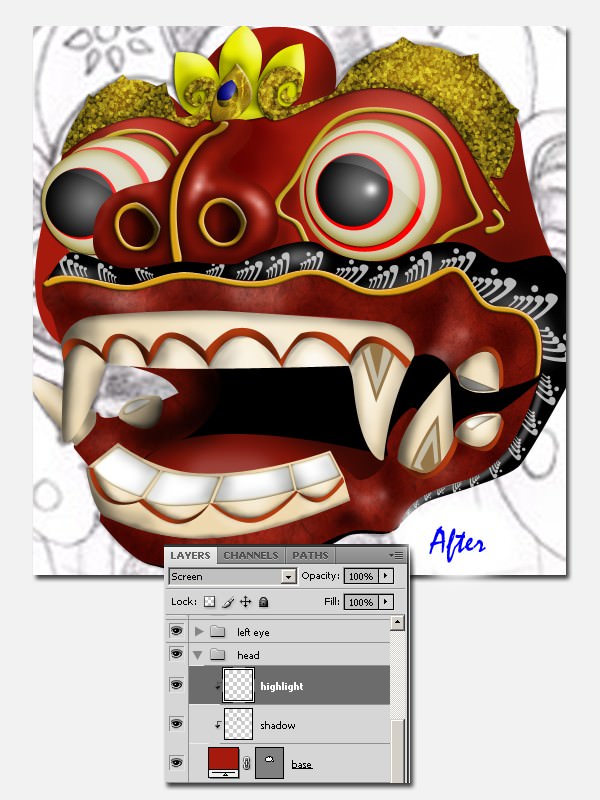
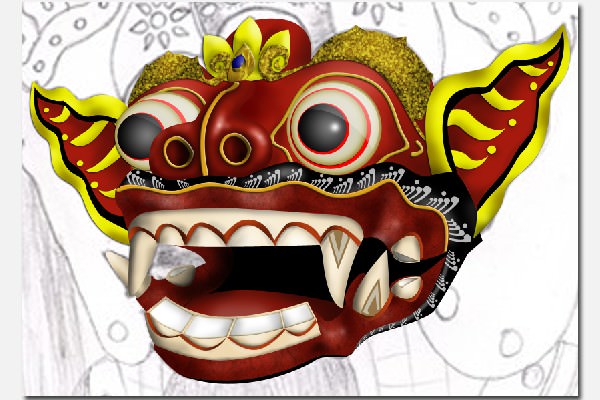
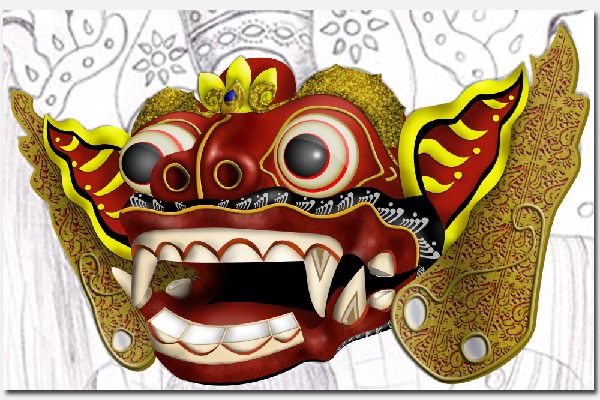
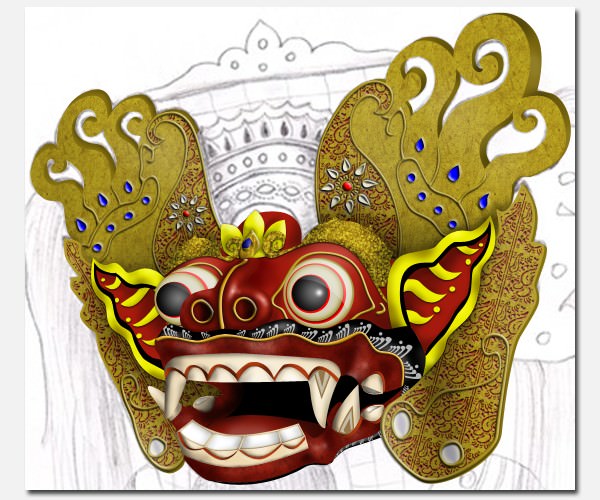
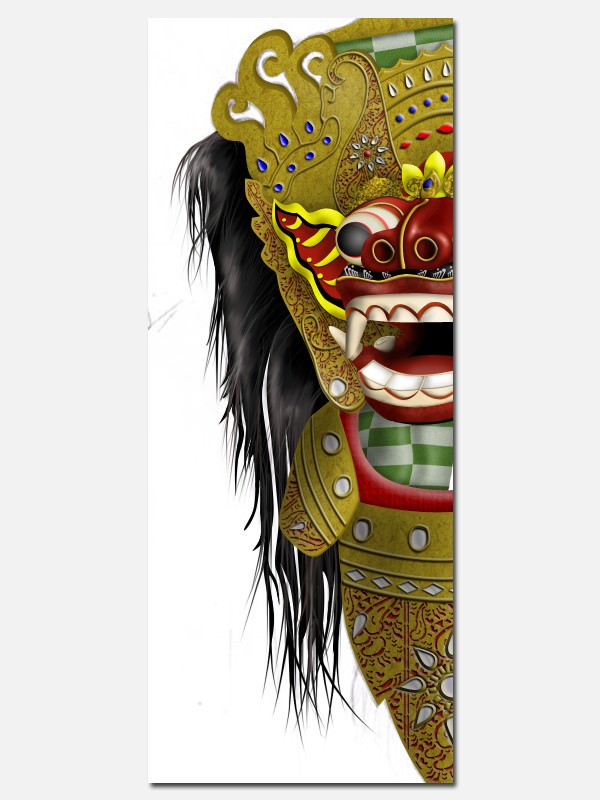
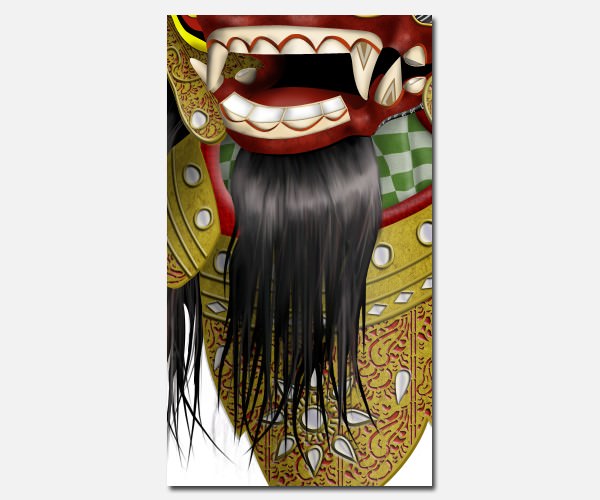
We will start with a pencil sketch, and this is what our final result will look like:
The mask looks scary, but don’t forget, this is the good guy. Before we get started, take note of what you will need.
The Head, Eyes and Nose
Step 1
Sketch the barong mask with a pencil and then scan it into your computer, or you can use this ready-made Barong Mask sketch.
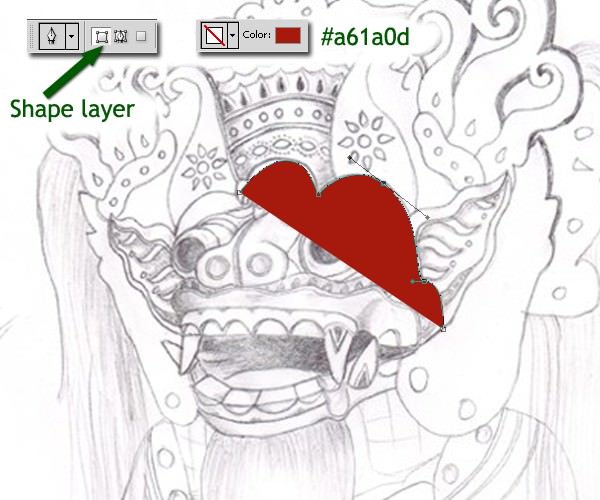
Step 2
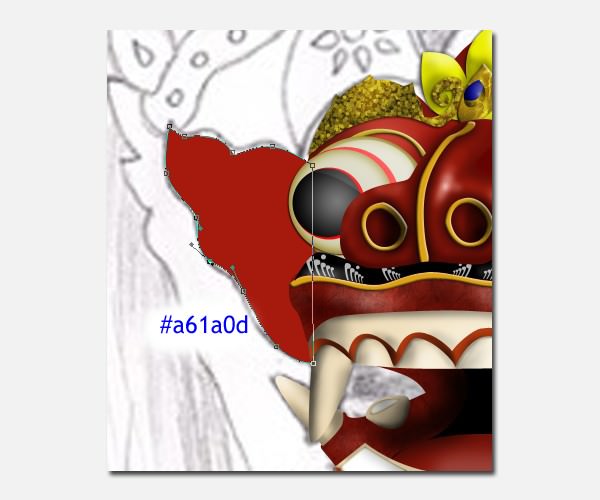
Create a new 1800 x 2000 pixel document. Use the Pen Tool (P) to draw the image. Draw the head with the #a61a0d color setting and set the Pen Tool to Shape Layer.
Every time we draw a path with Shape Layer setting, we will make a new layer automatically. But the layer will cover up the pencil sketch and may cause difficulties while drawing the full shape. I have a trick to overcome this problem You can decrease the opacity of the sketch until we can see the pencil line clearly.
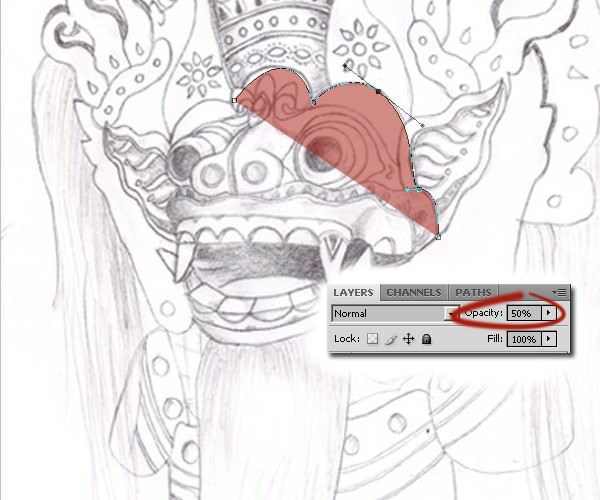
This decreased opacity setting is tentative. We will return it 100% later.
You can also try turning off the layer and turning on the path.
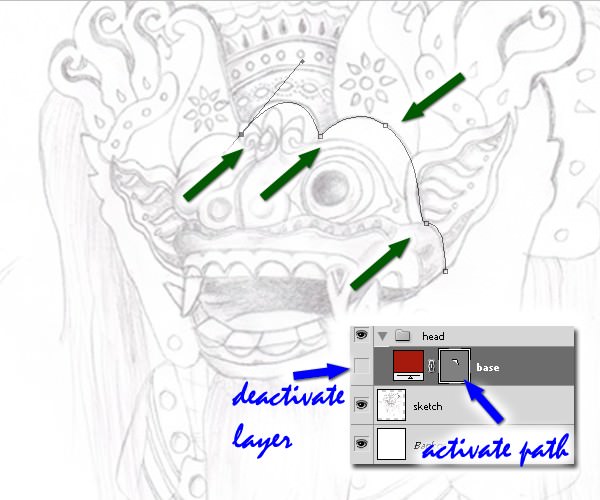
No matter which method you choose, or if you have your own method the important thing is it aids your drawing.
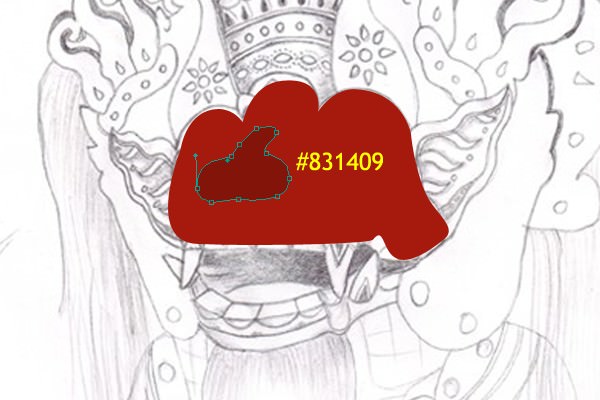
Step 3
After drawing the head, draw the nose. The color setting for this is #831409. It is darker than the head.
Step 4
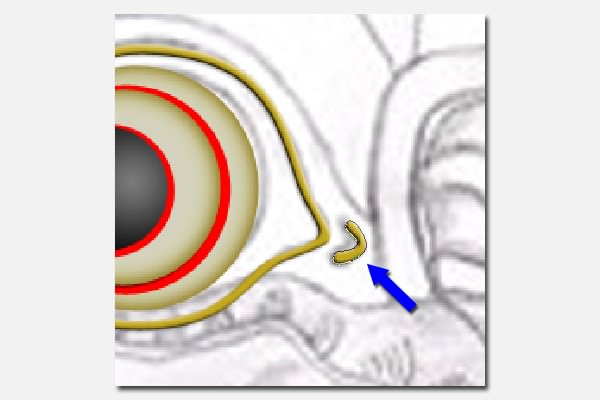
Hide the head layer. Draw the right hole, left hole and divide for the nose. Use #dca115.
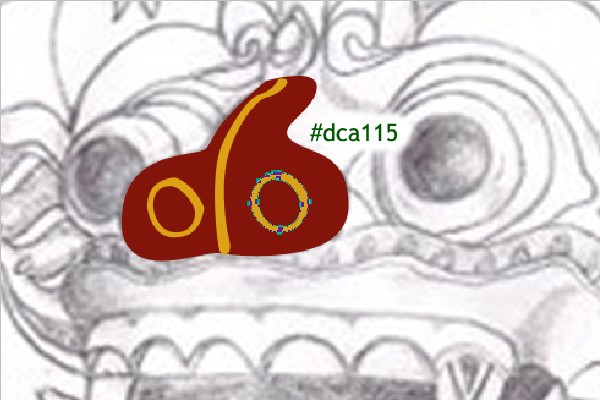
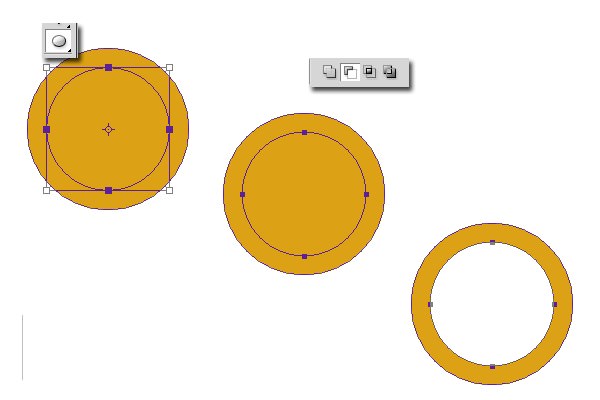
To make a hole, we can use the Ellipse Tool. Then copy path (Ctrl / Cmd + C) and paste path (Ctrl / Cmd + V). Resize the new one smaller, then set subtract.
We need to distort the hole in order to get a natural view. Just use Pen Tool (P).

Step 5
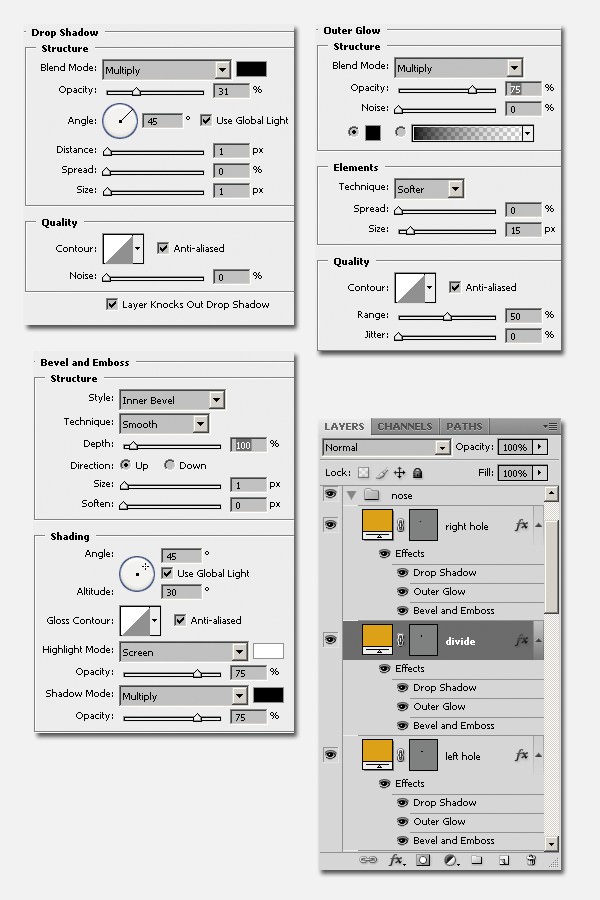
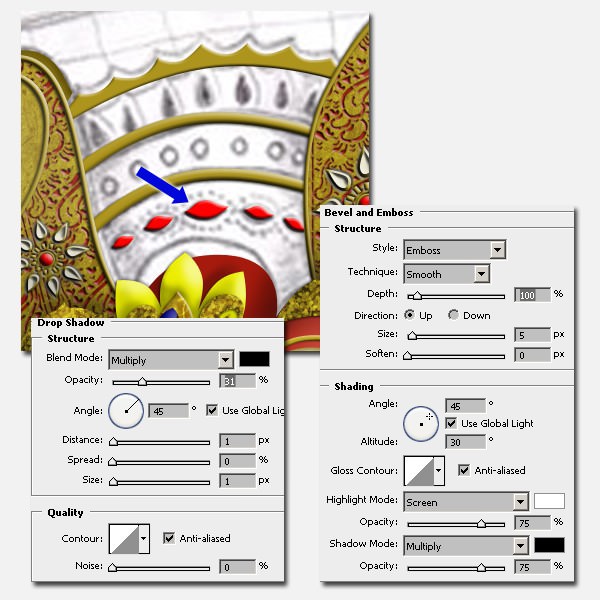
Add these layer styles to the right hole, left hole and divide.
Drop Shadow
- Blend Mode: Multiply
- Opacity: 31%
- Angle: 45º
- Distance: 1 px
- Spread: 0%
- Size: 1 px
Outer Glow
- Blend Mode: Multiply
- Opacity: 75%
- Set to black
- Technique: Softer
- Size: 15 px
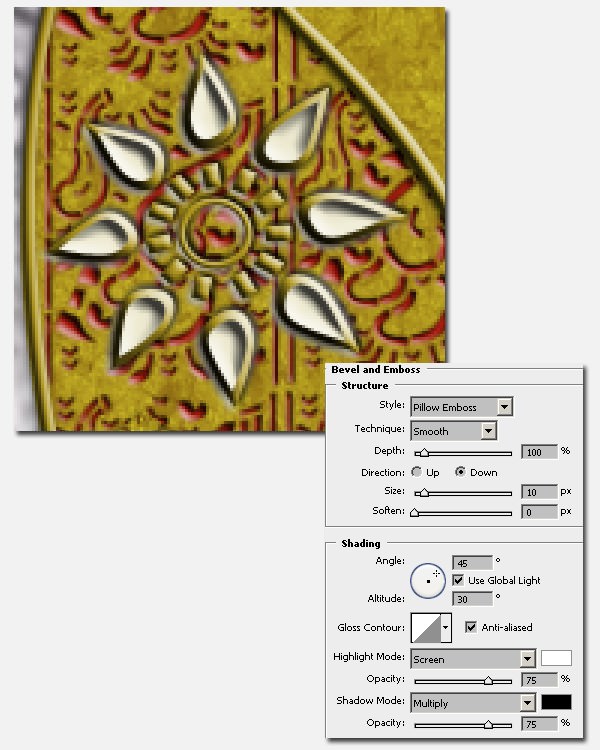
Bevel and Emboss
- Style: Inner Bevel
- Technique: Smooth
- Depth: 100%
- Direction: Up
- Size: 1 px
- Angle: 45º
And collect them into one group.
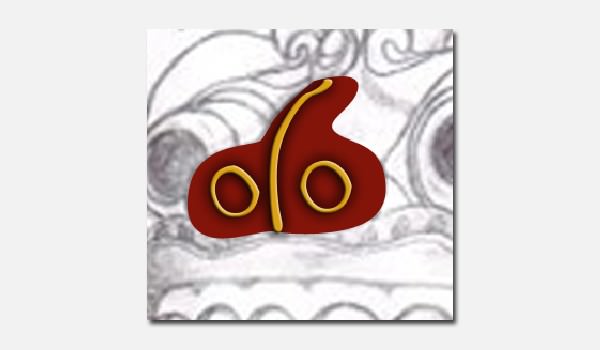
You will get this.
Step 6
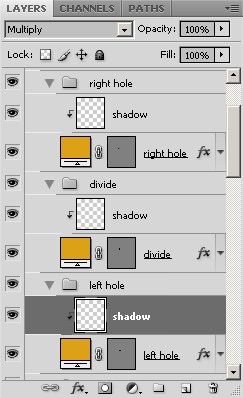
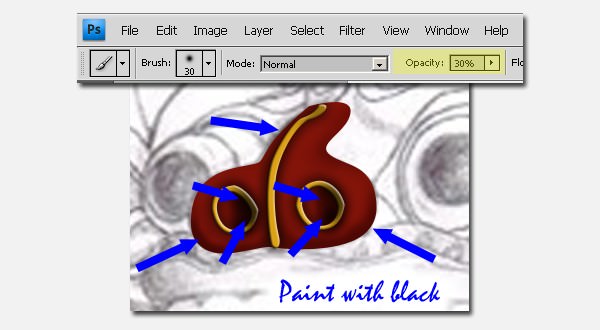
We need to add a dark side to parts of the nose. First, create a new layer in front of the left hole. Then set Blend Mode to Multiply. Then make a clipping mask (Cmd + Opt + G) / (Ctrl + Opt + G). Do the same to the Divide and Right Hole layers.
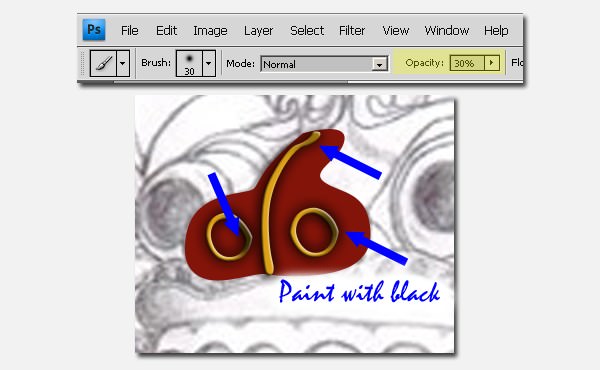
Paint the sides dark with a soft round brush on the new layers. Paint with black and with a thin brush opacity setting; you can use 30%.
Step 7
Do the same for the base of the nose with dark red. Create a new layer, set the Blend Mode to Multiply, and make a Clipping Mask, then paint the dark side with a thin opacity soft round brush. You may increase or decrease the opacity setting of the brush if needed but I prefer several thin brushing to just one thick brushing.
Step 8
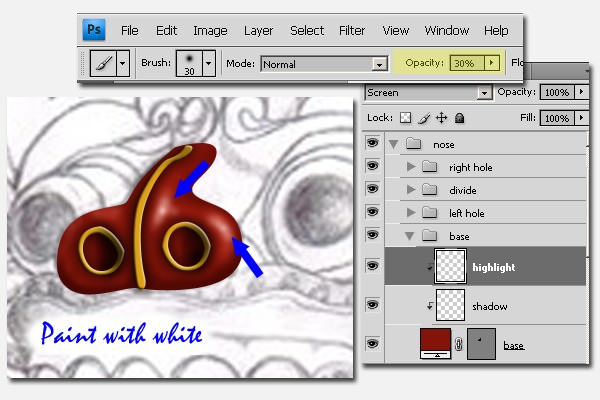
After that, add highlight to the nose. Create a Clipping Mask new layer with Screen blending mode. Paint the highlight white.
Step 9
Draw a circle for the left eye. And give a Gradient Overlay to it with the following settings.
- Blend Mode: Normal
- Opacity: 48%
- Gradient: White to Black
- Style: Radial
- Angle: 90º
- Scale: 139%
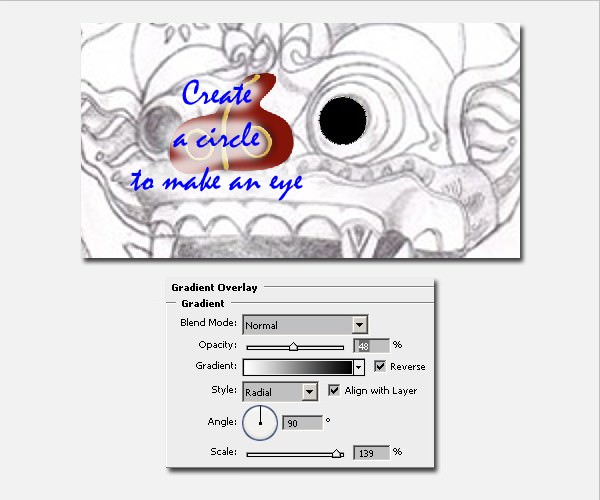
We need to drag the point of the gradient position to the right.

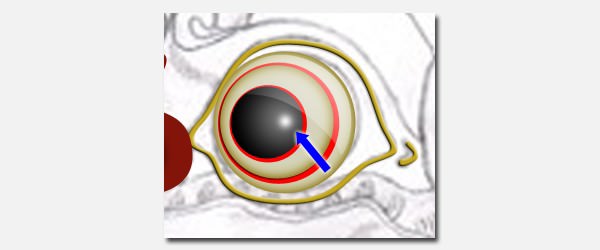
Step 10
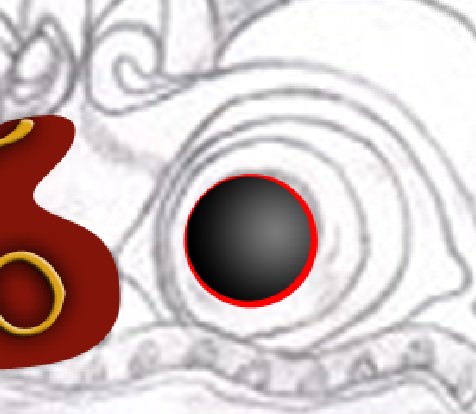
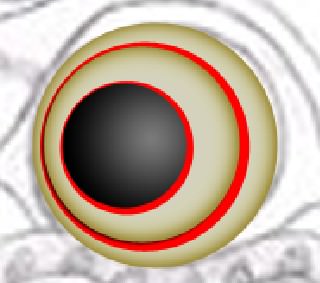
Draw a red circle behind the black circle at the position below.
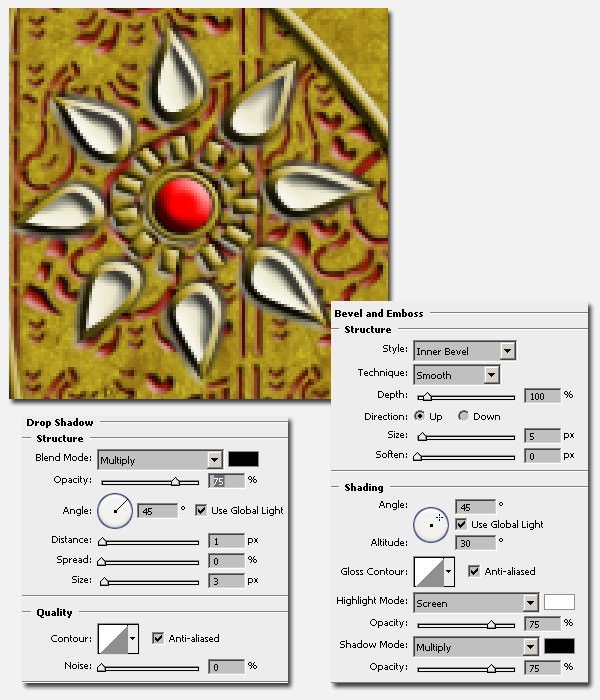
Step 11
Draw a #d4d2bd circle behind the red circle. Add Drop Shadow and Inner Glow layer styles.

Step 12
Again, draw a red circle and then a #d4d2bd circle again and add Inner Glow. Note the change in gradient.
- Blend Mode: Multiply
- Opacity: 75%
- *Set the gradient #ad941d to transparent
- Technique: Softer
- Source: Edge
- Size: 21 px
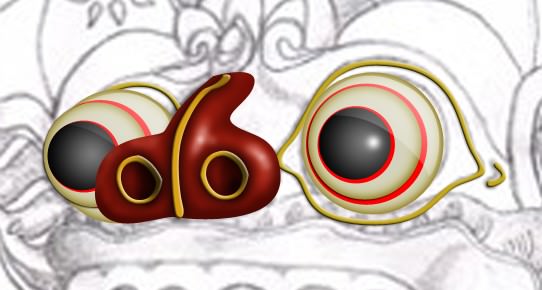
Step 13
Create a shape for the frame of the eye with a #c3a720 color setting. And give it Drop Shadow and Bevel and Emboss.
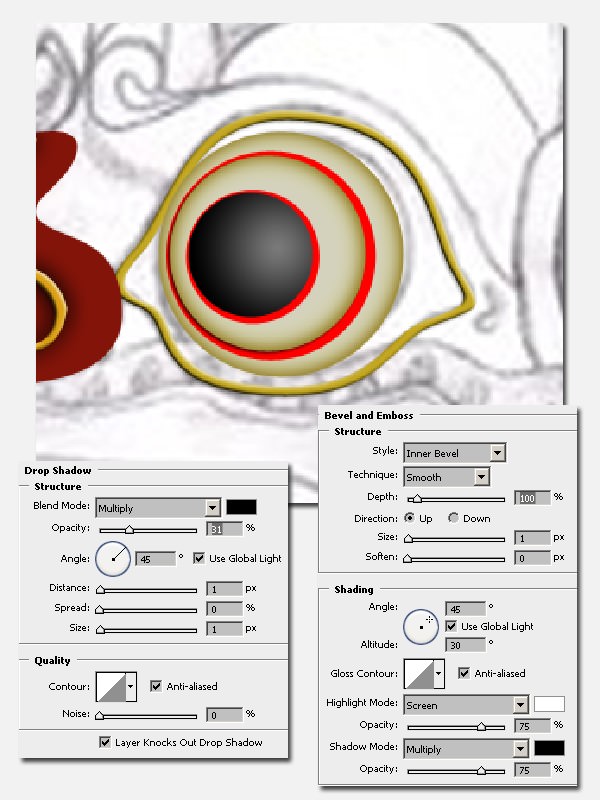
Draw this small shape and copy all layer effects from the eye frame. And the color setting also should be same, that is #c3a720.
Step 14
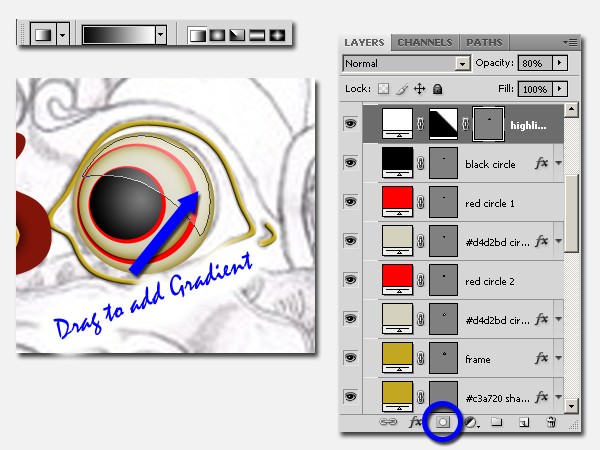
For adding highlights to the eye, draw a shape (like below) in front of the eye part layers. Set the color to white and the opacity layer to 80%.

Step 15
Add layer mask and then give it a linear gradient, black to white.
Step 16
Add a small highlight. In a new layer, use a soft round brush in white like you see below. Collect them into one group.
Step 17
Do the same way to the right eye. There will be a bit of a difference because of the angle of view. In this case, I didn’t make the small highlight because the right eye isn’t close to the light source.
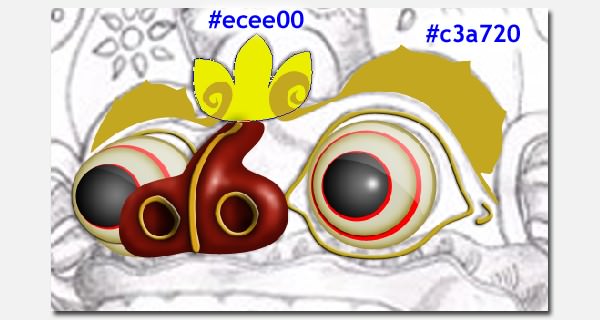
Head jewelry
Step 18
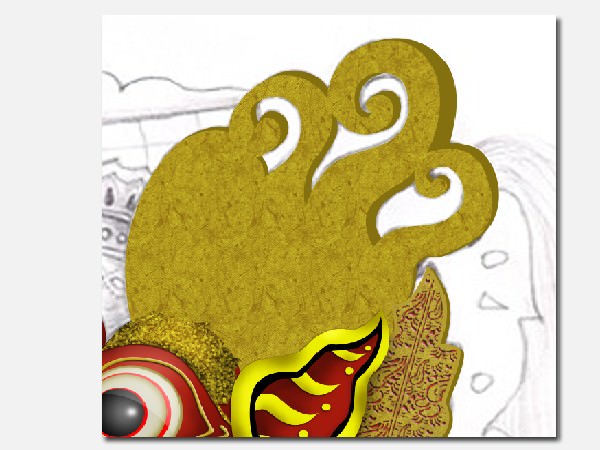
Let’s recreate the jewelry on the head. As you can see below, there are 3 shapes drawn, a tulip-like center and two half-moons above each eye. For the two, use #c3a720. For the center shape, use #ecee00.
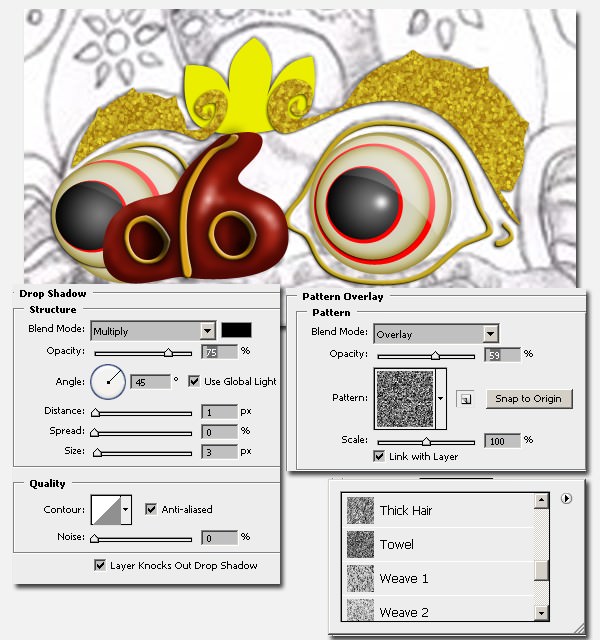
Step 19
For the left and right shapes, use these layer styles:
Drop Shadow
- Blend Mode: Multiply
- Opacity: 75%
- Angle: 45º
- Distance: 1 px
- Size: 3 px
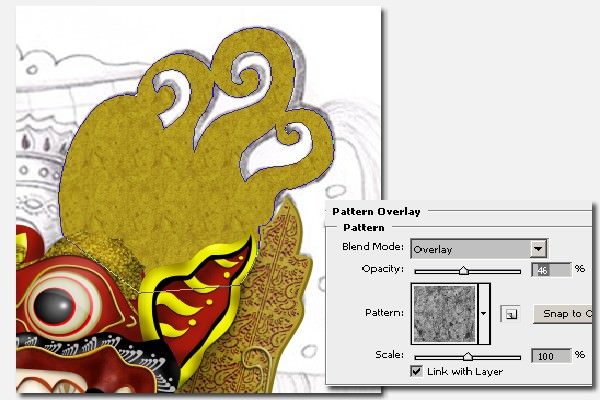
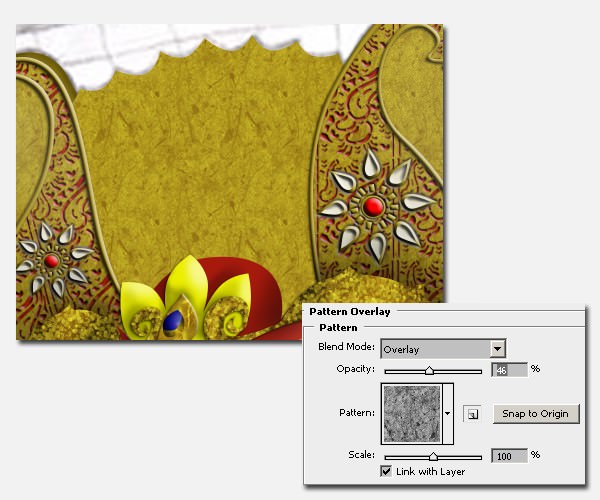
Pattern Overlay
- Blend Mode: Overlay
- Opacity: 59%
- Pattern: Texture Fill > Towel
- Scale: 100%
Step 20
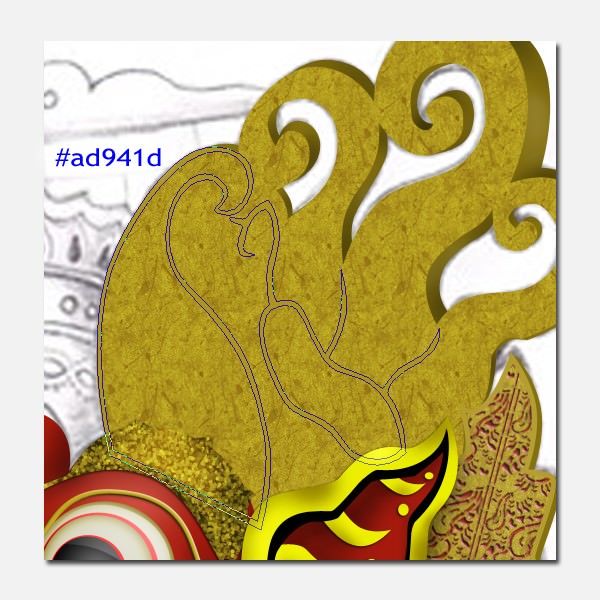
Draw a shape for the base of the bead on the center part of the jewelry. Use #c3a720 color setting.
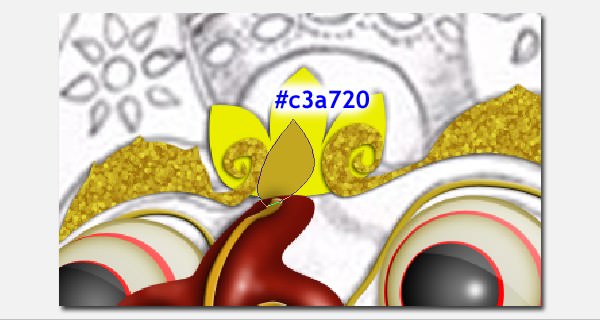
Then draw the main bead with #020283 color.
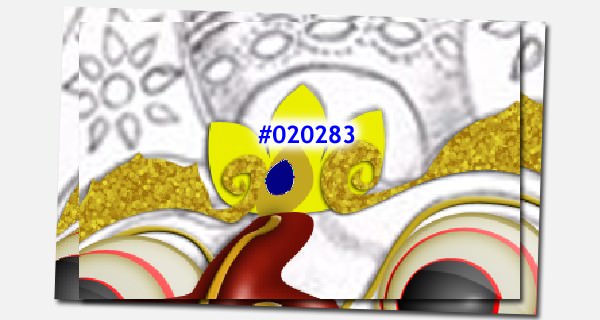
Then draw the shell of the main bead. Use #c3a720 for color.
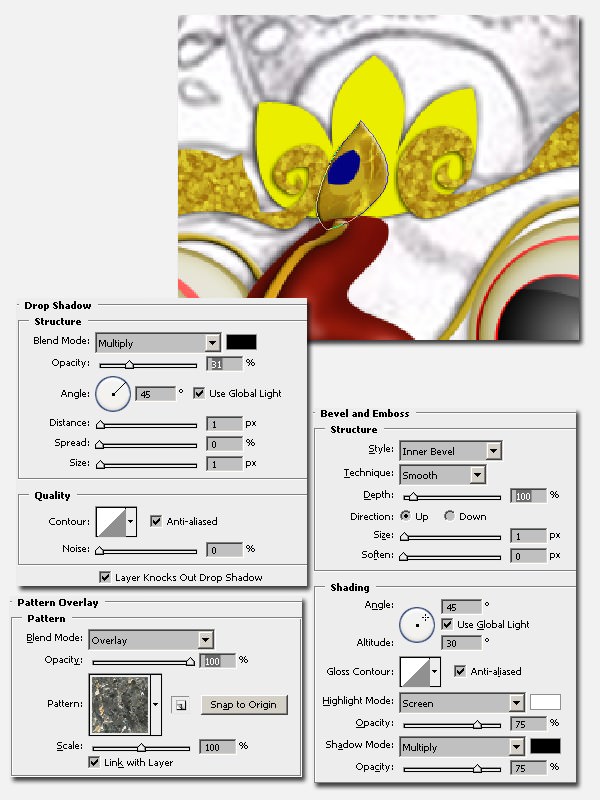
Step 21
For the base of the bead, add these layer styles:
Drop Shadow
- Blend Mode: Multiply
- Opacity: 31%
- Angle: 45º
- Distance: 1 px
- Size: 1 px
Bevel and Emboss
- Style: Inner Bevel
- Technique: Smooth
- Depth: 100%
- Direction: Up
- Size: 1 px
- Angle: 45º
Pattern Overlay
- Blend Mode: Overlay
- Opacity: 100%
- Pattern: Rock Patterns > Black Marble
- Scale: 100%
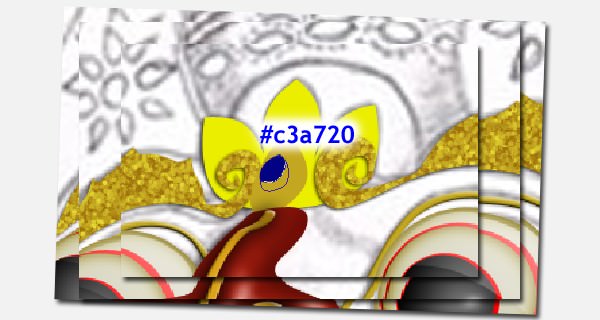
Step 22
Apply Inner Shadow on the main (blue) bead.
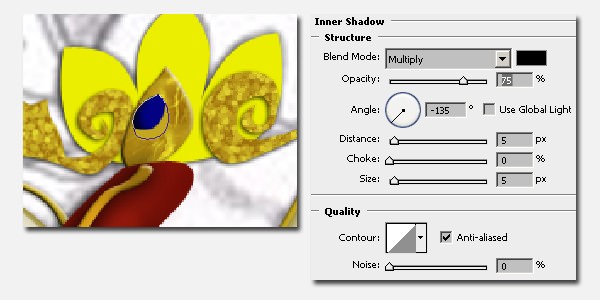
Step 23
For the shell of the bead, give these layer styles:
Gradient Overlay
- Blend Mode: Multiply
- Opacity: 75%
- Gradient: White to Black
- Style: Reflected
- Angle: 45º
- Scale: 78%
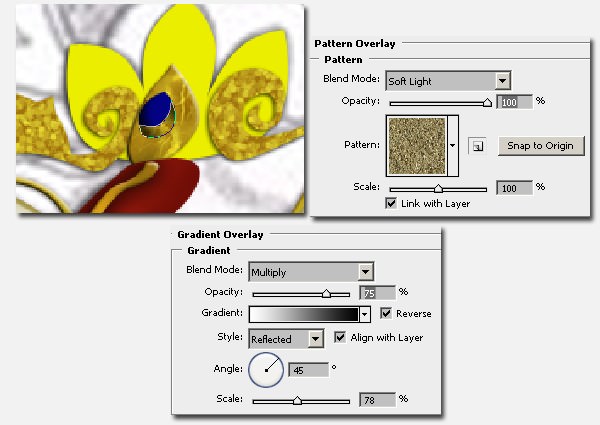
Pattern Overlay
- Blend Mode: Soft Light
- Opacity: 100%
- Pattern: Rock Patterns > Dirt
- Scale: 100%
Step 24
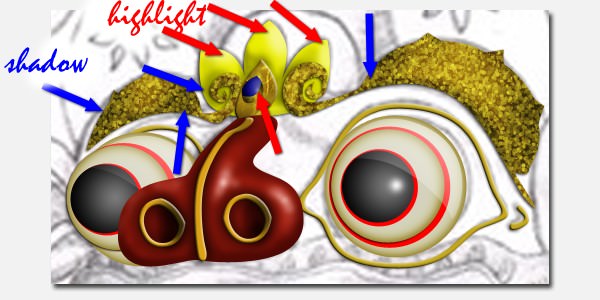
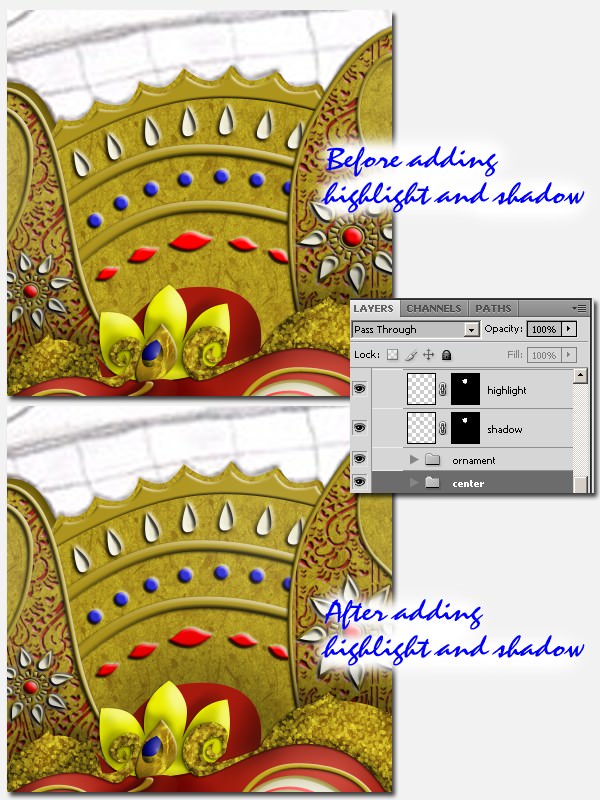
Add highlights and shadows by manual brushing them onto a Clipping Mask layer on each part. Set the Blend Mode of the highlight layer to Screen, and the shadow layers to Multiply. And don’t forget to manage them by grouping.
The Mouth
Step 25
Let’s create the mouth. Draw a mustache in black then add a motif for it.
Draw the motif with Shape Layer.
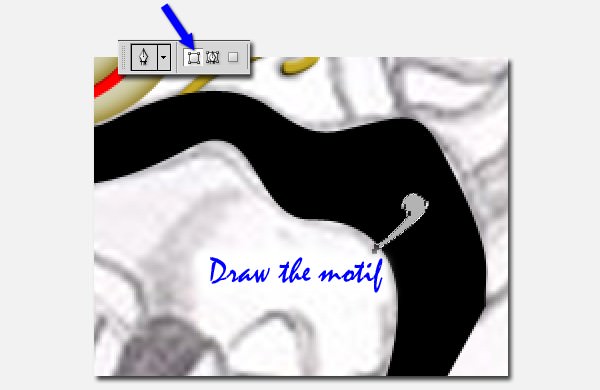
Copy the motif then resize it, and add a circle. Then combine them with Path Selection Tool (A). See this picture below as reference.
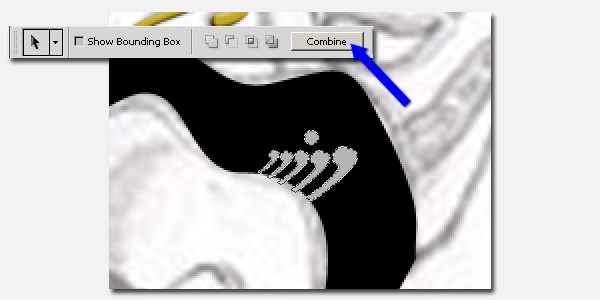
Then copy this new motif on the entire part of the mustache.
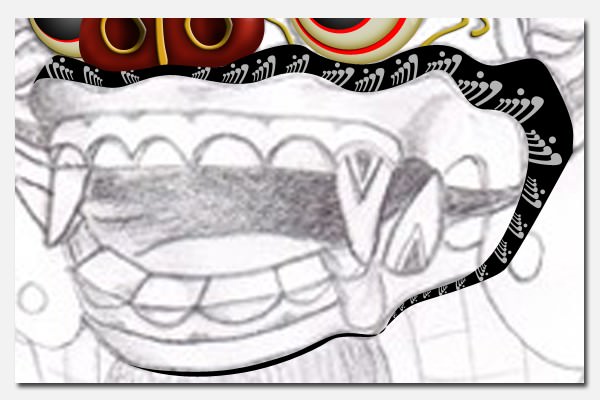
Step 26
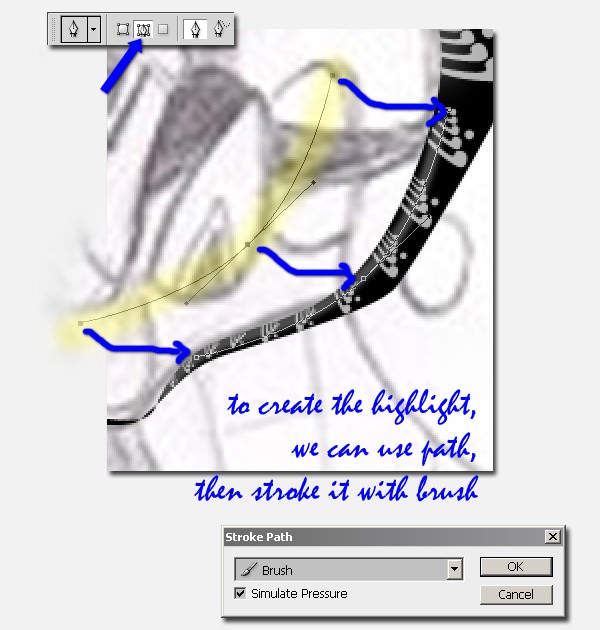
Add highlight by manual brushing on a new Clipping Mask layer. Set Blend Mode to Screen and paint white.
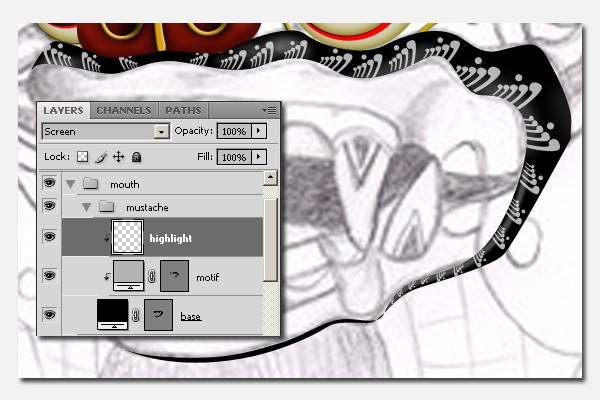
You can use path. Draw the path for highlight with the Pen Tool (P) then Stroke Path with Brush.
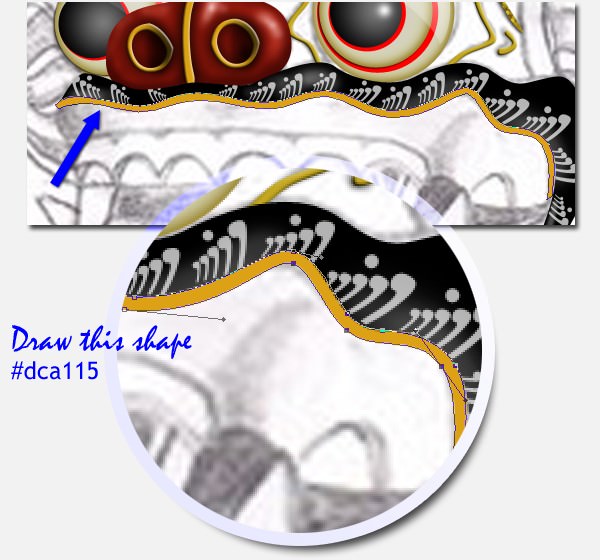
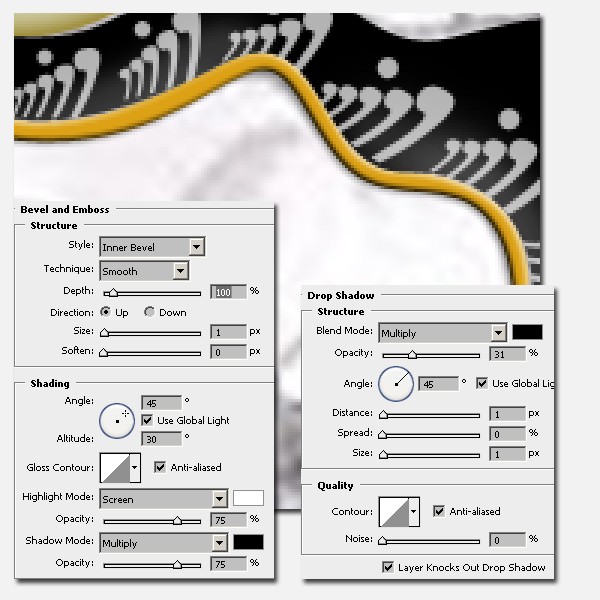
Step 27
Draw the shape you see below the mustache with #dca115 color setting, name it Divide and then add Drop Shadow and Bevel and Emboss.
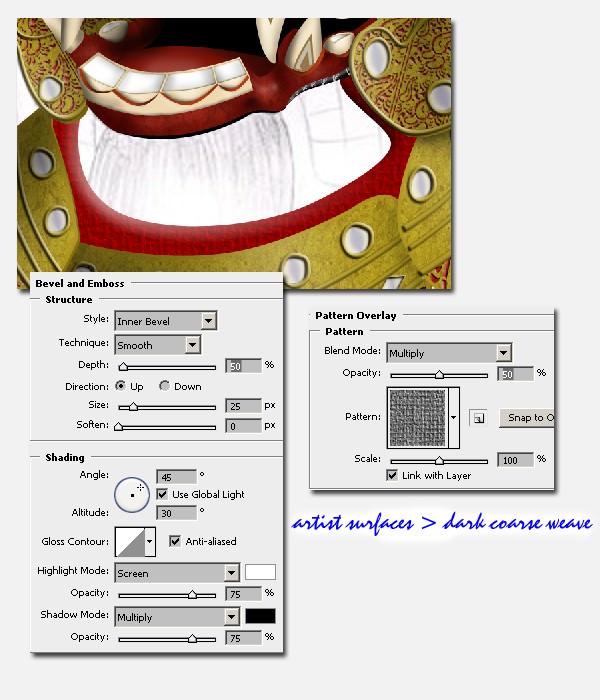
The Gum
Step 28
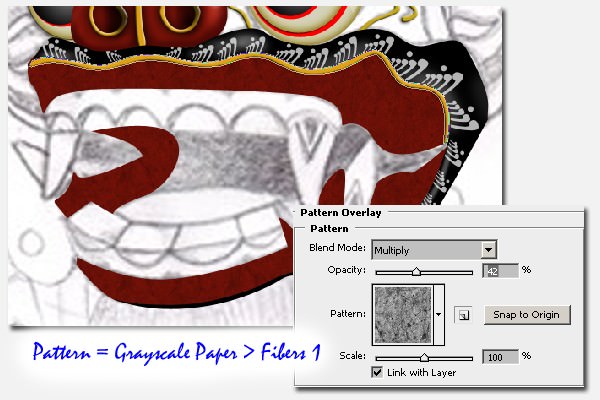
Draw the gum with #831409 color setting and add Pattern Overlay. Use Grayscale Pattern > Fibers 1.
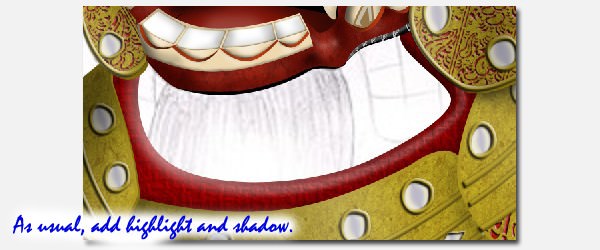
Step 29
Add highlights and shadows like what you see below.
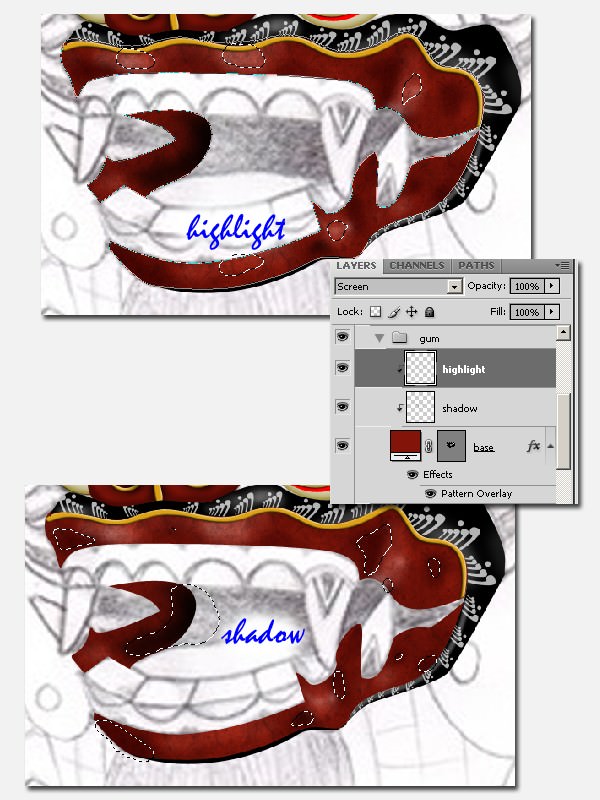
Manage them by grouping.
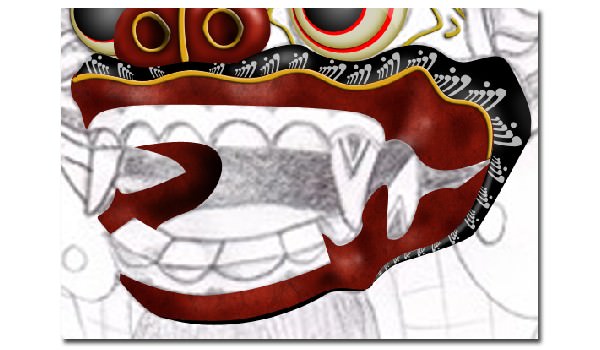
The Teeth and Tongue
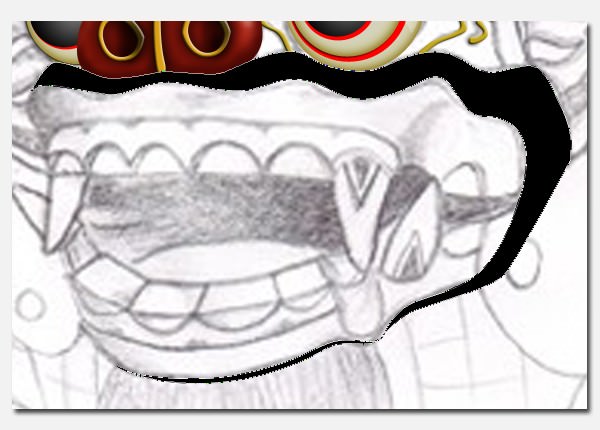
Step 30
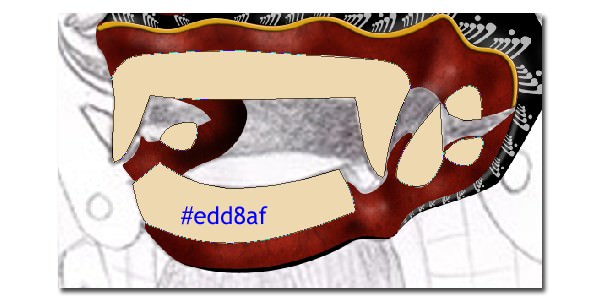
Draw the shape of its teeth using #edd8af color. This is your ‘teeth layer’. Add a ‘right fang’ layer, we’ll draw it later on a different layer behind the ‘teeth layer’.
Step 31
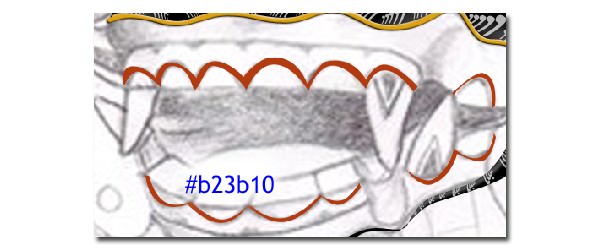
Then create a divide on the teeth with the #b23b10 color. You can hide some layers in order to get easier tracings from the pencil sketch.
Step 32
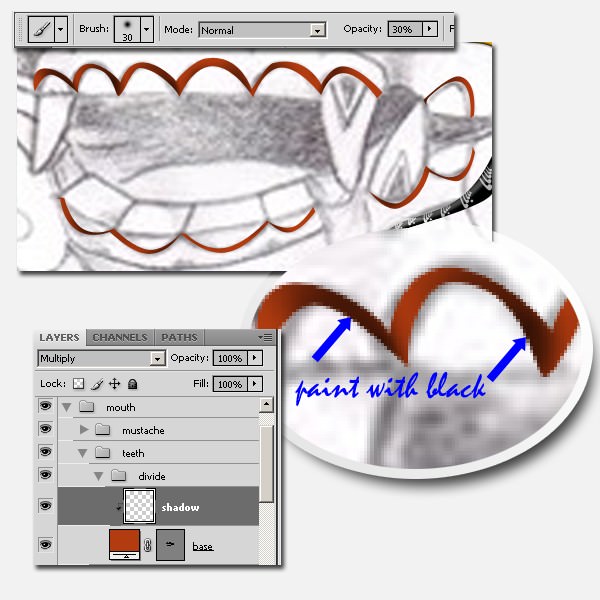
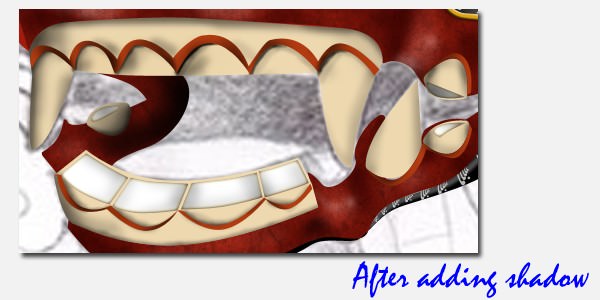
Give the divide a shadow like below.
Step 33
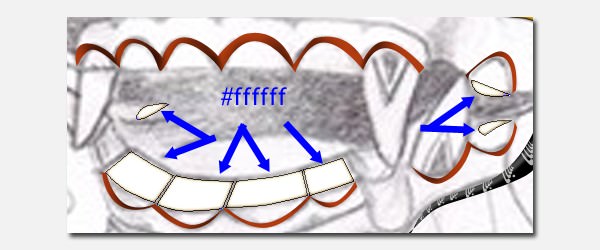
Create the ‘inner teeth’ shape layer in front of ‘teeth layer’. Use white (#ffffff). And then add dark sides to the inner teeth. Create a new Clipping Mask layer named ‘shadow’ in front of ‘inner teeth’ and paint it with soft black.
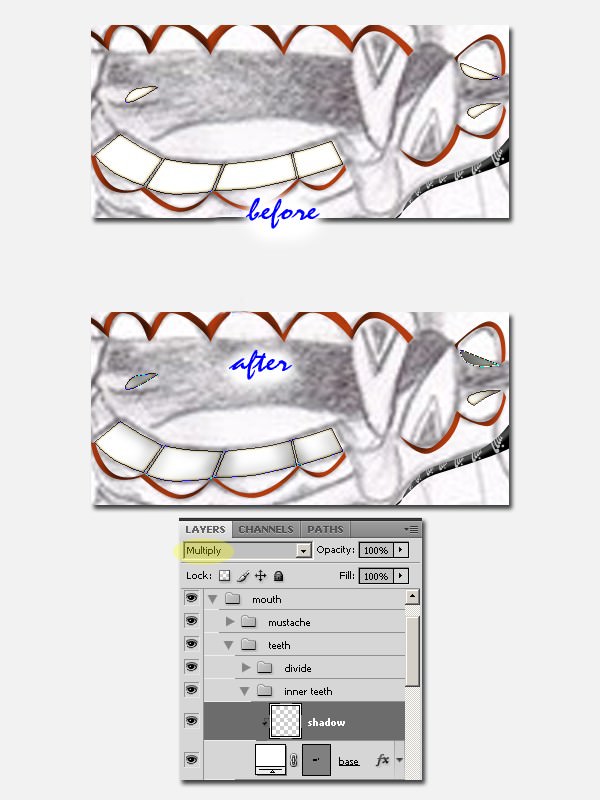
Then bring back the hidden layers.
Step 34
Add shadows and highlights for the teeth.
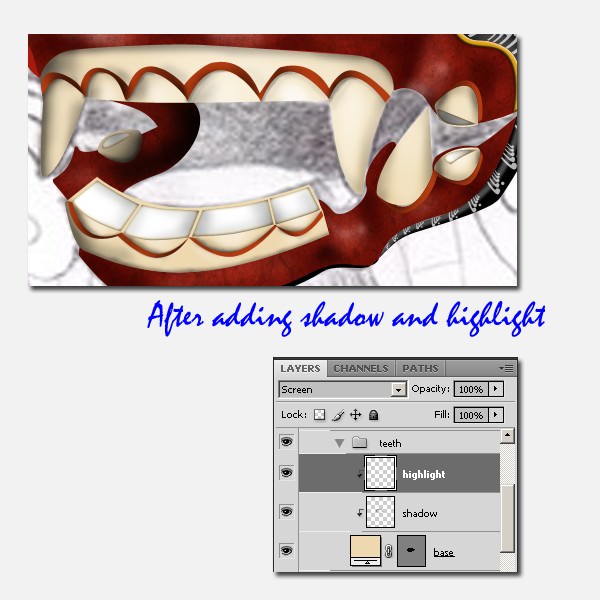
Step 35
Create the ‘right fang’ behind ‘teeth layer’ and add highlights and shadows to it.
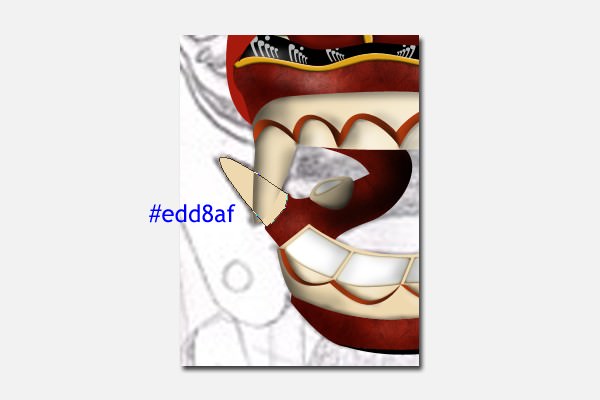
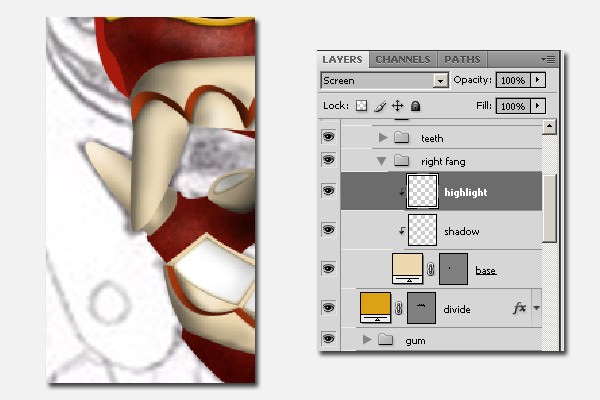
Step 36
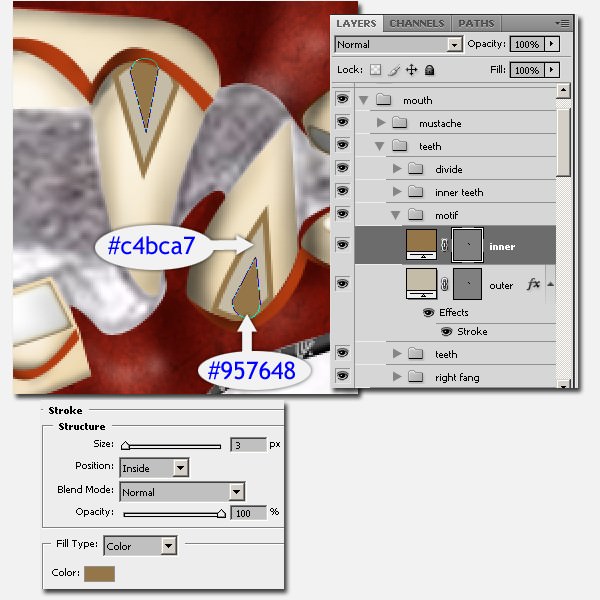
Apply a motif on the ‘left fang’. For the inner motif use #957648 and for the outer, use #c4bca7. Then add stroke with this colour #957648 for the outer part. See picture below for reference.
Step 37
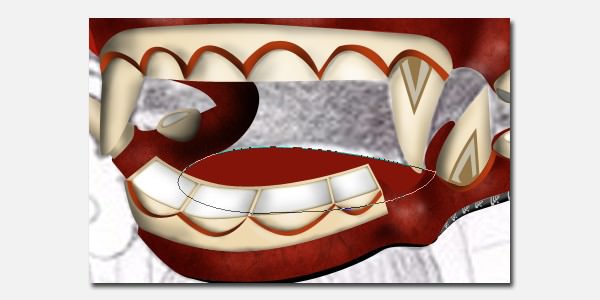
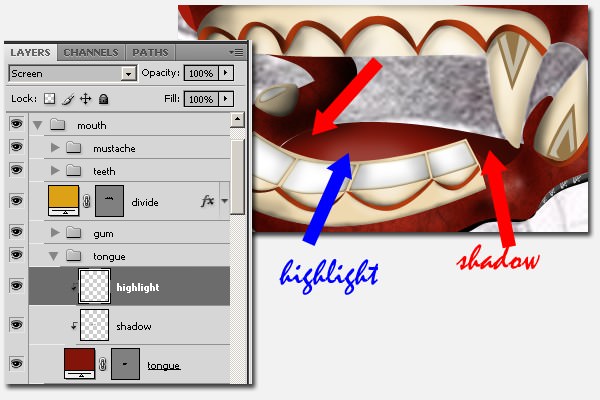
Create the shape of the tongue. Draw it behind the gum and teeth then add highlights and shadows to it.
Step 38
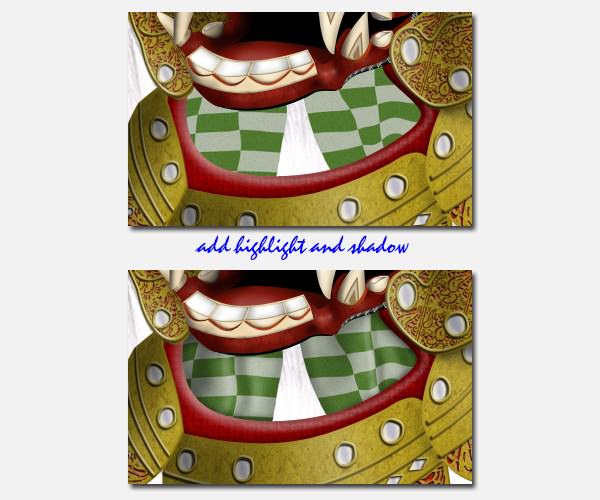
Create the hole of mouth. Draw it behind tongue and color it black.

Manage them by grouping.
Step 39
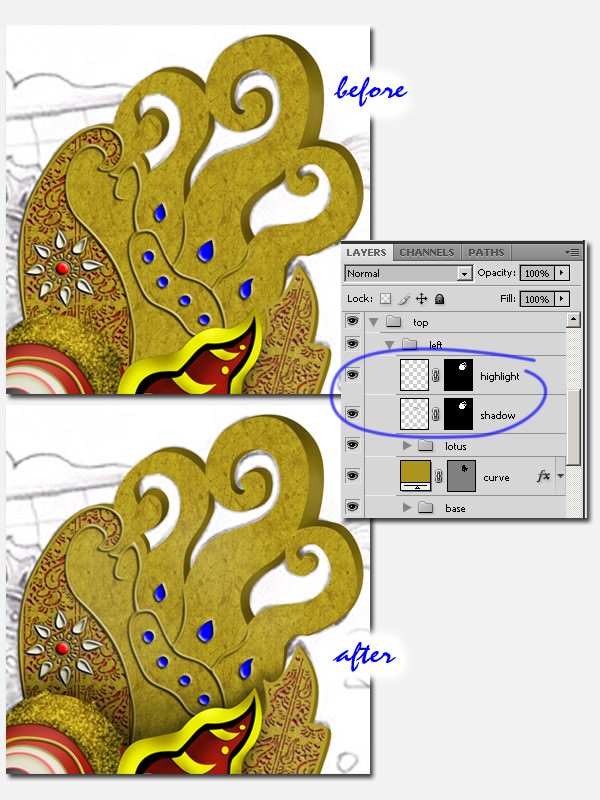
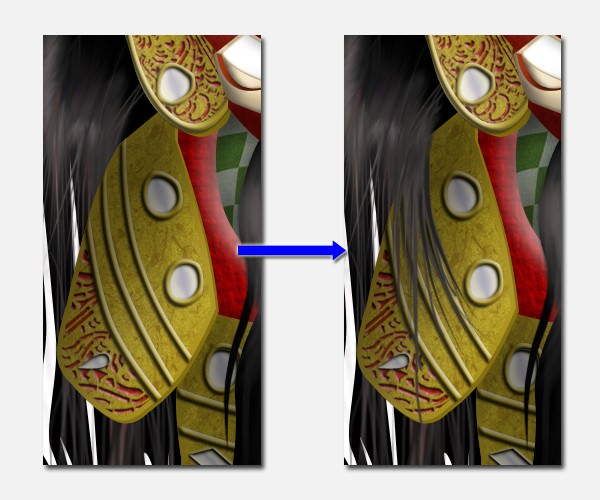
We also need to add highlights and shadows on the head.

The Ears
Step 40
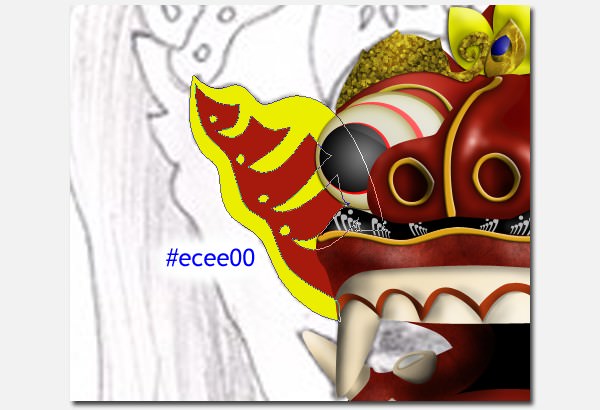
Then create the base shape for the right ear behind the right eye and in front of the head. Use #a61a0d for color.
Step 41
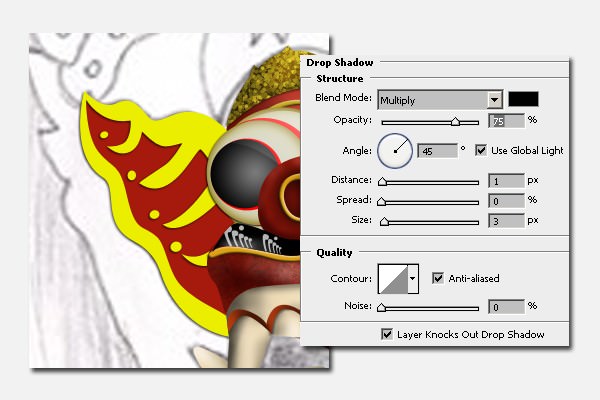
Draw the ‘yellow shape’ in front of the ear’s base. Use #ecee00 for color. And then add Drop Shadow to it.
Step 42
Then draw the black shape in front of the yellow shape.
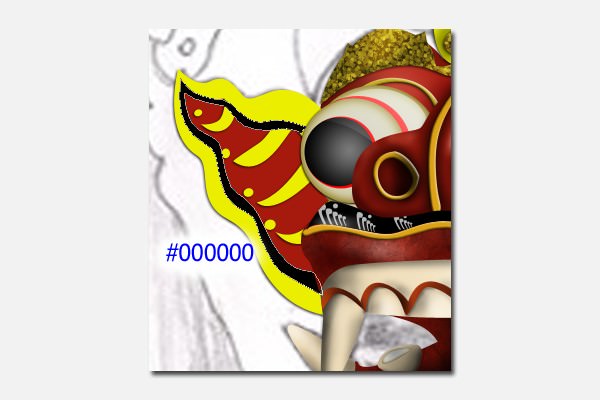
Step 43
Add highlights and shadows on the red ‘base’ and ‘yellow shape’.
Manage them by grouping.
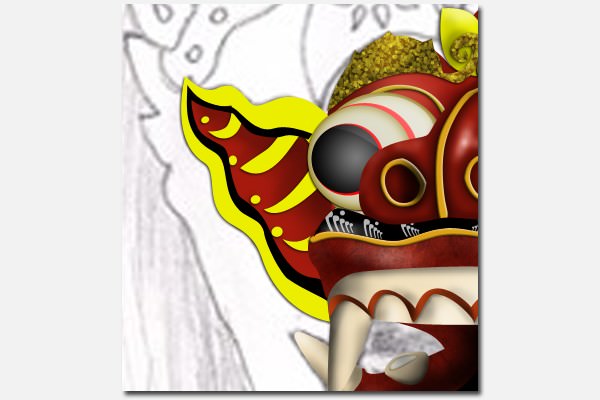
Step 44
Do the same way to create the left ear.
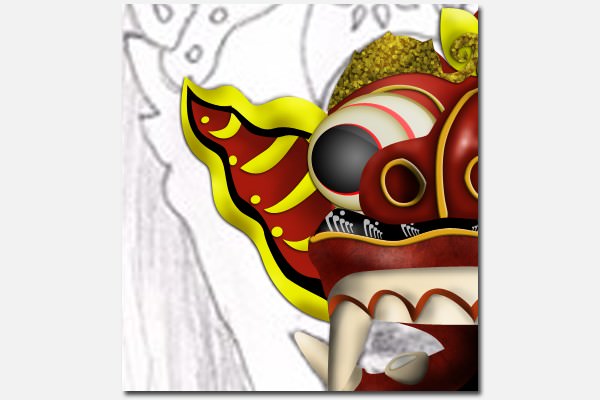
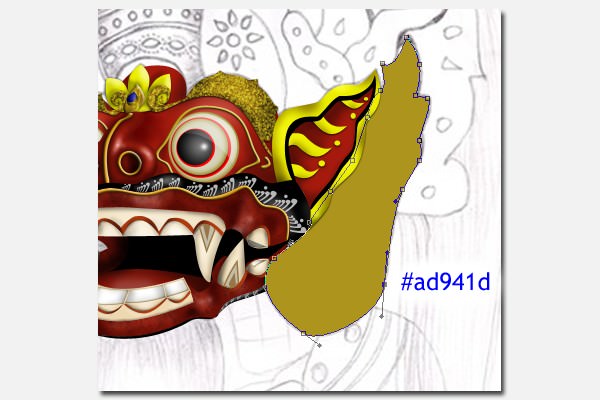
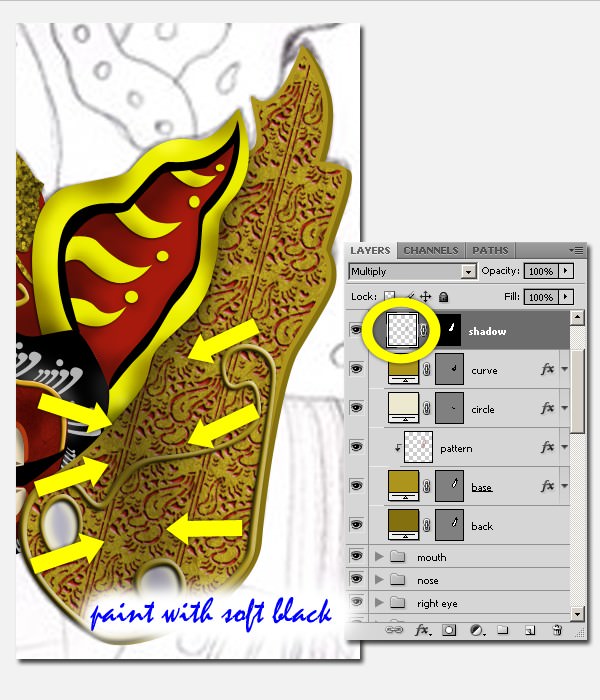
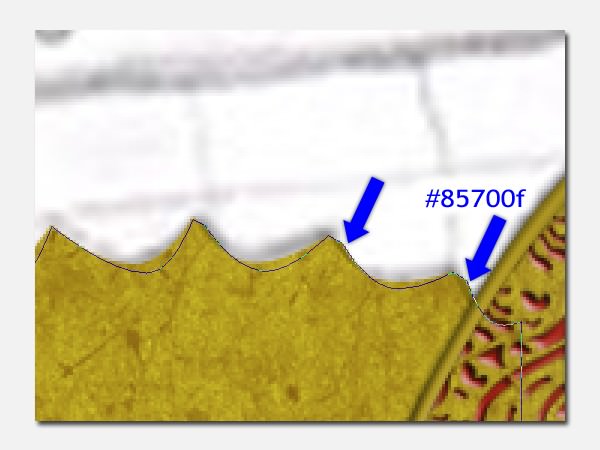
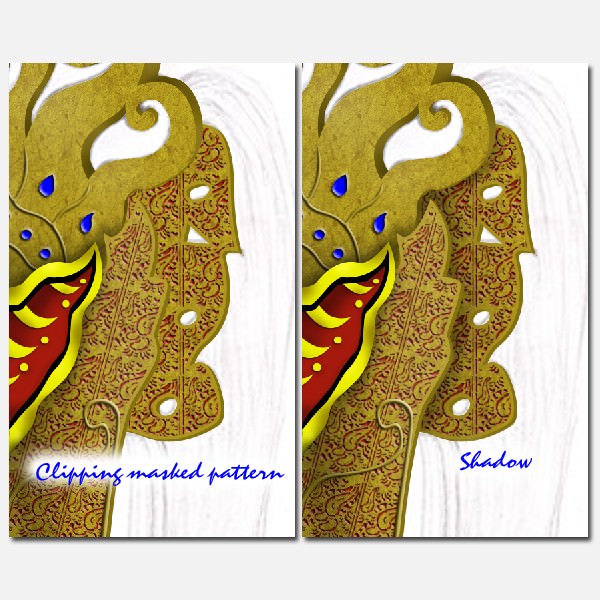
Step 45
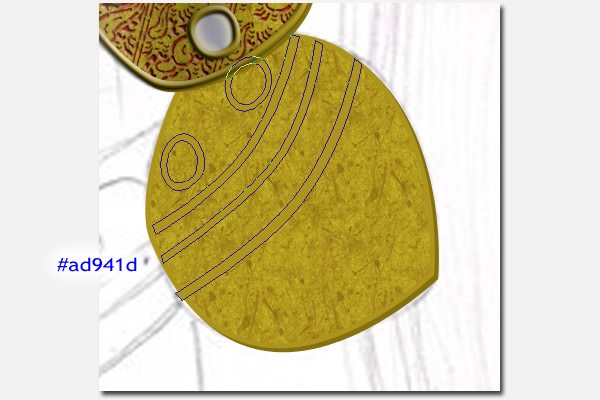
Then create this part. I call it ‘left side’. Draw the shape of the base behind the left ear. Use #ad941d for color.
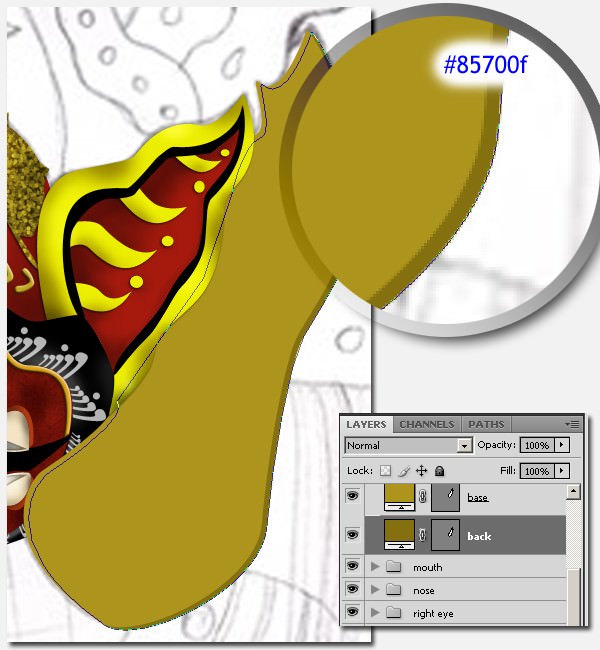
Step 46
In order to get a bit of a depth for the ‘left side’, copy the shape and change the color to #85700f. Put the copy behind the ‘base shape’ and nudge it a bit to the right and lower it a bit too.
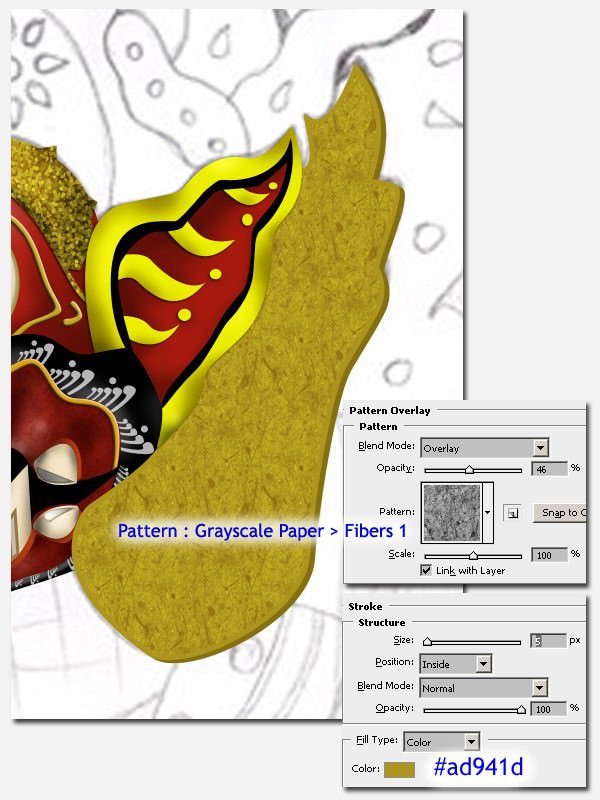
Step 47
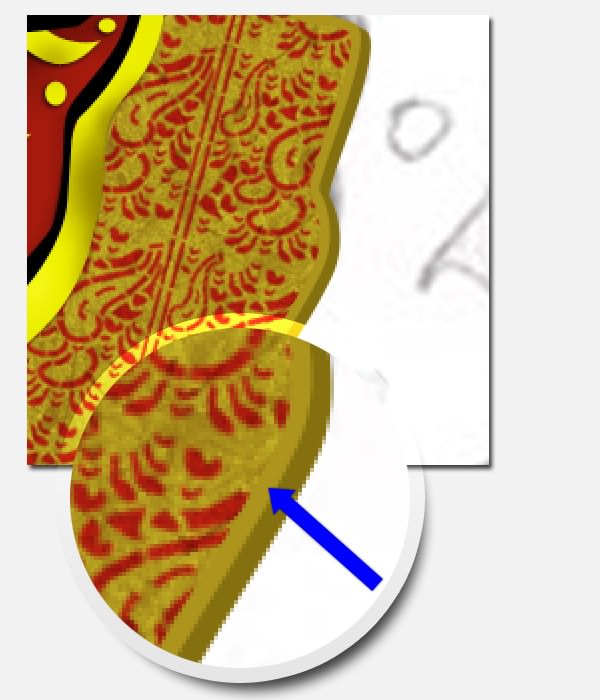
Add Pattern Overlay and Stroke for for the ‘base’ layer. For the pattern use Grayscale Paper > Fibers 1.
Step 48
Add a pattern for the base with the brush. You may use this brush or create your own. Set the color to #a61a0d. And then create a Clipping Mask.

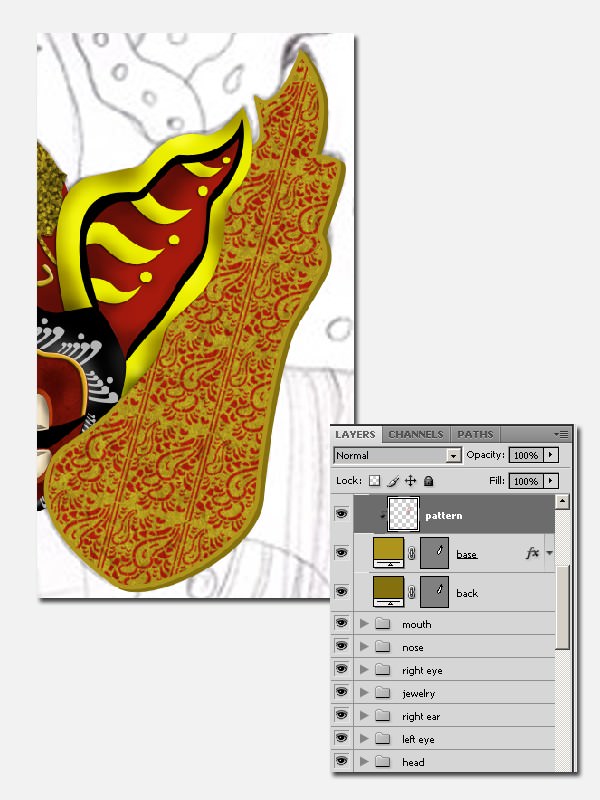
After creating a Clipping Mask, we can see why we added Stroke onto the base layer. This is to get a gap between the pattern and the edge of the base shape.
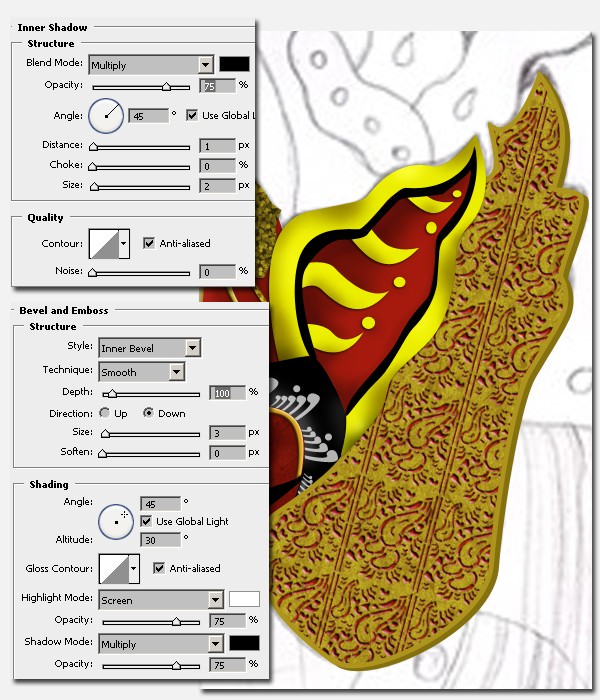
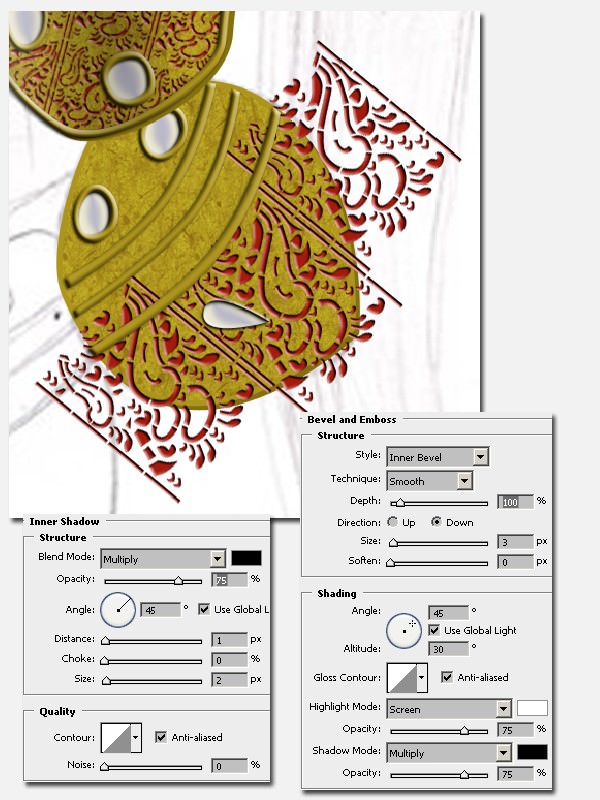
Step 49
Then add Inner Shadow and Bevel and Emboss.
Step 50
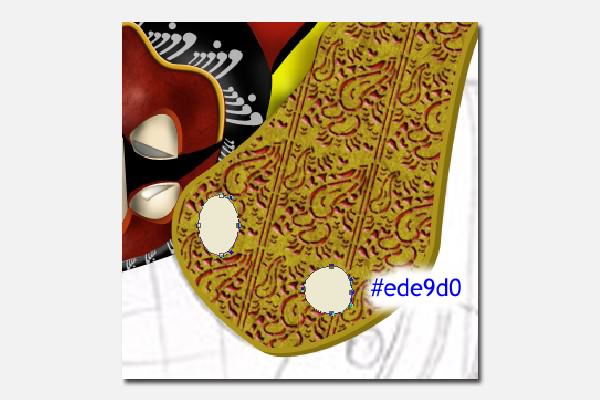
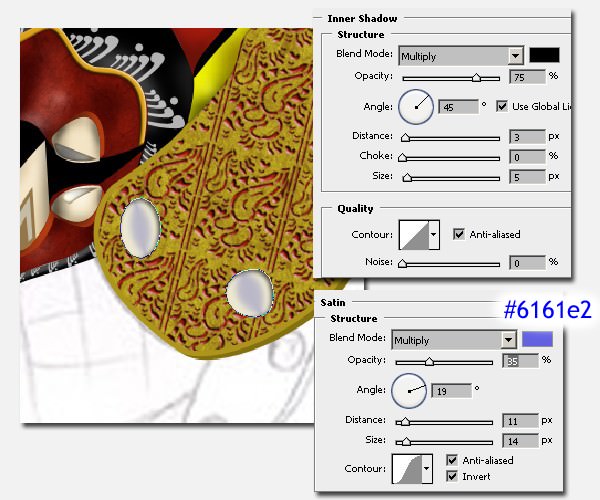
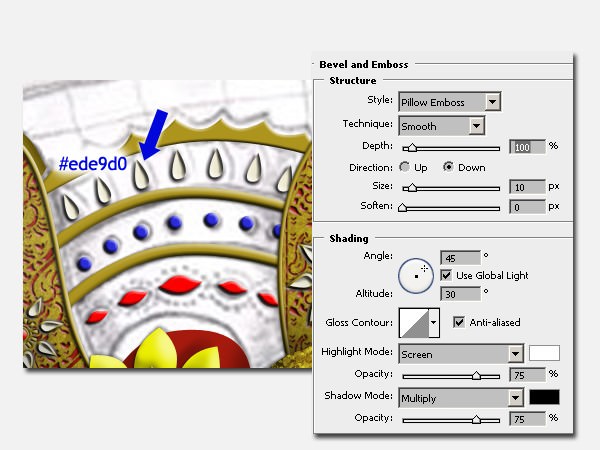
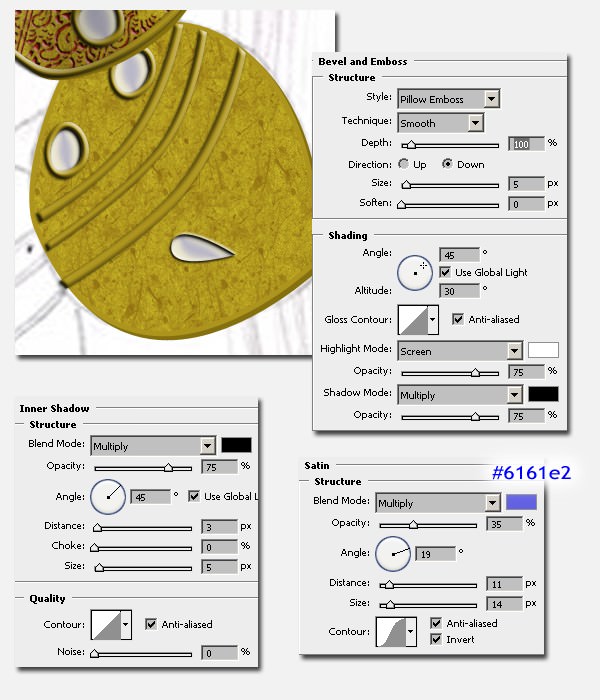
Create two circles with #ede9d0 color. Then add Inner Shadow and Satin.
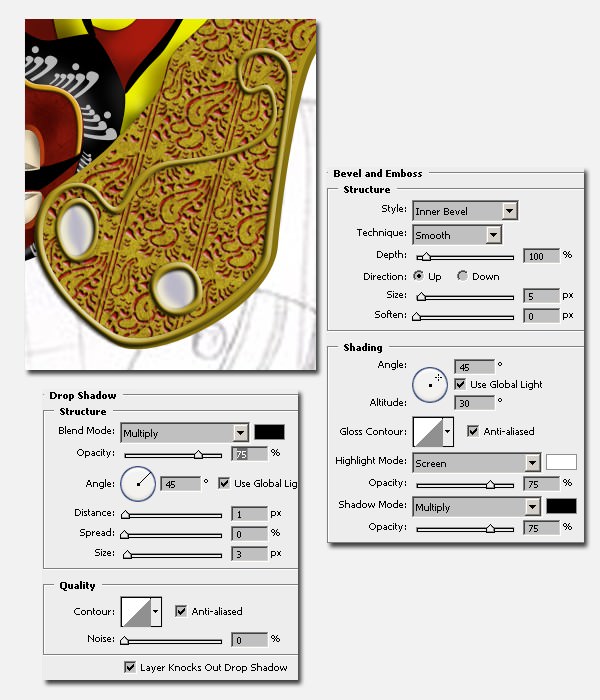
Step 51
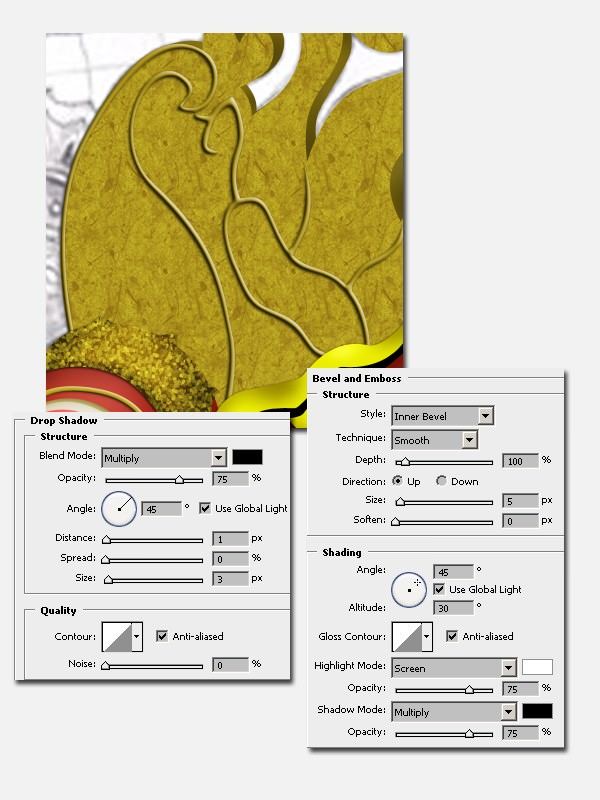
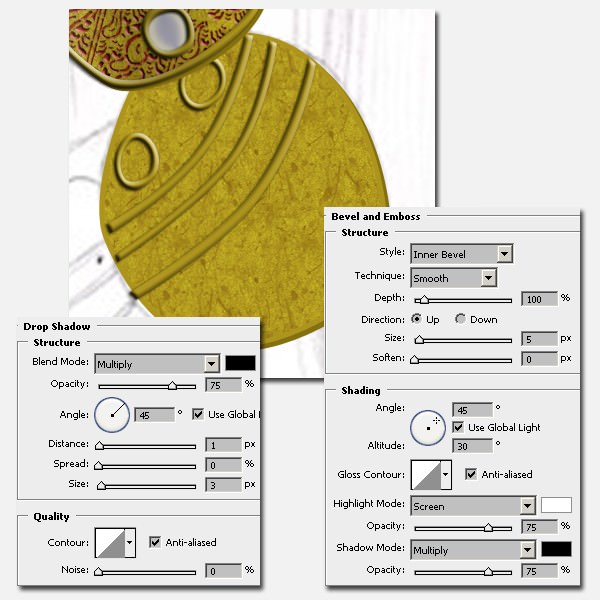
Draw curves with #ad941d. Add Drop Shadow and Bevel and Emboss for these curves.
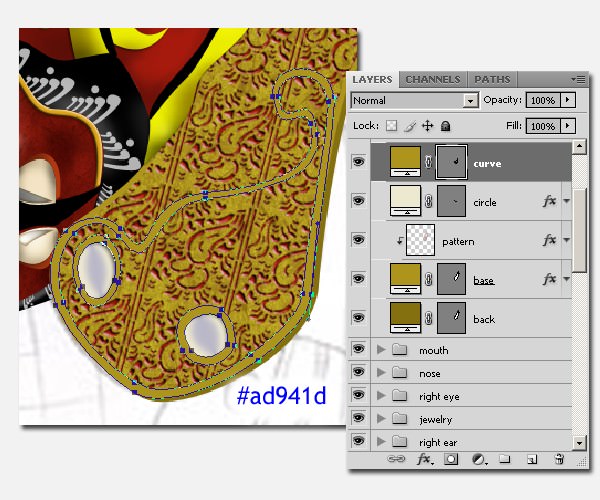
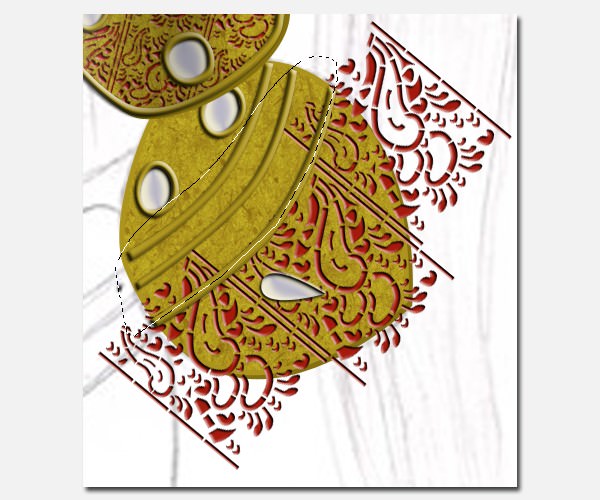
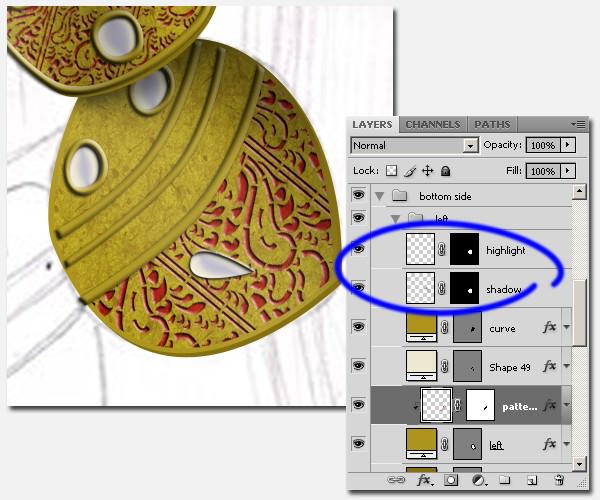
Step 52
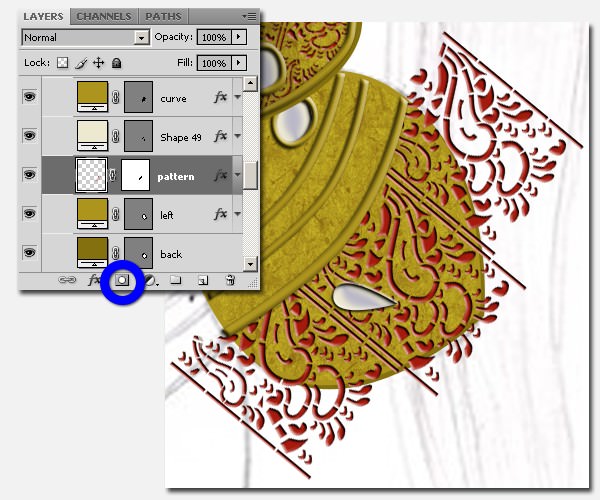
Create a new layer for adding shadow. But this time we won’t create a clipping mask because clipping mask layers will only influence the curves. We’ll use layer mask. Select from base shape for this ‘shadow layer’.
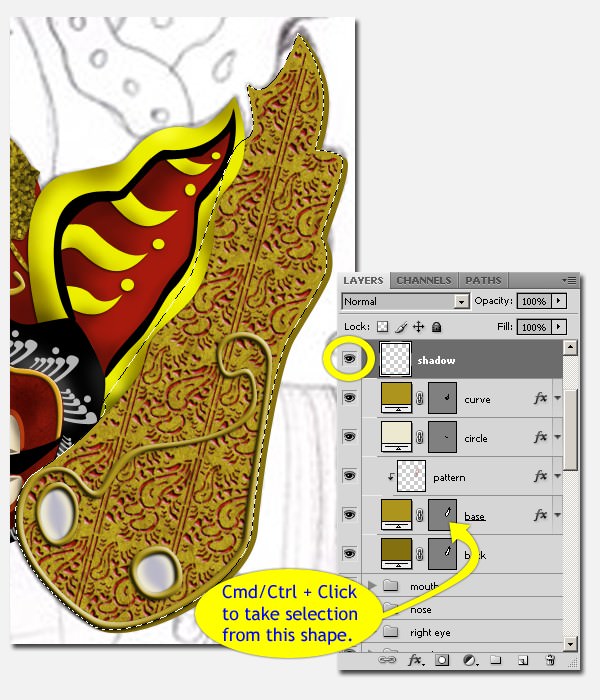
Create a layer mask by clicking Add layer mask icon. And set the Blend Mode to Multiply.
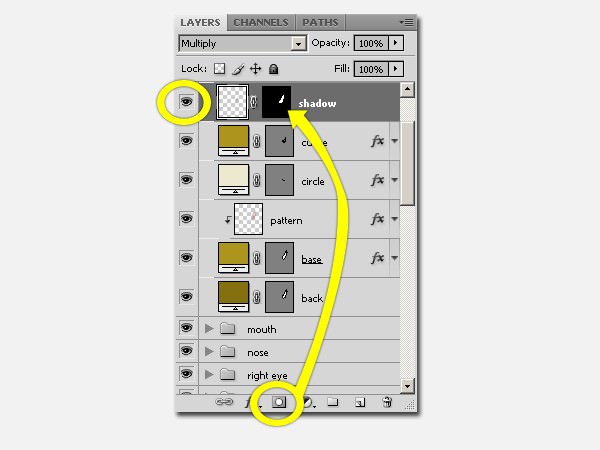
Step 53
Activate the ‘shadow layer’, not the layer mask. Make sure that the layer thumbnail is surrounded by a frame. Then paint the shadow area black to create shadows. Use a soft round brush with low opacity and low hardness.
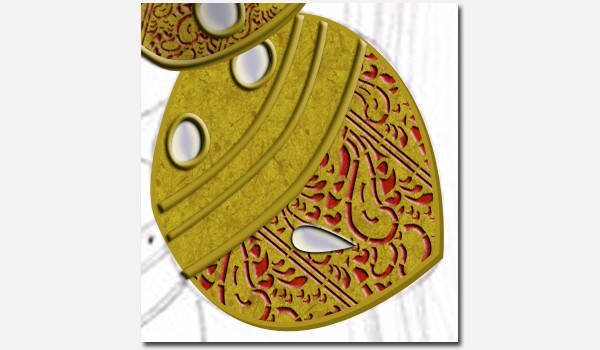
Step 54
Use the same way for highlights. Set Blend Mode to Screen.
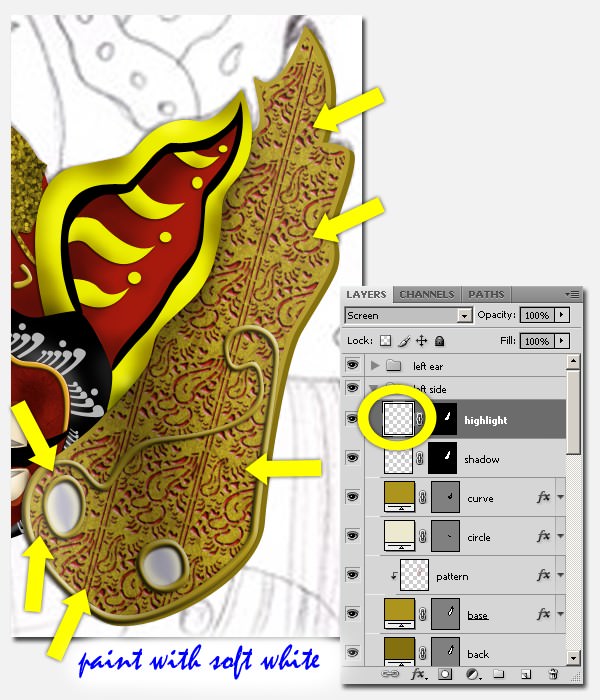
Manage them by grouping.
Step 55
Create the ‘right side’ behind the head.
Step 56
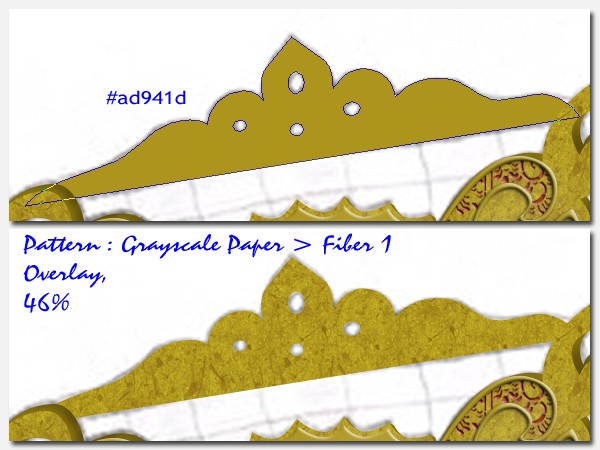
For the top left part. Draw this shape and name it ‘base’. Then add Pattern Overlay with Grayscale Paper > Fiber 1.
Step 57
Copy the shape without copying the layer style. Arrange it underneath the shape layer and change the color to #85700f. Name it ‘back’ then do some editing if necessary in order to get a 3D view for this top left part. Don’t forget to give highlights and shadows to it.
Step 58
Draw these #ad941d curves then add Drop Shadow and Bevel and Emboss.
Step 59
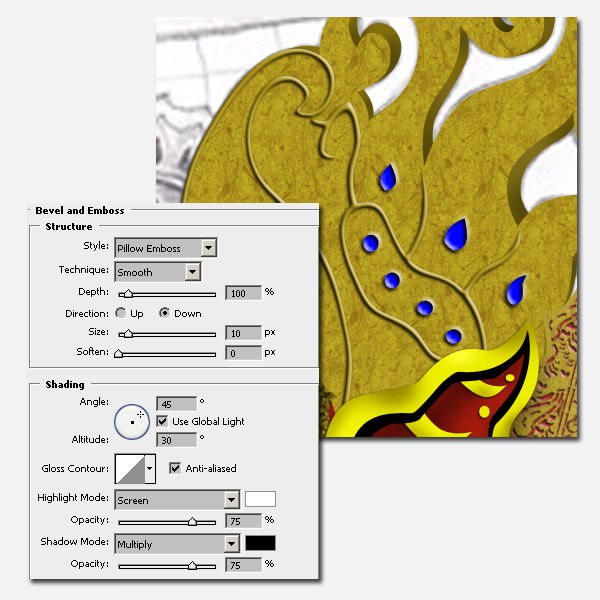
Create blue beads and Bevel and Emboss for them.
Step 60
Add pattern by brushing. Set the color to #a61a0d, then add Inner Shadow and Bevel and Emboss.
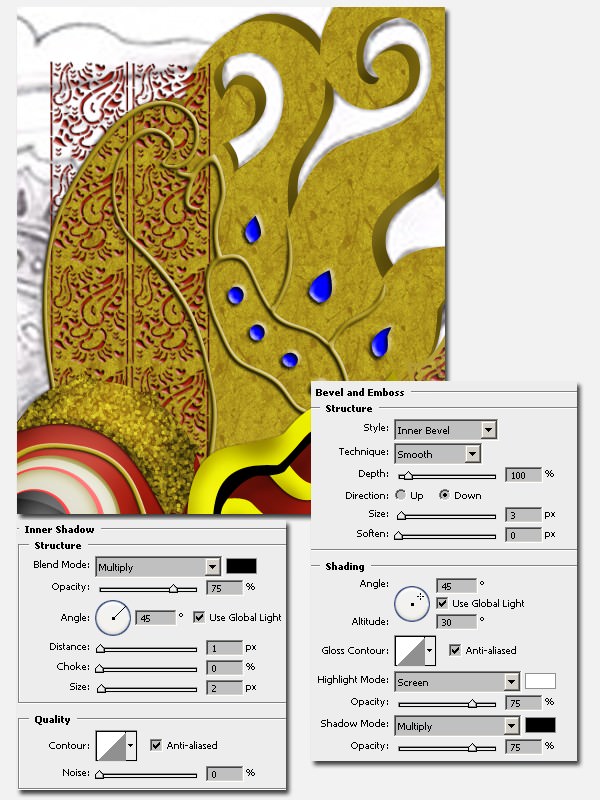
Step 61
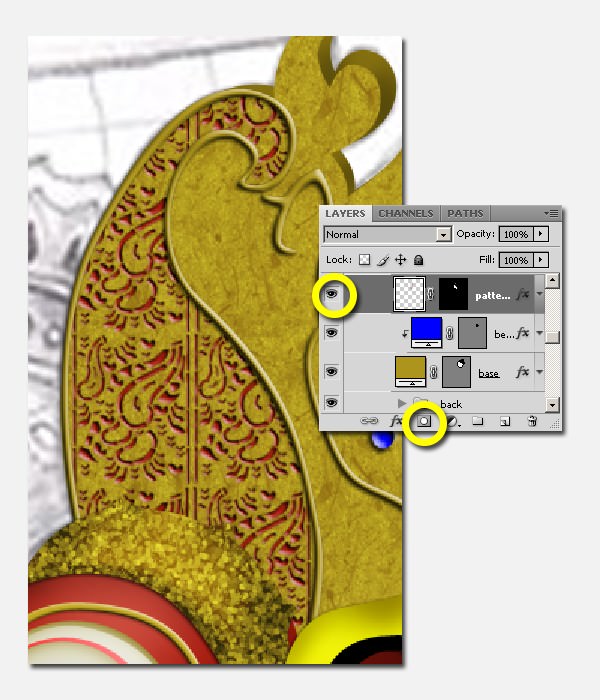
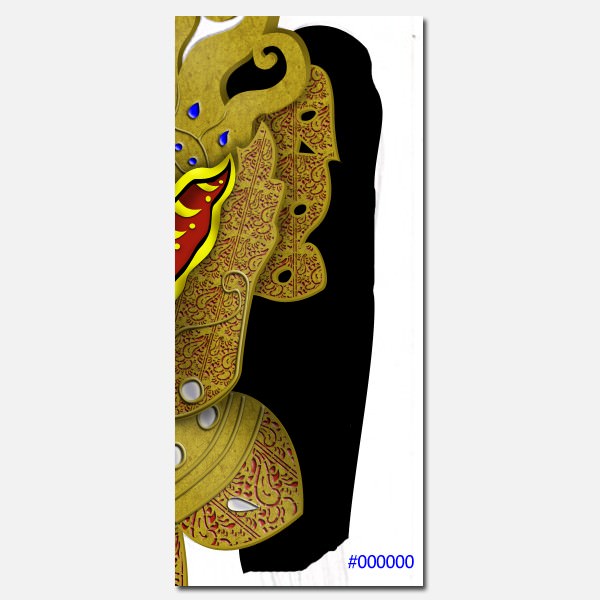
We need to mask unnecessary parts. Take selection from the curve.
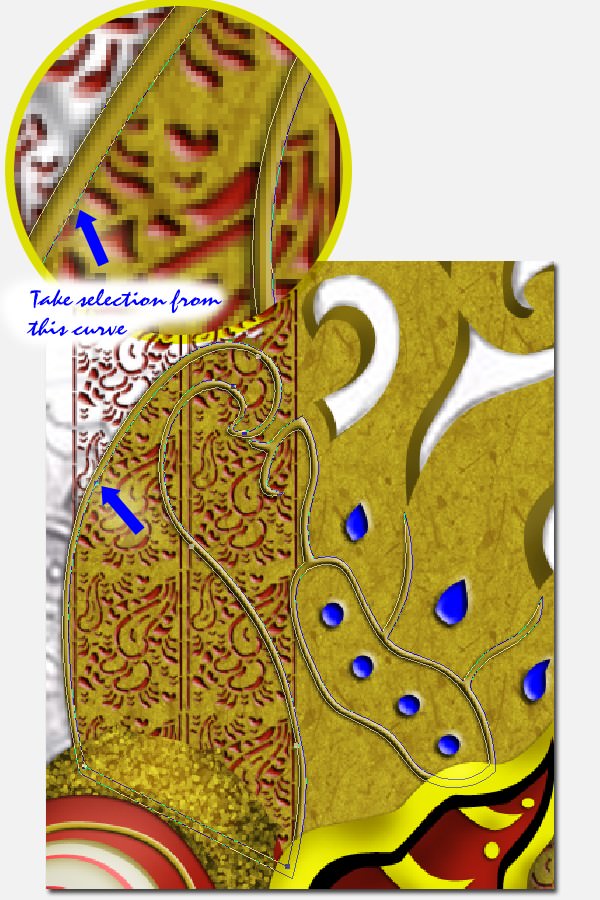
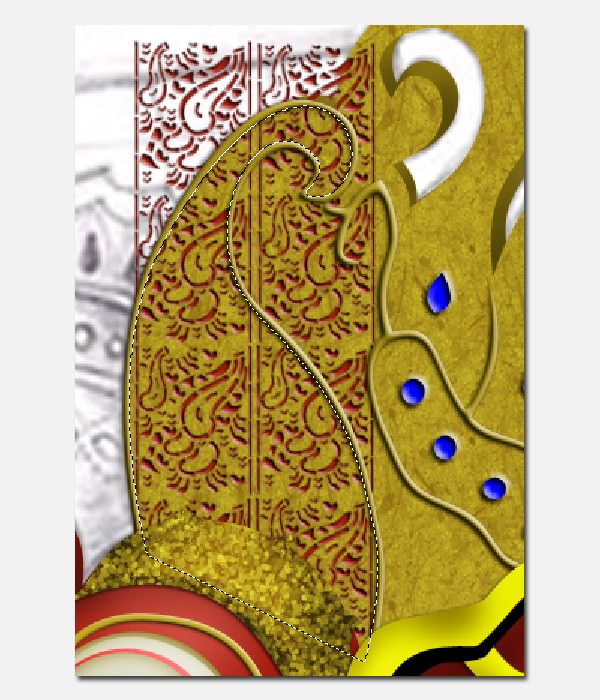
Put your cursor onto the pattern layer again to activate it. Then inverse selection (Cmd / Ctrl + Shift + I). And add vector mask.
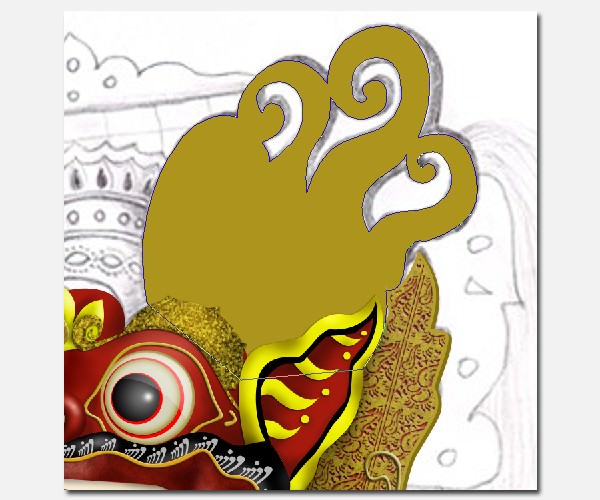
Step 62
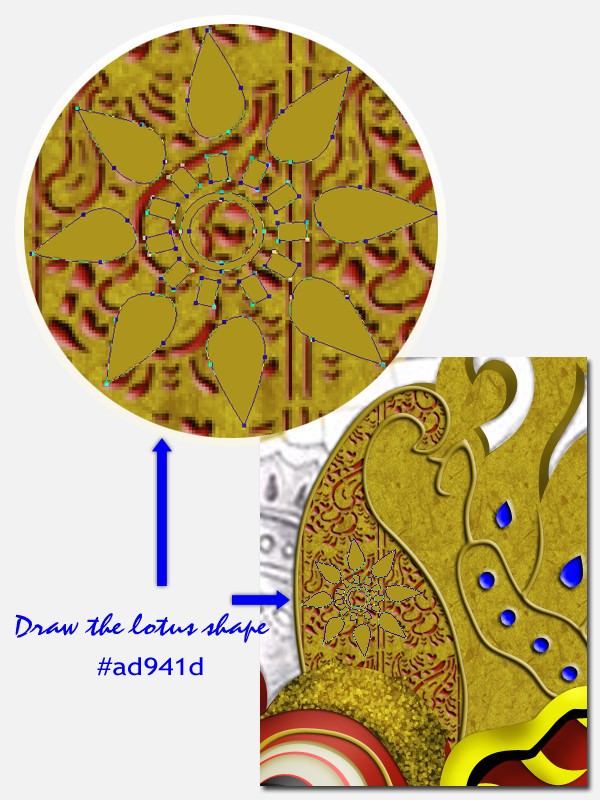
Then draw the lotus shape. You can see this image for reference or create your own lotus design. Set the color to #ad941d. Then apply Drop Shadow and Bevel and Emboss for our lotus.
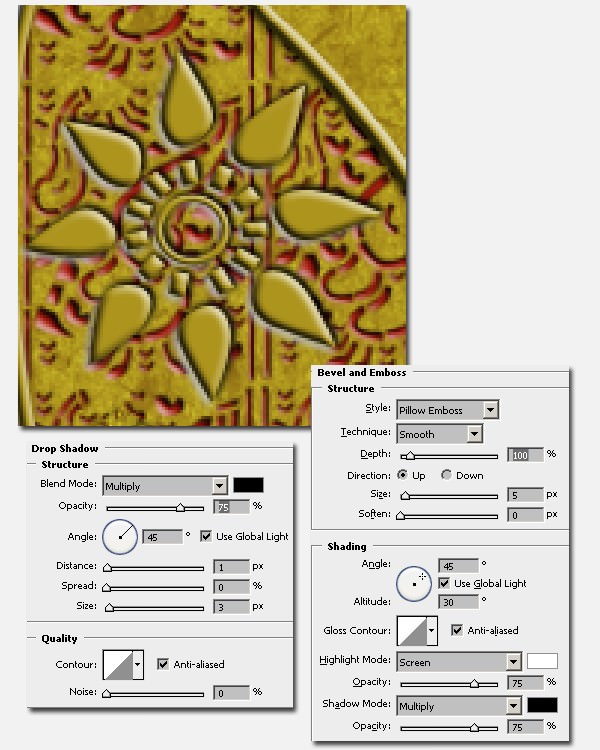
Step 63
Add this #ede9d0 shape then apply Bevel and Emboss.
Step 64
Create a red circle on the center of lotus then apply Drop Shadow and Bevel and Emboss.
Manage them by grouping.
Step 65
Then add highlights and shadows to this ‘top left’ part. And don’t forget to manage them by grouping.
Step 66
Do the same to create the ‘top right’ part of the Barong.
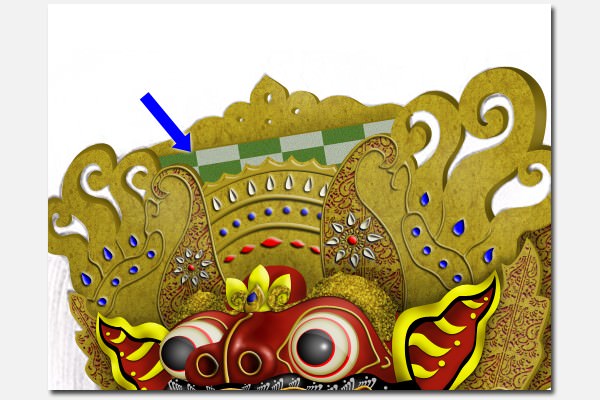
Step 67
Let’s create the ‘top center’ part. Draw this shape with #ad941d color. Then add Pattern Overlay with Grayscale Paper > Fiber 1.
Step 68
Copy the shape without copying the layer style. Arrange it to the back and change the color to #85700f. Name it ‘back’ then do some editing if necessary.
Group them.
Step 69
Hide the base shape layer and draw the curves with #ad941d color. Then apply Drop Shadow and Bevel and Emboss.
Step 70
Draw the other shape. The color setting is stil the same, #ad941d. Then apply Bevel and Emboss.

Step 71
Let’s create the ornament. Draw a few red beads then apply Drop Shadow and Bevel and Emboss.
Step 72
Create the other beads in #2b2bd9 color and apply Drop Shadow and Bevel and Emboss. Use the same setting as the red beads for these layer styles.

Also create the teardrop shapes in this color setting: #ede9d0 and apply Bevel and Emboss.
Step 73
Bring back the hidden layer. Add highlights and shadows. Manage them by grouping.
Step 74
After that, create the ‘top part’, still with #ad941d color. Then add Pattern Overlay with the previous settings. We can copy the layer style from the ‘base’ layer.
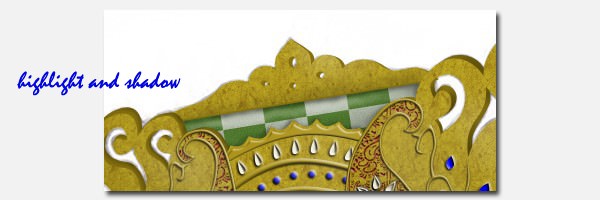
Step 75
Add another layer to add depth like we did previously. Add highlights and shadows onto the ‘base’.

Step 76
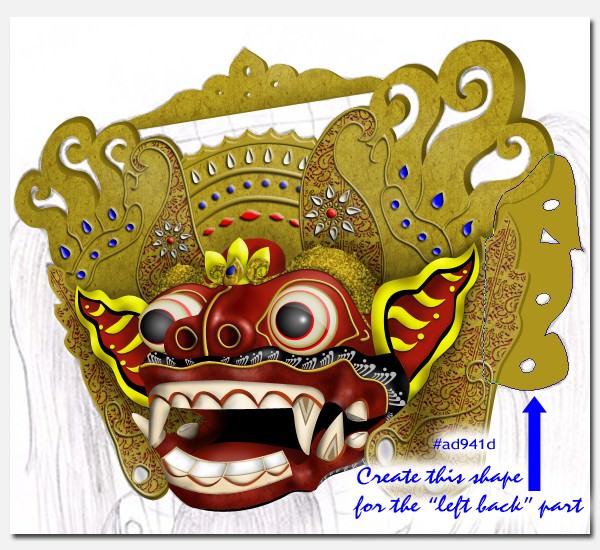
Then create the ‘left back’ and the ‘left side’. Apply Pattern Overlay and Stroke to the ‘base’. Create the depth. Add pattern by brushing, apply Inner Shadow and Bevel and Emboss onto the pattern then create a clipping mask. Then add shadow.
We won’t create the ‘right back’ part because it’s hidden from view anyways.
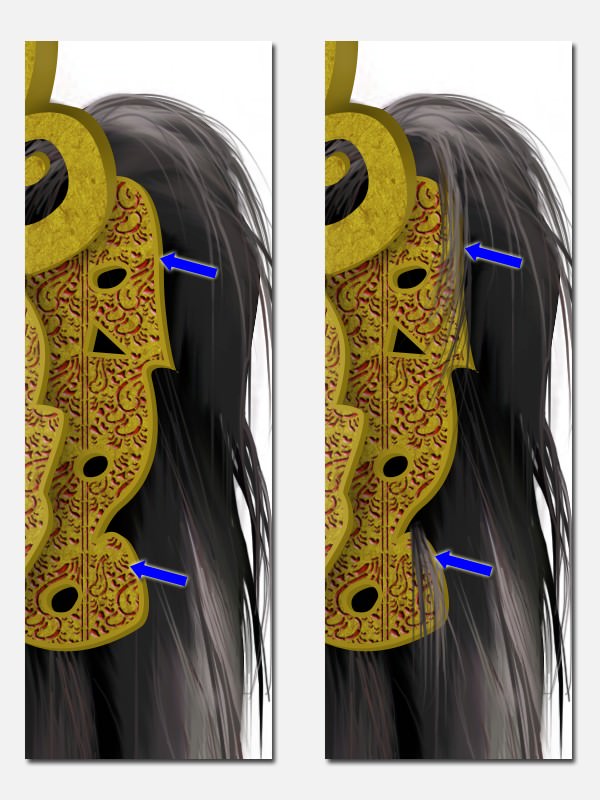
Step 77
Afterwards, let’s create the left bottom part. Draw the shape with #ad941d color setting and apply Pattern Overlay and Stroke like before. Also give depth this part. Then, draw the following curves, lines and circles with the same color setting.Then apply Drop Shadow and Bevel and Emboss on them.
Step 78
Draw these #ede9d0 shapes behind the curves layer. And apply Inner Shadow, Bevel and Emboss and Satin.
Step 79
As usual, add the #a61a0d pattern by brushing with Inner Shadow and Bevel and Emboss.
Step 80
To hide unnecessary part, make selection, like this.
Then add layer mask.
Create a clipping mask.
Step 81
Add highlights and shadows with layer mask. And manage them by grouping.
Step 82
Do the same to create the right bottom part of our Barong Mask. For the bottom center part, we can copy the lotus from top part of the Barong.
Step 83
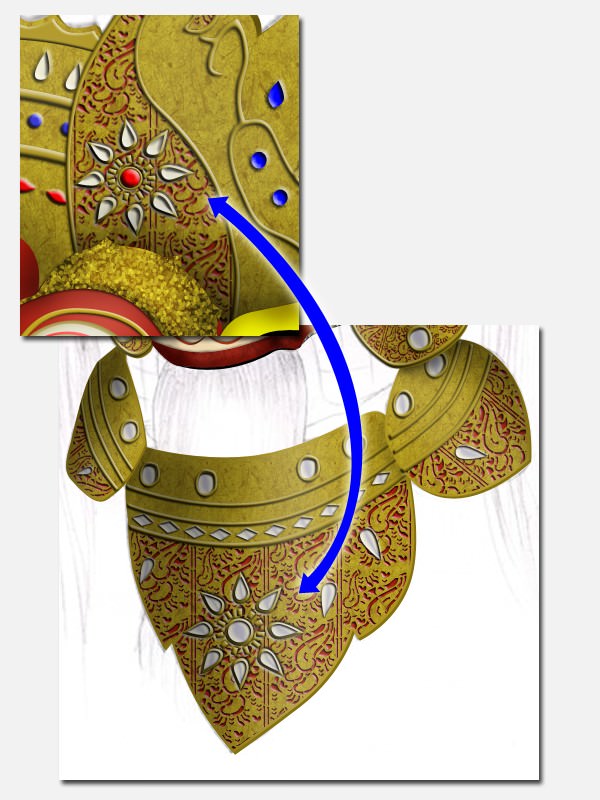
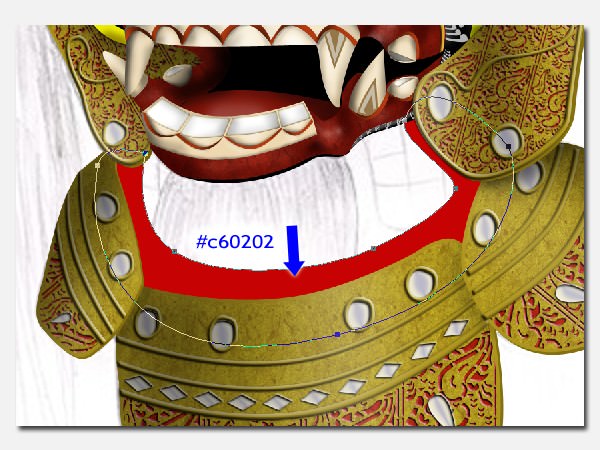
After that, we’ll create the ‘shawl’ for the Barong. Draw this shape with #c60202 color setting. Place it behind “Bottom Side”. Then apply “Bevel and Emboss” and “Pattern Overlay”. As usual, we have to add highlight and shadow.
The Sarong
Step 84
Then take the sarong pattern from this link. Transform, resize, rotate and place it at the back. Then add highlight and shadow.
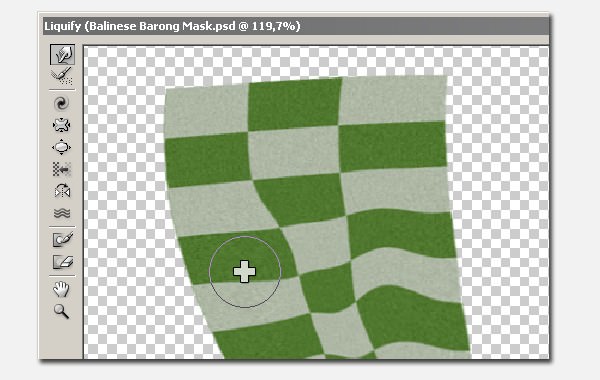
Step 85
We also need to add the sarong onto the neck of the Barong. Apply Liquify effect (Shift + Cmd + X) / (Shift + Ctrl + X) and edit accordingly, then add highlights and shadows.
The Hair
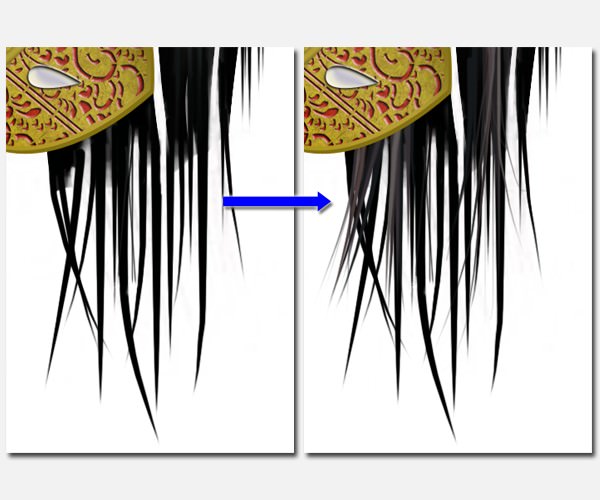
Step 86
The next step is creating the hair. Paint the hair black.
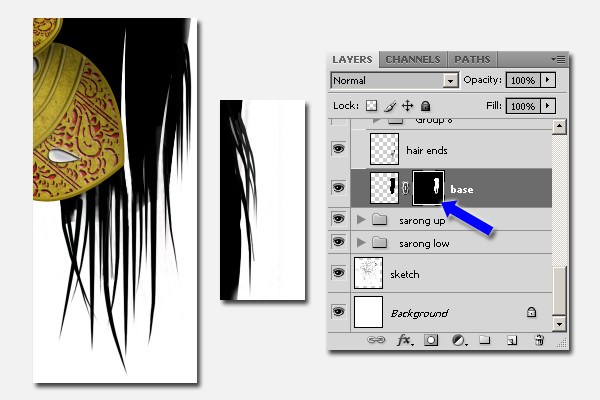
Step 87
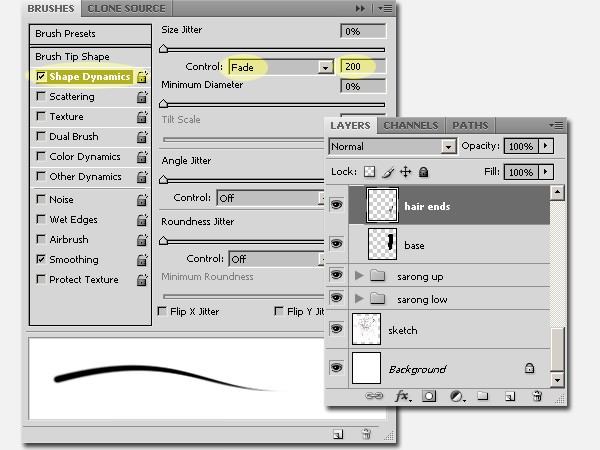
The next step is painting the tip of the hair on a new layer. Open Brushes options by pressing F5, on the Shape Dynamics option, set Control to Fade, 200. We can change it any time according to our needs. Use small soft round brush with medium hardness.
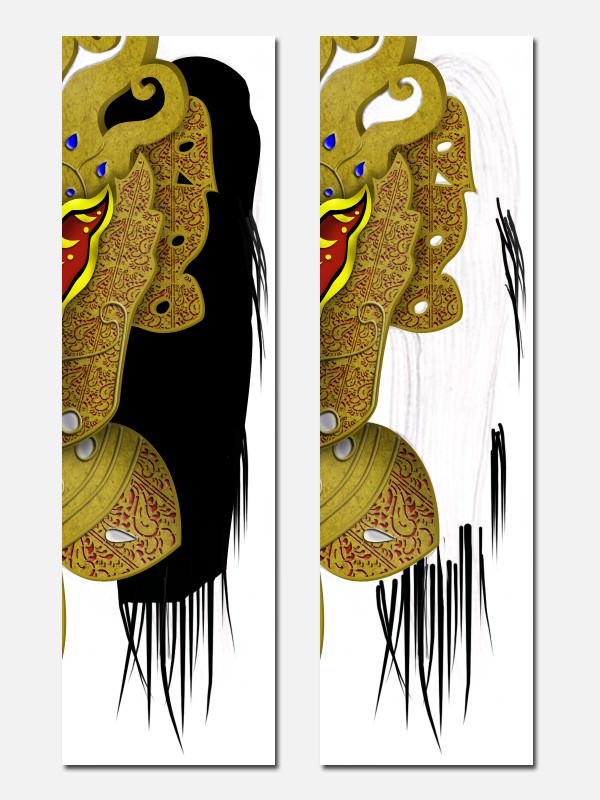
Step 88
Then do some masking on the hair base layer.
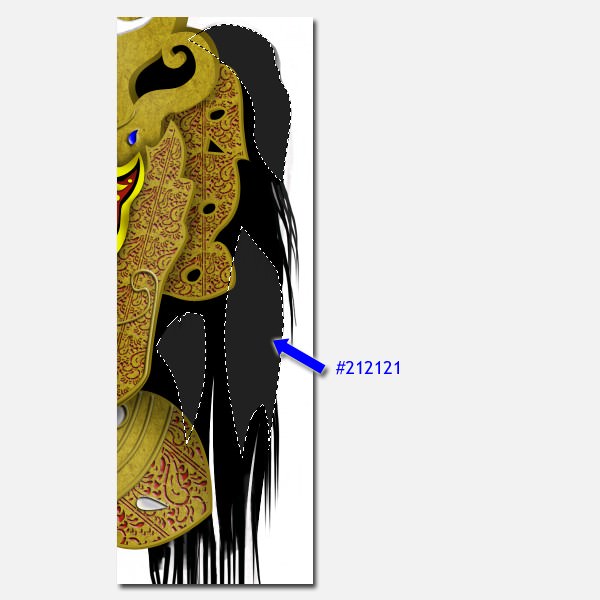
Step 89
Create a new layer and paint with #212121 like this or depending on where the light source is.
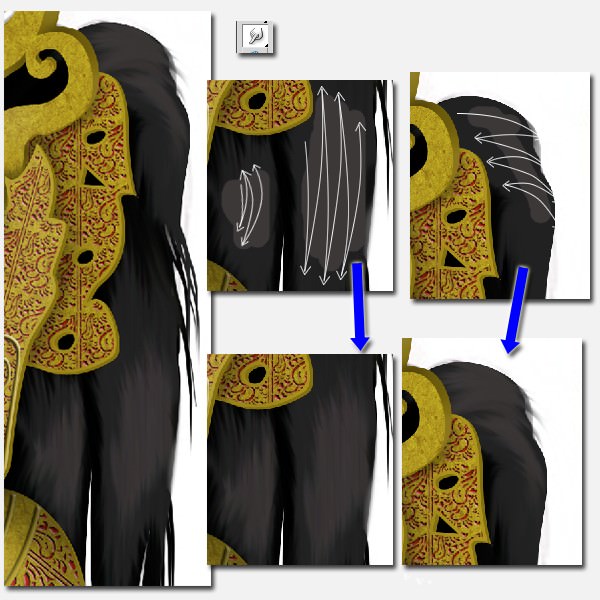
Step 90
So now we need the Smudge Tool. Smudge it with medium strength and small size.
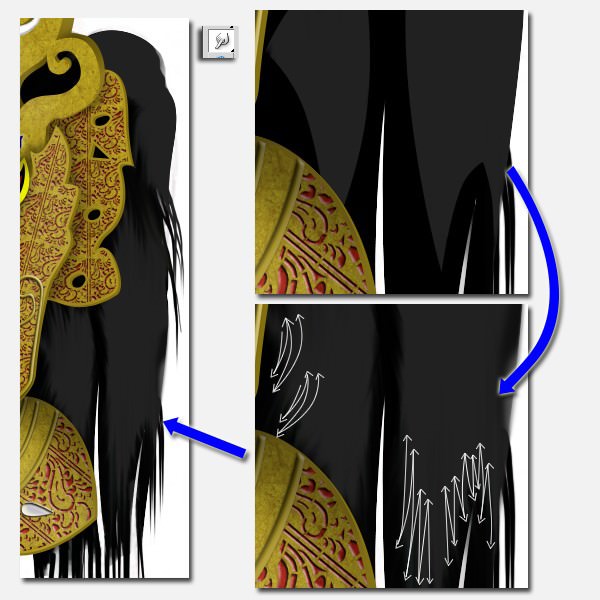
Step 91
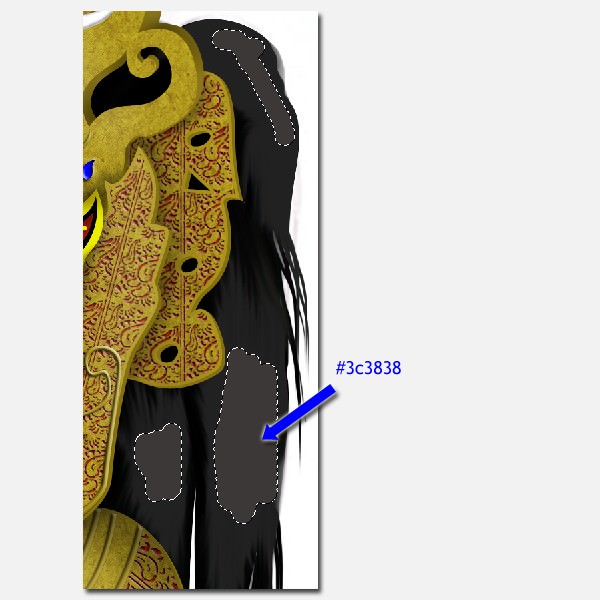
Create a new layer again and paint with a lighter color, #3c3838. And then smudge again, like before.
Step 92
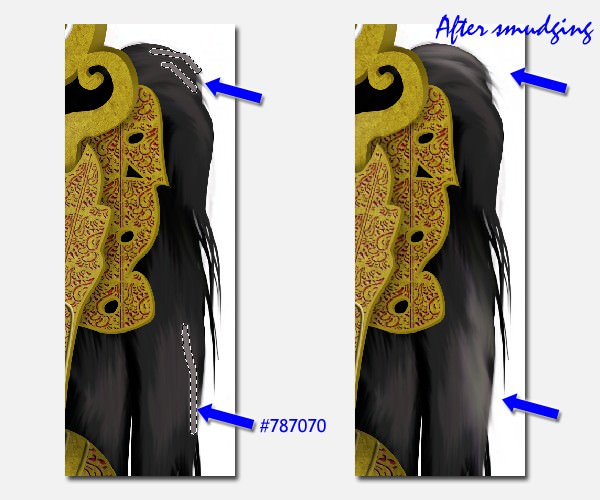
Create new layer again and paint with #787070. And smudge it.
Step 93
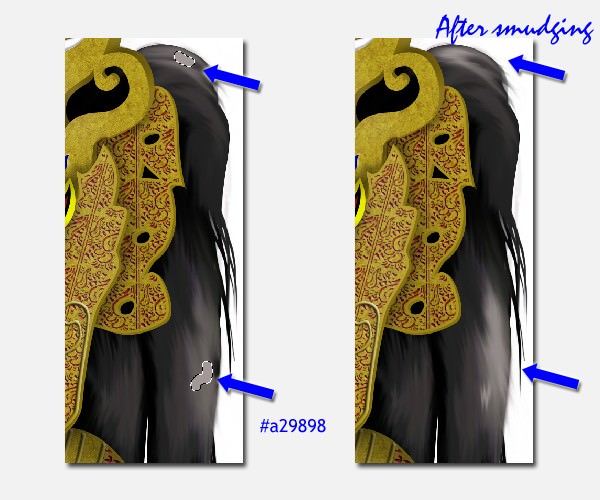
Create new layer again and paint with #a29898. And smudge it.
Step 94
Create a new layer then add the hair ends by brushing with various colors: #4e3836, #a29898, #787070.
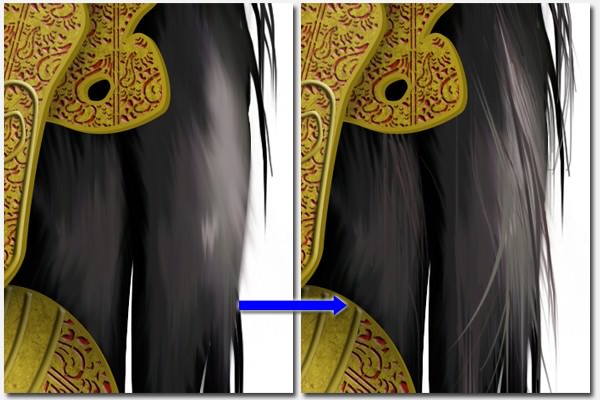

Step 95
Do the same way to create the hair on the right (‘right hair’) as well as the ‘beard’
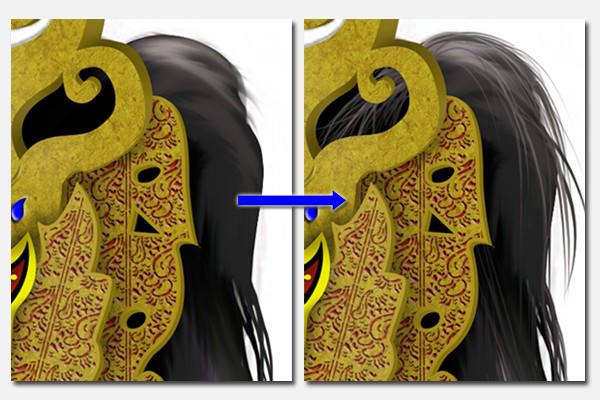
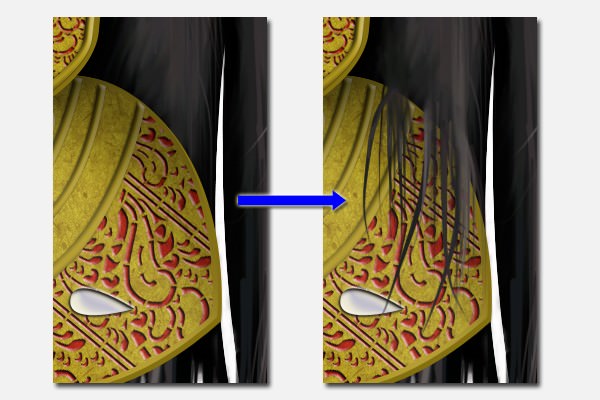
Step 96
To make it more realistic, we need to add hair that looks like it is flowing outward. Paint on a new layer.
Step 97
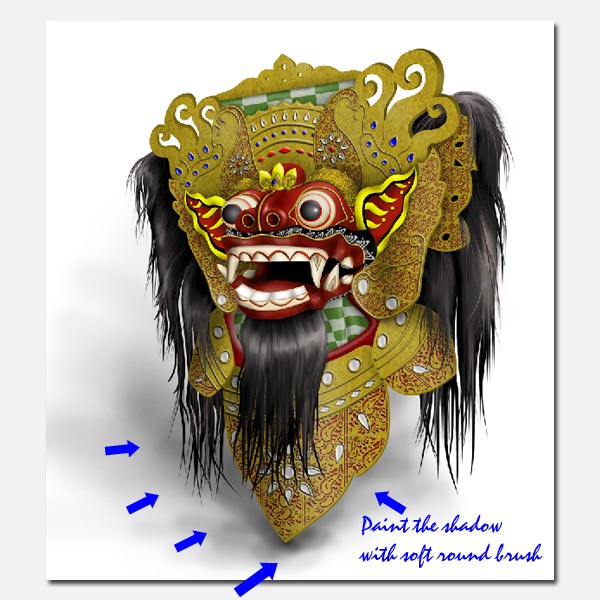
The next step is painting shadow under the Barong. Use a soft round brush with low hardness, low brush opacity, and Multiply the Blend Mode.
Step 98
We can add a background or even some text, if you like.
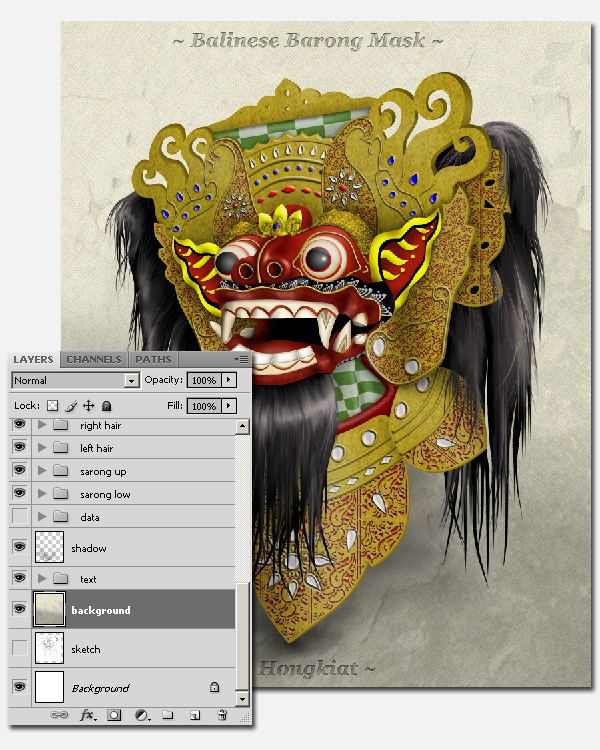
Final Result
And there you have it, your very own Balinese Barong Mask based on a pencil sketch and colored in with Photoshop. I hope you like the tutorial.