Beginner’s Guide to WordPress Multisite with MAMP
According to BuiltWith.com, WordPress is the most popular publishing platform with more than 8 million website using it as their Content Management System (CMS). In addition, Google Trends shows the increasing popularity of WordPress cross over the other CMS, such as Joomla and Drupal.
Some reasons that makes WordPress that immensely popular are it is easy to use, it is in very active development, it has great community support, many plugins with great functionality, beautiful themes, and one particular feature that makes it a powerful CMS is the ability to create multiple websites with one WordPress installation.
Originally, this WordPress Multisite was developed separately from the main WordPress. Then, the project has been merged since WordPress 3.0. So, if you are using WordPress 3.0 (and above), you are able to enable this feature and start creating multiple blogs. In this post, we will show you how to develop WordPress Multisite with MAMP, before bringing it online.
Make sure you have installed MAMP in your OSX. Otherwise, follow this instruction before proceeding this post.
Step 1: Setting-up Virtual Host
We will first setup Virtual Host so that we can host the website with a custom hostname or domain name, instead of using the default https://localhost:8888/. To do so, we will need to edit two files, the hosts file and the apache config file, httpd.conf.
Step 1.1: Adding a Hostname
Frist, we will add a hostname for local development in the hosts file. The hosts file is a plain text file to map the hostnames or domain names to their associated IP Address. When we try accessing a hostname (or a domain name) through the browser, the Operating System (OS) will first look-up the hosts file for the corresponding name and its IP address. If it is not available within the file, the OS will then look-up the DNS.
Recommended Reading: Domain Names & Hostnames
So, let’s open the Terminal and run the following command to open the hosts file.
sudo nano /etc/hosts
Then, add a hostname along with the IP Address. In this, I name it as domain.local, as follows.
127.0.0.1 domain.local
This is only an example, you can name the hostname to be something like domain.loc or domain.com. Change the name, as you want it.
Furthermore, If we host the sites using sub-directories adding the above line will be sufficient. However, since we are going to use sub-domain for hosting the sites, we need to add one line to specify a sub-domain, like so.
127.0.0.1       domain.local
127.0.0.1       sub.domain.local
Press Control + O and hit Enter to apply the changes within the hosts file. Then, press Control + X to exit.
Step 1.2: Directing the domain names
Next, we will direct the hostname to the directories where we will install the WordPress. To do so, we need to edit the Apache HTTP Configuration, which is located in Applications/MAMP/conf/apache/httpd.conf.
For your convenient run the following command through the Terminal to open it in TextEdit.
open -a TextEdit /Applications/MAMP/conf/apache/httpd.conf
In the httpd.conf file, add the following line to specify the directory where the hostnames, which we have just added, should refer to it. In my case, I will install my WordPress at /Users/thoriq/Sites/wordpress.
<VirtualHost *>
	DocumentRoot "/Users/thoriq/Sites/wordpress"
	ServerName domain.local
	ServerAlias domain.local *domain.local
</VirtualHost>
Afterwards, Restart the server.
Step 2: Installing WordPress
Installing WordPress is as easy as pie. There is the documentation and a lot of posts that shows you how to install WordPress locally with MAMP. For your convenient, here are a few links to visit.
- Installing WordPress Locally on Your Mac With MAMP — WordPress.org
- WordPress for Mac: How to Install Locally with MAMP [Tutorial] — WPMU.org
- If you prefer video over text-based tutorial, then this is one for you: Install WordPress locally using MAMP — Youtube
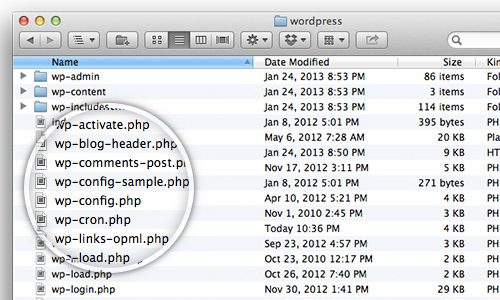
Make sure that you have downloaded the latest WordPress version, which currently is 3.5.1, and place it under the directory that is specified in the DocumentRoot in httpd.conf file. So, you are able to access it through the domain name, as shown below.

Step 3: Enable Multisite
The Multisite feature is not activated by default, but we can enable it easily. First, let’s open the WordPress config.php.
Then, add the following line.
define('WP_ALLOW_MULTISITE', true);
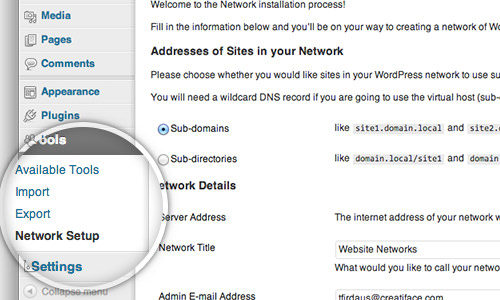
Login to your WordPress backend, and you should now find Network Setup under the Tools menu.
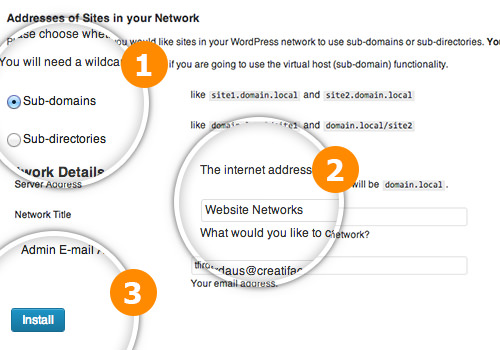
As mentioned, we will host our site with sub-domain. In the Network Setup setting page, check the Sub-domains option, and optionally you can name your network websites as well. Then, click on the Install button.
WordPress will generate some configuration lines to add in wp-config.php and .htaccess. The generated output will be slightly different than the one shown below, but the instruction remains the same.
Add these lines in config.php
define('MULTISITE', true);
define('SUBDOMAIN_INSTALL', true);
define('DOMAIN_CURRENT_SITE', 'domain.local');
define('PATH_CURRENT_SITE', '/');
define('SITE_ID_CURRENT_SITE', 1);
define('BLOG_ID_CURRENT_SITE', 1);
And add these lines in .htaccess
RewriteEngine On
RewriteBase /
RewriteRule ^index\.php$ - [L]

# add a trailing slash to /wp-admin
RewriteRule ^wp-admin$ wp-admin/ [R=301,L]

RewriteCond %{REQUEST_FILENAME} -f [OR]
RewriteCond %{REQUEST_FILENAME} -d
RewriteRule ^ - [L]
RewriteRule ^(wp-(content|admin|includes).*) $1 [L]
RewriteRule ^(.*\.php)$ $1 [L]
RewriteRule . index.php [L]
Now, the Multisite feature has been fully enabled and configured.
Step 4: Creating Multiple Websites
We just need to create the websites. So, let’s login to the dashboard.
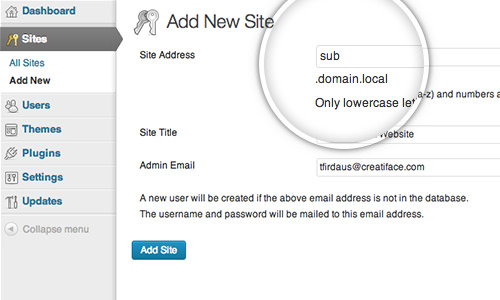
In the admin bar, go to My Sites > Network Admin > Sites menu. Then, click on the Add New to create the website using the sub-domain name that we have added in hosts file, like so.
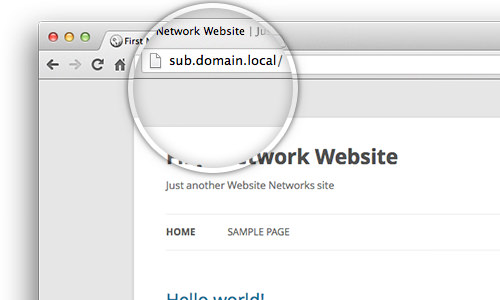
Now, when we access the sub-domain we will get our newly created WordPress website.
That’s it; you can then create as many websites as you want, in the same way.
Plugins for Multisite
Additionally, you can install some plugins to power-up your website networks. Below are some of my recommendations.
- Jetpack
- Multisite Admin Bar Switcher
- Simple Multisite Sitemaps
- Multisite Language Switcher
- Simple Multisite Login Log
- Multilingual Press
- Multisite Taxonomy Widget
- WordPress Multisite Domain Mapping
Once we added in the WordPress plugins directory, the plugins will be available in all the websites across the network.