Setting Up PHP, Apache, and MySQL on macOS Without MAMP Part II
In the previous tutorial of this series, we configured Apache and PHP, enabling us to run .php files on our local server. As a follow-up, we will now install and set up MySQL, which will be used for the database.
Let’s get started.
MySQL Installer
Fortunately, MySQL comes with a .pkg installer that provides an easy step-by-step setup process. Download the package from this page, and ensure you grab the DMG Archive version. Choose either the Mac OS X 10.7 (x86, 64-bit), DMG Archive or Mac OS X 10.7 (x86, 32-bit), DMG Archive if you are running a 32-bit machine.
Launch the DMG package, and you should find three files as shown in the screenshot below:
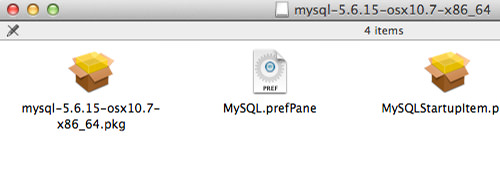
- mysql-5.6.15-OS X10.7-x86_64.pkg: The main package to install MySQL on macOS.
- MySQL.prefPane: Adds a MySQL panel to System Preferences.
- MySQLStartupItem.pkg: Enables MySQL to start at system startup or reboot.
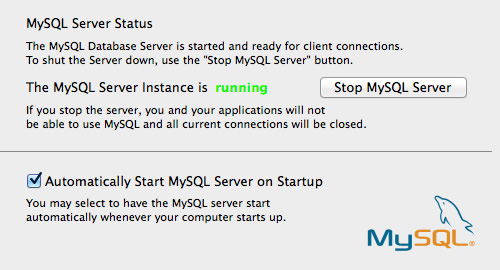
Install all three components. Once completed, open System Preferences and navigate to the MySQL pane.

Turn on the MySQL Server and tick Automatically Start MySQL Server on Startup.
Connecting PHP to MySQL
At this point, MySQL is running. However, macOS looks in a different directory for the MySQL socket, mysql.sock, which can result in the Warning: mysql_connect(): [2002] No such file or directory error when trying to connect PHP to MySQL.
To fix this, we will create a symbolic link (symlink) in the directory where macOS expects to find the MySQL socket.
- Open Terminal.
- Navigate to the
varfolder withcd /var. - Create a new directory named
mysqlusingmkdir mysql. - Create the symlink of
mysql.sockusing the commandln -s /tmp/mysql.sock /var/mysql/mysql.sock.
Set MySQL Password
Next, we need to set a password for the root user. In Unix-based systems, the root user has full administrative access. To set the password, enter the following command in Terminal:
mysqladmin -u root password new_password
Replace “new_password” with a password of your choice.
Managing MySQL
Now, let’s explore how to manage MySQL. While many opt for web-based tools like phpMyAdmin, I prefer using a native macOS application named Sequel Pro. Download the installer, move it to the Applications folder, and launch it.
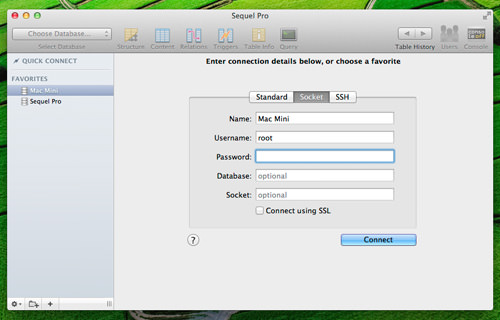
In this tutorial, we’ll connect to MySQL via the socket file. Navigate to the Socket tab in Sequel Pro and enter the following details:
- Name: This can be anything; for example, macOS MySQL.
- Username: Enter root as the MySQL username, as no other users have been created yet.
- Password: Enter the password you set for the root user.
- Database: Leave this blank since we haven’t created any databases yet.
- Socket: Set the socket path to
/var/mysql/mysql.sock.
Click the Connect button.
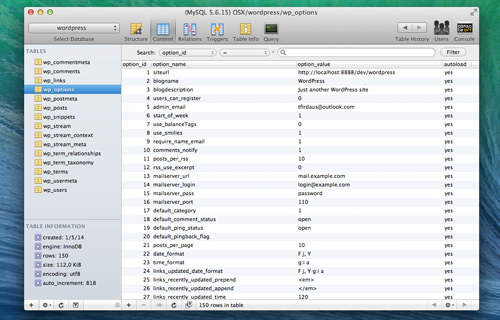
Once connected to MySQL, you can create, modify, and delete databases, as well as create new MySQL users. In the example below, I’ve created a database named wordpress for my WordPress site.
Conclusion
In this tutorial, we successfully configured MySQL on macOS. You now have a fully functioning local server for developing PHP-based websites. In the next and final part of this series, we will show you how to customize your localhost environment. Stay tuned!