How to Install PHP, Apache, and MySQL on a Mac Without Using MAMP
Using MAMP is probably the easiest way to get PHP, Apache, and MySQL up and running on macOS. You simply place the application in the Applications folder, launch the app, and click the Start Server button. It’s that simple.
However, macOS already comes with PHP and Apache built-in, so why not use them to develop and run websites locally instead of relying on third-party apps like MAMP? This approach not only saves space but also gives you the opportunity to learn more about the setup process.
In this post, we will guide you on how to configure PHP, Apache, and MySQL on macOS without MAMP.
Beginner’s Guide to WordPress Multisite with MAMP
According to BuiltWith.com, WordPress is the most popular publishing platform with more than 8 million website using it... Read more
Step 1: Enable Sublime Text Command Line
First, since I’m using Sublime Text, I want to enable the Sublime Text command line so I can open files and folders through Terminal and edit them within Sublime Text. Here’s how to do it:
1. Create a symlink of the Sublime Text subl binary in the ~/bin folder with this command:
ln -s "/Applications/Sublime Text.app/Contents/SharedSupport/bin/subl" ~/bin/subl
2. Then, run the subl --help command.
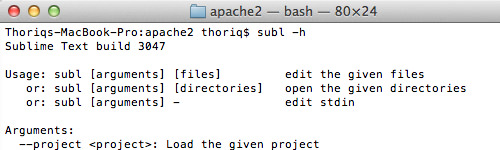
This will return the Usage and the list of Arguments that can be used with subl, as shown in the screenshot below. Additionally, this confirms that subl is registered and working.
Step 2: Configure PHP
As mentioned, PHP is already installed on macOS. You can check the installed PHP version in Terminal with the following command:
php -v
Enable PHP
However, the PHP module is disabled by default. We need to enable it to use and execute PHP scripts on the Apache server:
1. Type the following command to open httpd.conf in Sublime Text.
sudo subl /etc/apache2/httpd.conf
2. Uncomment the following line by removing the hash sign #:
LoadModule php5_module libexec/apache2/libphp5.so
See the screenshot below for more detail:

Enable PHP.ini
PHP configurations such as Increasing Memory Limit, File Upload Allowance, and Setting the Maximum Upload File Size are done through the php.ini file, which is also disabled by default. Let’s enable it.
Go to Terminal and run the following command. This command copies the php.ini.default and renames it to php.ini:
sudo cp /private/etc/php.ini.default /private/etc/php.ini
Step 3: Configure Apache
macOS also comes with Apache. You can type the following command in Terminal to start the Apache server:
sudo apachectl start
To stop Apache, type:
sudo apachectl stop
Access http://localhost:8888 in your browser to verify that the Apache server is working. If it is, you should see a message saying “It Works!”

Change DocumentRoot
The default Apache DocumentRoot, where you should put your website documents, is located at /Library/WebServer/Documents. However, if all your existing web projects reside in /Users/username/Sites, let’s change the DocumentRoot to that folder:
1. Run the following command lines consecutively to create a user-level configuration file. Replace username with your macOS shortname account:
 cd /etc/apache2/users/
 touch username.conf
2. Open this file in Sublime Text:
sudo subl username.conf
3. Then, add the following lines:
 DocumentRoot "/Users/username/Sites"
 <Directory "/Users/username/Sites">
 Options All
 AllowOverride All
 Order allow,deny
 Allow from all
 </Directory>
Change Apache Port Number
By default, Apache runs on port 80. But since I was using MAMP, which uses port 8888, I’m making Apache use this port number instead. This way, I won’t need to change the site URLs for all my existing websites.
1. Open httpd.conf and comment out the following line by adding a hash sign so it won’t listen to two ports simultaneously:
#Listen 80
2. Then open username.conf and add:
 Listen 8888
 ServerName localhost:8888
3. After making all the above configurations, save httpd.conf and username.conf, and type the following command to restart Apache:
sudo apachectl restart
4. Finally, access http://localhost:8888 in your browser. It will display all the directories stored within the ~/Sites folder, as shown below:

Run Apache at Startup
You might not want to launch Terminal and type sudo apachectl start repeatedly to start the Apache server. To make it run automatically at startup, run the following command:
sudo launchctl load -w /System/Library/LaunchDaemons/org.apache.httpd.plist
Wrap Up
In this tutorial, we have configured PHP and Apache. Technically, we can now run a PHP website. You can test it by creating a PHP file named phpinfo.php in ~/Sites and adding the following code:
<?php phpinfo(); ?>
Then, launch the file in your browser by navigating to http://localhost:8888/phpinfo.php. It will display the current PHP configuration details.
In the next part of this series, we will show you how to install MySQL and make everything work together seamlessly. So, stay tuned.