Photoshop Tutorial: Web 2.0 Badge That Flips Back

Advertisement

If you think the seal-shape Web 2.0 badges is too commonly used throughout the internet, here’s something for a change - the rounded flip-back badge. It is not as widely adapted as the seal shape badge but definitely cool. Full tutorial after jump.

Step 1

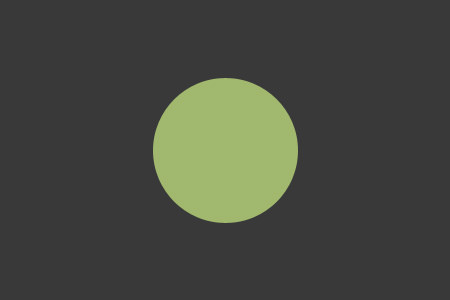
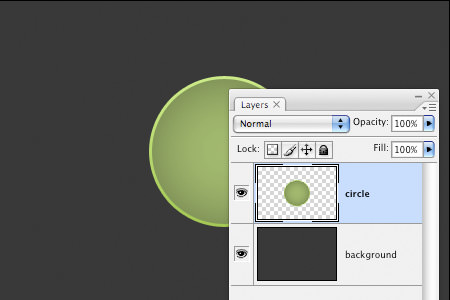
Go to Photoshop, create a new document at the size of 450 x 300 pixels. Start off with a dark background (#393939). Create a new layer, draw a circle (#a1b86e) in the middle.

Step 2

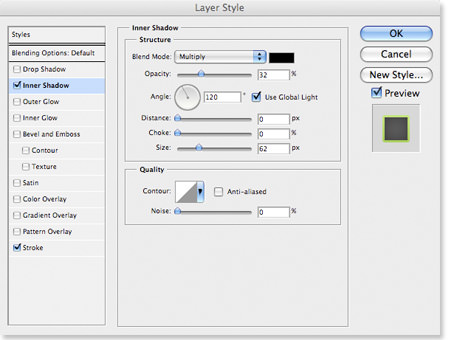
Select the circle layer, right click -> Blending Options or double click to launch the Layer Styles.

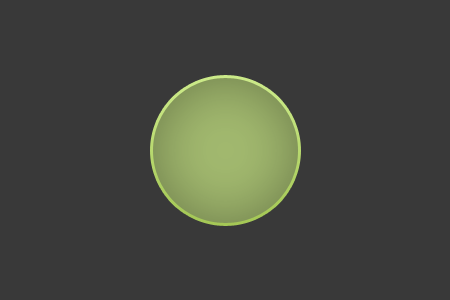
  1. In Inner Shadow, set Opacity to 32%, Distance to 0px; Choke to 0% and Size to 62px;
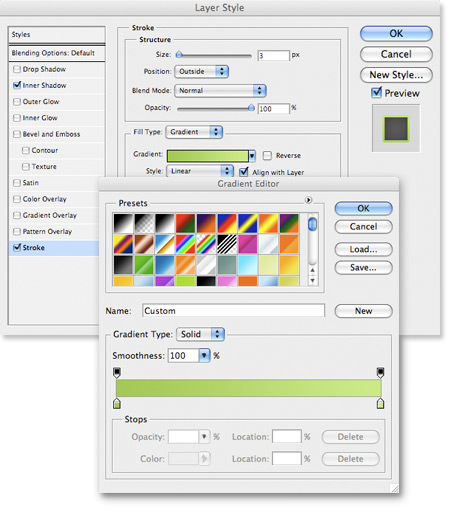
  2. In Stroke, Change Fill Type to Gradient, and insert the following color:
    • #a4c855 at Location 0%
    • #ccea89 at Location 100%

Step 3

Create a new layer on top of the circle layer. Hold Command/Control key, select both layers (the one you’ve created and the circle layer), right-click -> Merge Layers.

Step 4

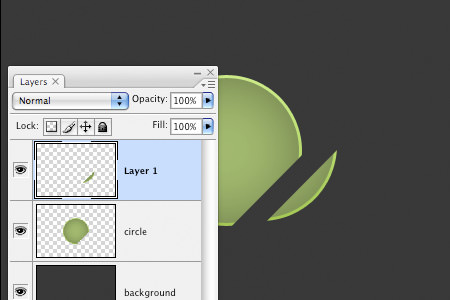
Select the Polygonal Lasso Tool. Select a small piece of the edge, cut it (Edit -> Cut or Command/Control X) and paste it back (Edit -> Paste or Command/Control V) in a new layer.

Step 5

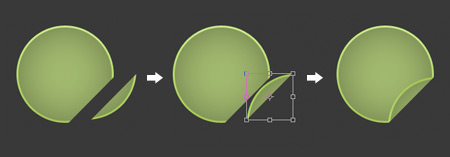
Select the Rectangular Marquee Tool. On the smaller piece of circle, right-click -> Free Transform or Command/Control T. Rotate and place it just nice at the edge of the bigger piece of circle.

Step 6

Select the smaller circle layer, right click -> Blending Options or double click to launch the Layer Styles.

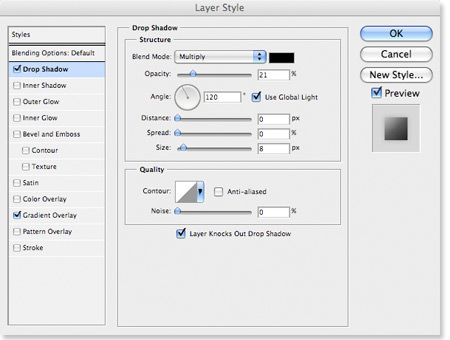
  1. In Drop Shadow, set Opacity to 21%, Distance to 0px, Spread to 0%, Size to 8px;
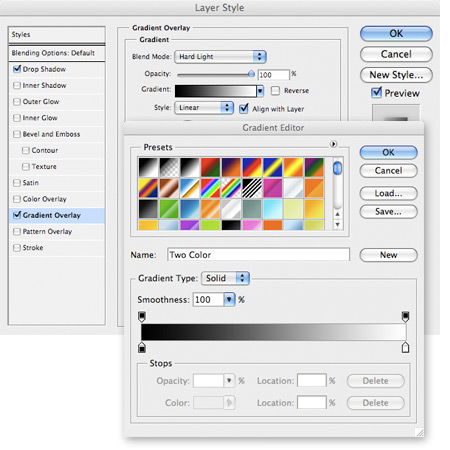
  2. In Gradient Overlay, set Blend Mode to Hard Light, Opacity to 100%. Insert the following gradient settings:
    • #000000 at Location 0%
    • #FFFFFF at Location 100%

    Change the Angle to 131.

Step 7

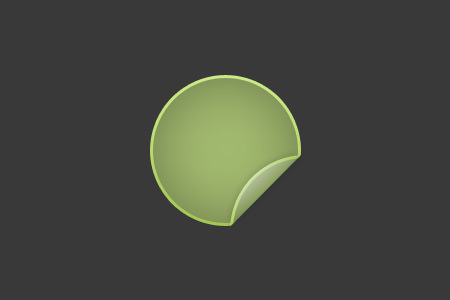
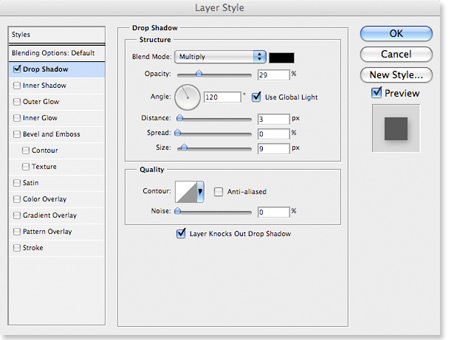
Let’s give the bigger piece of circle some shadow. Right click -> Blending Options or double click to launch the Layer Styles.

    1. In Drop Shadow, set Opacity to 29%, Distance at 3px; Spread at 0%, Size at 9px.

Step 8

Your badge is almost ready. Insert a text layer in between the circle layers. Hide little bit of the text underneath the flip to bring out the flip-effect.

Related Contents

Sponsors

Posted by hongkiat in Photoshop Tutorials , at 02.04.08

Tags: , , ,

Comments

  1. Fahmishah February 4th, 2008

    walla! thanks for the tutorial..i have been searching for this tutorial for a long time

    Reply
  2. assabakie February 4th, 2008

    cool tutorial. i will try it. i will download the psd file and edit it on my way.
    u r good in photoshop…

    Reply
  3. Syahid A. February 4th, 2008

    Nice one Hong Kiat. I really need to brush up my photo editing skills to make a nice article like this one.

    Reply
  4. keemanxp February 5th, 2008

    Simple yet elegant way of creating your badge or even logo! Thanks Hong Kiat!

    Reply
  5. Ashish Mohta February 5th, 2008

    This is pretty neat lol funny this like evil way of doing things. Good one

    Reply
  6. assabakie February 6th, 2008

    i can’t download the psd file.
    something is going on with the link…

    Reply
  7. Eli February 6th, 2008

    Very nice outcome.

    Reply
  8. Syokkahwin.com February 7th, 2008

    u never failed to amaze me hong kiat…u should produce a cd on graphic designs..there are lot of hungry people out there including myself..hehe..

    Reply
  9. RizalHardy February 8th, 2008

    kewl tutorial… this should sharpen my skill…sort of…hehe

    Reply
  10. Sabine February 9th, 2008

    Nice tutorial - easy to understand.

    Reply
  11. andy eaton February 19th, 2008

    thanks for a fantastic tutorial, simple to follow and looks amazing.

    Reply
  12. Geek Mother February 26th, 2008

    Oh boy, I have just found the photoshop tutorials!

    I have access to Photoshop but have never had the time to explore it but these as so condensed I can a result by just following the bouncing ball!

    The more I explore this site the more I like it.

    Thanks

    ( I feel a logo coming on!)

    Reply
  13. lka March 6th, 2008

    Thanks!

    Very nice, and easy to do!

    Reply
  14. shawne March 25th, 2008

    Good tutorials you got there hongkiat :) peace for ya.. :) Love that tuts!!
    OOooOOo yea HongKiat mind if you PM me i have something to ask you it’s personal .. MmmMm i think not in here.. :) you use gmail? oR yahoo Accounts?

    >> Yahoo Accts : mRDynotab
    >> Gmail Accts : aKaiso

    Thank’s.

    Reply
  15. Gerar March 28th, 2008

    awesome
    pretty easy and good results :P

    (i’m sorry if my english is bad -.- …. xD )

    Reply
  16. seegatez April 30th, 2008

    Great… I will translate this tutorial to bahasa.. is that ok?

    Reply
  17. Arun Satyal May 31st, 2008

    Umm… this is easy and fast idea to create badge. Its specially easier for starter.. good job keep it up.. :)

    Reply
  18. Hamid June 3rd, 2008

    Wow..niche :)

    Reply
  19. abdollah July 18th, 2008

    efgv

    Reply
  20. Atualizado July 26th, 2008

    Very nice tuto!

    Reply
  21. Angga Rifandi August 11th, 2008

    nice tutorial, I’ve done doing my glossy button after learn from tutorial, now I get the new one. thanks …

    Reply
  22. Filipino August 31st, 2008

    Nice one a wonderful result with an easy steps

    Reply
  23. AoC Gold September 16th, 2008

    Hey! , Your blog post about layers in photoshop is absolutely great. Easy to understand it and with excellent value. I just stumbled up and dugg your site to digg as good news article about layers in photoshop on Tuesday . Cheers, Mike Brown , keep up the good work !

    Reply

Leave a reply