How to Customize Windows Context Menu
Windows context menu refers to the menu that appears with right-click in a Windows PC, and a regular Windows user gets in touch with it on daily basis. A cluttered context menu, however, is a real productivity killer.
Unfortunately, it is very easy to clutter up the context menu as many third-party programs automatically add their option in the context menu. On top of that, some of them don’t even delete the context menu entry even if you delete the original app.
The good news is that the way you can customize shortcuts in Mac’s context menu, Windows context menu can also be managed, and in this post we will show you just how to do it.
Add Contextual Menu on Your Website With HTML5
The contextual menu is the menu that is listed when you right-click on your computer screen. The menu... Read more
Remove items from the context menu
With time, many entries become a part of the context menu making it long and sluggish, and so the solution is simple – remove the unwanted entries. Unfortunately, Windows doesn’t offer any user interface to easily get rid of items in the context menu. However, all these entries are made in the Windows registry and we can manage them from there.
You can either manually delete the entry from the registry or use a third-party program to do it for you. We are going to show you how to do it using both methods:
Manually delete entries from Windows registry
If you are not comfortable using a third-party program or don’t have rights to install one (limited user account), you can manually delete the entries from the registry.
Warning! Make sure you create a backup of your registry before making any changes in it. Any wrong tweak could negatively affect your experience or even corrupt the Windows.
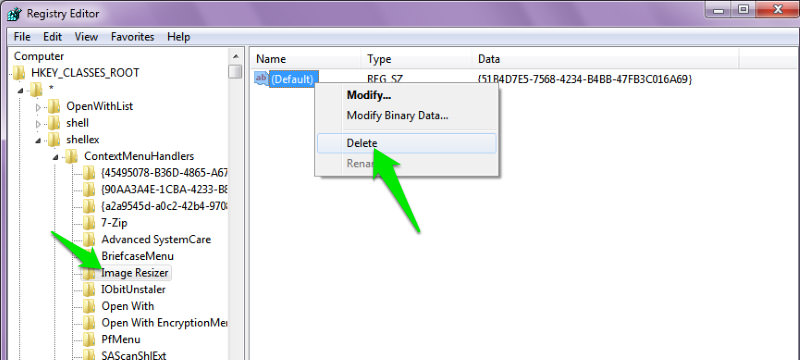
To access Windows registry, press Ctrl + R keys and type “regedit” in the Run dialog. Once the registry is open, you need to search for the context menu entries in the below mentioned locations.
HKEY_CLASSES_ROOT\*\shellex\ContextMenuHandlers\

HKEY_CLASSES_ROOT\AllFileSystemObjects\ShellEx\ContextMenuHandlers

HKEY_CLASSES_ROOT\*\shell

HKEY_CLASSES_ROOT\Directory\Background\shell

HKEY_CLASSES_ROOT\Directory\Background\shellex\ContextMenuHandlers

HKEY_CLASSES_ROOT\Folder\shellex\ContextMenuHandlers\

HKEY_CLASSES_ROOT\Directory\shell
These locations will list context menu entries for folders, desktop and drives. You might even see same entry in multiple locations, so you will have to get rid of it from all the locations. To remove the entries from the context menu, simply delete it from the said locations.
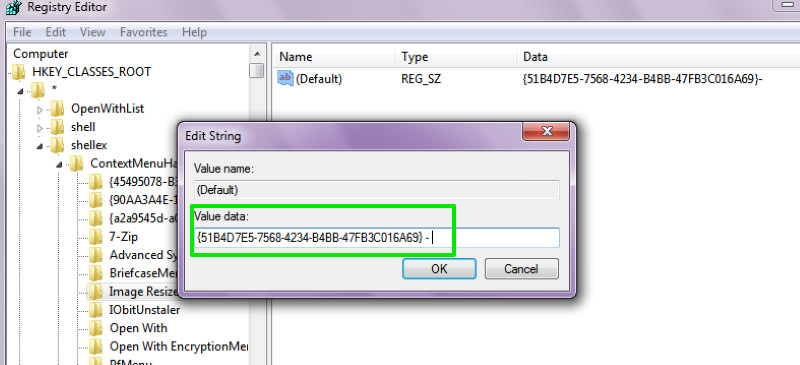
If you are interested in re-enabling the items later in time, then you should disable it instead. To disable an item:
- Double-click on its entry and add “–” (minus sign) at the end of the string to corrupt it.
- When you want to enable it again, simply remove the minus sign.
Third-party program to remove context menu items
There are dozens of third-party tools that can help you manage Windows context menu. All these tools fetch entries from the registry and show them to you in a simple interface.
From there you can remove, add, edit, disable or enable items. For this purpose, I trust Ultimate Windows Context Menu Customizer. It is a light, easy to use and free context menu customizer tool that works on all versions of Windows (Microsoft .Net Framework 3.5 may be required).
We will be using this tool to both remove and add items to Windows context menu, so you should download it now.
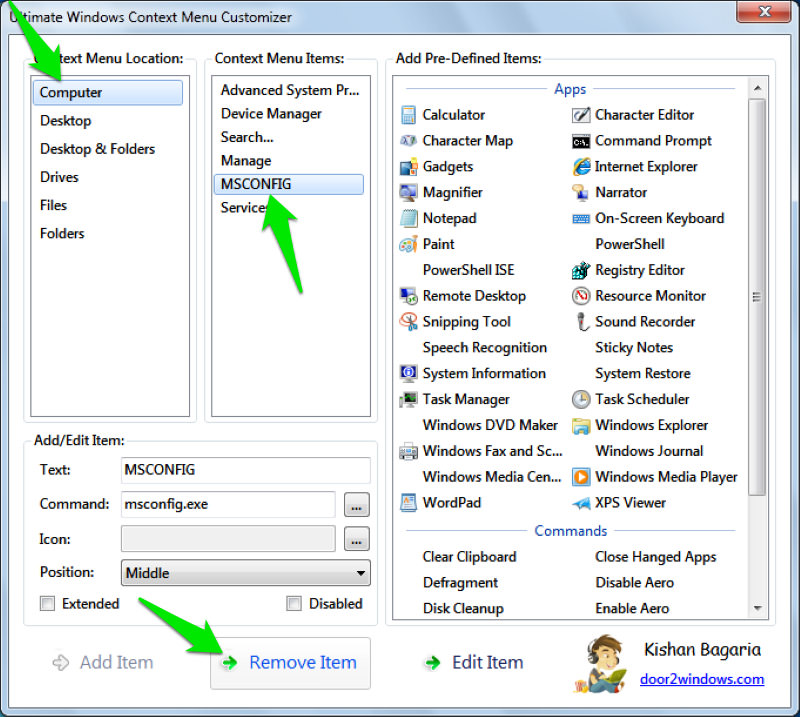
- Launch the program and you will see all six types of Windows context menu at the top left corner, including Computer, Desktop, Drivers, Files, Folder and Desktop and Folders.
- You can click on each of the context menus to see all the entries inside them.
- To disable an entry, click on the entry and then check the checkbox next to “Disabled” below in the settings. This will disable the item and it can be enabled again when needed.
You can also remove the entry if you don’t plan on using it in the future. To do so, select the entry from the list and then click on “Remove Item” at the bottom to remove it immediately.

Keep programs from adding items in the context menu
Your Windows context menu should look a lot tidier now that the unwanted items have been removed. However, the context menu can again get cluttered as you add more programs.
Unfortunately, there is no one-shot method to prevent programs from adding options in the context menu. You will have to be careful while installing the program to prevent it from adding items in the context menu.
Most of the programs will ask you whether a context menu entry should be created or not. If you will blindly click on “Next” and then “Install“, then your context menu will be cluttered very soon. You just need to be careful while installing programs and decline the offer to add context menu entry if you don’t need it.
Some rogue programs may not give this option while installing, and in that case you will have to remove the entry yourself using the explanation above.
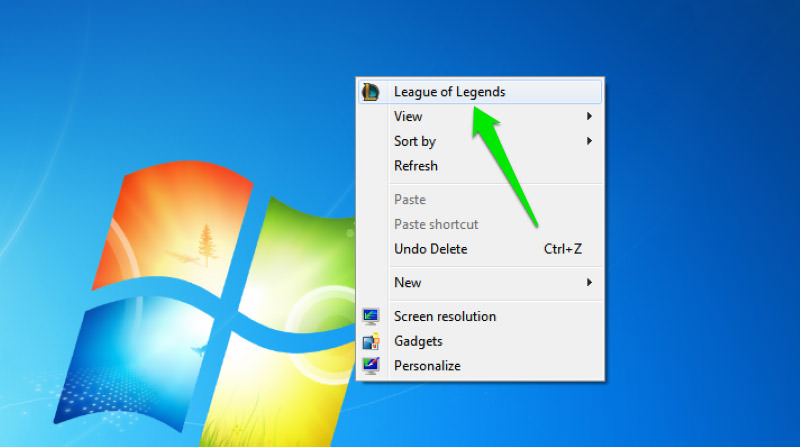
Add items in Windows context menu
Windows context menu is one of the fastest ways to access features and programs on your PC. You just need to right-click and select your prefered item and it will instantly open up, and so adding items in the context menu can be very productive.
Luckily, it is very easy to add any type of item in the context menu using Ultimate Windows Context Menu Customizer tool that we shared above.
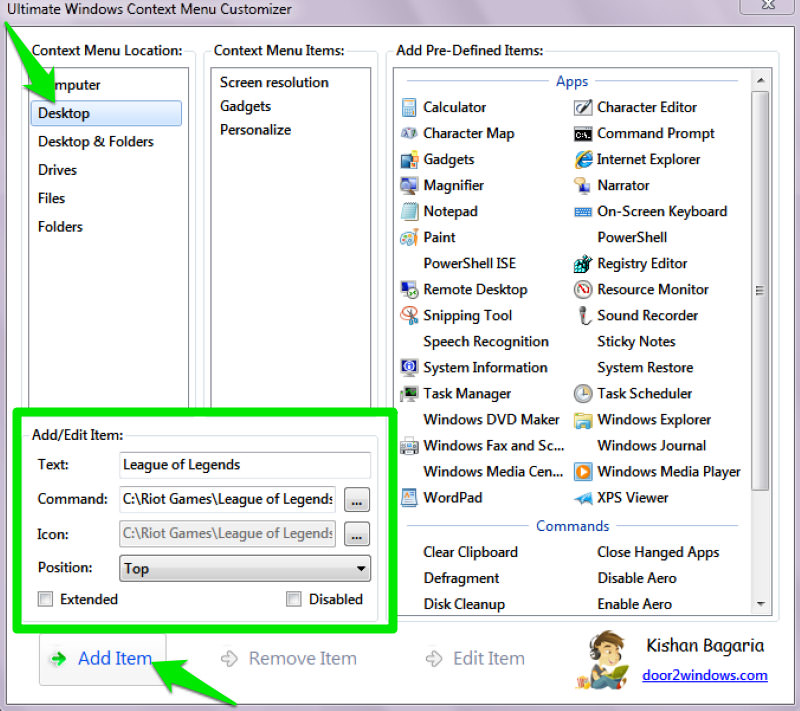
Launch the tool and you will see dozens of pre-defined Windows apps in the right column. You can either add these apps if you like or create a custom entry yourself.
To add a custom item, select your required context menu from the options and you will see its settings below (which should be empty).
Here, you can tweak the settings as we have explained below:
- Text: You need to add name of the item here. This will be used to identify what program the entry opens.
- Command: Click on the button at the end of this option (it has 3 horizontal dots) and Windows explorer will open up. Now navigate and look for executable file of the item that you would like to launch. A shortcut to the program will work as well.
- Icon: This is an optional feature, but a handy one to easily find items. Here search and select the executable file of the item again (that has the icon) and its icon will be used to show in the context menu.
- Position: Select where the item should show up in the context menu, top, middle or bottom.
Once all the information is provided, click on the “Add Item” button below and it will be added in the context menu.

Now just open the context menu where you have added the entry and it will be accessible.
Add folders in the context menu
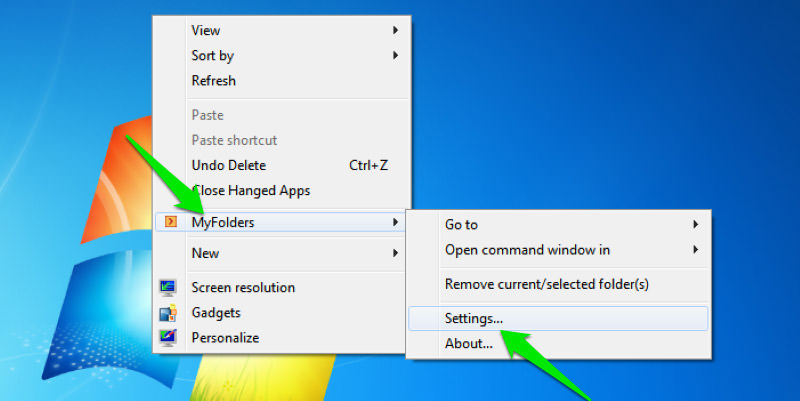
The Ultimate Windows Context Menu Customizer will not help you add specific folders in the context menu, and you will have to depend on a different app for this purpose. MyFolders is a good tool for this purpose that will add a single entry in the context menu from which you can access all your favorite folders.
- Once MyFolders is installed, right-click anywhere and hover your mouse cursor over “MyFolders” entry.
- From the side menu, click on “Settings” to customize the tool.
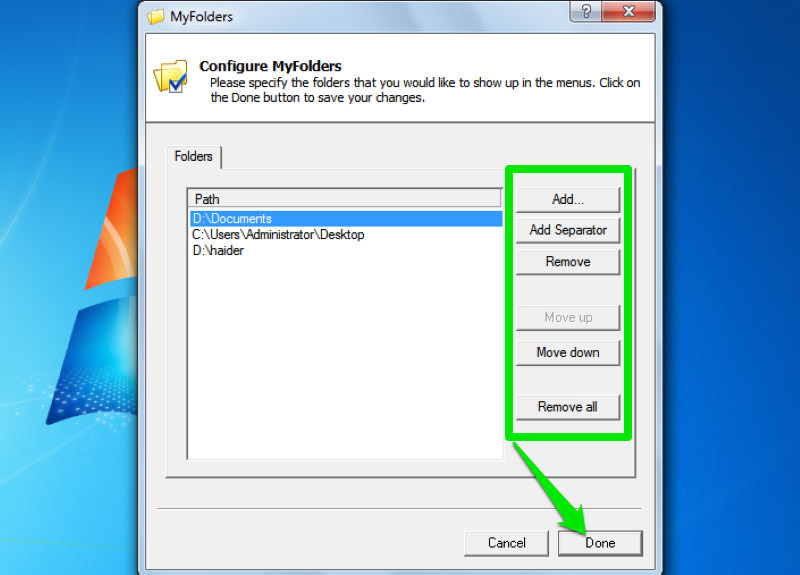
- In the settings, you can use the “Add” button to start adding important folders in MyFolders. You can also remove or adjust position of the folders. Once everything is added, click on “Done” to save the changes.
- Now you can simply right-click anywhere and access all the added folders from the “MyFolders” context menu entry.
Summary
I believe using a third-party tool to manage Windows context menu, as it is a much faster and intuitive way that gives full control. However, you can also remove context menu items yourself using the Windows registry if you don’t trust a third-party app.
If you know any other cool tweaks to manage Windows context menu, share with us in the comments.
12 Free Windows Productivity Apps You Should Download
Most professional fields require you to spend a major part of your day on your PC, and so... Read more