A Checklist: Setting Up And Configuring Your New Mac
macOS features a tool known as "Migration Assistant" to transfer your personalized settings and configurations from your old Mac to a new one. While it seems convenient, it may also transfer legacy files and recurring issues, which is why you might consider starting from scratch.
Indeed, setting up a new Mac merely involves making a few adjustments. To simplify the process, we’ve assembled a checklist detailing the necessary steps for your new Mac’s setup.
If you’re preparing a fresh macOS installation, this guide is tailor-made for you. This comprehensive checklist includes 15 key steps to be performed before and after the installation. We trust you’ll find this resource valuable.
6 Simple Ways to Speed Up Your Mac
Discover effective ways to speed up your Mac and optimize its performance. Follow these tips to boost your... Read more
Pre-installation
Here are some of the information you need before initiating the installation process.
1. Prepare your Apple ID and password
If you’ve previously owned an Apple device, it’s likely you already have an iCloud ID.
To seamlessly synchronize your emails, contacts, calendars, Safari bookmarks, and iPhoto photo streams, and to re-download previously purchased apps without incurring extra charges, your iCloud ID is essential.
2. Selecting a Name for Your New Mac
During the installation process, you’ll be prompted to provide a "username" and "name for your computer".
The username is straightforward, but give some thought to your computer’s name. This will be visible when connecting to networks and for Terminal users. Although you can change these details later if needed, it’s beneficial to set them correctly on the getgo.
We suggest using the naming convention of: <firstname>‘s <device name>.
Here are some examples:
- John’s Macbook Pro
- John’s MBP15
- John’s MBP
- John’s iMac
- John’s iMac27
- John’s Macbook Air
- John’s MBA
3. Ensure a Stable & High-speed Internet Connection
To properly set up your iCloud, it is essential to have not only a functioning internet connection but also a high-speed one. Although the installation can be performed without an internet connection, it is highly recommended to have everything set up accurately from the beginning.
Post-installation
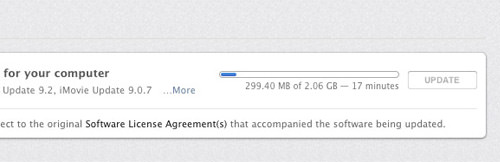
4. Conduct a System Update
Apple periodically releases updates to address various issues and improve performance. Therefore, it is possible that the newly installed operating system may not yet have the latest fixes. To avoid unnecessary work, it is recommended to check for system updates and apply them as needed, until no further updates are required.
To check for any updates required:
- Go to System Settings > General
- CLick Software Update
- Click "Update Now"
5. Prepare Your Mouse and/or Keyboard Peripherals
If you prefer not to use the trackpad, this is the stage at which you should connect your mouse.
6. Customize Trackpad Scrolling Direction
If you use the trackpad a lot, it is essential to calibrate it for optimal performance. By default, scrolling down on the trackpad will result in the page scrolling down as well. If this does not feel intuitive during your test run, do the following:
- Go to System Settings > Trackpad > Scroll & Zoom
- Deselect the "Scroll direction: natural" option


7. Configure Sharing Settings
Do you require screen sharing with another Mac? Are you collaborating with peers or need to share local files with them? Is there a necessity for remote access to this Mac when you’re not present? Or do you need to share peripheral devices (such as scanners, printers, etc.) connected to this Mac with others on a local network?
If any of these situations apply to you, it is recommended to navigate to General > Sharing in order to enable or disable your desired sharing preferences.
8. Simplify the Menu Bar
The macOS comes with a default set of app icons in the menu bar for easy access. However, if you prefer a minimalist and clutter-free menu bar, you can customize it by removing or modifying certain icons. Here’s how:
- To remove the sound icon: Go to Control Center. Under "Sound", select "Do not show in Menu Bar".
- To remove the Time Machine icon: Go to Control Center. Under "Time Machine", select "Do not show in Menu Bar".
- To display the clock as an analog version: Go to Control Center. Under "Clock", click "Clock Options…" and then select Style: Analogue.
9. Customize Your Menu Bar with Your Name
Would you like to have your name displayed on the menu bar, as shown in the image below? Follow these easy steps:
- Go to Users & Groups.
- Select "Off" for "Automatically log in as ".
10. Activate Access for Assistive Devices
Certain productivity applications, such as TextExpander, necessitate access to your Mac’s assistive devices feature. If you plan on utilizing such applications, it is recommended to enable this option.
To do so:
- Go to Privacy & Security > Accessibility
- Check to allow apps to control your computer.
11. Secure System Preferences
To prevent unintended modifications to your configured settings, it is advisable to secure the settings in the System Settings. Once secured, any further adjustments can only be made after initiating an unlock option, which necessitates entering a password.

12. Remove Unnecessary Icons from Your Dock
The Dock is a useful feature on a Mac, allowing you to quickly access frequently used applications. However, upon initial setup, your Mac may include a selection of pre-installed apps on the Dock, regardless of your personal preferences or usage habits. To maintain a clutter-free workspace, it is advisable to remove any unwanted applications from the Dock.
To remove unnecessary icons, simply click and hold the desired icon, then drag it upwards until it disappears from the Dock. This will help create a more organized and efficient workspace tailored to your specific needs.

13. Uninstall Unnecessary Applications
In case your Mac has limited storage space due to lower specifications, it is advisable to remove any pre-installed applications that you do not intend to use.
To effectively and efficiently uninstall applications from your Mac, we recommend using CleanMyMac, or AppZapper.
14. Display Hard Disks on the Desktop
By default, macOS maintains a clutter-free desktop by hiding icons or shortcuts for hard disks, connected devices or networks, and mounted discs. To make these icons visible on your desktop, follow these steps:
- Launch the Finder application. Navigate to Finder > Preferences.
- Under the General tab, locate the "Show these items on the desktop" section.
- Check the desired items to display them on your desktop.
15. Customize Desktop Icon, Grid, and Text Size
To optimize your desktop appearance and organization, you can easily modify the icon, grid, and text size to suit your preferences. To access these customization options, simply right-click on the desktop and select "Show View Options."
Within this menu, you can adjust the "Icon size," "Grid spacing," and "Text size" to achieve your desired layout. Additionally, selecting the "Snap to grid" option will ensure that your icons and folders align neatly within the grid, streamlining the organization process.