Beginners Guide to Making Time-Lapse Video With DSLR
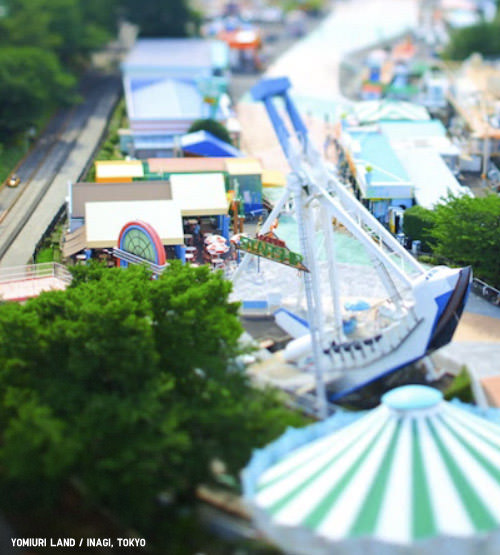
Time-lapse photography is an interesting technique that records a scene or object with a slow state of change and turns it into a video that plays back at high speed.
The easiest way is to have your camera stationary on something that changes slowly (e.g., clouds, plants growing, etc.) and start taking a series of photos for hours or even days. Hours and hours worth of photos is compressed into a video with merely a few minutes of playtime, thus creating a time lapsing effect.
In other words, it allows us to see the progress faster without having to wait along the actual time. Spotting the sun’s movement from sunrise to sunset takes about 12 hours; it’s boring, and you probably won’t notice the changes. But seeing it rise and set in 10 seconds that’s pretty interesting!
In this article, we’ll show you how to create your own Time-lapse video. To make things easier to digest, we’ve split the content up into several sections:
- Understanding Time-lapse fundamentals
- Choosing your camera for Time-lapse project
- Post-editing your Time-lapse photos
- Combining photos into Time-lapse video
Ready? Let’s do it!
1. Understanding the fundamentals
We’ll start by understanding some fundamental rules. Under normal circumstances, every second in a video comprises 24-30 frames of photos, calculated with the unit fps (frame per second).
If you watch a 2 minutes video at 24 fps, that means it’s made up of 2880 photos (frames) animating at high speed.
To create a Time-lapse effect, you basically reduce the interval for each shot and merge them into a 24-30 fps video.
E.g., if the sun takes 12 hours to set and you take a photo every 1 minute, you will have 720 photos. With a 24 fps compression, you’ll have a video of the sun rising to sunset in 30 seconds. Isn’t it amazing!
Your subject
You probably already have some ideas in mind, but here’s what we can think of just in case you left your creative cap at home.
- Sunrise, sunset, or from sunrise to sunset
- Fruit rotting
- Flower blossoming
- Growth of plant
- Ice melting
- Clouds movement
- Stars movement (clear sky required)
- Movements of a busy city street
Smooth or Blocky?
Before you get all excited and try out your first Time-lapse photography project, we’d recommend that you start by thinking ahead of the interval of each photo, i.e., the pause time between each photo; is it going to be 1 second? 10 second? 1 minute? 1 hour? Etc.
Let’s get into more details.
Smooth (Shorter interval)
A shorter interval between each photo gives you a smoother video output. It is usually used to shoot something with a slightly faster state of change, e.g., ice melting, cloud movement, or busy city street.
Shorter interval is usually around the range of 1-1hour per image.
Blocky (Longer interval)
Longer interval between each photo tends to give you a more blocky video output. It is usually used to shoot something with a slower state of change, e.g., the progress of a building rotting of an apple that could take days or construction take could take years.
The pause time between each photo can be quite subjective, it can be 1 hour per photo, 6 hours per photo, or even one or few days per photo, depending on the subject.
Now that you’ve chosen a subject for your Time-lapse, and have a rough idea of the intervals, let’s take a look at how it can be done with various types of cameras, be it DSLR, point-and-shoot cameras, or webcams.
2. Choose your camera
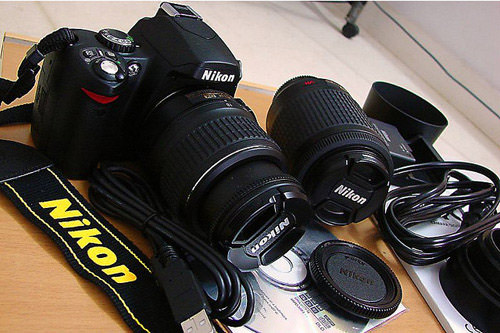
DSLR
DSLR (Digital Single-lens Reflex) camera is a better choice for Time-lapse photography compared to point-and-shoot cameras or others. It has higher output quality and better control. If you are a DSLR user, you probably know better.
Let’s take a look at some of the equipment needed.
Essential equipments
Tripod It is important to make sure your camera is stationary and consistently taking photos of the exact same location without moving here and there.
Of course, you have done it without a tripod, but the choices of the subject will be limited, and it will be challenging to have your camera maintain stability.
Intervalometers Intervalometers (some call it remote control) is a device, an add-on that usually doesn’t come with your DSLR.
What it does is it allows you to set your DSLR to hit the shutter button at the interval you prefer, e,g., every 1 second, every 10 seconds,s or every 1 minute.
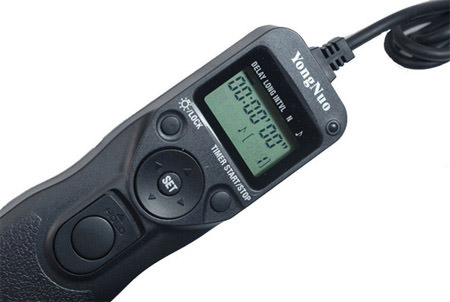
Intervalometers are almost essential because you don’t want to manually click on the shutter yourself, not with Time-lapse photography.
Intervalometers vary from brand, and it is priced around $40 – $60. And if you are unsure where to get one for your camera, we’ve got you covered.
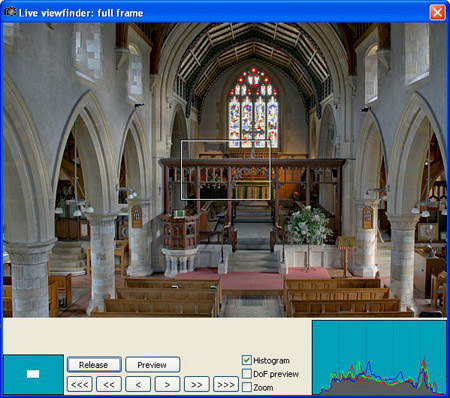
Software (alternatives to Intervalometers) If you don’t have Intervalometers, here’s an alternative solution. There is software out there that allows your laptop to take control of your DSLR’s shutter interval.
They work like Intervalometers, allowing you to set the interval between each frame. But that means your laptop will have to be connected to your DSLR via USB cable the entire time during the Time-lapse project.
Here are some recommended software capable of doing Time-lapse photography for various cameras.
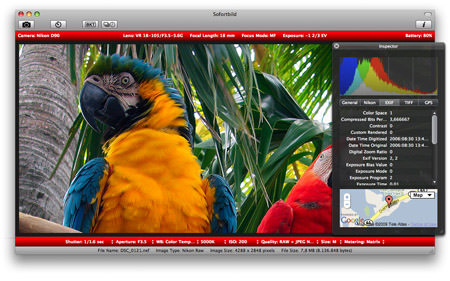
Nikon users:
Sofortbildapp (Mac) Sofortbild currently supports all newer Nikon digital single-lens reflex cameras, including the high models D3s, D3x, D3, D700 and the consumer D300s, D300, D90 and D5000.
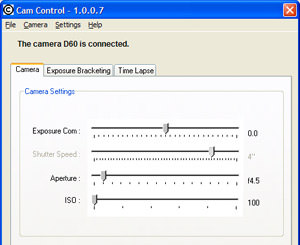
D-Software Cam Control (Win) Allows the user to remote control a Nikon DSLR digital camera from a personal computer.
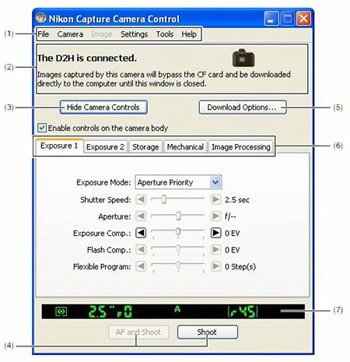
Nikon Capture 4.0 (Win & Mac)
Powerful and intuitive image-editing software that optimizes workflow and maximizes potential.
Canon users:
DSLR Remote Pro (Win & Mac). Check out Mac’s version here.
inPhoto Capture (Win) – Works for Olympus camera too.

Point-and-Shoot Camera
Point-and-shoot camera, also known as a compact camera, usually comes in pocket size, with lesser functions compared to SLR, but that doesn’t mean they can’t do Time-lapse photography. If you’d like to try doing a Time-lapse experiment and do not own a DSLR, this is probably your best bet. Let’s take a look at some essential equipment you’ll need for Time-lapse photography:
Essential equipments:
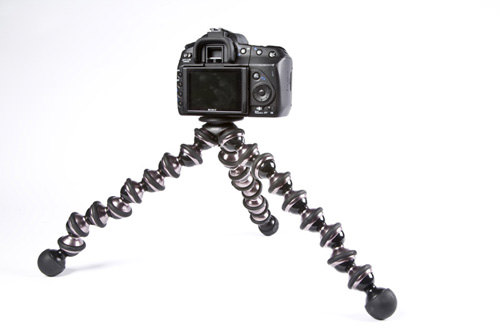
Tripod / Gorillapod
Point-and-shoot cameras are smaller in size, however, that’s also one of its disadvantages to maintain stability while shooting. A small tripod is recommended, or a Gorillapod would be good to counter obstacles and uneven surfaces.
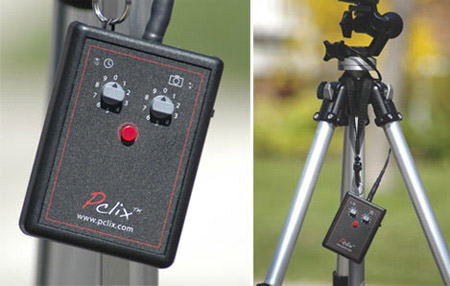
Time controller device / software
Pclix is a portable that is capable of triggering your camera’s shutter every second or every hundred hours plus anywhere in between all in one second increments. It does not work with all point-and-shoot cameras but covers a pretty lot of models. Here’s a compatibility list of Pclix supported cameras.
Note: Some point-and-shoot cameras do come with Time-lapse function. Always check your camera’s instruction manuals first.
On a side note…
Like everyone else, we tend to fail on the first attempt. Even when we are well prepared, some things tend to fail or disappoint. Here are some tips drawn from our experience, so you be aware of and reduce the chances of failing in a Time-lapse photography project.
- Do test shots – Don’t start shooting right away. Always do some test shots to ensure you are getting the right angle and composition you want.
- Take photos in basic JPG – Set your camera to take photos in the most optimum JPG quality else, you’ll be running out of disk space very fast.
- Manual mode for all – It is recommended that you shoot in manual mode with manual shutter speed, aperture, exposure, and white balance to avoid the camera trying to adjust itself when the environment of the subject gets unexpectedly darker or brighter.
- Extra batteries. If you are time-lapsing outdoors, then good batteries are essential. It’s good if your camera battery can be changed without removing the camera from the tripod. If the Time-lapse is taken indoors, it is better if you use the camera’s main charger to avoid draining the battery. That includes taking care of your laptop’s battery, too if you depend on your software to control the Time-lapse interval.
- Extra Memory cards. You need to make sure you have enough memory space for the Time-lapse. You can make your own calculations to get the free memory amount you need for your desired Time-lapse. Just find out what’s the file size of one picture and then calculate how many pictures approximately will be taken, and you can do the math to get a result of memory space you need for your Time-lapse.
- Choose a strategic spot – Set the tripod up securely and in a place where it will not be moved or knocked over easily, especially if you are shooting in a busy street.
- Keep an eye on your camera. Always keep your camera and the equipment in sight during the shooting, or at least make sure they are safe from filching.
3. Post editing Time-lapse photos
After you are done shooting, you’ll be left with hundreds (if not thousands) of photos, depending on the length of your project. Sometimes there can be some small little things that you want to tweak before merging them into video, e.g., brightness, cropping, white balance, etc.
Editing a photo at a time can be really tedious. Here are two ways how you can tweak them at a way quicker rate.
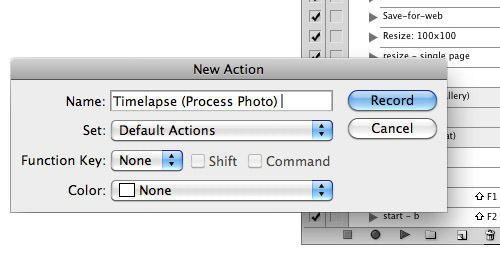
1. Photoshop “Action” and “Automate” Function
Drag one of the photos into Photoshop and practice the tweaks you want on it. Once you are comfortable with the outcome, create a Photoshop “Action” (Windows -> Actions) and redo the entire process again so the action is recorded.
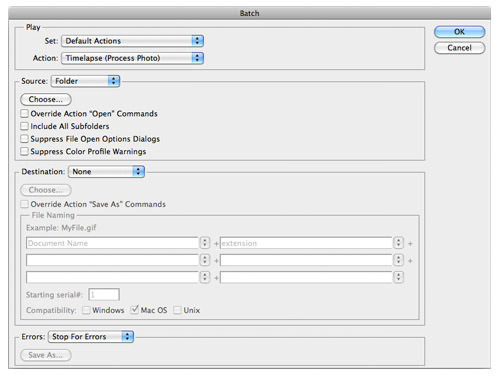
Next, batch automate all files (File -> Automate -> Batch) and telling Photoshop:
- Which action to use
- Source of your images (folder)
- Source of your output (folder)
Hit the OK button and Photoshop will start editing all photos according to the pre-set action. You can now sit back and wait until the entire process is over.
2. Lightroom
Adobe Lightroom is another good alternative to batch post-edit your photos. If you swear by Lightroom to manage your photos, you should already be familiar with this function. But if you are not, no worries – it’s easy.

After importing your photo into Lightroom, you can start by editing the photo in the Develop Mode. Once it’s done, select the photos (most probably all of them) you want to have the same effect and hit the Sync button. This will take all the effects you applied on the first photo and apply them on all the photos you’ve selected.
Hold the Control (Win) / Command (Mac) key with Sync button will turn it into Auto Sync.
For more details, check out this video tutorial – How To Sync Changes in Adobe Lightroom.
4. Combining photos into Movie
This is the last step, also the most exciting step as you’ll be merging all your photos into a beautiful Time-lapse video. There are a few applications that will assist you in doing that. We’ll talk about a few of the common ones.
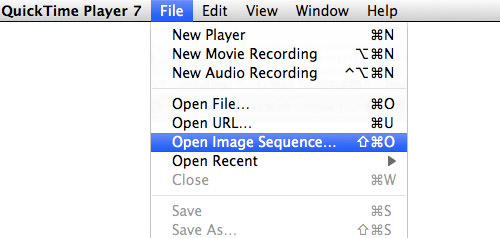
Apple Quicktime Pro 7 (Win / Mac) – Go to File -> Open Image Sequence, locate the folder of your Time-lapse photos, select the first photo and hit open button. You can then sit back and let Quicktime do the rest of the job.
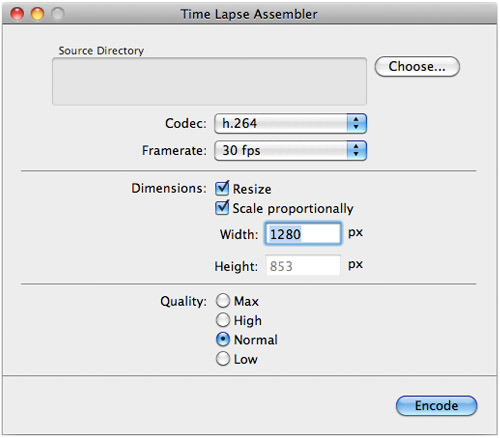
Time-lapse Assembler (Mac) – This is a simple freeware that allows you to merge your Time-lapse photo into video as well.
These two are probably the simplest and easiest software we’ve tried. Assembling Time-lapse photos is also possible with Mac’s iMovie. If you have other software that will do the job, please leave your suggestion in the comment box below.
Beautiful Time-lapse videos
Last but not least, we’ll leave you with some beautiful and nicely done Time-lapse videos. Hope these will inspire you to create some, and if you do, please do share with us.
Small Worlds. Preview for the Small Worlds Exhibition at Customs house.

Fruit and Vegetable Decomposition. This video shows the process how fruits and vegetables are decomposing.

Tokyo Time-lapse. Stunning Time-lapse of Tokyo city.